Adding a Menu Item - Step by Step
by ErikMsp
So you just installed a new piece of software and it did not get added to the menus. Don't worry, it is easy to add something to the menu structure.
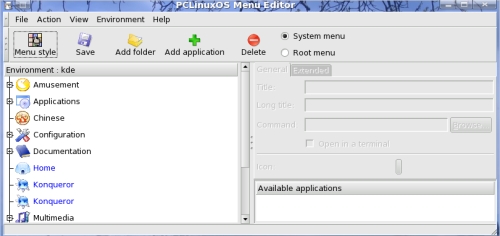
Open the Main Menu. Navigate to Configuration -> Other and Choose Menudrake.
If you prefer, right click on the PCLOS logo on the start bar and select Menu Editor. Since you are about to make a major change, you will be asked for your root password. If you are already logged in as root, you will be asked if you would like to use the System Menu or the Root Menu. If you select the System Menu, any changes you make will be visible to everyone on your computer; if you select Root menu they will only be visible to you.

When the Menu Editor opens, click on the location where you would like the new menu item to appear. Click the Add Application button. A pop dialog will now appear. The first line will say Title. Type in the name you would like to call this item.

In the second line it says Command. Click the Browse button. Now go and find the program to run (Hint: there is a small arrow pointing to the left, this will take you up a level) Most programs are found in the /usr/bin or /usr/share/bin. Select the program that you want to run and then click the Open button. The full path to the program will now appear in the Browse dialog's Command field. Example: /usr/bin/kwrite.Click the OK button. The path to the program will now appear in the Menu Editor's Command Field. I choose Tellico, a collection manager.

If the program requires any options, put them in the command field after the program's name. Be sure to put a space between the name of the program and the options. Example: /usr/local/program/start -option1 -option2. Many programs will not run, or will not run correctly unless options are specified. To find what those may be and how to use them is beyond the scope of this article. A good starting place is to open a terminal and type man program_name_help. Assuming the program has a manual installed(most do) this will open the appropriate manual and display the options.

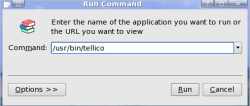
To test the command, highlight the text in the "Command" field. and copy it to the clipboard (Ctrl-C). Click on the main menu and choose the "Run Command". In the pop up dialog that opens, paste your text from the clipboard (Ctrl-V). The "Command" field in this dialog should be exactly the same as the command field in the Menu Editor. Click the "Run" button.

If the program runs as expected, then you are ready to proceed.
If the program does not run, then you will have to solve that problem first. Solving that problem is outside of the scope of this article.
If you can't get the program to run, then click "Cancel" in the Menu Editor to avoid adding the broken menu item.
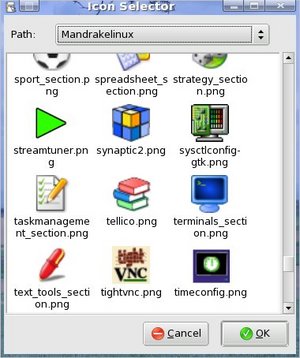
Now that you have verified that the command is valid, you can change the icon. In the Menu Editor, right below the "Command" field, you will see the default icon.
Click on the icon and an "Icon Selector" will appear. Choose something appropriate and click OK.
When you are satisfied with your new menu entry, click the "Save" button. Be patient, the saving/updating process can take a while.
When this process is finished, you can close the Menu Editor. Now click on the Main Menu, find your new menu item and test it. Your program should now launch. Enjoy!.