KDE User Guide
Published by the United Nations Development Programme's Asia-Pacific Development Information Programme (UNDP-APDIP)
Kuala Lumpur, Malaysia
Email: info@apdip.net
© UNDP-APDIP 2004
The material in this guide may be reproduced, republished and incorporated into further works provided acknowledgment is given to UNDP-APDIP.
This work is licensed under the Creative Commons Attribution License. To view a copy of this license, visit http://creativecommons.org/licenses/by/2.0/ or send a letter to Creative Commons, 559 Nathan Abbott Way, Stanford, California 94305, USA.
This guide has been modified by Papawoob to reflect the Linux distribution of PCLinuxOS 2007. You will also find much of it to be relevant to most KDE Desktop Environments.
Chapter 2: Using the Desktop
Basic Desktop Customization
The desktop can be customized to your preferences and tastes in a variety of ways. Here we will explore some basic customizations. More details can be obtained by clicking on the Main Menu and then on More Applications, Documentation, and then KDE Help Center. After the KDE Help Center opens, choose KDE User Manual and scroll down to "III. Kde Components."
Desktop Background
The background image displayed on the desktop can be changed by running the Background application. Just right-click on the desktop and select "Configure Desktop."
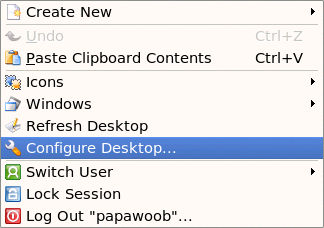
Fig. Right Click Menu
After clicking on "Configure Desktop" you will see a dialog box appear that looks like this:
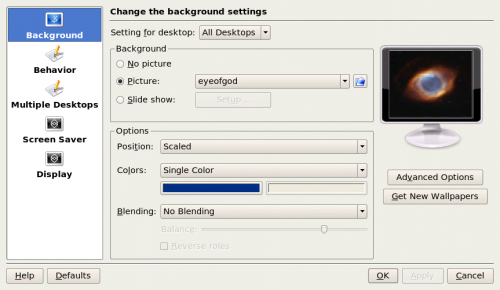
Fig. Configure-KDesktop
To change the background image, click on the Background tab on the left column. Next, click on the "Picture" image selector dialog. Choose an image from the dialog. As you select each image, a thumbnail (small picture) will be displayed in the monitor to the right of your selection.
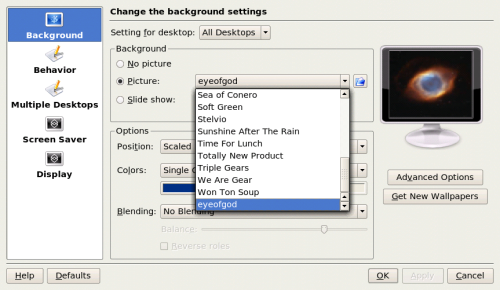
Fig. Selecting a New Background image
If you want to choose an image from another directory, click the Browse button. The Browse button is located to the right of the "Picture" image selector dialog and looks like a file folder. After you have chosen an image, click on "Apply" and then click "OK."
Desktop Behavior
Our next option in the Configure-KDesktop window is "Behavior." The "General" tab allows you to select between file icons or device icons and if you chose to have them on your desktop, which ones you want to be seen. Refer to the figures below. It also allows you to setup what each of your mouse buttons do when they are clicked. You can also choose whether you would like your Menu bar at the top of your screen and if so, what style. You can also setup what each of your mouse buttons does when clicked.
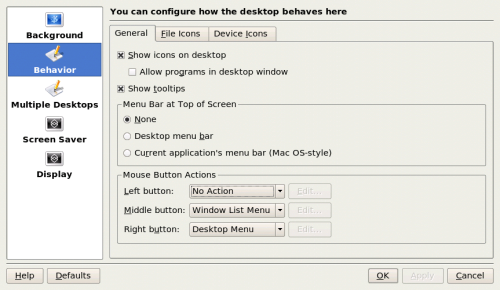
Fig. Behavior Dialog
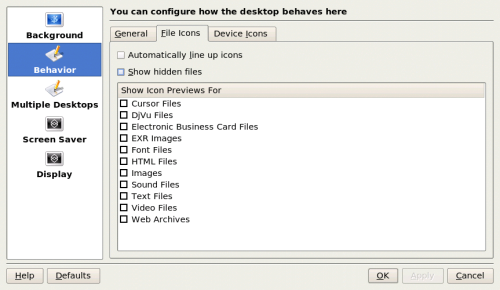
Fig. File Icons
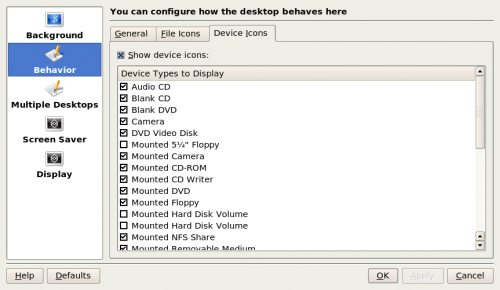
Fig. Device Icons
Multiple Desktops
The "Multiple Desktop" tab allows you to increase or decrease the number of virtual desktops that are available in your Taskbar. To change the number of desktops, you can use either the "slider" or the up and down arrows located to the right of the slider. Each time the number increases (or decreases) you will add (or subtract) 4 virtual desktops.
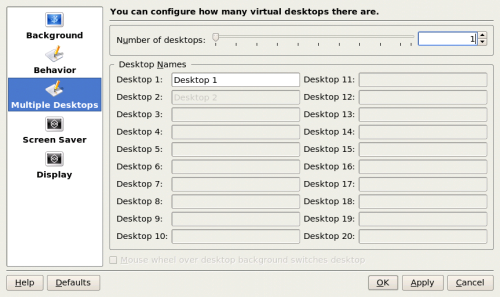
Fig. Multiple Desktops
Screen Savers
The next configuration option in the "Configure KDesktop" dialog window will let you setup your screen saver. Select this option by clicking on the "Screen Saver" tab located on the left side of the dialog window and you will see a window similar to the following:
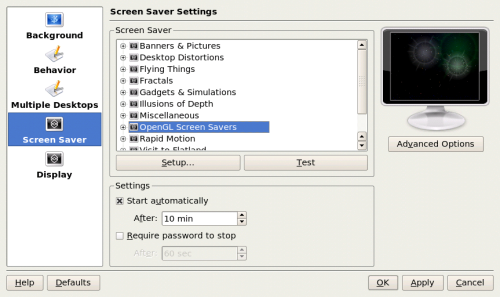
Fig. Screen Saver
The first thing you will notice will be a long list of different types of screen savers. If you click on the little "+" sign next to any of these, it will open to show another list of that particular group of screen savers. Here is an example:
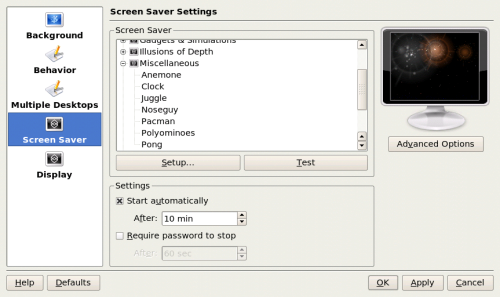
Fig. Screen Saver Types
There are far too many groups to cover in this howto so you will have to experiment and try them until you find one that you like. This window works just like the background window did. Click on a screen saver and a thumbnail (small picture) will be displayed in the monitor to the right of your selection.
You will also notice a "Setup..." button and a "Test" button below the list of screen savers. Some screen savers require extra information to make them work exactly as you wish, which is why you would use the "Setup..." button. The "Test" button will bring up (open) the screen saver in full screen mode so that you can see what it will look like when it starts.
There are two other options in this window. The first, is whether or not you want to have the screen saver start automatically,and if so, how long after there is no keyboard activity. Simply use the up and down arrows to select and set the number of minutes.
The second, allows the screen saver to effectively "lock" your desktop. To unlock the screen saver you will have to enter your login password into the box that will pop up when you try to return to your desktop.
There also is an "Advanced Options" button under the monitor where your thumbnails are displayed. Selecting one of these enables you to start your screen saver by moving your mouse into a particular corner and leaving it there. Your choices can be seen below:
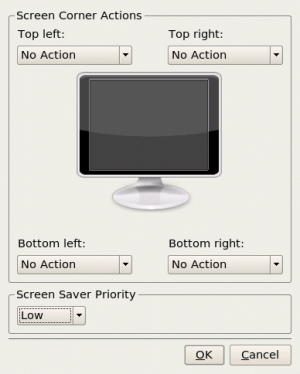
Fig. Advanced Options
Display
The last tab in the "Configure Kdesktop" window is the "Display" tab. There are three tabs within this window: 'Size & Orientation', 'Monitor Gamma', and 'Power Control'. We will only explore the "Size & Orientation" and "Power Control" tabs.
The only thing on this sub-window that is of interest to this howto is the "Screen size" (resolution) tab. This adjusts the size of everything displayed on your desktop, including the icons, text with icons, Taskbar text, etc....
The Kde desktop will default this setting to the largest resolution that your monitor can handle. In the screenshot below you will see that mine is set to 1280x1024. If you click on the arrow next to this setting a list of resolutions that are available for your monitor will be displayed. The smaller the first number, the larger everything will appear. Choose one and then click "Apply." The desktop will go blank for a moment and on return you will see your desktop in the new resolution with a dialog box asking whether or not you want to accept this new resolution. If you want to accept it use your mouse to click on the accept button.
Note: Do not try this if you are running any 3D effects.
If you would like to have this setting as your default resolution when you start Kde, click on the box next to "Apply settings on Kde startup."
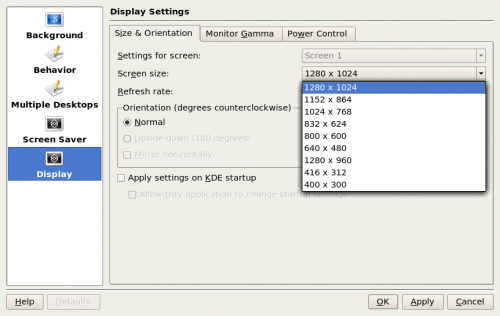
Fig. Display
Next month we will bring you Part 2 of Chapter 2. See you then!
