KDE Desktop on PCLinuxOS
Published by the United Nations Development Programme's Asia-Pacific Development Information Programme (UNDP-APDIP)
Kuala Lumpur, Malaysia
Web: http://www.apdip.net/
Email: info@apdip.net
© UNDP-APDIP 2004
The material in this guide may be reproduced, republished and incorporated into further works provided acknowledgment is given to UNDP-APDIP.
This work is licensed under the Creative Commons Attribution License. To view a copy of this license, visit http://creativecommons.org/licenses/by/2.0/ or send a letter to Creative Commons, 559 Nathan Abbott Way, Stanford, California 94305, USA.
This guide has been modified by Papawoob to reflect the Linux distribution of PCLinuxOS 2007.
Chapter 7: Multimedia Graphics Access
Multimedia Access and Players
Apart from being able to view and create graphics and other images, the PC is capable of supporting a wide range of audio and video features and facilities. These include the playing of audio CDs, audio digital files, VCD and DVD as well as multimedia games.
Note: While support may be available in the software, the necessary hardware has to be available before these multimedia facilities can be used, e.g. a DVD drive is required to be present on the system before you can play a DVD.
By default most modern PCs come with a CD-ROM drive capable of playing audio CDs and VCDs as well as a sound card and speakers. As such in this chapter we shall discuss how you can listen to an audio CD, play audio digital files and view VCDs.
In the following sections we shall be discussing several media players. Some of these e.g. mplayer and xine are multimedia players in that they can be used as generic players for audio CD, digital audio files, VCD and DVD.
The Volume Control Applet
Since almost all the multimedia applications require some form of audio production and mixing, it is useful if we know how to control the various channels of audio available from the sound card using the Volume Control Applet on the Panel. This may be launched by right-clicking the Volume Control icon on the Panel and selecting Open Volume Control. If it is not there you can also launch it form the Main Menu:
Main Menu -> Multimedia -> KMix
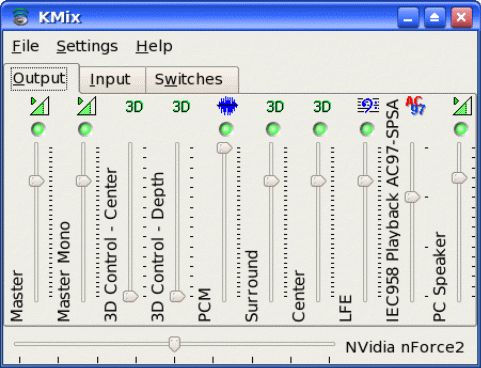
Fig. Volume Control Applet
KMix is essentially an audio mixer which enables you to mix the audio for a 2-channel sound card. Every mixer control that your sound card provides is represented by a volume slider. Mono controls always have a single slider while stereo controls can have either one or two sliders, depending on your settings. There is also a panning slider at the bottom of the window. If your system has more than one sound card, a list will be displayed at the top of the window.
The KMix window can have up to three different sections, Output, Input, and Switches. Each section will contain volume sliders, switches for enabling/disabling record or playback functions, and multiple choice selectors.
- Output: This tab holds the controls that are most likely related to playback, like the Master volume control.
- Input: This tab holds the controls that are most likely record related, like Capture.
- Switches: These controls allow you to switch certain functions On and Off, like External Amplifier.
- KMix also features LEDs. The general coloring rule is as follows:
- Green: An LED dealing with playback
- Red: An LED dealing with recording
- Yellow: An LED dealing with special sound card capabilities
- A lit LED means On, a non-lit LED means OFF.
In most situations the volume can be adjusted by clicking on the Volume Control applet on the Panel and raising or lowering the slider accordingly.
Playing Audio CDs
You can play an audio CD by placing the CD into the CD-ROM drive. The CD player application (KsCD) will be run automatically to play the CD. Ensure that your speakers are turned on so that you can hear the CD! You can also manually start the CD Player application from the Main Menu:
Main Menu -> Multimedia -> Sound -> KsCD
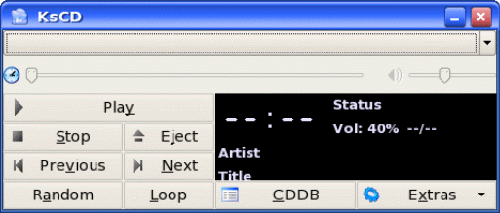
Fig. CD Player
You can control the CD Player just like a normal CD player with the buttons shown on the CD Player screen. These include volume control, track forward/backward, play/pause, stop, eject as well as jumping to any track on the CD directly.
Playing Digital Audio Files
PCLinuxOS gives us Amarok which is arguably the most complete music manager available today. Amarok serves many functions rather than just playing music files. For example, Amarok can be used to organize a library of music into folders according to genre, artist, and album, can edit tags attached to most music formats, associate album art, attach lyrics, and automatically "score" music as you play it.
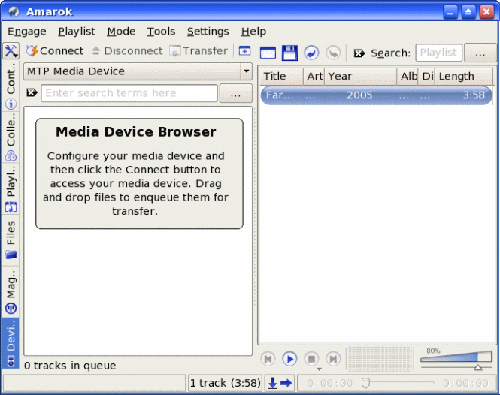
Fig. Amarok
Amarok plays media files in various formats including but not limited to (depending on the setup), Flac, Ogg, Mp3, AAC, WAV, WMV, and Musepack.
Note: Amarok will not play digital music files protected by DRM, such as those purchased from the Itunes Music Store.
It also can Sync, retrieve, play, and upload music to digital music players, such as Ipods or Creative Zens.
Note: To work with Creative Zens or other MTP devices, libmtp0 will need to be installed from the repositories.
One last notable feature is Last.fm support, including submitting played tracks (including those played on some digital music players) to Last.fm, retrieving similar artists, and playing Last.fm streams.
You can find Amarok by going to:
Main Menu -> Multimedia -> Sound -> Amarok
Another excellent player that in the repositories and can be easily installed is XMMS. The XMMS (X Multimedia System) application can be utilized to play a wide variety of digital audio file formats. These include the popular MP3 as well as the open Ogg Vorbis formats. To launch XMMS, (after it is installed) select:
Main Menu -> Multimedia -> Sound -> XMMS
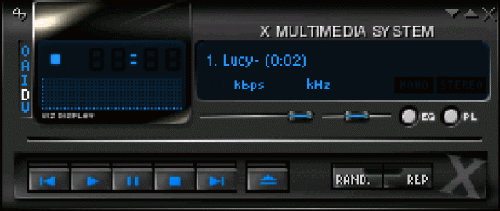
Fig. XMMS Player
Note: XMMS may need additional plug-ins to be able to play some of the audio file formats. If these are not already installed on your system they can be installed from the repositories using Synaptic.
You can control the XMMS player using the graphical knobs and buttons displayed. In addition, you can select the source of the audio files to play. To do this, right-click on the XMMS player and from the pop-up menu select "Play File" to select the audio file to play. If you want to be able to play an audio file from the Internet select "Play Location" and enter the Internet location of the file.
Playing VCD and DVD
There are several excellent applications readily available for you to use to play VCD and DVD media. Here we shall look at two of them: Kaffeine and Mplayer. These can also play CD and digital audio music files.
Kaffeine
The Kaffeine application may be used to play VCD and DVD. You can start Kaffeine from the Main Menu:
Main Menu --> Multimedia --> Video -> Kaffeine
The Kaffeine user interface is highly intuitive as it resembles a normal VCD/DVD player with all the basic control knobs and buttons.
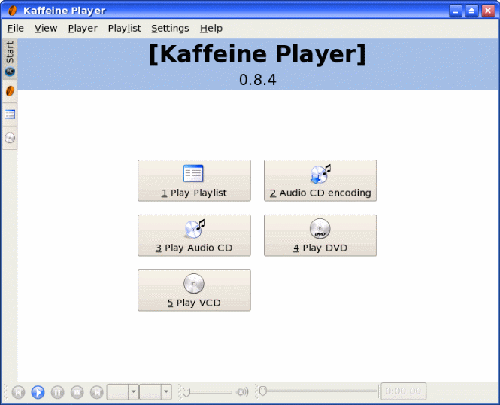
Fig. Kaffeine Control Panel
To play a VCD, place the VCD into the CD-ROM drive and click on the Play VCD button on the Kaffeine control panel.
To play a DVD, place the DVD into the DVD drive and your movie should start playing. If it does not then right click on the DVD icon on your desktop and choose "Play DVD with Kaffeine."
The volume control can be adjusted by clicking on the volume control button.
Kaffeine is a very powerful multimedia application with many features. It can also play audio CDs as well as digital audio files.
Note: to be able to play encrypted DVDs you will need to install libdvdcss and win32codecs from the repositories using Synaptic. You will need to check to see if the use of these libraries is legal as it is considered illegal to use this in certain parts of the world.
MPlayer
Mplayer is a popular movie player for Linux. In addition to being able to play VCD and DVD it is also able to handle a wide variety of audio and video file and streaming data formats. Hence it is useful to use Mplayer as the universal multimedia player. The Mplayer GUI can be started from the Main Menu,
Main Menu -> Multimedia -> Video ->MPlayer
On start up, the main Mplayer control screen and the Mplayer video output screens are displayed.

Fig. Mplayer Control Screen
Fig. Mplayer Video Screen
The control screen enables you to control the operations of Mplayer while the video screen displays any video that is being played. In addition, right-clicking with the mouse when it is inside either the control or video screens will also bring up a menu for controlling the use of Mplayer.
The Mplayer control screen enables you to perform the following:
- start, stop and pause play
- go to the next and previous stream
- jump to the first and last tracks
- adjust the sound balance
- adjust the volume and mute
- select files to play
- set up a playlist
- set the video and audio equalizer
- configure preferences
- exit the Mplayer application
All of the above functions are represented by intuitive knob, dial, and button icons on the control screen making it very easy to use Mplayer.
To play a VCD, place the VCD in the CD-ROM drive, move the mouse over the control screen or video screen and right-click it. Select,
VCD -> Open disk
To play a DVD, perform the above for VCD but instead select,
DVD -> Open disk
The size of the video screen can be controlled by right-clicking on the mouse and selecting normal size, double size or full screen. When you are in the full screen mode, to return to normal size, right-click on the mouse and select normal size.
Exercises
- Play an audio CD using the KsCD Player
- Play an audio digital music using Amarok
- Play a VCD or DVD using Kaffeine and MPlayer
Graphic Images Access
Very often it is useful if we are able to view graphic image files on their own, or in thumbnail fashion if there are many of them. It is also useful if there are simple tools available which will enable us to manage these image files, e.g. catalog and classify them and recall them for viewing. In this section, we shall look at several tools available on your system which provide some of these functionalities.
File Manager
The File Manager itself provides a simple and convenient means to access and view image files. To view an image file from the File Manager, move your mouse pointer over the file and a larger thumbnail picture will appear. To view the file full size double click on it. Another convenient way of viewing when you have a lot of files in a folder is to select the "View Mode > Photobook" option from the View menu selection.
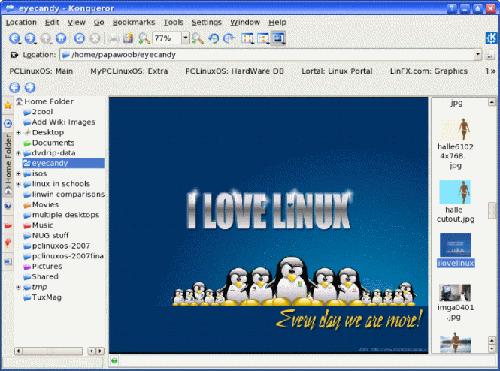
Fig. Photobook View in File Manager
This will result in only the image files present in the folder being displayed. You can then select an individual image to view and also perform zoom in or zoom out views.
DigiKam Camera Access
Digikam is a simple digital photo management application, which makes importing and organizing digital photos a "snap". The photos can be organized in "albums" which are automatically sorted chronologically. An easy to use interface is provided to connect to your camera and preview images and download and/or delete them.
Digikam uses a folder on your file system as an album library, meaning that every sub folder of this folder will be considered as a photo album and displayed in the album list on the left side of the main window.
Clicking on an album will start showing the thumbnails for the images in the album. You can change the icon size to small, medium, large or huge from the magnify buttons in the toolbar. Right Clicking on an item will give you a pop up menu, using which you can view, rename, delete, see the exif information, and add/edit comments of the images. Double clicking on an item will open it up in the image viewer.
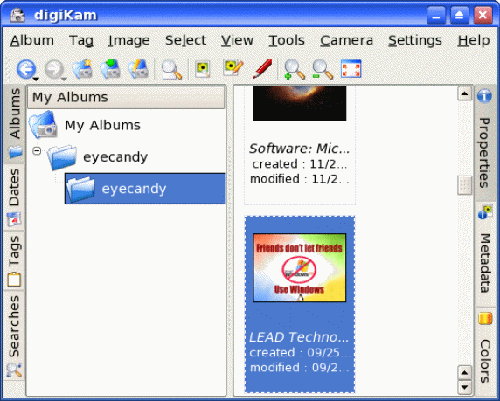
Fig. DigiKam Photo Manager
To be able to use your digital camera with Digikam, connect the camera to your computer, switch the camera to the image display mode and turn it on. If your camera is detected as a mass storage device (ex. sda1) a "New Medium Found" window will be displayed on your desktop along with an icon. If this does not happen when you plug your camera in and turn it on then you will need to setup the camera model and port using the setup interface. Try and see if Digikam can auto-detect the camera; if not, you can set the camera model and port manually.
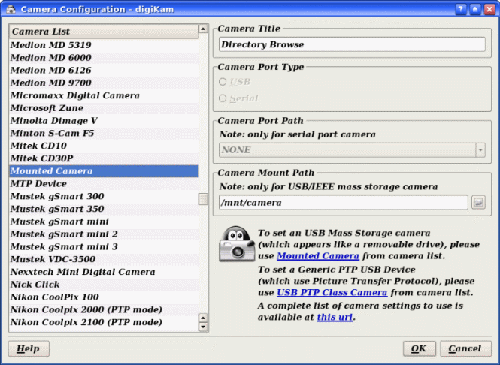
Fig. Camera Configuration
Once you have the camera setup, go to the "Cameras" menu in the main interface and you will see the camera listed in the menu (Note: You can choose any title you like for the camera in the setup and this title will be used in the "Cameras" menu). If you have more than one camera, you can add them throughout the setup interface.
Clicking on the camera item in the menu will pop up a new Camera Interface and this will connect to the camera, and thumbnails (if supported by the camera) will be downloaded and displayed. You can then select the images and download or delete them from the camera. Downloading can be done by using the menu/toolbar buttons or by dragging and dropping them onto an album folder or any other folder that you choose.
Digital cameras nowadays store images on either a CompactFlash card, SD card, or SmartMedia card. The camera internally makes sub folders in these storage media which it uses to save the images. Digikam displays these internal folder trees and also provides a global virtual folder which shows all the images available in the camera.
When you open the camera interface for the first time the folders are hidden and the contents of the global virtual folder are shown (i.e. all the pictures in the camera). You can choose to see the actual folders on the camera by unselecting "Hide Folders" in the "View" menu. This will show the folders on the camera, the topmost folder being the global virtual folder. Clicking on a folder will show the contents of the folder in the thumbnailview.
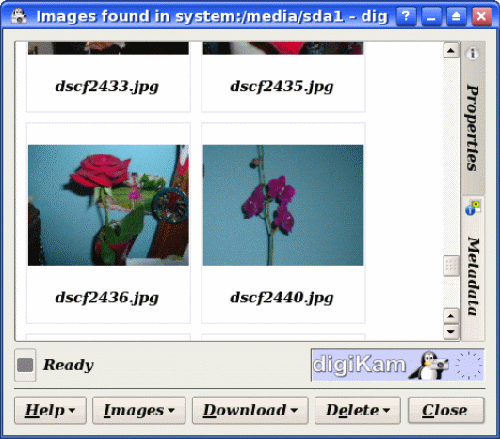
Fig. DigiKam Camera Client
showFoto Image Viewer
The showFoto image viewer is a powerful tool for viewing, and organizing graphic image files. To start this application perform:
Main Menu -> Multimedia -> Graphics ->showFoto
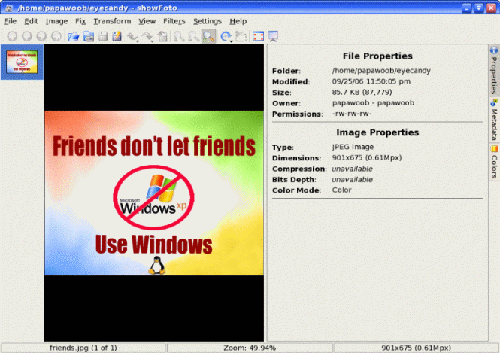
Fig. showFoto Image Viewer
View
The simplest way to view an image is to double-click on the name of the image and it will be displayed in full. You can also navigate to the next/previous image as well as go to full-screen viewing. The Zoom function can be used to zoom in or out of the image currently being displayed. Click on the Folders button at the top of the screen to go back to the thumbnail view. A preview of the image will be displayed in the preview area if you just select the thumbnail.
One useful feature of showFoto is the slide show. After a folder has been opened (File > Open folder), selecting View > Slide Show will start a full screen slide show of the images in that folder.
Image Manipulation
You can also manipulate the images under showFoto. Some supported functions include rotation, flipping, resizing, and Blowup. To access these functions select "Transform" from the menu bar at the top. Additional tools for working on your graphics files can be found under the Fix menu.
Convert Format
The Save As function of showFoto allows you to convert your image files from one format to another. Some of the 14 supported formats are:
- Portable Network Graphics (PNG)
- Joint Photographic Experts Group (JPEG, JPG)
- Tag Image File Format (TIFF)
- TARGA format (TGA)
To use the Convert function, select an image first and then from the top menu bar, select,
File -> Save As
and choose whichever format you would like to save to from the drop down list.
Help
showFoto has many other useful features. The online help guide should be consulted for more details on how to use showFoto.
Exercises
- Use showFoto for the following:
- View the images in the following folder: usr/share/backgrounds/images
- View a slide show of the images in the folder above.
- Copy one of the images from the above folder into your home directory and scale it down to 25% of its original size and save it.
