Retroshare: The Secure Social Network
by Archie Arevalo (Archie)
Preface
Slax invited users to test out Retroshare on the PCLinuxOS Support Forum and I responded by installing and using it. I also found out that since Retroshare has very scarce documentation and FAQ, this article might help users install, set up and use Retroshare. At this point of writing, there are still issues that need to be addressed, but insofar as my experience goes, I hope that users won't have to go through the hassles of making it work. It is a good piece of software that has potential.
Your mileage may vary. Whatever is written in this article are my own experiences and observations. I am not an authority in Retroshare. I'd like to promote its use because I think it is a good, useful application.
The scope of this article is divided into two parts. The first part deals with the installation and setup, as well as some uses for Retroshare. The second part, which will be in the next issue of the PCLinuxOS Magazine, will deal with the different features, tips and tricks for using Retroshare.
Installation and Setup
Retroshare lets you securely chat and share files with your friends and family, using a web-of-trust to authenticate peers, and OpenSSL to encrypt all communication. It is a client bundled with goodies one might find in apps such as Kopete or Pidgin, Konversation or XChat, KTorrent or Bittorrent and Frostwire - and it is becoming obvious that many of my preferred apps are KDE - all built into one single application. It also provides features such as channels or news feeds and slightly different type of forums.
Most of these features and functions will be examined and explained in details later, but first let us begin with installing and setting up the software. Make sure that your installation is fully updated and current.
Open Synaptic and Search for Retroshare. Install it, along with any dependencies it might have. Once installed, you can find it on the Application Launcher Menu under Internet. Click the entry to launch Retroshare.
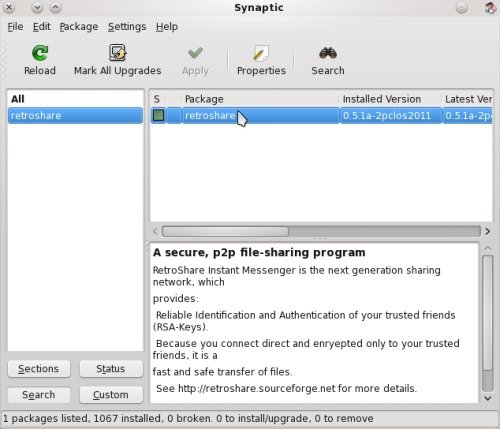
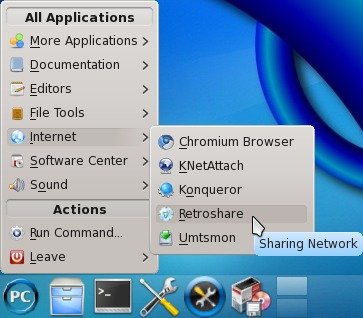
Retroshare uses Gnu Privacy Guard (GnuPG or simply gpg) extensively to authenticate users and friends. Before you can start using Retroshare's features, you need to create a profile. If you already have an existing Profile (Gpg key), you can use that instead. In the meantime, my test machine informs me that it did not locate any existing profile, so I should create one.
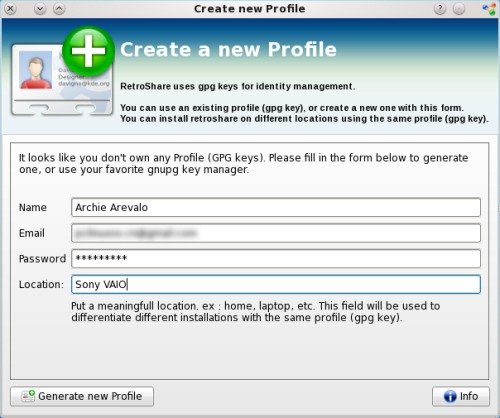
Fill in the blanks for your name, email, password and location, then click Generate new Profile.
The Gpg key block Retroshare would use is only a few lines of jumbled characters that would be your unique ID. The key generation itself might take a little while, so this might be a good time to make yourself a sandwich.
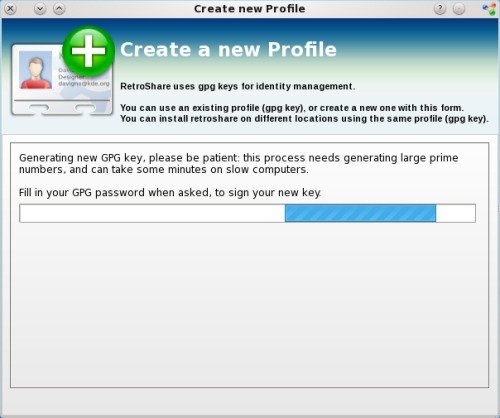
If for some reasons, the GPG key generation fails on your setup, you can use the console to create your GnuPG to be used on Retroshare. The procedure is short and sweet. You can read more of the command at http://www.gnupg.org/gph/en/manual.html#AEN26. On the console, type the command gpg --gen-key then press Enter.
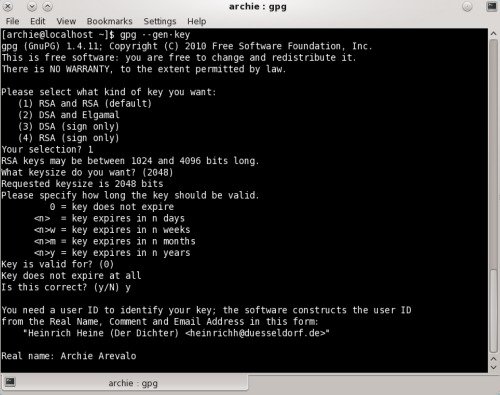
You will be asked what kind of key you want to create and shown a list of keypairs. The default (1) should be suitable, but would require a larger keysize than (2) or (4). The smallest size is 768 bits and the largest is 2048 bits. The longer the key is, the more secure it would be against brute force attacks. At last, you will be asked to specify how long the key should be valid. The default has no expiration, but if you want to use it say for six months, type in 6m. If you want to use it for 2 years, type 2y. If you want to use it for 3 weeks, type 3w.
After you've provided information on those three items, you will be asked to verify the entries and type either a Y for yes or an N for no. So, type Y and press Enter.
You would also need to provide a user ID in addition to the key information. These user ID fields are your Real name, your Email address and any Comment you might like to add (or you can leave the comment field blank). Once again, you will be asked if the information you've provided for the user ID is okay, or if you need to change something. If all is well, type the capital O and press Enter.
At this point, you will be asked for a passphrase. It could be your favorite password, or your favorite sequence of words. You won't be able to see what you are typing, and you will be asked to repeat what you typed for verification. Once completed, press Enter and the key generation will start its process. If the information you've provided is not enough to generate your Gnu Privacy Guard key, you will need to type in more words or start moving your mouse around or even open some application. Any activity will help the process in of cryptographic generation of your key.
Once generated, it will be stored at your ~/.gnupg folder, and you can use this key to create your profile in Retroshare.
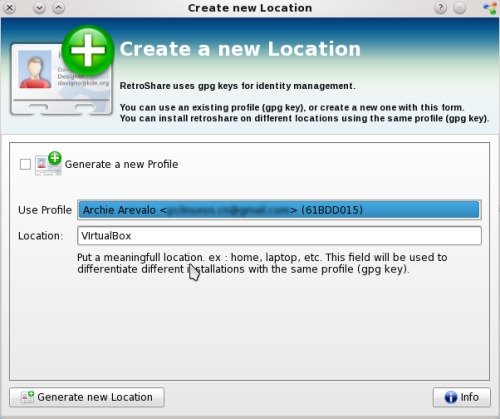
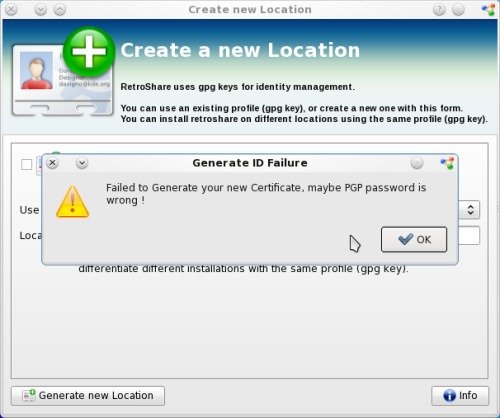
Note: If you get an error message, such as in the screenshot below, then you are definitely out of luck. You'll need to get off that VM emulator (such as VirtualBox) and install Retroshare on a real account. Apparently, Retroshare does not like emulators, although there have been reports that Retroshare failed to create Profile IDs for some users.
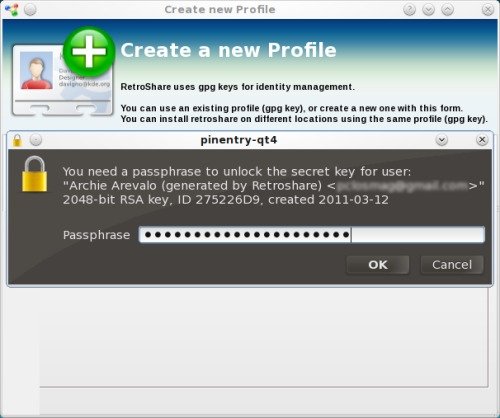
Okie-dokie. It took a little while to generate your ID and all is well. You now have to type in your passphrase to assign your profile for the use of this particular Retroshare setup.
And you're done. From this point on, it is important to remember that you can change your settings, add/remove friends, etc. So, on with the Quick Start Wizard.
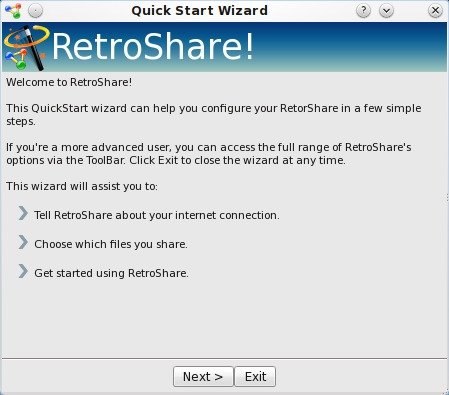
Nothing to see here, just click Next. On the next window, we should make our selection from the items to maximize for the best performance.
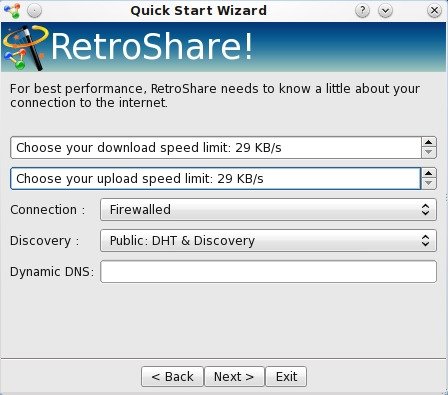
Note: If you have a lot of bandwidth to spare, it wouldn't hurt to set the Download and Upload Speed Limits a little higher. If you have a dynamic IP, it wouldn't hurt to register for a Dynamic DNS to ensure that when your IP changes, you can be assured that you are covered. The Connection and Discovery are chosen automagically and should be OK for most uses, unless you feel geeky enough to change these settings. Cool! So, now click Next.
So, we've arrived at one of the real essence of Retroshare — the P2P sharing. What? You do not want to share anything? Music files? Wallpapers? Then don't use Retroshare, LEECHER! Also, note that you will be able to change this setting at any time you might wish to do so.
Ahem. Okay, we'll click Add and choose a folder to share. You can start off with sharing your Downloads or your Music folder. I am sharing a few gigabytes of files (a few thousand files) with my friends on Retroshare. How does one go about browsing through all those files and folders? I'll tell you later. For now, let's keep on reading.
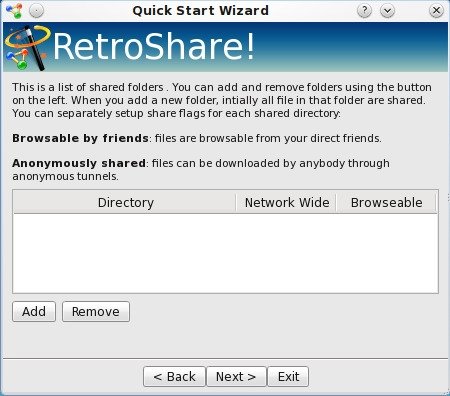
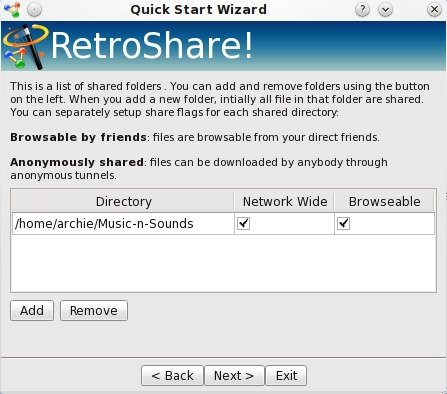
Retroshare is not as easy as setting up Wordpress, but it could be just as good an app. Let's click Next. And one more to go…
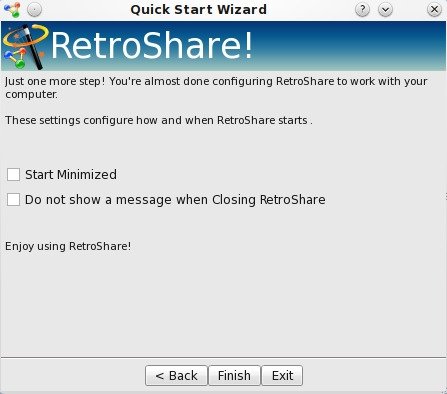
… and that's only to click Finish and you're done with the Setup. How does Retroshare look?
Using Retroshare
At first glance, might might not amount to much when looked at. However, underneath all those icons and tabs, there's a pool of worlds that separates the different tasks and jobs, yet somehow manage to merge them all together. Now, what does that mean? Explain in newbie terms, please.
How about downloading a couple of music albums from one friend, while uploading a set of wallpapers to another, at the same time you are chatting with these friends while they are busy posting news items on the channel feed for all the others who are subscribed to such channel can read and reply? Yep, done that. All on one application? Retroshare is still behind on IM clients such as Pdigin in terms of VOIP features, but it is not only an instant messenger. It lags behind all the information about a torrent when compared to KTorrent, but Retroshare is not only a filesharing app. I suppose it's aiming to be an all-in-one communication software.
Let's take a tour…
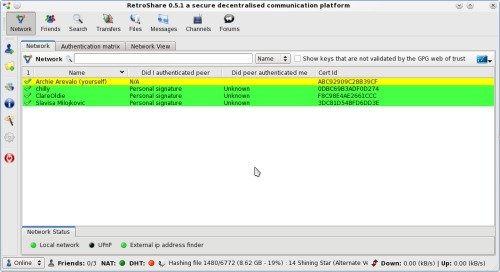
First, we'll look at each tab on the Iconbar, the Side Panel shortcuts and understand the Status Bar. First, the Status Bar as it will be visible at all time.

The first item is your Online Status, and you can set it in either Online, Busy or Away, to let your friends know whether you are available to chat, or you are doing something important and you cannot talk with them, or that you are on a holiday at the Bahamas.
The second item is the number of Friends (Online/Total), and as you can see, starting puts you at 0/0. Soon enough, you'll be able to connect with more friends, and that's when the fun really begins.
The next items are your NAT (Network Address Translation) and DHT (Distributed Hash Table) indicators. Green is "On" and Orange-Red is "Off." Do you need to worry about the color? Not that I am aware of, but it would be nice to have them all in greens.
The empty space on the status bar between the DHT light and the Up/Down arrows of your Download/Upload speed is where you'll see the status of your hashed files. I'll talk more about hashed files later.
On the Network iconbar and the Network tab is where you'll have your list of Friends, plus who you have authenticated and who authenticated you and their certificate IDs. At the bottom of this window is your Network Status.

Again, greens are good, meaning "On," and grayed out means "Off." Local network should always be green. UPnP (Universal Plug and Play) was off in my install, but did not really obstruct my file transfer to and from friends, nor my chat session with them. External IP Address Finder should turn itself on once Retroshare determines your External IP and forwards it to your friends. If you are having trouble getting this to turn on because of the changing IP address your provider is assigning to you, then a Dynamic DNS would be your best bet.
Adding a New Friend
Obviously, this app can only be useful if you have a friend to connect with. So the first thing you would need to do is add a friend. There are a number of ways you can do this, but most important is that your friend must also be using Retroshare, and that your friend had already done the installation and setup.
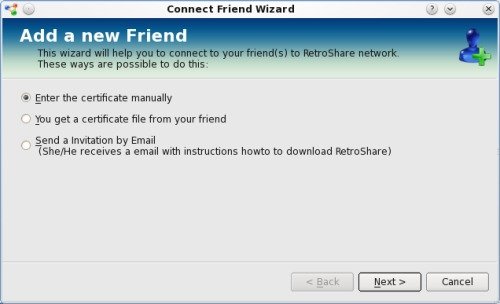
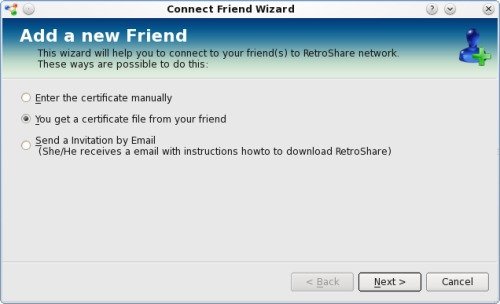
As you can see, you can:
- Enter the certificate manually
- You get a certificate from your friend, or
- Send an Invitation by Email
Let's try the first option.
Before you can enter a friend's certificate manually, your friend should have already sent you his key. Open your favorite file manager and locate the file you received. Once you have located the file, open it with your favorite text editor.
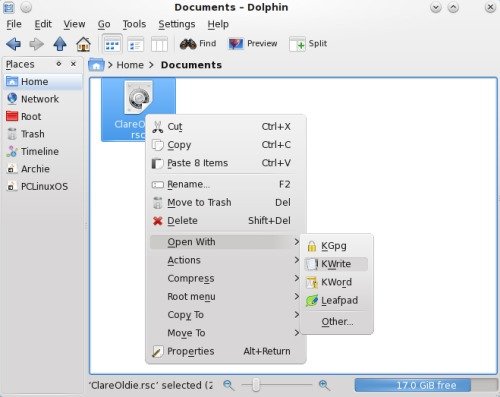
On your text editor, you will be able to view your friend's public key block as plain text, along with other information. Select the whole block from the first dash, all the way to the end of the file, by pressing Ctrl + A. When you have selected everything, press Ctrl + C to copy the selection to the clipboard.

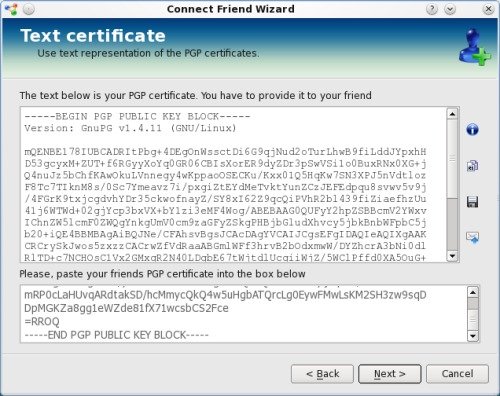
Click Next to Enter the Certificate manually. The Connect Friend Wizard's Text Certificate Window is divided into two sections: Your PGP certificate is located in the top section, which you can copy to the clipboard, save to a file or send by email. It is best that you save a copy that you can send to your friends later. The bottom part of the window is where you would paste your friend's key block. Mouse click on the empty section, right-click your mouse, and you should paste the contents of your clipboard. Inspect your friend's key block to make sure it is correct. Then click Next.
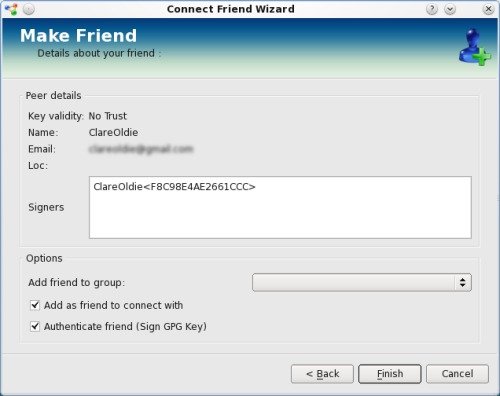
At this point, you will be shown details about your friend you added. You should take note of the Key Validity and set Trust to Fully. Also, you can start organizing your friends into groups. Click "Finish" and all you have to do is wait for ClareOldie to authenticate your request to add him as your friend and you're in business.
Another way to add a friend is through the second option. You can directly browse and select your friend's Retroshare certificate if you already have it on file, as in the screenshots below.
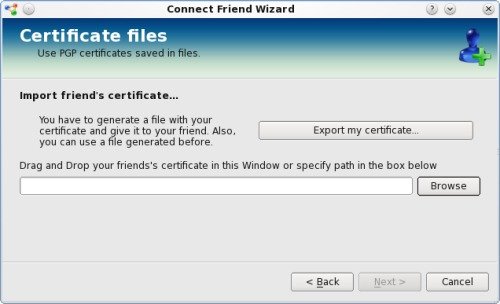
Click "Browse", and navigate to the folder where your friend's Retroshare certificate is stored.

Click on the certificate to open and add your friend.
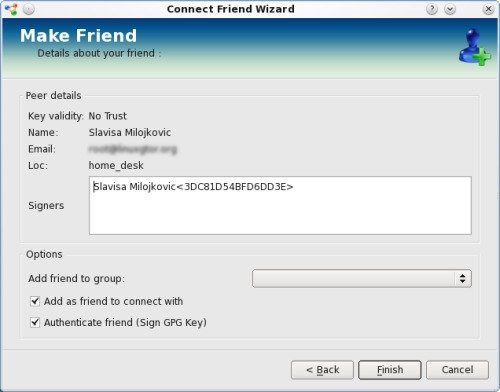
Click Finish.
The third option is by email invitation, where you will need to type in your friend's email address, and an invitation to Retroshare will be sent.
So that's it for this issue. See you next month.
Answers to Learning rtmpdump Through Examples
- Answer 1
- Answer 2
rtmpdump -r rtmp://fms5.visionip.tv/live \
-y RT_3 \
-o ~/$FILENAME \
-B 1200
#!/bin/bash
YESTERDAY=$(date -d yesterday +"%d%m%y")
rtmpdump -r rtmpt://tvone.fcod.llnwd.net/a4337/dwwod1/ \
-a a4337/dwwod1/ \
-y mp4:dwtv_video/flv/eme/emagen"$YESTERDAY"-euromaxx01ep_sd_avc.mp4 \
-W http://mediacenter.dw-world.de/player/flash/media.player.swf \
-p "http://mediacenter.dw-world.de/english/video/#!/75622/euromaxx/Program=7555" \
-f "LNX 10,1,82,76" \
-o ~/euromaxx_"$YESTERDAY".flv


