Gnome User Guide
Chapter 2: Using the Desktop
Part II
The Desktop provides a useful metaphor for a modern office/home work environment. On the Desktop we find that the applications that we want to run can easily be started or launched and the information and data that we need can easily be located.
Running Applications
Applications that we can run from the Desktop are found either from the Applications Menu (and sub-menus therein), or, as icons on the Panel and the Desktop itself.
- To run an application from the Applications Menu, open up the menu (or sub-menu) and click on the application listed in the menu bar.
- To run an application from the Panel, click once on the icon representing the application.
- To run an application from the Desktop itself, click once on the icon representing the application.
Sometimes it is handier to have an application as an icon on the Panel or Desktop where you can launch it more easily by just clicking on it, rather than in the Applications Menu, especially if it is buried deep within several sub-menus. To achieve this, open the Applications Menu and select the application item by clicking with the right mouse button. Click on the "Add this launcher to panel" and a copy of the application icon will be placed on the Panel.
- To make a link of the application on the Desktop, click with the right mouse button, and select "Add this launcher to desktop" and the application icon will be placed on the the Desktop.
- To remove an application icon from the Panel, right-click on it and select the "Remove From Panel" option.
- To remove an application icon from the Desktop, right-click on it and select the "Move to Trash" option.
The Panel
The Panel houses many useful utilities called applets. Applets are small applications that run on the Panel. As discussed in Chapter One, by default, the Taskbar and the workspace switcher applets are placed in and run on the bottom Panel. Other useful applets that are placed on the top Panel include:
- clock
- network status icon
- volume control
- preferred applications (Firefox, Thunderbird, Glipper, and a terminal)
Placing an Applet on the Panel
To place an applet on the Panel, move the mouse over to an empty space on the Panel and right-click it. Select the item "Add to Panel" and from the sub-menu select the applet to place on the Panel. For example, to place the "Battery Charge Monitor" applet on the Panel, select:
Add to Panel --> Battery Charge Monitor -->Add
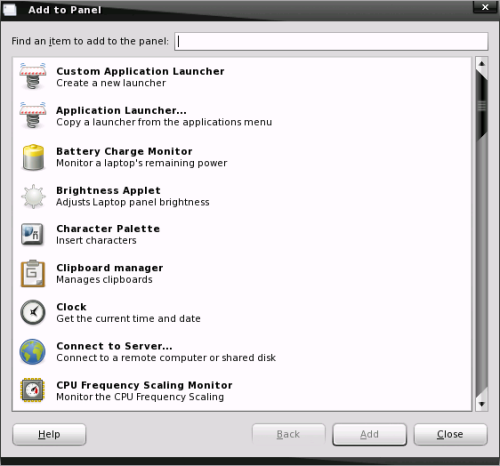
Fig. Add Applet
To prevent accidental removal of an applet, you can lock the applet by right-clicking on it and selecting "Lock To Panel."
Removing an Applet from the Panel
To remove an applet, right-click on the applet icon and select the "Remove From Panel" option. If the applet is locked, you will have to unlock it first by right-clicking on the icon and clicking on "Lock To Panel."
Configuring the Panel
To change the properties of the Panel, right-click on the Panel and select "Properties."
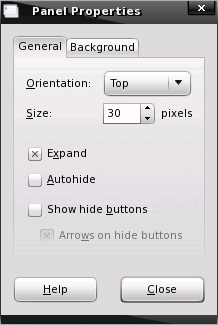
Fig. Configure Panel
From the General properties tab you can change the position, length, whether to hide it or not, and size of the Panel.
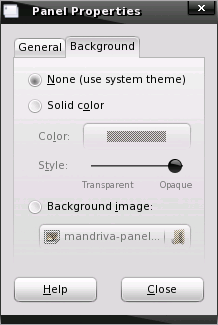
From the Background properties tab, you can change the background of the panel to match the current theme, to a solid color, or match your Desktop background.
Launchers
Launchers allow the user a quick way to access specific resources on the system. For example, if a user often needs to access a specific file in one of the folders, he/she can create a launcher to run an application to open the file and this launcher can be placed on the Desktop. In this way the resource (the file) can be accessed very quickly by just double-clicking on it.
To create a launcher on the Desktop, right-click on an empty area on the Desktop and select the item "Create New." From the sub-menu, select "Link to Application". Enter the Name and the Command to run (in the box seen below) and if you want, you can select an icon for it by clicking on the icon button.
You can find most of the commands you need by clicking on the "Browse..." button, use the "up" arrow to move up in the file structure to "/" and double-click on "/usr." Once that window opens you can double-click on either "/bin" or "/share" and choose the necessary command in most cases.
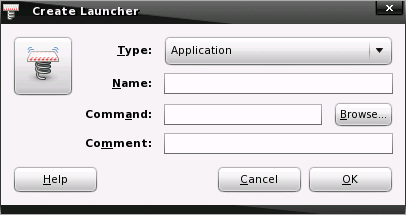
Fig. Creating a Launcher
Exercises
The Gimp image manipulation program is a popular application for Linux systems. Locate the Gimp application in the Applications Menu and place it on the Panel as well as the Desktop. Launch the Gimp application from:
- the Desktop
- the Applications Menu
- the Panel
Configure the Panel so that it has the following properties:
- a background color of solid blue
- contains the Battery Charge Monitor and Force Quit (locked) applets
Create a launcher to run the text editor command "GEdit" on the Desktop. Use an appropriate icon for the text editor.
Setting the Date and Time
It is important that the date and time are set correctly in your system. This will make it easier to manage the system resources and files, and also aid in troubleshooting any problems. To set the date and time, run the Date & Time application tool from the PCLinuxOS Control Center:
System --> Administration --> Configure Your Computer --> System --> Adjust the date and the time
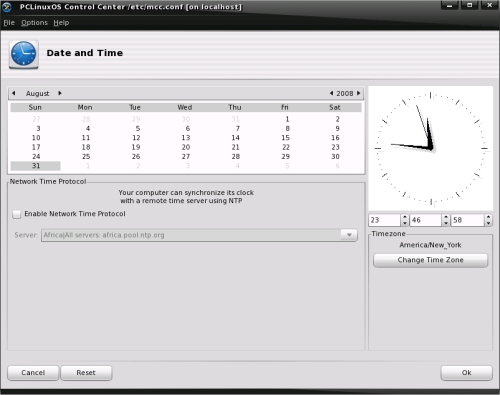
Fig. Configure Your Computer Clock Menu
A dialog box asking for the root password will appear if you are not logged in as root. This is because the system date and time are important system parameters and so only the system administrator, or root, is allowed to change it. After entering the correct root password, you can change the date using the displayed calender, and the time in the boxes provided. Select the Time Zone tab and check to see that the timezone selected is correct. If not, correct it by selecting the appropriate timezone region.
Click on the OK button after all is done to enable the new date and time. You can check for the new date and time by looking at the clock (time) applet display on the Panel at the top of the screen. If the time is correct, click on the OK button.
So ends another chapter on learning and using our Gnome desktop. I will bring you some more interesting information next month as we continue on this journey. See you then!