Using Bookmarks In Konqueror
by Andrew Strick (a.k.a. Stricktoo)
Introduction
When I recently installed PCLinuxOS 2009.1, I starting getting things set up the way that I like them. As I was working on Konqueror, I was struck by an urge to try something that I've never done before but which might make using Konqueror much more efficient — and the funniest part is that it's so basic and simple that I couldn't figure out how I hadn't ever thought of it before. So what was this magical little tweak?
Using bookmarks and the Bookmark toolbar.
I'm sure that at this point many of you are rolling your eyes at my foolishness. But nonetheless, I'll explain the process.
Before I begin, I should point out that this won't work quite as well if you use also Konqueror for web browsing, since Konqueror lumps all bookmarks together, instead of making a separate directory for Bookmark toolbar items. There is a work-around, but it leaves a little to be desired. And no, switching between the "File Management" and "Web Browsing" view profiles doesn't work.
Adding Bookmarks
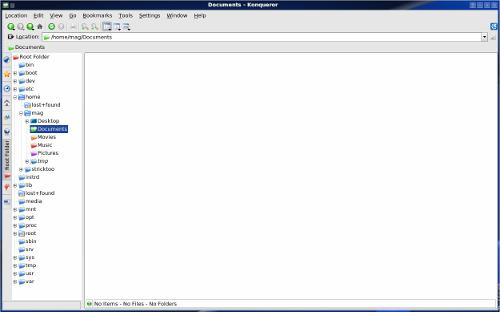
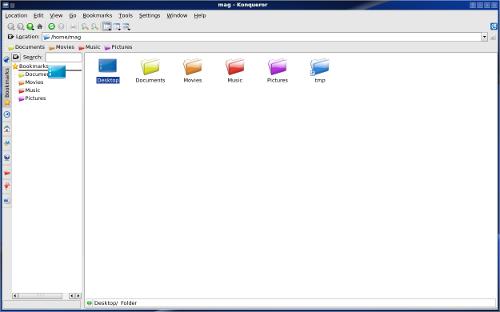
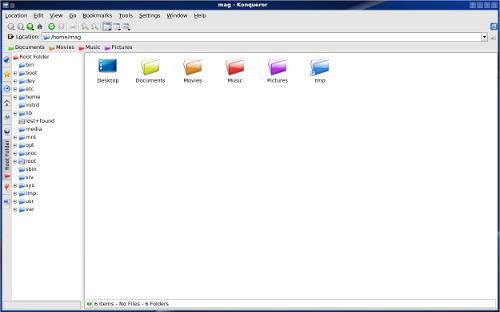
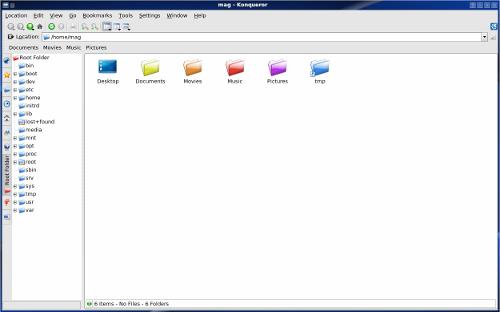
On a new installation, the default Konqueror window should look something like this:
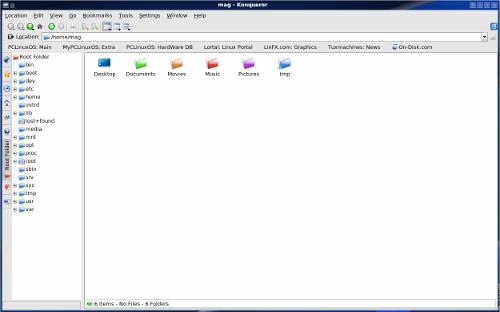
As you can see, there are four toolbars at the top of the window: the Menu bar (Location, Edit, etc.) which cannot be moved or edited; the Main toolbar, which contains the action buttons (backwards, forwards, Home, etc.), the Location toolbar, which displays the current directory and allows quick travel to other directories; and the Bookmark toolbar, which displays bookmarks. We want the last one.
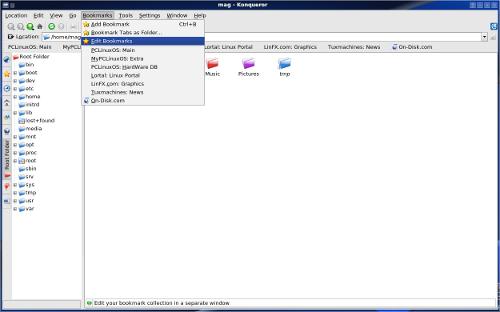
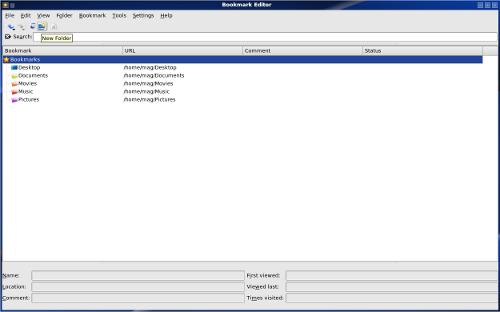
The first thing that we need to do is to delete the existing bookmarks. To do this, we will navigate to the Bookmark Editor (in the Menu bar: Bookmarks > Edit Bookmarks)
After clicking that, the Bookmark Editor dialog will appear.
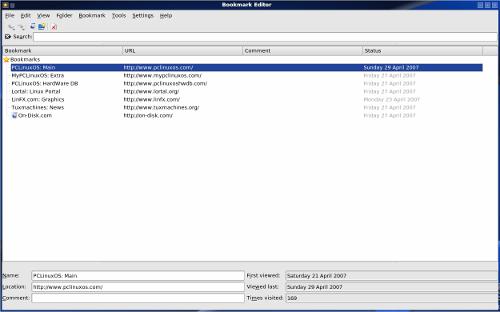
From here, we can delete the existing bookmarks, either by clicking on the Delete button in the Window or by simply pressing the Delete key. Once the bookmarks are gone, we can close the Bookmark Editor.
The next thing that we need to do is to navigate to the directories that we want to bookmark. We'll start with the pre-existing Documents directory.
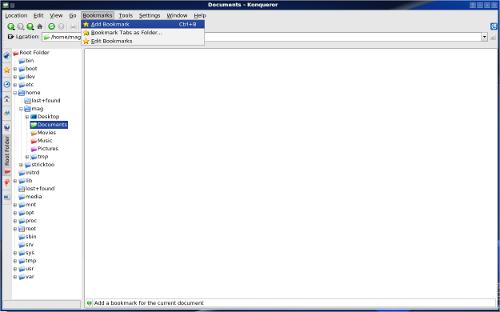
Once we're there, we'll go back to the Bookmarks menu, only this time we'll select "Add Bookmark" (alternatively, we could use the shortcut — Ctrl+B — that's listed).
When we do that, a small dialog box will pop up, asking us to name the bookmark.
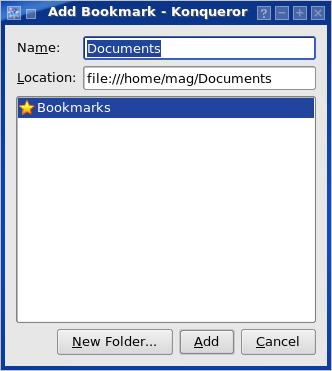
Once we click "Add," the Documents directory will be added to our bookmarks.
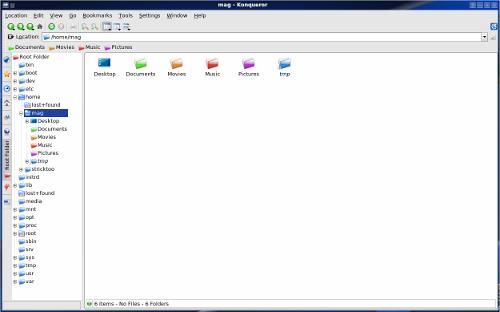
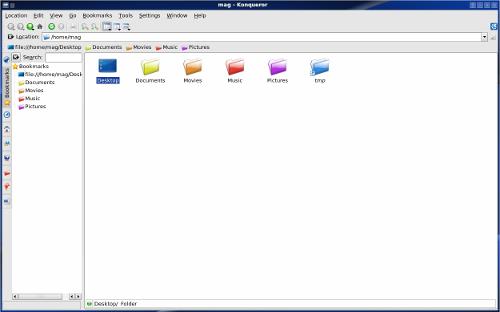
Now we repeat with the Movies, Music and Pictures directories. The end result should be something like this:
An Alternate Method
Since this is Linux, there is of course another way to add bookmarks. On the left-hand side of the Konqueror window is the Navigation Panel, which has several different panes, each of which is accessible via the appropriate button. It just so happens that there is one for bookmarks. In these screenshots, it's labeled with a yellow star.
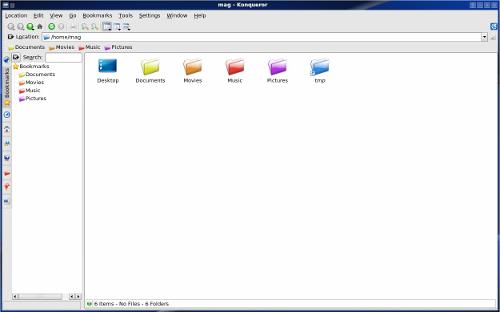
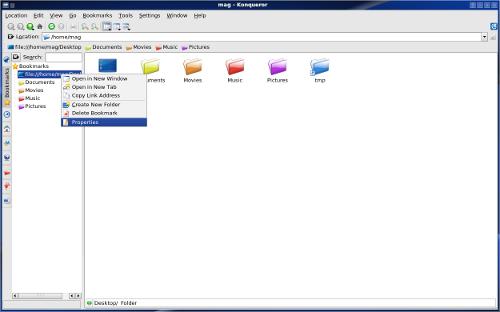
To add a directory, we can simply drag and drop it into the Bookmarks pane. We'll add the Desktop directory, since the others are already there from our previous work.
The downside to this method is that the resulting bookmark is named with the directory's full path.
Luckily this can easily be fixed. All we need to do is to right click on the bookmark and go to Properties.
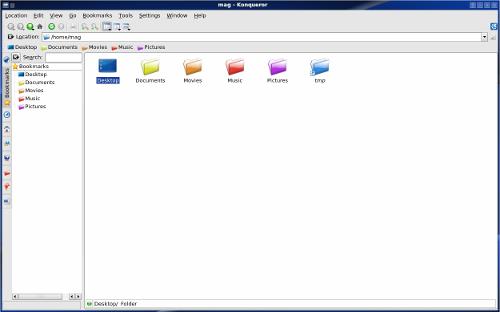
We can then change the Name field in the resulting dialog and the problem is solved.

The results:
One Caveat and the Solution
If you change your icon theme, the little icons in the Bookmark toolbar will stay the same, which results in something like this:
Notice that the Documents icon in the main Konqueror window has been changed to yellow, but the icon in the Bookmarks toolbar is still green (Bonus: if you've been looking carefully, you may have noticed that the screenshots for the previous section already show the Documents directory and bookmark with the yellow icon. I goofed and created the screenshots for this section before I created the screenshots for that section)
The Hard Way
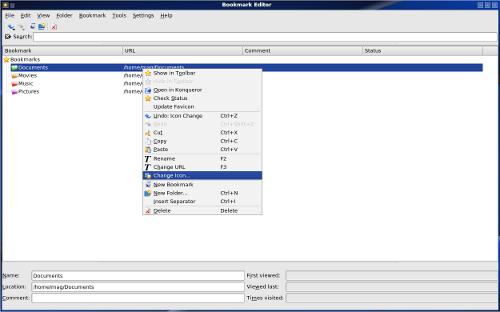
Unfortunately, if we want to change that icon we're going to have to do it manually. We start by opening the Bookmark Editor (Bookmarks > Edit Bookmarks) and right clicking on the entry for Documents. We can then select Change Icon from the context menu (incidentally, I don't know what Update Favicon does, but it didn't automatically change the icon when I tried it).
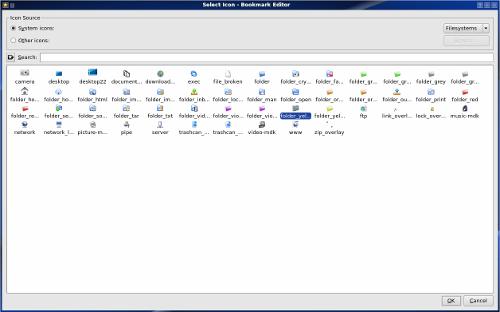
We can then pick the correct icon from the list in exactly the same way that we could change an icon in the main Konqueror window
The result:

The Easy Way
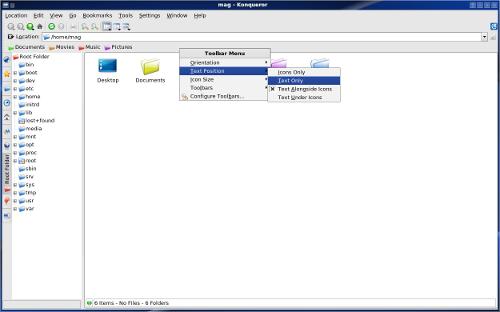
Luckily there is an easier way: just turn off the icons in the Bookmark toolbar. It's not quite as pretty, but it's much easier (and it also saves space). To do so, just right click on the Bookmark toolbar and from the context menu select Text Position > Text Only
The results:
The Work-Around for Web Browsing
Like I said in the introduction, if you want to implement this while also using Konqueror for web browsing than you'll have to use a work-around to keep from creating a mess. Unfortunately it's not perfect, but it will work.
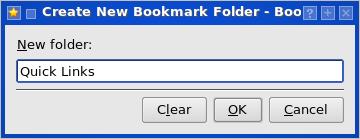
We'll again need the Bookmark Editor. Once inside the Editor, we'll click the New Folder button.
We can then give a name to the new folder. For the sake of example we'll call it Quick Links
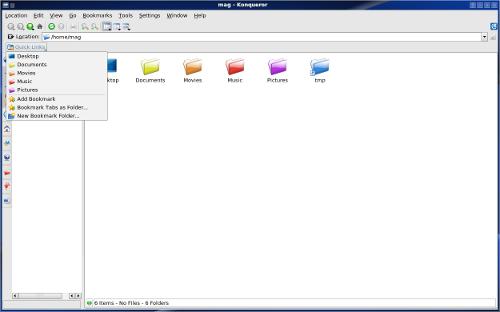
Once we've created the folder, we can start dragging our existing links into it.

The results, as seen from the main Konqueror window:
Of course, this means that you'll have to keep all of your web bookmarks in folders, which will all appear on the Bookmark toolbar. But hey, it works.
Conclusion
That's really all there is to it. Bookmarking in Konqueror is fairly simple and straightforward, but it can make your life much easier. There's even an applet that you can add to your panel that will allow you to access an of your bookmarks directly from the desktop!