Panorama Construction with Hugin
by Meemaw
I love to take pictures! I'm not good enough to be a professional photographer, but I can usually hold the camera steady enough to get a decent picture. I was lucky enough to get to go to Hawaii a few years ago. That trip was wonderful! While we were in Honolulu, we visited the Pearl Harbor Memorial and the Punchbowl National Cemetery. Both are very good historical places to visit.
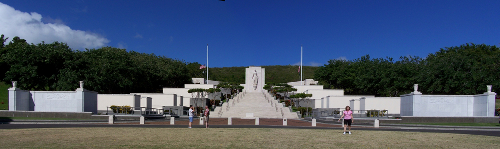
Have you ever looked at a shot and just known that you couldn't get it all in one picture? That's the situation I was in at the Punchbowl. I wanted to get a picture of the main monument, which has a huge flight of stairs, big marble monoliths on each side and a central structure with a statue at the top of the stairs.
When I got home I was looking for a way to put the two halves together. I tried to blend them in the Gimp, but the "seam' between the two pictures was painfully obvious. Then someone told me about Hugin. It's a panorama "stitcher"!!! However, reading some of the tutorials, it can do much more complicated construction.
You can read about it at http://hugin.sourceforge.net/ and look at some of the pictures. It is in our repository. Simply go to Synaptic and search for hugin, mark and install.
This article will be on the most basic project, stitching two photos together.
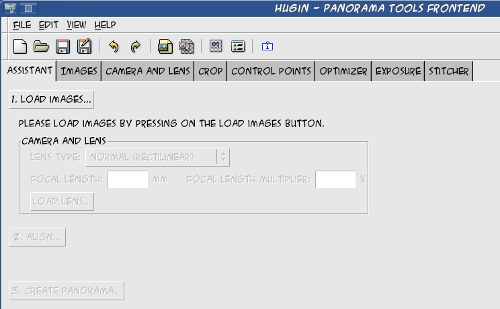
Open Hugin (it's most likely in "Multimedia > Graphics") and you'll see the main window. Opening it for the first time is a little daunting because there are LOTS of settings and tabs. You have to have two pictures that "overlap" for the stitcher to work. The program looks for similarities in the two pictures and uses them to do its work. So, here are my two:

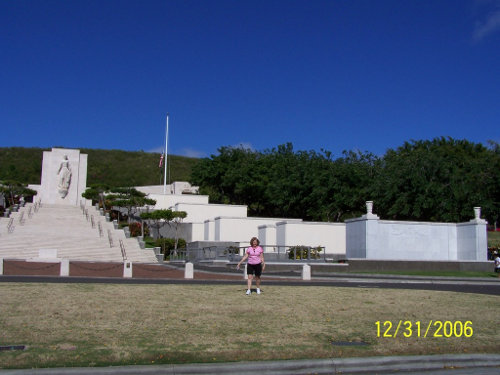
You notice that the central statue is in both pictures, so that's what the program will use. The first thing you see is a box saying "Load Images" — click on that and choose your two pictures.
Close-up of main hugin window
After you load the images, you can click the button that says "Align" — you should get a separate window with all sorts of text flying by! Basically, it is looking at the two pictures and finding control points — features that are common to both pictures, which the program will use to line them up. When it is finished you should get a preview. If you don't, the third button from the right on the main window's toolbar is the preview button so you can click that as well. You'll get a separate window. Mine looked like this:
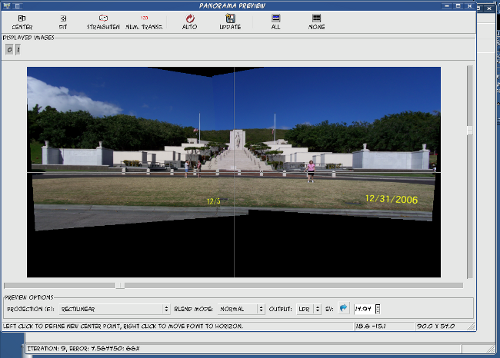
In the preview, the photos may look as if they have been turned and stretched. (Mine aren't straight across the bottom.) Hugin does that to line up the control points, but when it is finished your panorama should look correct. The lens type can be altered for different effects, but if you are just trying to combine two pictures, the "Normal Rectilinear" is the setting you want. It basically tries to combine the two pictures so any straight lines in them (like the steps and railings and so on) stay straight and aligned.
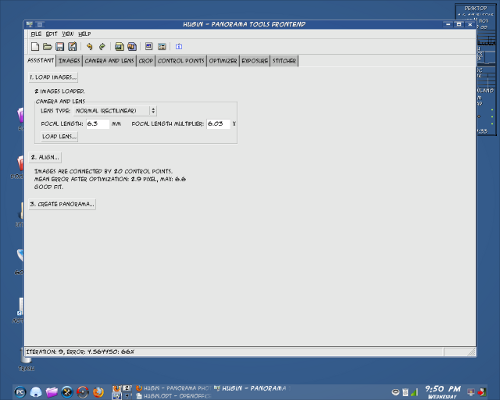
Notice in the screenshot below, all the buttons are visible, because I have already aligned the pictures and am ready to stitch.
You can click on "Create Panorama" and it will be done for you. There is a Stitcher tab with many settings, from the picture type you wish to use, to the size you want it to be. The first couple of times, however, it's probably a good idea to just click the Create button and let Hugin do it. You will be asked for the file name to use. The default file extension is .tiff but you can change that on the Stitcher tab if you wish. After saving, I took it into Gimp and cropped the dates and ragged edges out.
A list of online tutorials is here;
- http://hugin.sourceforge.net/tutorials/index.shtml
The overview summarizes the process and actually gives you tips on how to choose your control points if you do them by hand. It also defines many of the terms in the program and explains a little about the different lens settings and info on the tabs. - Flickr has a gallery of photos created with Hugin;
http://www.flickr.com/photos/tags/hugin/Some of them are very interesting! Enjoy!!!

