HDR Photography With Qtfpsgui & Gimp
by Dave Buckler (roc4fun)
Hi All, I'm Dave. You probably know me as roc4fun. This is a tutorial about using Qtfpsgui and Gimp to create HDR photographic images.
All photographic processes suffer having a fixed — and arguably narrow — dynamic range, which is the difference between the lightest and darkest portions of an image. HDR — High Dynamic Range photography is a way of expanding the range of tones in an image. This is usually accomplished by combining portions of several exposures of the same scene. There is commercial software available for this, but thanks to our wonderful packagers, we have excellent open source versions in our repo. If you haven't done so already, you'll want to use Synaptic and install Qtfpsgui and Gimp.
First we need some images. It's best to use a tripod to take a series of pictures of the same scene. You'll want to bracket the exposures from too light to too dark. I generally take 3 or 5 pictures, varying the exposure by 1-2 stops.
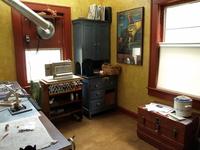
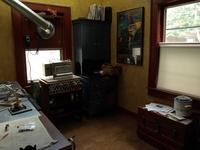
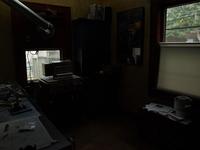
Here are some shots of my girlfriend's lampwork studio. See how the windows are completely blown out in the lightest image, while the darkest image shows little other detail.
Open Qtfpsgui and click New HDR. Use the dialog box to load your exposures.

If you've had too much coffee and your images aren't perfectly aligned, you can use the automatic tool here. Click next.
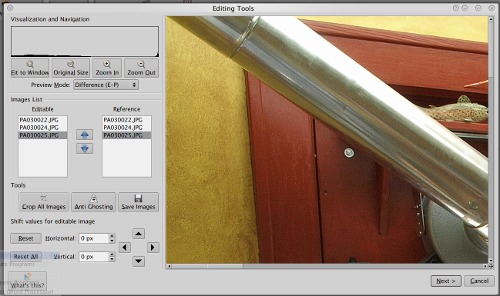
The next tool allows you to edit your images if you need to. You can manually align the exposures here. Click next.
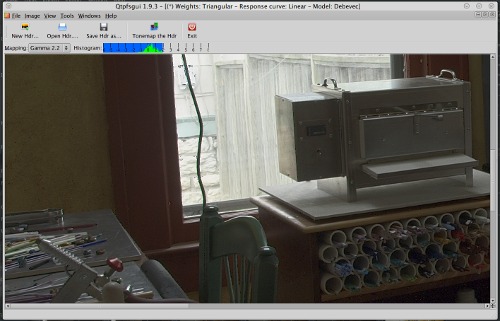
After some crunching, Qtfpsgui presents you with an HDR image, but it doesn't look like much. That's because the HDR image is being rendered in an LDR medium. We can help this with some tonemapping. Click Tonemap the HDR.
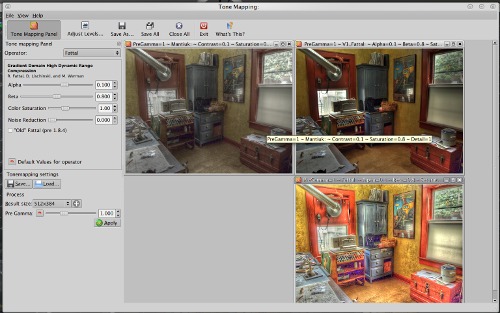
I think this is where it starts to be fun. On the left, you find a place to select an operator. The operators are different tonemapping algorithms. I'm not very knowledgeable about exactly how they work, but each operator will give somewhat different results. Additionally, each operator can be tweaked using the controls. I've had good results with Mantiuk, Fattal — both old and new, and Drago, but don't limit yourself to my recommendations. Go crazy here and make several tonemaps. Notice you can direct the output size of your tonemap images. Small images process faster, big images are… bigger, and take more time to process. Size them with your end use in mind. Save them somewhere convenient. Now switch desktops and open Gimp.
File -> Open as layers the tonemaps you created.
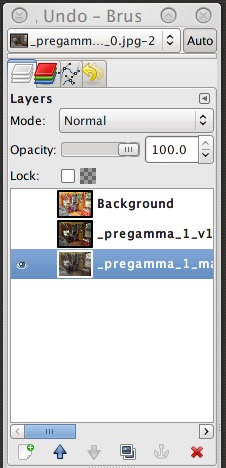
This is another opportunity for creative exploration. What I generally do is put the most “fundamental” image on the bottom of the image stack and add the others above. Experiment with the layer mode of the upper images; I've had good luck with “Overlay” and “Soft Light”. Use the mode and the opacity of the upper layers to control their contribution to the overall image. It should go without saying that any of the layers and the resulting flattened image can be tweaked with any other Gimp tools. Merge your layers and save.
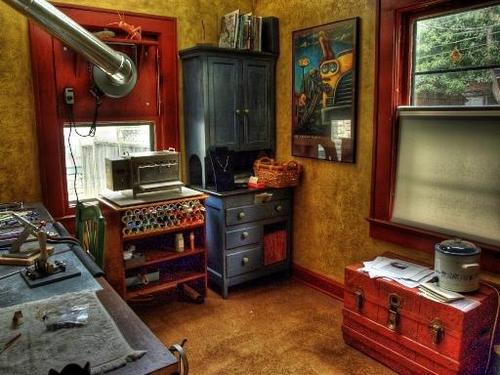
Compare this image to the series of three initial images, and you can see a little of the power of HDR. Thanks to open source software developers and our own PCLinuxOS packagers, we have a set of HDR tools that is second to none.