Clipping Objects Together To Create Cool Graphics With Ink
by Timeth
This is a very simple tutorial for a technique anyone can use to clip one object to another, so that the image/text at the front defines the final shape of the image, but it also takes on the color/design of the image that you put behind it. It’s something you can use on your wallpaper, for your forum profile picture or signature, or anywhere else you’d like to use it. Here are a few examples using country flags, because they’re easily recognizable.

Peru with the country’s flag clipped over it.
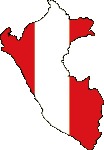
The shape of the country of Peru with the flag clipped over it.

Dobie with the Australian flag clipped over him.
Just a few things before we get started.
- You’ll need to install Inkscape from Synaptic for this tutorial, if you have not already done so.
- You can choose any image/shape and any second flag/image you like but for this tutorial. I’ll use Dobie and the flag of The Republic of Seychelles (because it’s a cool flag).
You can download:Dobie
Use any flag you like, but this is the flag I’m using:Flag of the Seychelles
A great place to find flags:Wikimedia Commons
- When choosing an image/shape that the flag will be clipped to, (such as Dobie or the shape of a country), you’ll usually need to use an SVG type image. If you use a PNG or JPG, while it may look to be the shape of a country, for example, it will actually have an invisible rectangle around it. This means you can’t clip it to the shape of the country. As you will see, the Dobie image is an SVG type image, and so is the Seychelles flag, although it doesn’t need to be. The flag can be PNG, JPG or any image format that Inkscape supports, although for the best results when resizing the flag, SVG is recommended. Wikimedia commons is also a great place to find SVG type images of anything, not just flags. There are some other great sites for SVG images, and I’ll provide links for some of them at the end of the tutorial.
Let’s get stuck in!
- Download the Dobie image and the flag, and put them on your desktop.
- Click on Inkscape to open the application and click the ‘shrink window’ button on the window frame at the top, so you are viewing Inkscape in a smaller window, and you can see part of the desktop behind it.
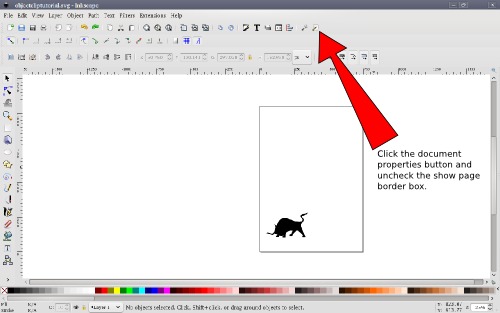
- Now drag and drop Dobie onto the Inkscape canvas. Anywhere is ok. Before we go any further, let’s get rid of that page you can see on the canvas, because we won’t be needing it. Click on the ‘document properties’ button as shown in the screen shot, and uncheck the 'show page border’ box.
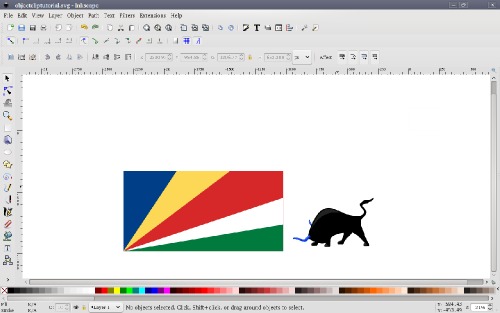
- Next, drag and drop your flag onto the canvas somewhere near Dobie. You can now maximize the Inkscape screen so that it fills the whole desktop.
- If you are using Dobie and the same Seychelles flag, you won’t need to do this next step, (because they are both SVG images), but it is important to do it if you are using any JPG or PNG images. You need to go to the menu at the top and click on Extensions > Images > Embed Images, then click apply, then close the little 'Embed Images’ box. This embeds the PNG, JPG etc. image into the code of the SVG image so that it’s not still linking to the saved image on your desktop.
- Left click and hold, and drag the flag, and drop it on top of Dobie.
- Then click the 'lower selection to bottom’ button which is in the toolbar just above the ruler at the top of the canvas. It looks a bit like this.
- To zoom in and out, use the up/down zoom keys in the bottom right corner of the window.
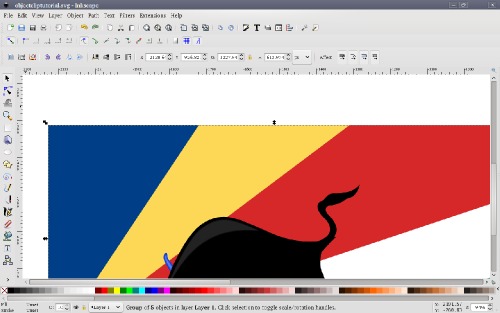
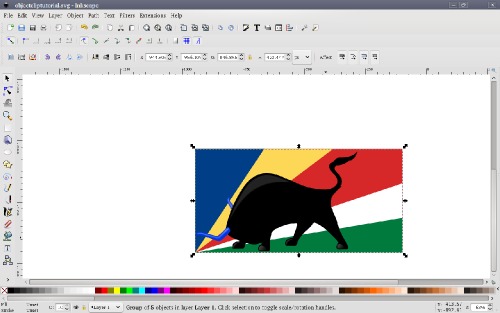
- As you can see, the flag is larger than Dobie, but we want as much of the flag as possible to be clipped onto Dobie. Let’s resize the flag so that it’s closer to Dobie’s size. Click on the flag until you see these arrow guides surrounding it.
- Next, holding down Shift + Control, click and drag one of the corner arrows in towards the centre of the flag until it is tight around the shape of Dobie. You can click on the flag itself and drag it around if you need to re-position it a little, or you can click and drag Dobie around into a different position.
- Click somewhere on the white canvas and drag a rectangle around both the flag and Dobie. This will select both of them putting guide lines around both.
- Now go to the menu at the top and click Object > Clip > Set. Now you’re done!!
- Now that it’s done, there are a few things you can do with it.
- You can export the image to PNG format if you want to use it just as it is on a forum or website.
- You can drag a desktop wallpaper onto the canvas and position/resize Dobie on it, then run step 5 again and export it to PNG format and use it for your desktop wallpaper.
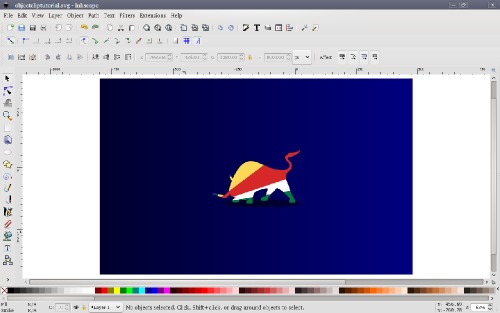
- You can create a new wallpaper on the canvas, position/resize Dobie on it and export it to PNG format to use as your desktop wallpaper like I’ve done in the next screenshot.
- Exporting your image to PNG format is easy. Select the image you’ve created and go to the menu at the top. Click on File > Export Bitmap. Then click Selection, choose where you want to save the image, and select Export.

This will drop the flag down to the bottom so that you can see Dobie on top of the flag. If you added the two images onto the canvas in the reverse order at the beginning, Dobie may already be on top which is fine.
There are two types of guides, so you may need to click a couple of times until you get these particular guides.
You can also drag any one of the arrow guides on the sides of the flag if you need to adjust only one side. For example, in this last screenshot, you could click the right middle arrow guide on the flag and drag it toward Dobie’s bum, but I’ve decided to leave it where it is. **REMEMBER** The 'undo last action’ button in the toolbar at the top is your best friend!! It's very handy, if something goes wrong. When you are happy with the placement of both Dobie and the flag, it’s time to clip the flag.
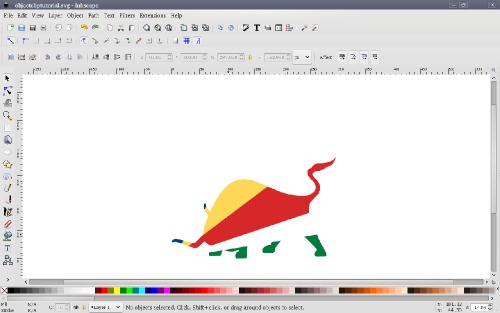
Your flag should now be clipped to the shape of Dobie.
I’ve been working on a project for while that uses this technique. I’ve been clipping various countries’ flags to the PCLinuxOS text and have uploaded them to my blog. So far I’m up to 27 flags, and more to come if anyone asks for them. Check it out and download them here: http://timeth.wordpress.com/category/logos/. OR, you could try to make one yourself!
Here’s an example:

Well, that’s it! I hope this tutorial was easy to understand. If anything was unclear, please ask questions on the forum in the Artwork and Theme Requests section. There are people there who can help.
Don’t forget to show off your creations in the Artwork and Theme Requests or Screenshots sections on the forum! See you there!
As I promised earlier, here are some sites where you can download some SVG images:
- http://www.clker.com
- http://openclipart.org
- http://commons.wikimedia.org/wiki/Main_Page
- http://screencasters.heathenx.org
(Fantastic video tutorials here for Inkscape)