Alternate OS: Icaros, Part 1
by Darrel Johnston (djohnston)
Most who used Amiga computers in the 1970s and 1980s came to love the capabilities of the machines. A well equipped Amiga would "run circles" around any other personal computer of the time. But, the history of the Amiga and Commodore Business Machines is a long and contentious one. And PC hardware and software has come a long way since then. Since Commodore declared bankruptcy in 1994, ownership has changed hands many times.
AmigaOS is the default native operating system of the Amiga personal computer. It was developed first by Commodore International, and initially introduced in 1985 with the Amiga 1000. Early versions (1.0-3.9) run on the Motorola 68k series of 16-bit and 32-bit microprocessors, while the newer AmigaOS 4 runs only on PowerPC microprocessors.
On top of a preemptive multitasking kernel called Exec, it includes an abstraction of the Amiga's unique hardware, a disk operating system called AmigaDOS, a windowing system API called Intuition and a graphical user interface called Workbench. A command line interface called AmigaShell is also available and integrated into the system. The GUI and the CLI complement each other and share the same privileges.
AmigaOS can be divided into two parts: the Kickstart (ROM) and Workbench disks. Versions of Kickstart and Workbench used to be released together, for use with each other. Since Workbench 3.5, the first release after Commodore International stopped development, however, new Kickstart revisions stopped being produced, relying instead on a 3.1 ROM that is patched during boot.
The AROS project, started in 1995, has over the years become an almost "feature complete" implementation of AmigaOS. This was achieved by the efforts of a small team of developers. AROS used to mean Amiga Research Operating System, but to avoid any trademark issues with the Amiga name, it was changed to the recursive acronym AROS Research Operating System.
It can currently be installed on most IBM PC compatibles, and features native graphics drivers for video cards such as the GeForce range made by Nvidia. As of May 2007 USB keyboards and mice are also supported. While the OS is still lacking in applications, a few have been ported, including E-UAE, an emulation program that allows 68k-native AmigaOS applications to run. Some AROS-specific applications have also been written. AROS has TCP/IP networking support. The Poseidon USB stack has been ported to AROS.
AROS is designed to be source-compatible with AmigaOS, but not binary-compatible. Source code that will compile on AmigaOS should compile on AROS, but binaries already compiled for AmigaOS will not run, even if they are compiled for the same family of CPU. This means that, unlike MorphOS or AmigaOS 4, AROS is not capable of running legacy software directly, only applications compiled for AROS. There are plans to integrate the Amiga emulator E-UAE directly into AROS to run AmigaOS applications, and even a bounty to run MorphOS software on the PowerPC build of AROS.
The aim of AROS is to remain aloof of the legal and political spats that have plagued other AmigaOS implementations, by being independent both of hardware and of any central control. The de-facto motto of AROS, "No schedule and rocking" both lampoons the infamous words "On Schedule and Rockin'" from Amiga, Inc. CEO Bill McEwen, and declares a lack of the formal deadlines.
Paolo Besser develops the Icaros desktop as an enhanced version of AROS. He recently released version 1.2.6. The file is actually a self-extracting 7zip. So, after downloading, Linux and Mac users should delete the .exe portion of the file name before extracting. Extracting the 7zip file results in a folder containing an iso image, some document files, and another folder with Windows executables and configuration files for the Bochs emulator. To run Icaros in VirtualBox, we only need the iso, which is named icaros-pc-i386.iso, and is 1.8GB in size.
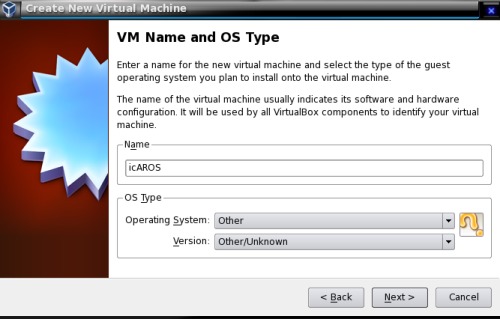
I began the installation as Operating System Type: Other, and Version as Other/Unknown.
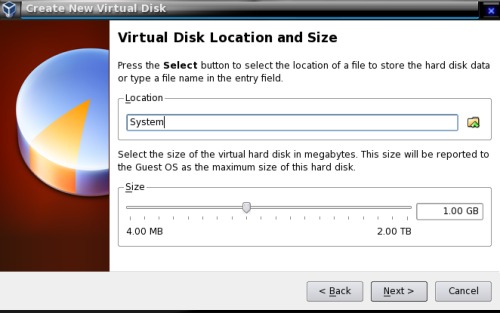
On a real Amiga system, the partitions are named System and Work. Note that the partitions can actually be created as one drive, with the logical Work partition being defined as an Amiga assignment. For this project, I created two separate VM hard disks.
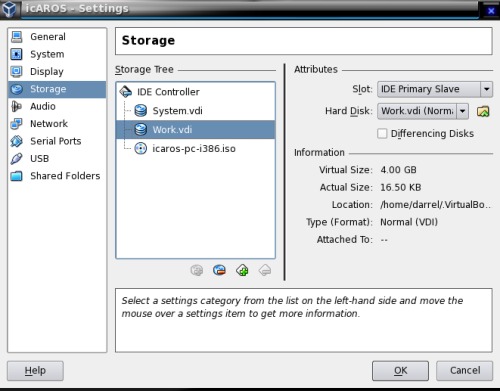
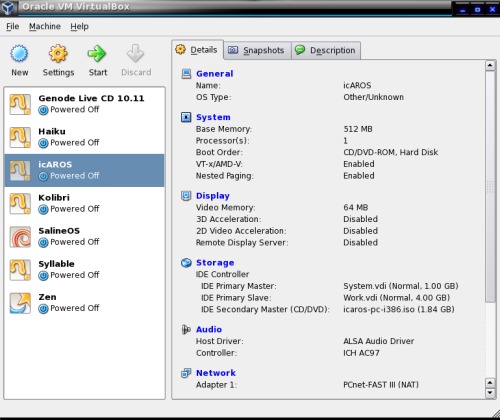
The System drive is the IDE primary master, and the Work drive is the IDE primary slave. The CD/DVD drive is the IDE secondary master.
I also assigned the VM 512MB of RAM, and 64MB of video memory.
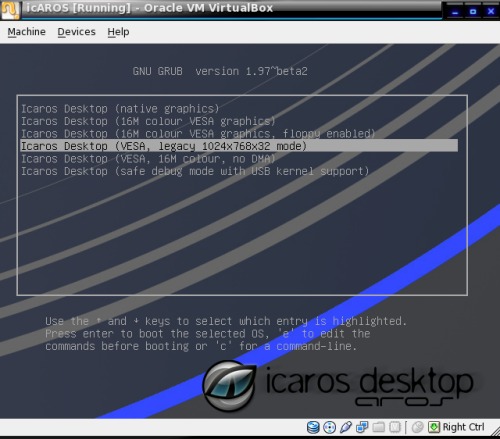
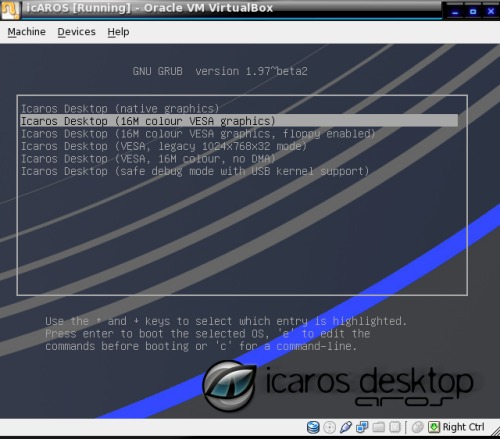
Booting from the CD/DVD, we first see the GRUB screen. Note that the default option is the second line, "Icaros Desktop (16M colour VESA graphics)". Using that option will result in a VM screen size of 1600x1200. Since my real screen size is only 1280x1024, it's not very convenient having to use sliders to move around inside the virtual machine. I chose the 1024x768 option instead.
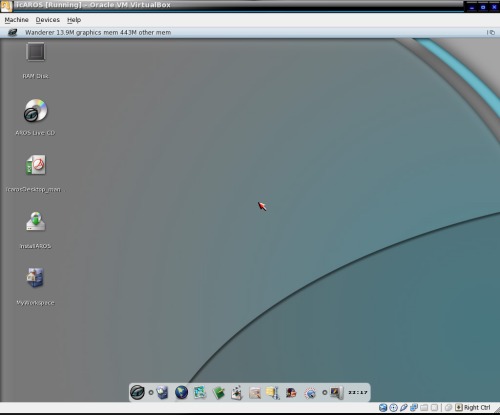
First boot from the DVD. Note that there is an "InstallAROS" icon on the desktop. It looks as though we can simply just launch that application to begin the installation. However, looks can be deceiving. If we begin the installation now, we will get nowhere fast. The installer offers an option to wipe the drive, specify the drive type, and specify the partitions and partition sizes. However, I've found no way to make the wipe drive option work correctly. I believe the option is actually a "placeholder" for future implementation of the feature.
We are going to manually create the drive partitons, using the provided AROS tools. This is where it gets a little tricky. The reason is that the original Amigas use a rigid disk block (RDB) to store store the disk's partition and filesystem information. The PC equivalent of the Amiga's RDB is the master boot record (MBR). Unlike its PC equivalent, the RDB doesn't directly contain metadata for each partition. Instead it points to a linked list of partition blocks, which by itself contains the actual partition data, their start, length, filesystem, their boot priority and their buffer memory type. Because there is no limitation in partition block count, there is no need to distinguish primary and extended types and all partitions are equal in stature and architecture. The data in the Rigid Disk Block must start with the ASCII bytes "RDSK". Furthermore, its position is not restricted to the very first block of a volume, instead it could be located anywhere within its first 16 blocks. Thus it could safely coexist with a Master Boot Record, which is forced to be found at block 0.
The AROS partitioning scheme will combine the RDB and MBR partitioning methods. We will begin by double clicking the AROS Live CD icon to open its contents.
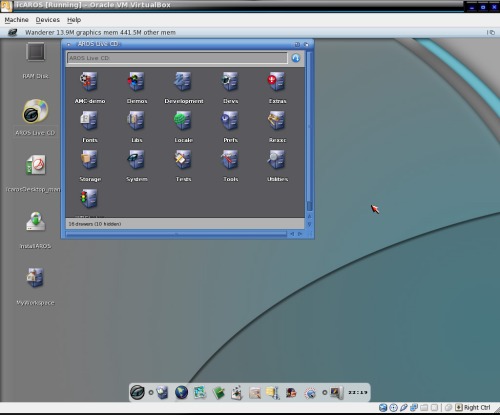
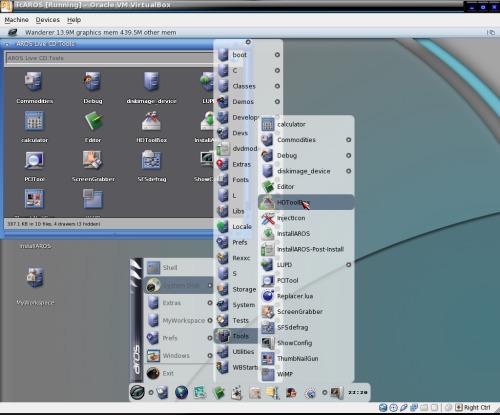
We then double click the Tools directory, which looks like a file cabinet. In Amiga terms, directories are drawers, instead of folders. We can accomplish the same task by using the Icaros menu, and selecting System Disk > Tools > HDToolBox, which is the partitioning tool.
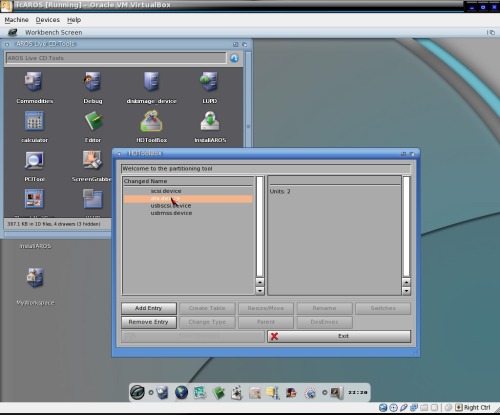
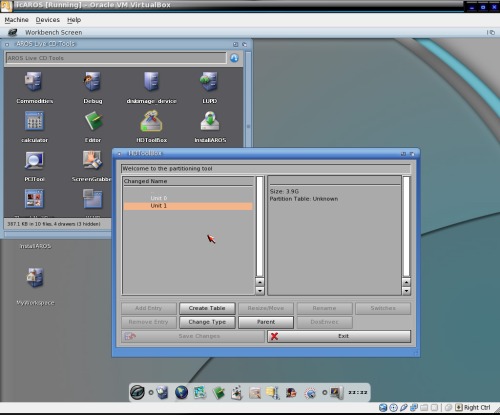
The root level of the HDToolBox shows us the possible devices. We are only concerned with the ata.device, which contains 2 units. Double click the ata.device.
Unit 0 corresponds to the System hard drive and Unit 1 corresponds to the Work hard drive.
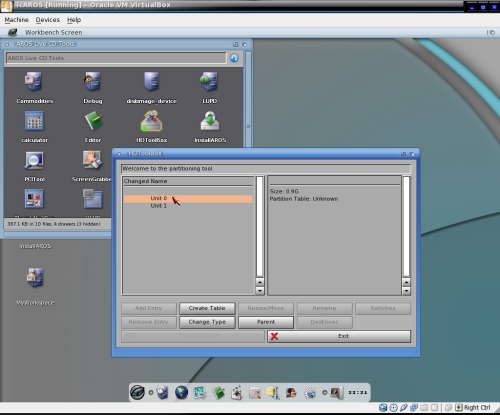
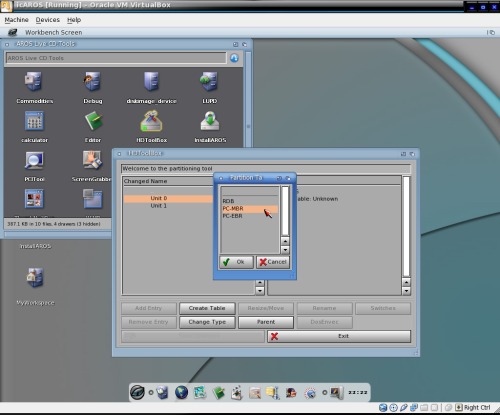
We must first create a partition table for the drive. The partition type is PC-MBR. Click the Create Table button. Select PC-MBR in the Partition Table window, then click OK.
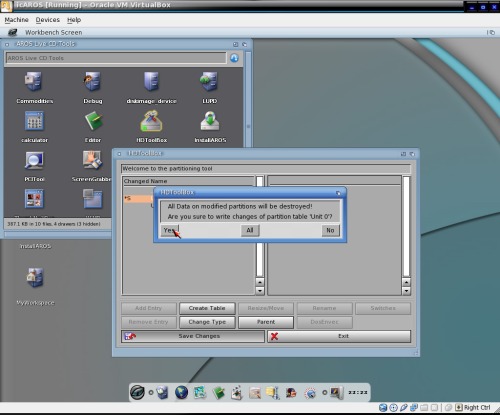
Before proceeding further, we need to save our changes. Click the Save Changes button.

Verify we wish to save the changes by pressing either the Yes or All button.
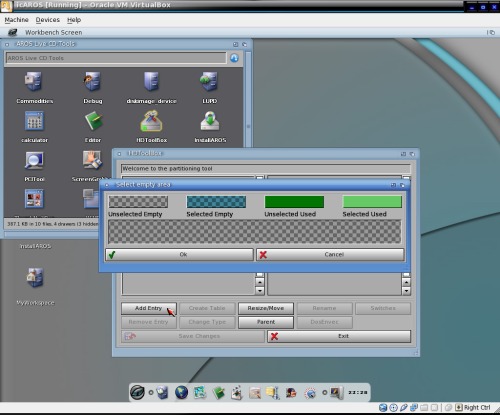
Next, we double click on Unit 0. Click the Add Entry button to begin creating a partition table. The default window shows Unselected Empty. Click Selected Empty to create a partition table of the entire disk, then click the Ok button.
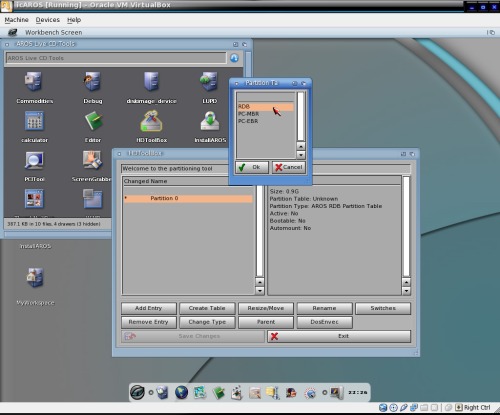
We now have a Partition Type of AROS RDB Partition Table, but the Partition Table is Unknown. Click the Create Table button. Select RDB in the Partition Table window, then click the OK button.
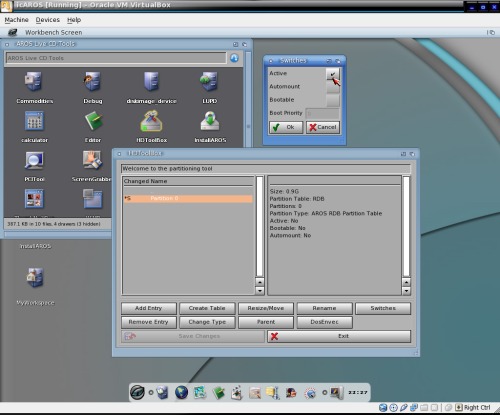
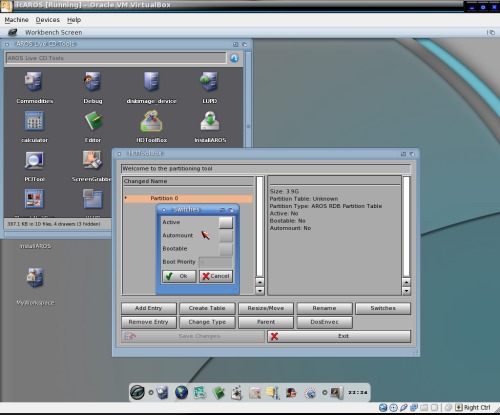
Next, we have to make the partition active in order to be able to boot from it. Click the Switches button. Click the Active button in the Switches window, which results in a check mark, then click the OK button.
Note that we still have no defined partitions, just a partition table. Double click Partition 0.

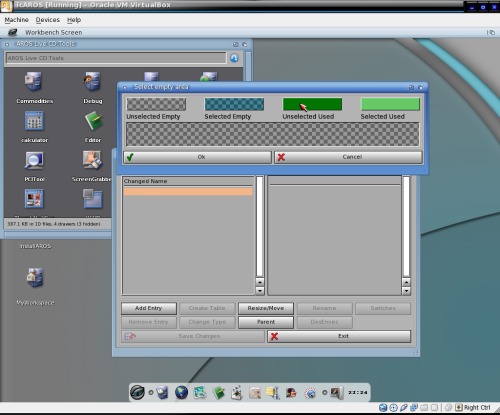
Click on Selected Empty to create a partition size of the entire disk. Then click the Ok button.
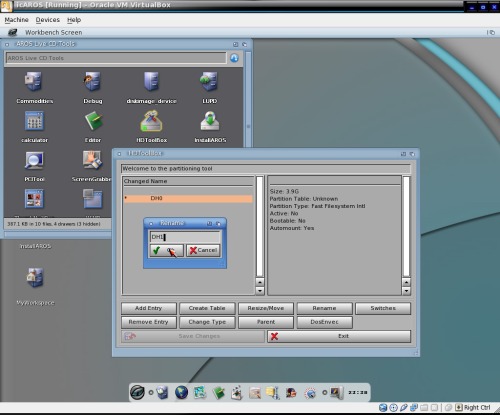
DH0 is automatically inserted as the first partition designation.
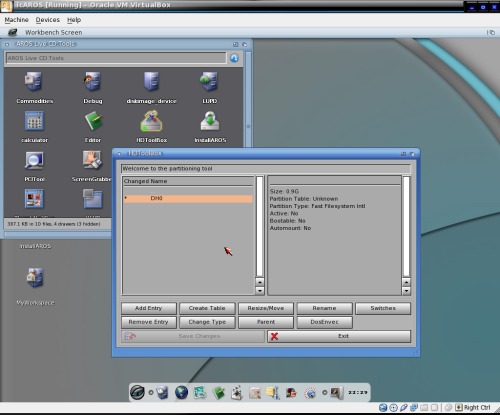
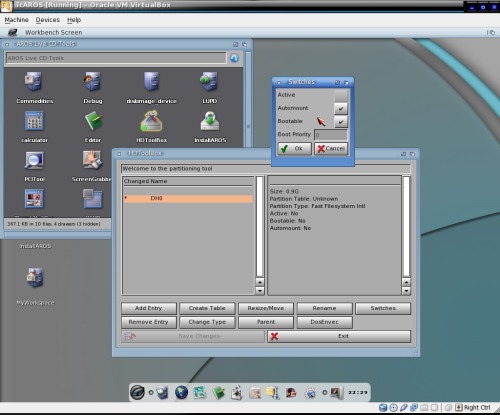
Click the Switches button. Click the Automount and Bootable buttons, resulting in check marks. Click the Ok button.
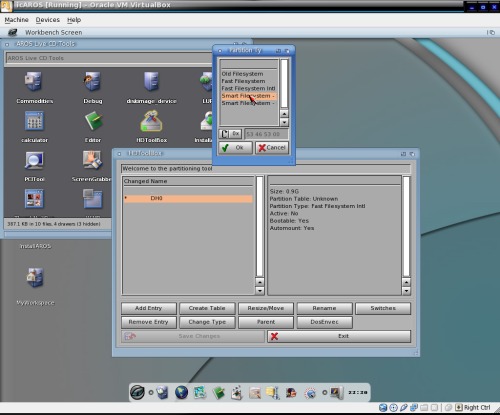
The default filesystem type is Fast Filesystem Intl (International). From past experience, the FFS has proven to be very unstable and worrisome. A sudden reboot or powerdown can result in the loss of the entire partition's contents. Click the Change Type button. In the Partition Type window, select Smart Filesystem. The first SFS option listed is BE (byte encoded) and the second SFS option is LE (length encoded). Choose SFS BE, then click the OK button.
At this point, we have made a lot of changes which have not been saved yet. But the Save Changes button is ghosted out, and is not selectable. Click the Parent button until we come back to the window showing Unit 0 and Unit 1.

Note the *S to the left of Unit 0. It's an indication that there are unsaved changes. Click the Save Changes button.

We must now repeat the same steps in order to create a partition for Unit 1.
We only need one bootable disk, so we will leave the Active button unchecked in the Switches window. Click the OK or Cancel button. Then, double click Partition 0.
Again, DH0 is inserted as the default partition designation. But, we already have a DH0, and we don't want two. Click the Rename button, change the name to DH1, then click OK.
Once again, we have made changes that are not yet saved. Click the Parent button until you are at the window showing Unit 0 and Unit 1. Be sure Unit 1 is highlighted, then click the Save Changes button. After all this work, it is a temptation to now run the AROS installer. However, the system won't recognize the hard drive partitions until the OS has been rebooted. Click the Icaros menu button and select Exit. In the User Request window, click the Reboot button.
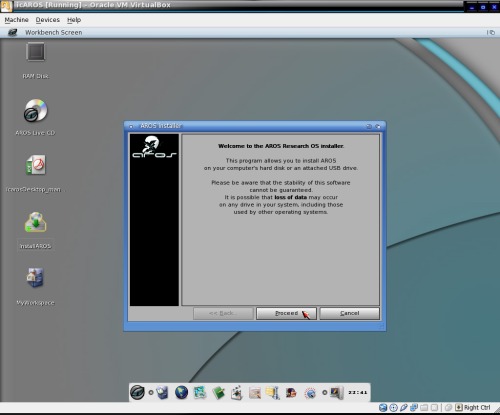
Once we have rebooted, we can begin the AROS installation by double clicking the InstallAROS icon on the desktop. Please take heed of the warnings in the AROS Installer window. We're running in a VM, so we're not particularly worried about data loss. But data loss is a distinct possibility when running on real hardware.
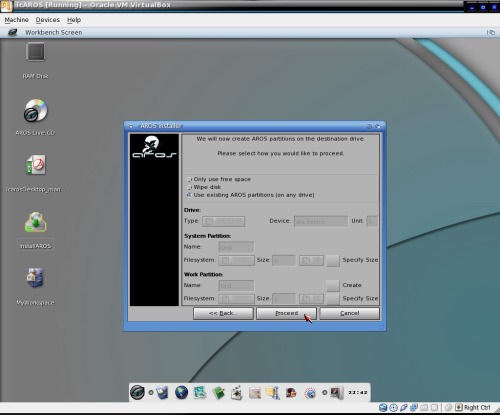
We've already created the AROS partitions needed, so the default selection is to use the existing partitions. Click the Proceed button.
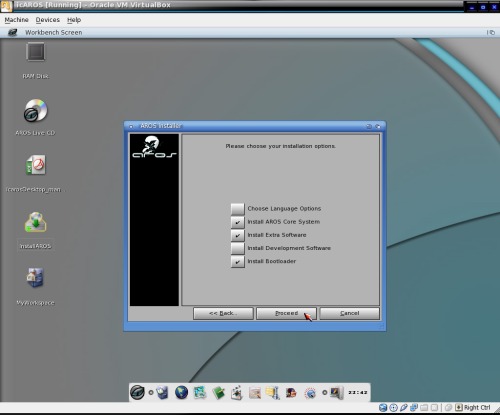
I'm only going to use one language, so I leave that option unchecked. Non-English users, or those wishing to use more than one language will want to check that option. I'm not a developer, so I leave that option unchecked.
Developers, developers, developers! (Shades of Steve Ballmer. WARNING: Video is scary!) Click the Proceed button.
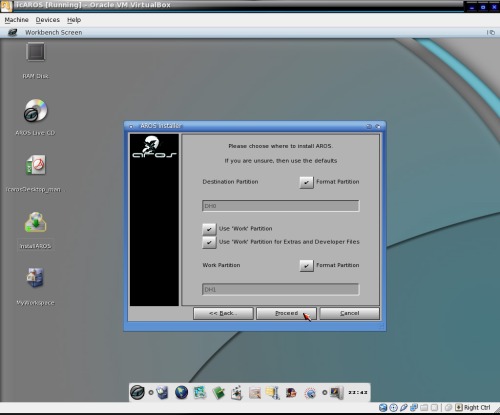
The partitions are unformatted, so we want to select those options. We also want to use the Work partition, and put all the Extras files there, so select those options.
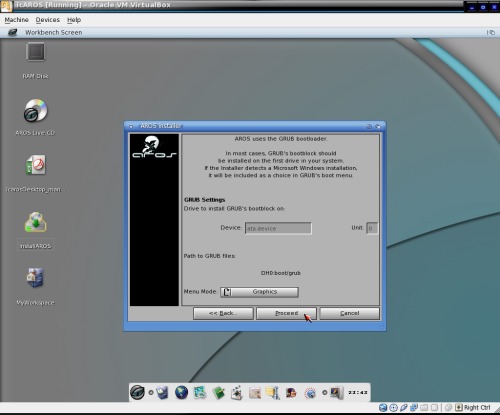
GRUB will be installed to the MBR on ata.device. Its configuration files will be placed in /boot/grub. I changed the Menu Mode from Text to Graphics. Click the Proceed button.
If you're sure you wish to continue, click the Proceed button. Otherwise, click the Back button to review the options.

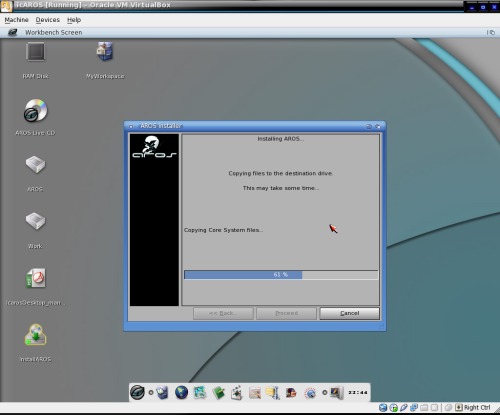
The installer is running.
The installation is almost complete. Click the Proceed button to finish the installation.
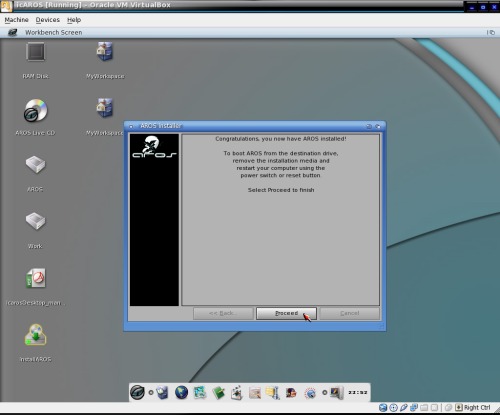
At this point, selecting to reboot from the Icaros menu will simply restart Icaros, but will not restart the VirtualBox virtual machine. (You may have to see this in action to fully understand.) We now wish to detach the DVD from the VM and boot from the System hard drive. For that reason, we will power off the VirtualBox VM.

We have now detached the icaros-pc-i386.iso DVD from the virtual machine. The default GRUB boot option is still not the one I want. I will edit the /boot/grub/grub.cfg file later to change the default boot option.
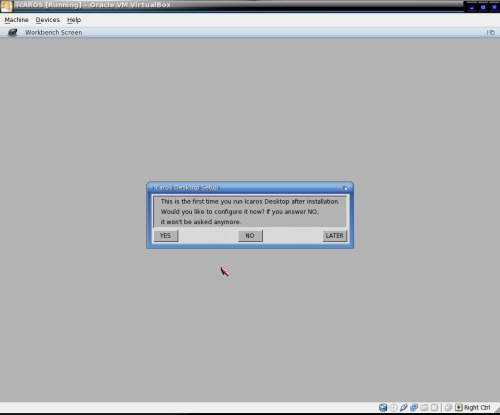
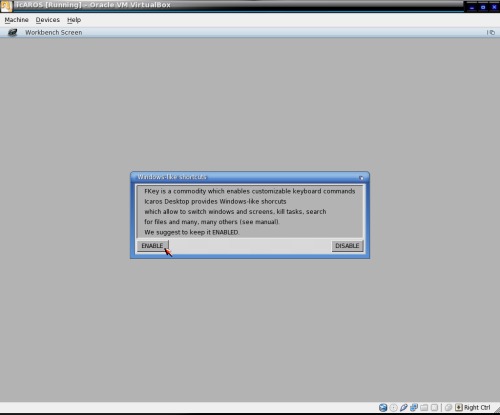
On first run, you are offered the option to configure the installation options. I chose to configure them.
This is self-explanatory.
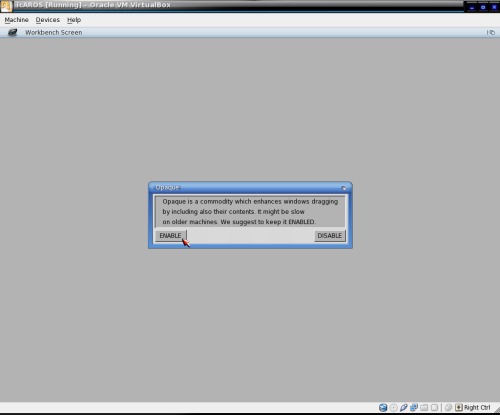
I chose to keep this option enabled.
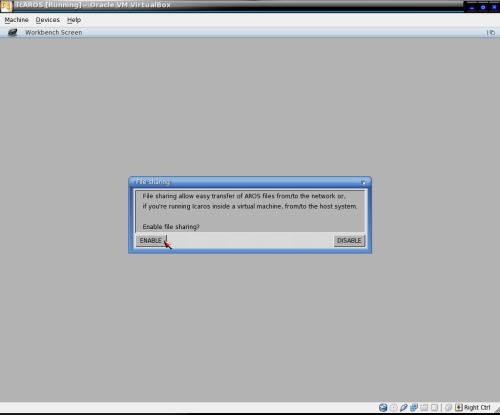
I may want to share files between the VM and the host, so I chose to enable this option.
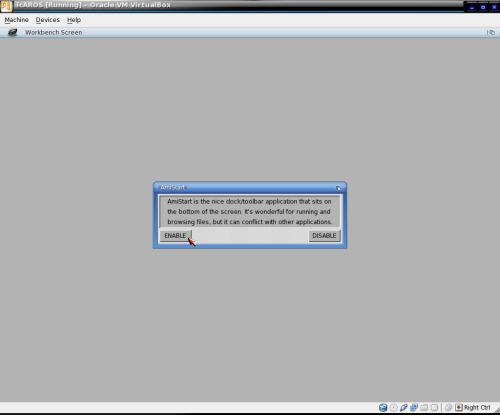
AmiStart is the menu bar we have already seen at the bottom of the Icaros desktop. I chose to keep it.
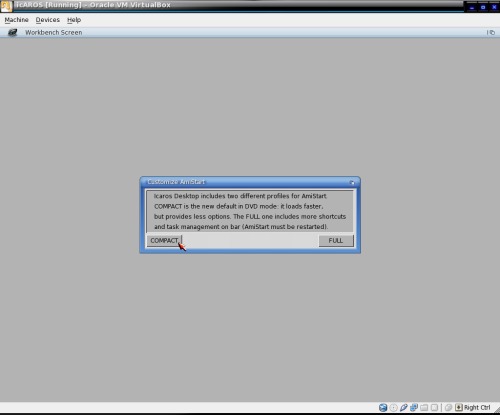
I chose the compact menu mode which is also used on the live DVD.
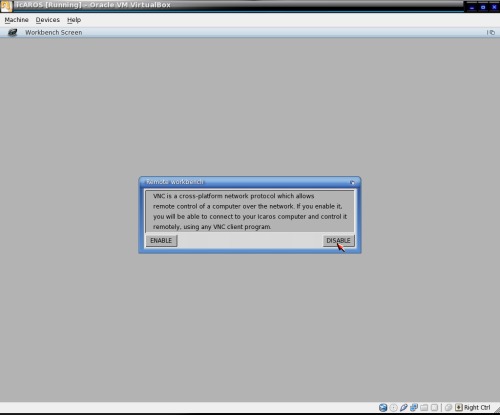
I don't wish to control the Icaros desktop remotely. Life is complicated enough, as it is.
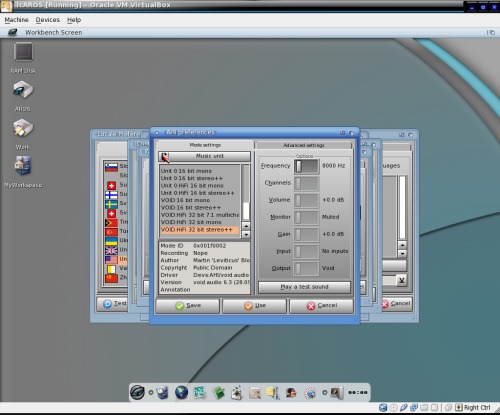
More options windows eventually appear, stacked upon one another. Music unit is the default option for sound playback.
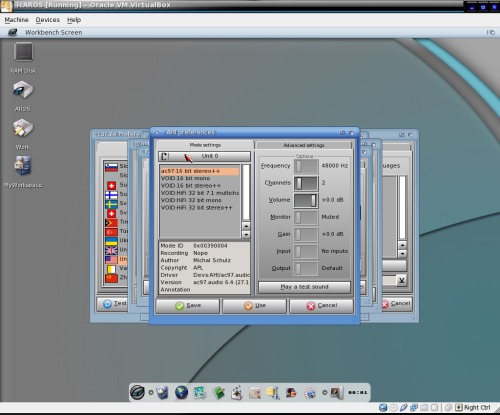
The only other option shown to me for a sound source is Unit 0. That shows the ac97 option, which is what the VM uses. Clicking the Play a test sound button produced an audible two second tone.
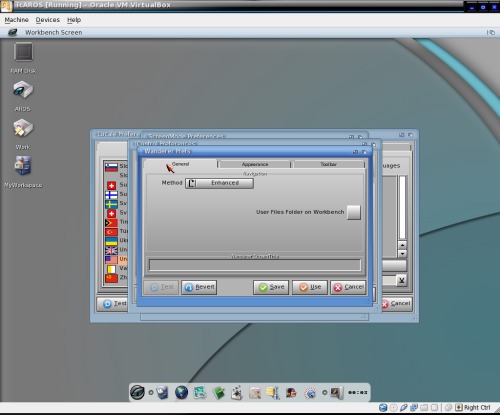
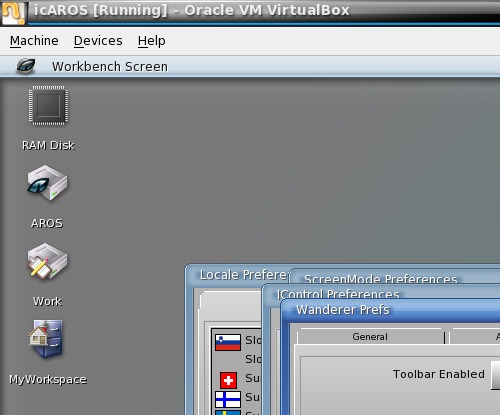
Wanderer is the menu toolbar which is accessed by right-clicking the "Workbench Screen" bar at the top of the desktop. I left the General tab with the default options.
Clicking the Toolbar tab in the Wanderer Prefs window shows an option to enable the toolbar. I selected that, resulting in a checkmark.
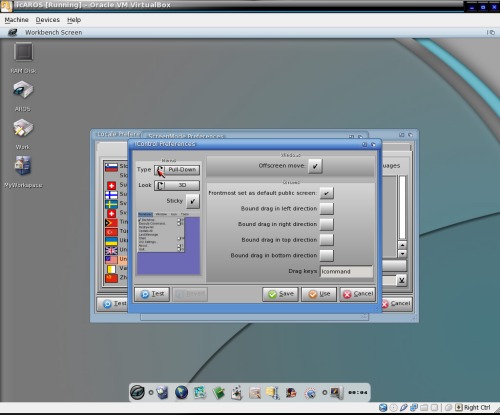
I left the IControl Preferences at the defaults.
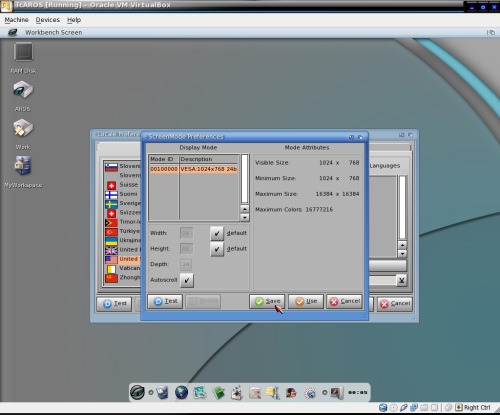
I left the ScreenMode Preferences at default.
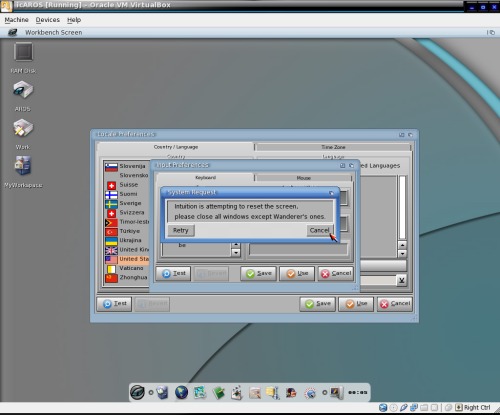
After saving the ScreenMode Preferences, Intuition (window manager) will attempt to reset the screen. Because we have two more preferences windows still open, select Cancel here.
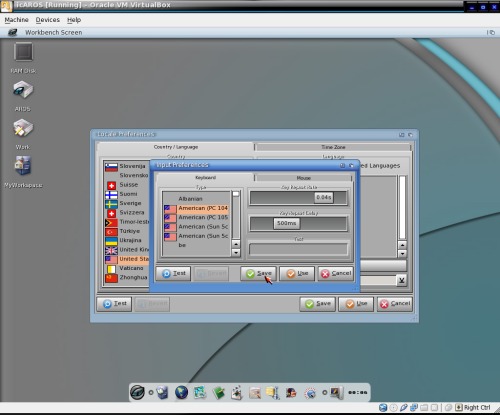
I chose the default American PC 104 keyboard. (There are lots of keyboard options, as well as a Mouse options tab.)
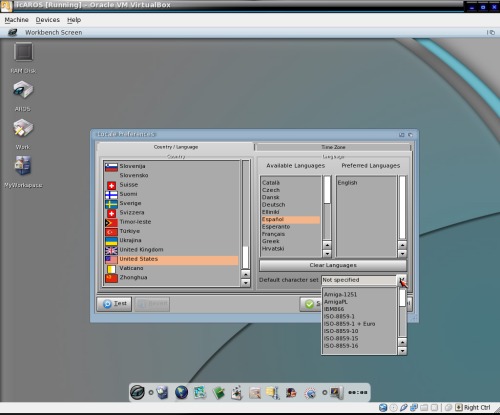
I left the default character set at its default option. Double clicking English in the Available Languages column moves it into the Preferred Languages column. You can select more than one preferred language.
I changed the default U.S. Eastern time zone to U.S. Central by clicking the appropriate spot on the world map.

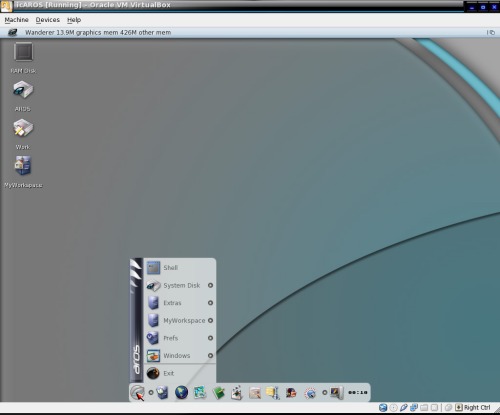
Here I am going to restart the Icaros desktop, without leaving the virtual machine. I start by clicking the Icaros menu button.
I select Exit from the menu. Just to be on the safe side, I saved the preferences.
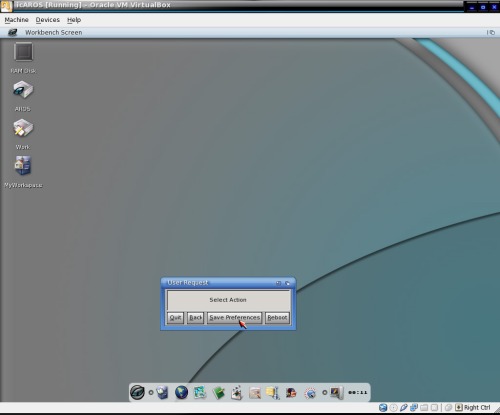
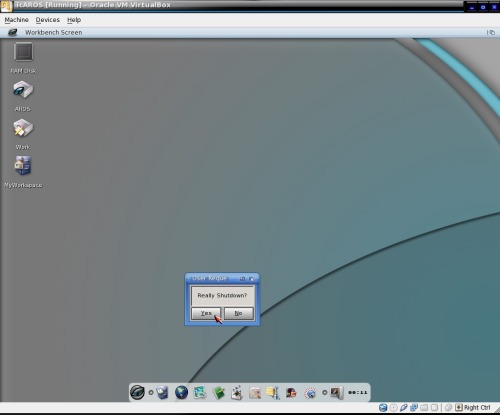
Next, I clicked the Icaros menu button again, selected Exit, and clicked the Reboot button. Again, this will restart the Icaros desktop, but not the VirtualBox session. (NOTE: There is no Shutdown option. Clicking the Quit button will simply end the Icaros toolbar session at the bottom of the desktop.)
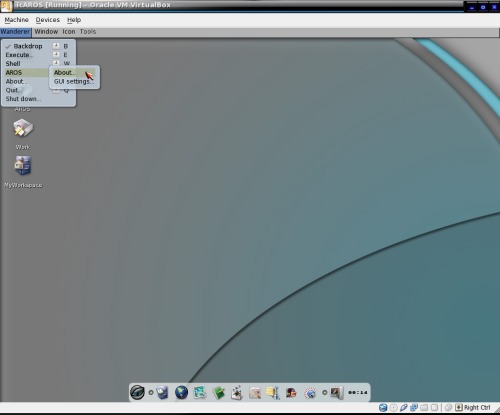
After restarting the Icaros desktop, I selected the Wanderer (file manager) menu by right-clicking on the "Workbench Screen" toolbar at the top of the screen. I then selected Wanderer > AROS > About…
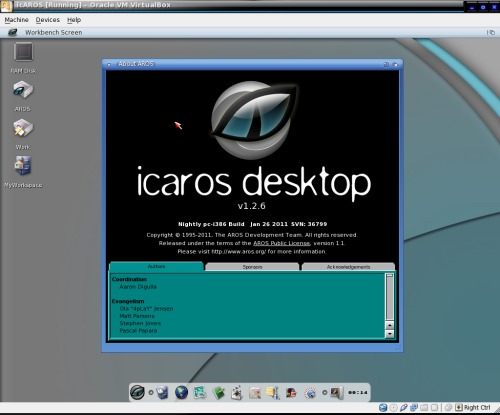
The installed version is 1.2.6, released January 26th, 2011.
Next month, we will take a look at some of the capabilities of Icaros. Note that all of the preferences which were set on the first run can also be changed later, from the Prefs section of the menu, or by opening the Prefs drawer (directory) of the System hard drive. Also note that the System hard drive is labelled as AROS on the desktop. I'm not sure, but I think that's a newer feature.