Avidemux Under PCLinuxOS
by Daniel Meiß-Wilhelm (Leiche)
Translated from German by Longtom
When it comes to editing video, converting video files, or preparing video to burn to a DVD, it's hard to beat the capabilities of Avidemux.
Avidemux is in the PCLinuxOS respository, and it comes in three flavors: a command line version, a Gtk+ version and a Qt4 version. Functionally, the latter two GUI versions are identical.
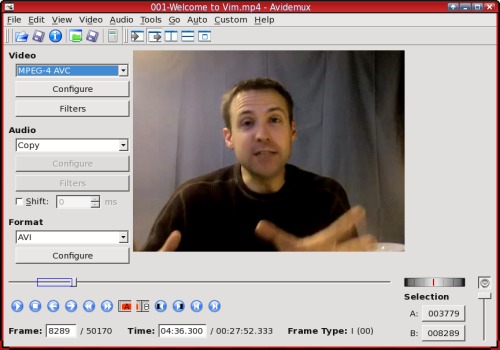
Once you open AviDemux for the first time, you will see the following window:
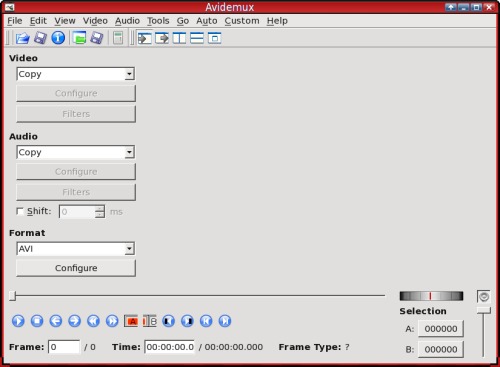
Use "Open" to start the file browser and find video or picture files. Video formats would be mpg, vob and, as the name indicates, avi. Picture formats (like jpg, bmp, png) will also be listed, and possibly others.
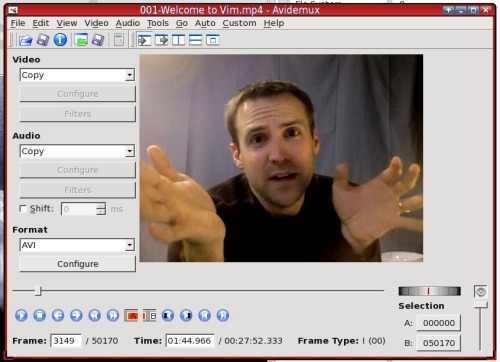
I have chosen a screen cast from Derek Wyatt.
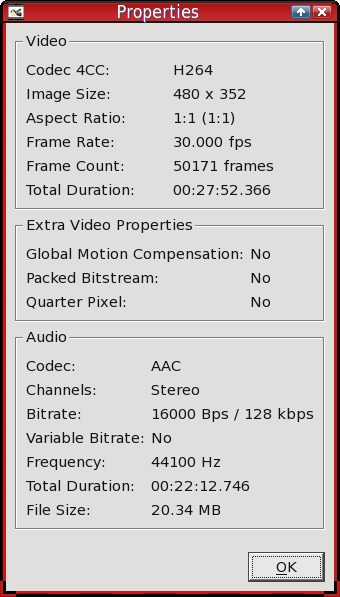
A click on "File > Information" reveals some details concerning the loaded video. When you make a DVD, keep in mind that there are certain standards that apply. One of those would be resolution. Under PAL, we use the following:
- 720×576 very good quality depending on compression 2h video
- 704×576 very good quality depending on compression 2h video
- 352×576 good quality up to 4h video
- 352×288 satisfactory quality up to 6h video
Under NTSC, we use the following resolutions:
- 720x480 very good quality depending on compression 2h video
- 704x480 very good quality depending on compression 2h video
- 352x480 good quality up to 4h video
- 352x240 satisfactory quality up to 6h video
It all depends on the rate of compression.

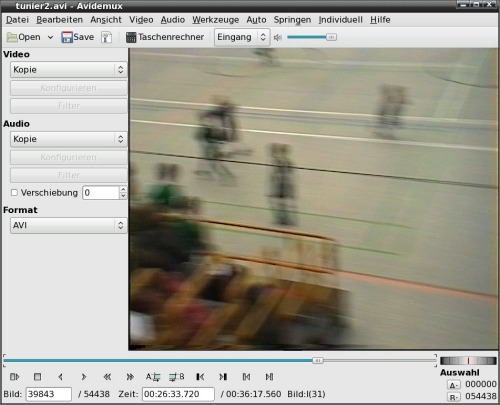
You can jump back and forth with the slider, or define a part of the video you intend to work with. We mark the beginning of such a part with "A" and the end with "B".

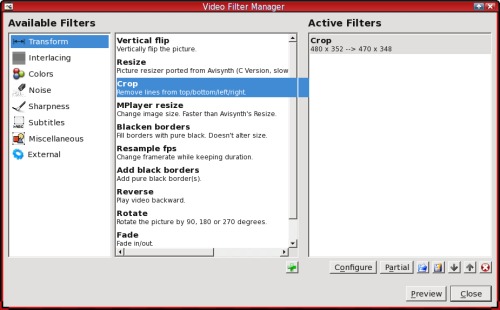
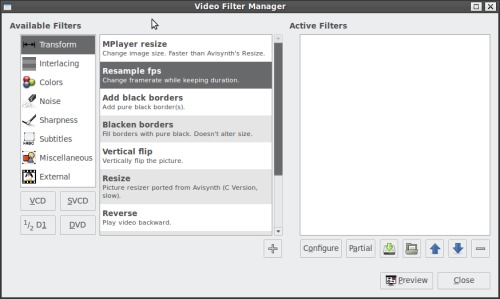
The selection is displayed again in the bottom right hand corner (marked in red). Since the selection is done, we can focus now on the different filters available. We choose "Video > Filter" and get the following window:

The "Crop" filter is for cutting off unsightly edges.
Click on "Crop" and the following window appears:

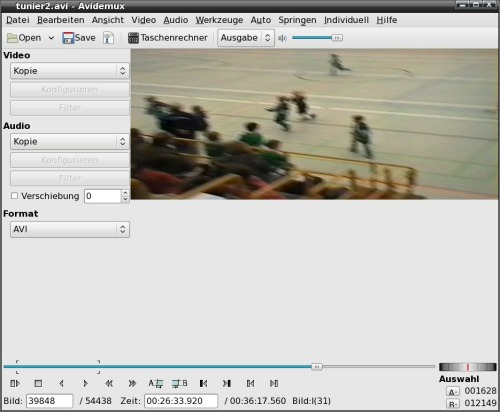
The edges to be cut off are marked green. We click "OK" and we are returned to the "Video Filter Manager."
In the right pane of the window, we see that our first filter has been activated. To make sure the filter works as desired, switch from "input" to "output." All filters will be applied in real time. Depending on the intensity of the filter, this can place a heavy load on your CPU.
That means the video can not be played back fluently. The video is not standards compliant any more. This could be rectified by "Add Black Borders." Add the appropriate number of vertical lines, as well as horizontal, in order to arrive at a standard size. I suggest adding similar amounts for top and bottom, as well as left and right, in order to keep the visible part of the video in the middle.

Original Picture

Add border bottom only

Add border top and bottom
If you scroll down in "Transform" in the Video Filter Manager, you'll find the filter "Fade." This filter can be used to blend your video in and out whenever desired. Please make sure that you use the frames which have been previously marked only.

Don't forget to tick "blend to black." The fading time can be chosen freely and according to taste. We are now entering an area where opinions differ. Some would do it one way, others a different way. Just be sure the result is what is you desire.
In this picture, we see some comb filtering forming. How that happens and why is something I will explain later, together with all the other filter options. In the Video Filter Manager, I chose "Interlacing" in the left field, and chose "Separate Fields" on the right. Unfortunately, this filter has a side effect. The resolution changes from 704x576 to 704x288 and the frequency from 25.000fps to 50.000fps (29.97 to 59.94 in NTSC). Especially the 50.000fps (25.000fps = 25 frames per second in PAL, and 29.97fps in NTSC) are not standard.
In the Video Filter Manager, we need to go back to "Transform" on the left and choose "Resample fps" in the right frame. Now we can adjust the frequency.
The resolution is still not right, and the display is out of focus. We will leave the video interlaced, so we will have to choose this accordingly with the encoder codec later.
To save time authoring the DVD later, we correct the proportions of the picture sides. In the Video Filter Manager, choose "Mplayer resize" function under "Transform."
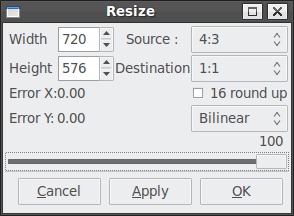
Now choose the size 720x576 (720x480 with NTSC video). We need a ratio of 4:3, and not 16:9. Let's have a look at the encoder options.
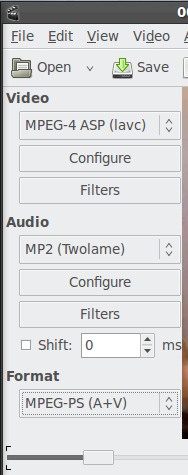
Underneath "Video" choose the DVD(lavc) codec. Afterwards, choose "Configure," and choose a setting possibly like this one below:
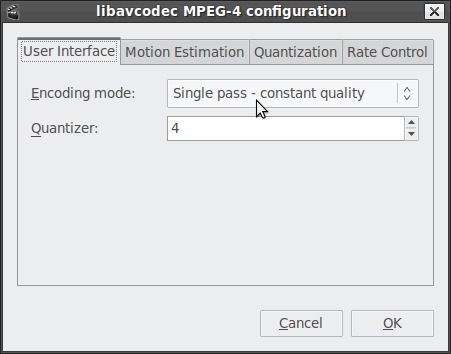
With a standard DVD, the GOP size in PAL is 15. The GOP size for NTSC video is 18. As mentioned before, change Interlacing from "Progressive" to "Interlaced TTF." The aspect ratio should be 4:3. We will leave the other settings as they are.
Audio Options:
In Audio, the standard is 48.000kHz and MP2. AC3 and Wave can also be used. Wave should only be used if you want to fill up the DVD, since it uses a lot of space. Let us choose configure:
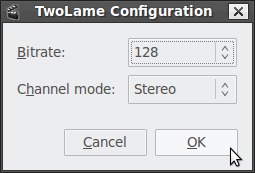
With MP2 (Twolame), a bitrate of 128 is standard. This is also standard for MP3. However, I prefer to use a bitrate of 192 kbps.
In Filters:
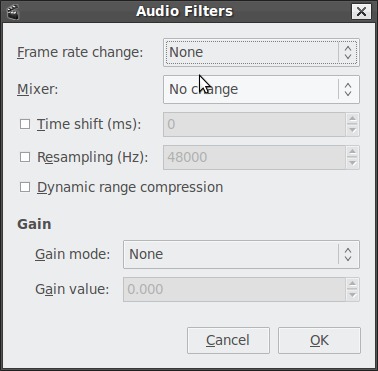
These settings are self-explanatory. I learned that if the audio remained at 44.100kHz, that it would not be DVD standard compliant any longer. The DVD standard requires a 48,000 Hz sampling depth. As a result, I would then have to change the setting to 48,000. Because of this, we check the "Resampling" check box.
In "Format" we choose the setting MPEG-PS (A+V).
Once all the settings are completed we click "Save" and we are returned to the file browser.
Now name your video and sit back. Depending on which filters you have chosen, this can take a while. Remember that working with video files can be a lengthy process.
Now, let the creativity flow.