WindowMaker on PCLinuxOS: Working with Icons
by Patrick G Horneker (phorneker)
Introduction
The icon has been one of the most important elements of the user interface (if not the most important) on the desktop.
The concept of the icon first came out back in 1968 as Xerox was developing a better way to manage documents at its Palo Alto research center. It was here where the first graphical interface was developed.
The public was introduced to the graphical interface and the concept of clicking (and double clicking) on icons with the introduction of the original Macintosh back in 1984.
Fast forward four years. The icons I am referring to in this article were introduced with the original NeXT system, and the same concepts introduced with NeXT have been implemented in WindowMaker.
Each icon on the WindowMaker desktop is a 64 x 64 pixel tile. The default size of these icons are the same as those implemented with the NeXT system. (This can be changed to as small as 24 x 24 pixels in the PCLinuxOS configuration through the WindowMaker Configuration Manager to save screen space.)
Configuration
Unlike other desktops for PCLinuxOS, each icon in WindowMaker has its own background. Application and other icons normally displayed in desktops such as KDE, GNOME, XFCE, LXDE, and Enlightenment are displayed centered and inside the WindowMaker icons.
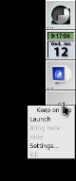
You can change the icon displayed by right clicking on the desired icon. When the menu is displayed, click on Settings. . . to open a dialog that allows you to select the icon you want.
Note:You can launch the application associated with the icon by selecting Launch from this menu. (IMO, it is easier to simply double click on the icon to launch applications.)
Keep on Top makes sure that no window can be displayed where the effected icon is located.
Application Icon Settings
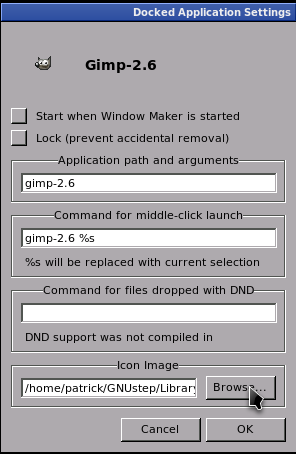
As we can see here, there are plenty of settings that you can associate with most any WindowMaker icon. The settings that show up here depends on where the icon is. This is what you see when the icon is in either the Clip or the Dock.
When the icon is on the lower left hand corner of the screen, the menu that you see differs, and the only setting you may change is the application icon that appears in the WindowMaker icon.
Clicking on “Start when WindowMaker is started “ allows the associated application to launch when WindowMaker is launched. This is useful when you want an application to automatically start when you start your desktop.
Icons can be removed from the Clip and/or the Dock by simply dragging the icon away from the Clip and/or the Dock. To prevent accidental removal of icons, click on Lock.
The fields for Application path and arguments and Command for middle click launch should already have been filled in, so you do not need to change anything here.
The term “middle click” refers to the middle button found on three button mice of yesteryear. Mice for UNIX systems (BSD, AT&T System V, AIX, HP-IX, Solaris, etc.) in the 1980s typically came with three buttons. Mice for PCs in the day had only two buttons. To compensate for the missing middle button, double clicking on an icon was the same as middle clicking. This is true for other desktops in PCLinuxOS as well as for Windows or OS/2 (for those who remember what that was).
Do not worry about the Command for Files dropped with DND field. WindowMaker was compiled without drag and drop capability in the version for PCLinuxOS (and for Mandriva). NeXT systems allowed files to be opened with the application where the icon was associated by simply dragging and dropping file icons on the application icon.
The last field is where we assign application icons to the WindowMaker icon. Click on Browse. . . to open a dialog box where you will see a list of directories from which applications are stored.
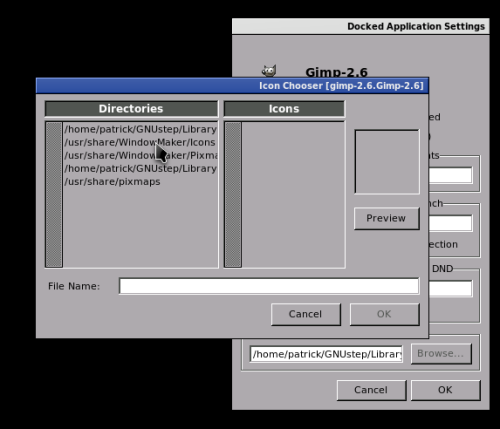
Click on a directory first, then click on the name of the icon you wish to use. A preview will be shown for you to look at if the icon file is in a supported format.
Supported Formats are: PNG, TIFF, XBM, and XPM.
If the icon is larger than 64 x 64, the icon will be centered and cropped so that it fits into a 64 x 64 space.
You can add or delete directories in the listing by editing Paths in WindowMaker Configuration Manager, or with the Preferences utility (double click on the top icon on the Dock to open Preferences).
For PCLinuxOS, icons that come with WindowMaker are stored in /usr/share/WindowMaker/Icons and in /usr/share/WindowMaker/Pixmaps.
PCLinuxOS has WindowMaker configured to use /usr/share/pixmaps as well as ~/GNUstep/Library/WindowMaker/IconSets and ~/GNUstep/Library/WindowMaker/Pixmaps in addition to the aforementioned directories in the previous paragraph.
Sources for icons can be found at the WindowMaker website:
Creating Your Own Icons
You can use a graphics program such as GIMP, GNU Paint, Kolourpaint, gnome icon editor, MTPaint, or whatever you have that can edit bitmap files. Be sure to save it in a supported file. I recommend PNG as it supports 24-bit color, and is of the best quality when it comes to graphic reproduction. My second choice would be TIFF (or Transfer Image File Format), a lossless format intended for storage of photographs. XBM and XPM are among the oldest formats for graphics. These older formats were designed for X Window System displays and are intended for 8-bit color icons.
There is another way to get icons for use with WindowMaker. If you are using any Windows based software on PCLinuxOS (through Wine), you can install icoutils from Synaptic. icoutils contains utilities that extract icons from Windows DLL (libraries) and EXE (executable) files and store them in PNG format.
This is useful if you want to run a Windows application (on Wine) inside WindowMaker.
NeXT time
For my next article, I will show you how to install and use wallpapers in WindowMaker.