Alternate OS - Plan 9 Part 2
by Darrel Johnston (djohnston)
After installing Plan9 to a hard disk, we should ensure that our local timezone is set correctly. According to the Installation Manual, we are to login as user adm. After doing so, I got errors messages that the /usr/adm directory did not exist. After listing the timezones, by entering ls /adm/timezone/, I saw there is a US_Central timezone. So, I followed the instructions to copy that timezone as the local one.
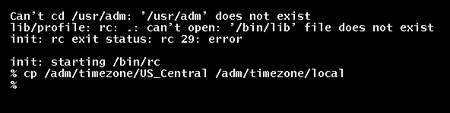
All attempts to create the /usr/adm directory were futile, no matter what user I logged in as. Every user, including adm, received permission errors.

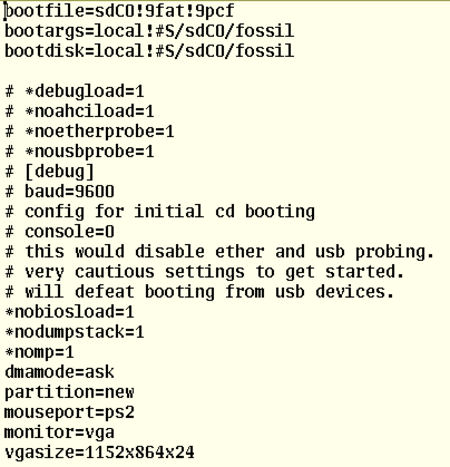
Next, I changed the screen resolution size from 1024x768x24 (heightXwidthXcolor depth) to 1152x864x24. First, right-click the screen and select “New” to draw a new terminal window. Next, right-click on the area of the screen where you want the upper left corner of the window to be, hold the right mouse button down, and draw the new window area. Once the right mouse button is released, the terminal window is drawn on the screen. First we must change to the 9fat partition by issuing the command 9fat:. Next, we must then call the editor and the file to edit with the command sam /n/9fat/plan9.ini.
When first started, the sam editor will show a small plain blue window with no contents. You must right-click within that window and select the file name you have already called, then right-click in the blue window again in order to see its contents. Not very intuitive.

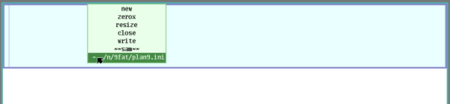
After editing the contents of any file, right-click in the same editor window, and select “write”, then right-click the editor window again. Otherwise, any changes made will be discarded without any warnings being issued. Navigation in the editor’s window is best done using the mouse cursor. Up and down keyboard keys simply scroll the text vertically up or down. The right and left keyboard keys work normally. The delete key does not work normally. I found using the destructive backspace key to be the most efficient in erasing any unwanted text.
The edited contents of plan9.ini are shown below.
The next step is to create a new user. While logged in as the default user glenda, issue the command con -l /srv/fscons to get a connection to the fileserver. Next, issue the command uname <user> <user>, <user> being the actual username. To allow the user to make changes to the system (configuration) files, which are writable by group sys, add the user to sys: uname sys +<user>. I used darrel as the username. Finally, shutdown the filesystem by issuing the command fshalt. Once you see the message “done halting”, close the VM.
Start the VM again, and login as the new user. Once logged in, you will be at a command prompt. Issue the command /sys/lib/newuser to create a minimal Plan 9 home directory. Minimal is, indeed, the key word. Once the command has been issued, you will see a plain grey screen background, and nothing else, except the mouse cursor. To begin any work, right-click on the screen, select “New”, and draw a terminal window. I began by trying to create a password for the new user by issuing the passwd command. Amazingly, it would not work because I had no working dns.

During initial installation of Plan9, networking was not set up. After spending some time perusing the networking section of the Installation Manual and reading the ipconfig man page, I looked at the contents of /net/ndb file by using the cat command. The IP address was set to local loopback 127.0.0.1. IP mask was set to /401, or local port 401. The gateway values were ::, or null values. I foolishly though that by editing the /net/ndb file I would be able to get an internet connection. After editing the file and rebooting the VM, I was back where I started. Evidently, the contents of that file are dynamically set.
Rooting around in other configuration files seemed to lead to nowhere. I decided to create another VM and restart the installation from the CD. This time, though, I selected net as the installation medium, rather than local (the CD). I went through every VirtualBox NAT network card listed. Contrary to the Plan9 supported hardware page, none of the Intel cards worked. Only the two PCnet cards worked. I decided to change to the Bridged Adapter instead of NAT, as that always seems to work in cases such as this one.
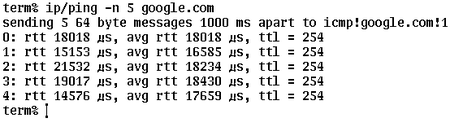
I went back to the Plan9 VM, using the Bridged Adapter, and attempted to get a network connection. As per the installation instructions, I issued the ip/ipconfig command, followed by the ndb/dns -r command. I received no errors. So, I attempted to ping Google with the command ip/ping -n 5 google.com. (-n 5 gives a count of 5 tries. If no count is given, ping will kep running. Issuing a break character will not stop the command. You have been warned.) Finally, I read in the network troubleshooting section of the Installation Manual:
“If after installing a fossil+venti system you get an error message like
ndb/dns: can't read my ip address
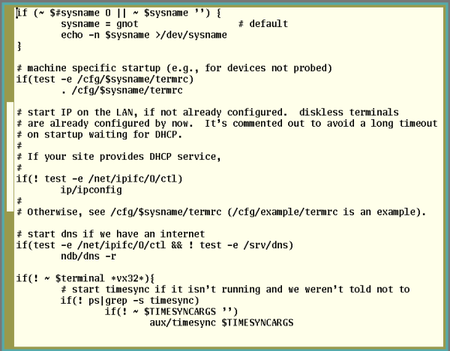
you might want to edit the /rc/bin/termrc to omit the test conditions for both ip/ipconfig and ndb/dns - the relevant section should just read something like:
ip/ipconfig >/dev/null
>[2=1]
ndb/dns -rf $NDBFILE”
Correct me if I’m wrong, but “omitting” the section consists of commenting those relevant lines in the file. I opened the /rc/bin/termrc file in the sam editor and discovered the relevant lines were already commented. I uncommented them, saved the file, issued an fshalt command, restarted the VM and logged in.
Bingo! Now we can update the Plan9 installation. To do so, issue one simple command: pull. The results are shown below.

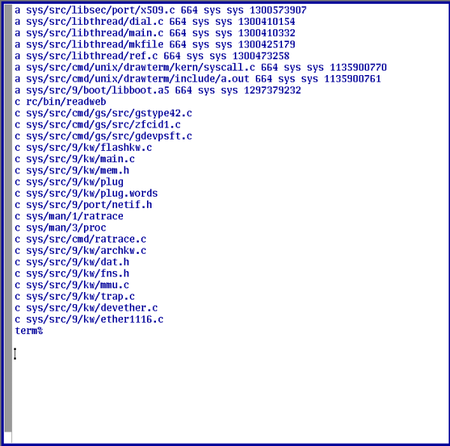
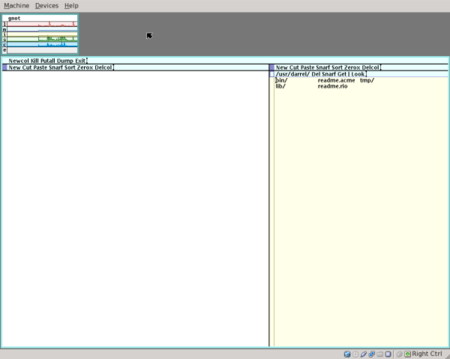
No statistics, counts or status messages are given after completion. You are simply returned to the terminal prompt. What new goodies does the update bring us? Do we get any new themes or a new way of interacting with the Plan9 system? None that I could tell. After doing an fshalt and restarting the VM, I was once again greeted with a plain grey background, my only friend being the mouse cursor. I attempted to recreate the user glenda’s login experience by copying all directories and files from /usr/glenda to /usr/darrel and making appropriate edits of configuration files. I still get just the plain grey background with no windows automatically started. I have to manually start an acme and a gnot window on each login (acme is the larger window).
I did not again attempt to create a password for user darrel. Neither the user adm or the user glenda have passwords, either. As stated in Plan9 Part 1, “Plan 9 has no full-featured web browser”. By reading the Plan9 Commands Manual, I discovered that there is a web browser included, which is named abaco. However, due to a missing file and permission errors in creating the file, I was unable to test the web browser.

It is my opinion that Plan9 will never become a desktop operating system. It was designed, first and foremost, as a research operating system with enhanced networking capabilities, to be used by researchers and academicians.