Gnome 2.32: Control Center, Part 1
by Meemaw
The first thing many people do when they finish installing their new Live CD is configure their desktop, if they didn’t already do it while running it while running the Live CD. The place to do that in Gnome is in the menu at System > Control Center.
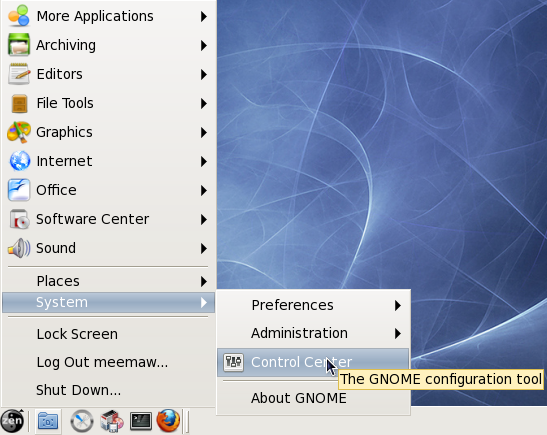
Clicking on this menu item will open the Control Center. The Control Center is arranged in five different sections, which are listed in the left-hand column. In this article we will cover the first two sections, Personal and Internet & Network.
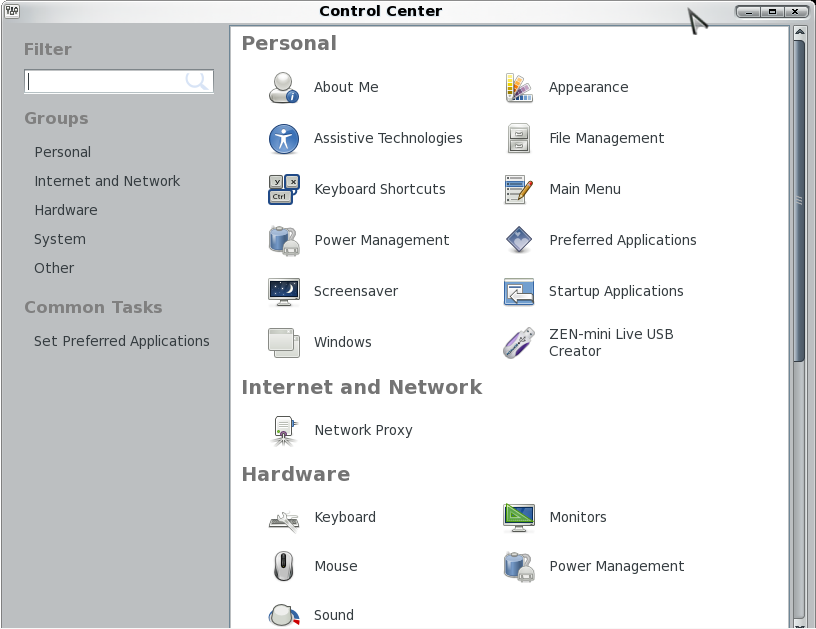
Personal is the largest section. It has twelve sections, all dealing with configurations for your desktop. The first section, About Me, allows you to add in your personal information, if you want it to be saved on your computer. You can change your picture and password from here, as well as adding your email address(es), IM nicks, home address and even work information and your web pages.
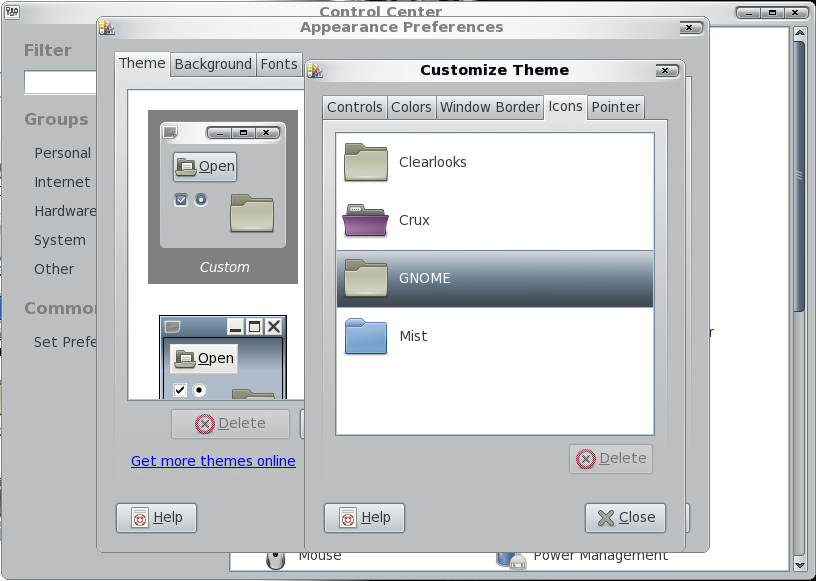
The next section, Appearance, is where most of the desktop configuration can be done. This section works a little differently than it does in some of the other desktops. The first window presents you with theme, background (wallpaper) and fonts tabs. To find the additional items you may want to change (such as your mouse pointers), you should choose the theme you want to use, then click ‘Customize’. You will see another window with five tabs: Controls, Colors, Window Border, Icons and Pointer. Controls is the configuration for buttons and check boxes. In Colors, you can change your window background color, highlight color, or default font color. Window Border lets you configure the shape of your title bar and border thickness. Icons is where you choose the icon set you wish to use from the ones you have installed, and Pointer is where you select your desired mouse pointer. It even has a slide bar so you can make your pointer bigger.
This configuration window works well, because if you like one theme’s colors and another theme’s window borders, you can ‘mix & match’ until you get what you like. Changes that are made take effect immediately, so if you choose something you don’t like, you are free to change it back immediately.
The next section is Assistive Technologies, which allow you to program special ways for computer access. When you click File Manager, you will get the Preferences window in the Nautilus file manager. Keyboard Shortcuts lets you designate hot-keys for specific functions. Clicking Main Menu gives you a window where you can edit your menu. Be careful that you don’t delete something you need!!!
The next item is Power Management. From here you can configure the time frame for standby or sleep modes. Preferred Applications is next where you can decide the default program that opens when you click on a sound or video file, web link or terminal icon. You can also choose your default news reader. Screensaver lets you configure your screensaver, and Startup Applications lets you designate the programs, such as conky or Dropbox so that they start when your desktop starts.
Windows is actually Window Preferences, and you can choose other preferred actions for your windows (one being the action you want if you double-click a window’s title bar). Finally, ZEN-mini Live USB Creator is located right here so you can make a backup copy of your install, just in case of a problem.
The second section, Internet and Network, contains a single item; Network Proxy. Most of us will choose direct connection, but many companies use a proxy, and would choose to configure it manually.
In Part 2 we will cover the rest of the Gnome Control Center.