Vcron: A Visual Interface For cron & at
by Ralf Vöpel (DAGAZ)
What is cron?
cron is a daemon that executes scheduled commands. Cron wakes up every minute, examining all stored crontabs, checking each command to see if it should be run in the current minute.
An example of crontab format (with commented fields) is as follows:
# Minute Hour Day of Month Month Day of Week Command
# (0-59) (0-23) (1-31) (1-12 or Jan-Dec) (0-6 or Sun-Sat)
0 2 12 * 0,6 /usr/bin/find
Do not worry, since vcron does all of this for you.
And then there is the command 'at'.
cron vs at
The command 'at' runs a command ONCE at a specified time on a specified date, whereas ‘cron’ allows you to run the command or script repeatedly at different minutes, hours, days, monthly or on different weekdays.
Vcron?
V stands for visual and as all GUI's do, it makes life easier and takes a lot of 'syntax' off your hands. In short, vcron is a front end for cron. Install vcron via Synaptic. Once Synaptic is done, you will find it here: Application Launcher → More Applications → Accessibility → Visual Cron
Welcome to Visual Cron, scheduling made easy.
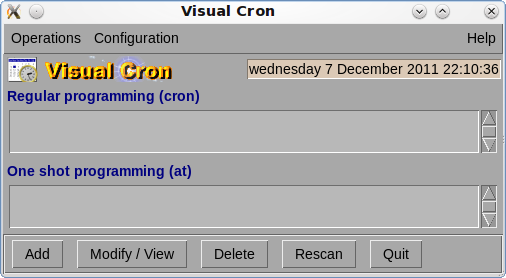
This is how vcron initially appears and we are about to change it. But first, let us familiarize ourselves with the GUI.
The Operations Menu:

As you can see, clicking on Operations shows the same selections as those at the bottom part of the Visual Cron window.
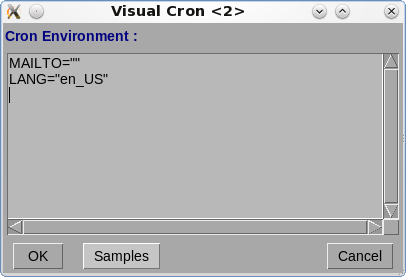
The Configuration Menu:
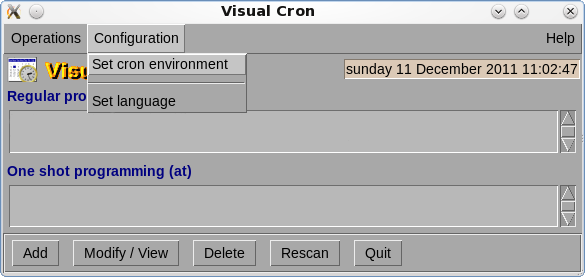
Set cron environment allows you turn on/off email notifications and more. We do not need to change or add anything here. However, if you want more details visit:
http://adminschoice.com/crontab-quick-reference.
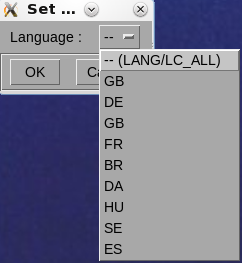
Set language:
You guessed it. You can change the language on the fly, meaning you do not have to restart vcron. Now is this not cool?
Now, it’s time to add a task. First click on Add. You will be asked what kind of cron job/task you want to create. Remember the difference between cron and at?
We are going to create a cron job which synchronizes our /home folder with a NAS (Network attached storage) device. You can, of course, sync any folder to any device or any folder.
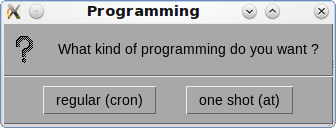
Click regular and the next window shows up.
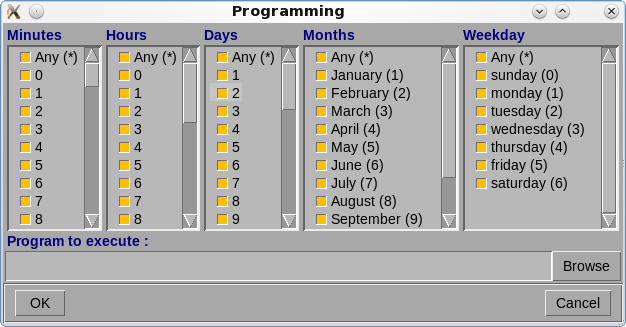
In the Minutes column click 0, Hours 3, Days Any, Months
Any, Weekday Sunday.
Click into the Field → 'Program to execute:’ and type in:
rsync -a --delete /home your_server_ip_or_ folder/where_to_sync_folder.
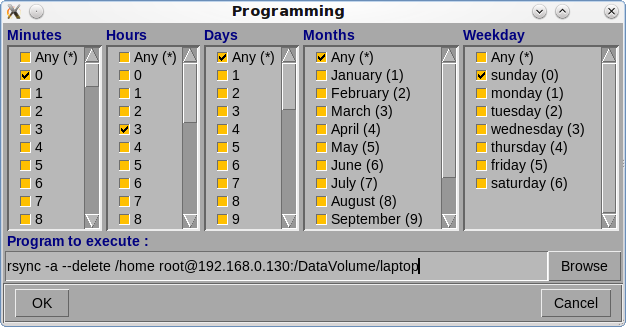
The example above means:
run rsync at 3:00am every Sunday, archive the /home folder as root on a NAS with the network address 192.168.0.130 in the folder/ DataVolume/laptop AND delete every file on the destination server that does NOT exist anymore in the /home folder. If you do not have a NAS device, you can modify the command to: rsync -a --delete /home any_drive/any_folder. Click OK.
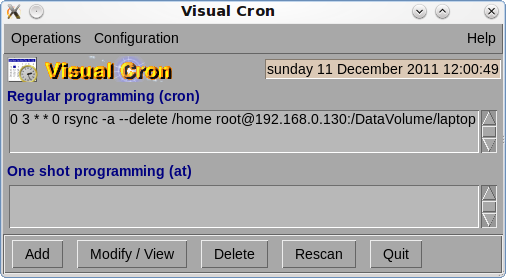
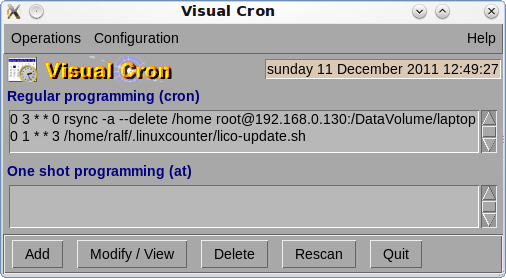
Congrats, your first cron job has just been created. It shows up under regular programming and from now on, the task will be done every Sunday at 3:00am.
If you have your own script(s) and you want it/them to be executed automatically, use vcron to set time and date and your trusty PCLinuxOS box will take care of it.
Here is how to get your program or script automated:
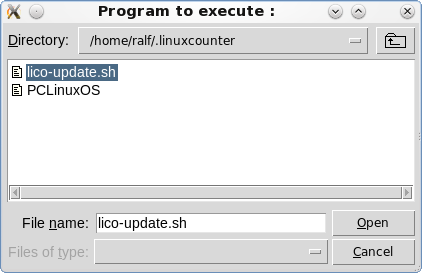
Instead of typing the command into the Program to execute field, click on Add, then Browse, locate
your program or script and click Open.
Voila! There it is. lico-update.sh updates my status on linuxcounter.net.
Now what about the One Shot Programming ‘at’? The command ‘at’, as we now know, runs a job only once. So what is it good for?
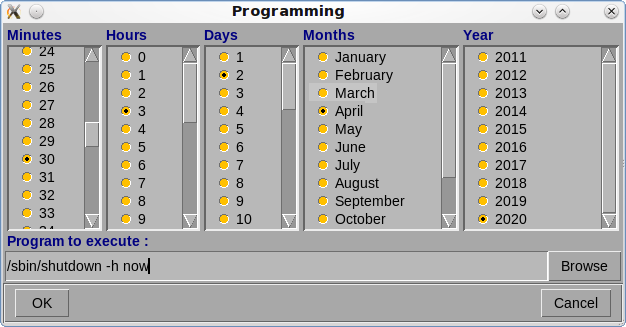
Let us say you want to shutdown your machine on April 2, 2020 at 3:30 AM. Click Add, select one shot (at), click the required minutes, hour, day etc., browse for shutdown, the program to be executed (/sbin/shutdown) and add /sbin/shutdown -h now. Click OK
Now your one time job is in the list under One shot programming.
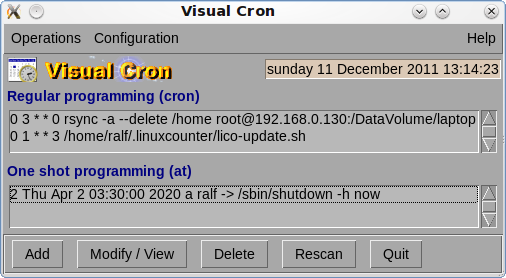
We now have 2 jobs that will run from now on at the set date and time until we modify or delete them and we have 1 job that will run in 2020 ONE time. To delete, modify or view a certain job, click on the job in the list and then click the wanted “action” button.
!! Important !!
Vcron creates the cron job for the current user. If you want vcron to create jobs for ROOT or another user, you need to open a Terminal, su to root/other user and call vcron from the Terminal. You also need to have the rights to execute the scripts or commands you want to run.
Have fun with Vcron. Consider it crontab -e without the headache.