xdg-open: Making Life Easier
by Paul Arnote (parnote)
February 23, 2012. It was early morning, and still dark outside. I was sitting down at my computer, preparing to lay out the March issue of The PCLinuxOS Magazine. As always, my first task is to check my email. I subscribe to the TechRepublic blogs, and one item caught my attention in their “Windows Desktop” email. The headline read “Add Google Docs to the Windows 7 New menu,” and the article went on to talk about how, with a simple Windows Registry hack, you could add a quick-access menu item to the Windows menu to access your Google Docs account.
Now I know that many computer users today shun using Google products, due to privacy concerns. But this magazine uses Google Docs as the primary vehicle to share magazine articles for editing among the magazine staff. Quite simply, there’s not much else out there that works for distance-based document collaboration and editing, at least that I’ve found. Plus, if Google wants to spy on The PCLinuxOS Magazine to see what we are up to, I say go ahead. I’m all for anything that gives PCLinuxOS more exposure and publicity. We have nothing to hide, even from the prying eyes of Google.
It – the TechRepublic headline and story lead – got me thinking about how easy it would be to create something similar in PCLinuxOS. I run the latest version of Phoenix, the PCLinuxOS version of the Xfce desktop, on my desktop computer. You might (or might not) be surprised at how easy it is to do under PCLinuxOS. The entire process is made simple by one little command: xdg-open.
Using the xdg-open command, I was able to create a custom launcher on my Xfce panel that, when clicked, opens Google Docs in my default web browser. The xdg-open command is a powerful little command that can save you a lot of trouble.
Basically, xdg-open takes a file name – or a qualified Internet URI – and opens the file using the default application that is associated with that type of file. We’ll talk more about this in a bit. First, here’s how I created my launcher for Google Docs on my top Xfce panel. The process is similar in other desktop environments, such as LXDE or e17. However, since I am using Xfce on this particular computer, the instructions below will be somewhat specific to Xfce. It won’t (shouldn’t) differ significantly under other DEs, however.
Step 1: Add the launcher to the panel
Under Xfce, right click on the panel you want to add the launcher to, and select Panel > Add New Items... from the context menu that pops up.
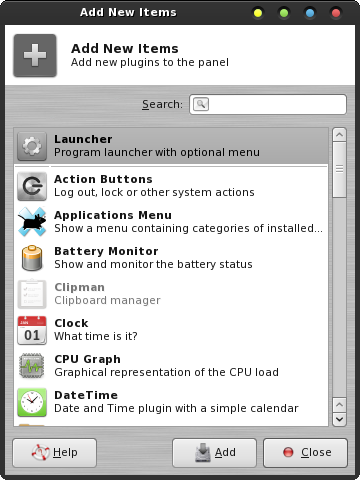
Select “Launcher” at the top of the list, and select the “Add” button at the bottom of the window. Another window will open asking you to select which panel you want to add the launcher to. Panel 0 is the top panel, and Panel 1 is the bottom panel. After selecting which panel to add your new launcher to, click on the “Add” button in the second window.
This will add your launcher to the selected panel. Under Xfce 4.8.x, the launcher is added at the far right edge of the selected panel. Right click on the launcher, and select “Move” from the context menu. Then, just drag the launcher to the location you want it to appear at on your panel.
Step 2: Pick an application, any application
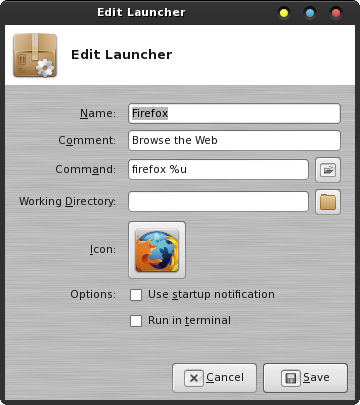
Next, you will want to right click on the new launcher, and select “Properties.” Below is how the “Properties” dialog box looks for your new launcher, before you’ve selected the properties for your new launcher.
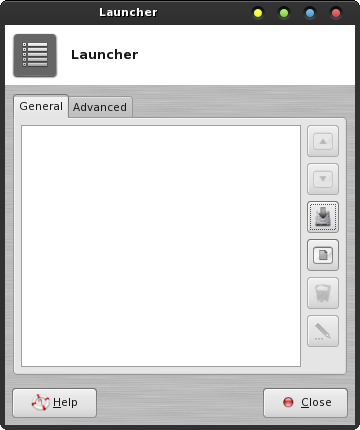
Along the right side of the Launcher dialog box, you will see six buttons arranged in a vertical row. Select the third one, to add a new application to the Launcher list. You will see a new dialog box appear, with all of the installed applications on your system.
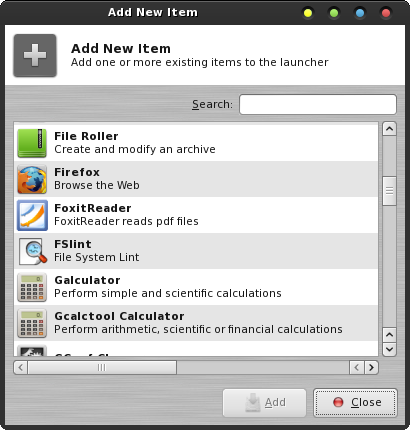
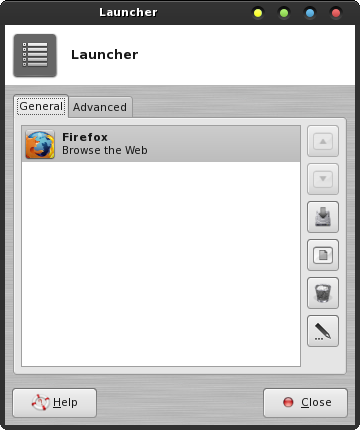
Literally, just pick an application – any application. We’re going to change it anyway. Once you’ve clicked on one of the applications in the list, click on the now-activated “Add” button. I selected Firefox from the list, and below is how my Launcher “Properties” box looks after adding Firefox. I could have picked any other application from the list, however.
Step 3: Edit the launcher
Now, remember that we are creating a launcher specifically to open Google Docs. Since Google Docs isn’t in our list of installed applications, we will want to edit the entry in the Launcher Properties dialog box. This is why I said pick an application – any application – from the list of installed applications. Click on the sixth (and last) button in the vertical row of buttons on the right. This will open a dialog box where you can edit the properties of your new launcher.
Make the following edits to your launcher:
Name: Google Docs
Comment: Create/share documents online
Command: xdg-open http://docs.google.com
Working Directory: /Documents (optional)
Next, click on the icon displayed in the middle of the dialog box. For me, that is the Firefox icon. Select a new icon for your Google Docs launcher.
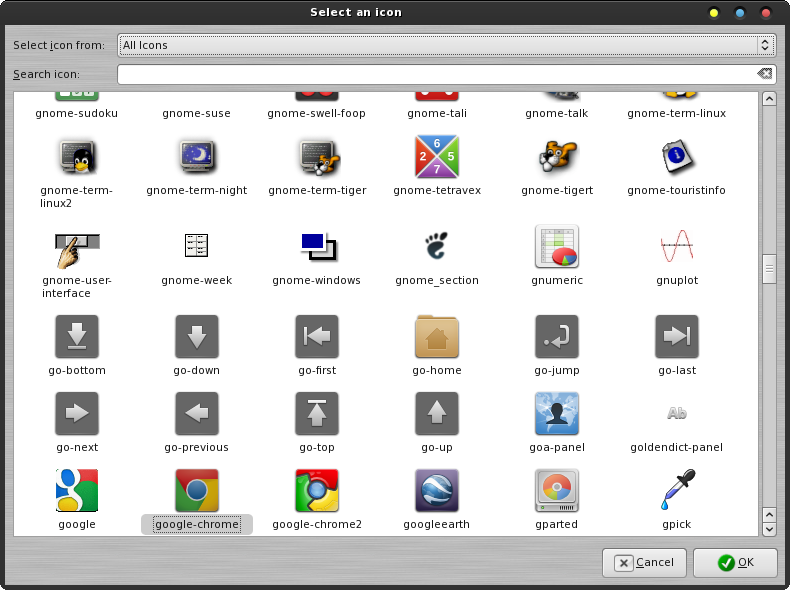
From the drop down list at the very top of the window, choose “All Icons” so you can see all the installed icons on your computer. Find the icon you want to use (I chose the “google-chrome” icon, since it’s easily recognizable as a Google product), click on it, and select OK at the lower right corner of the dialog box.
After all of your edits, your dialog box should look something like the one below.
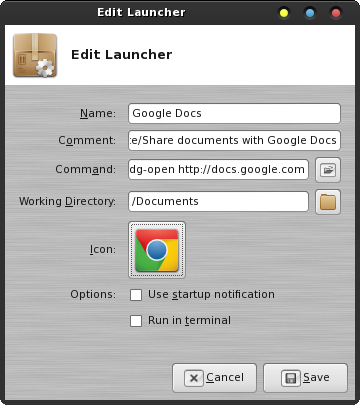
Click on the “Save” button at the lower right corner to finalize your new launcher. Now, whenever you click on that icon on your panel, Google Docs will open in your default web browser – whatever that happens to be. For what it’s worth, that default (for me) happens to be Firefox.
A little more about xdg-open
You can use xdg-open for more than just automagically launching your favorite web sites in your default web browser. Xdg-open uses file type associations to open files in the associated default application.
For example, typing xdg-open ~/Documents/old-settler-beans.pdf on the command line will cause the specified PDF file to open in your default PDF viewer. Typing xdg-open ~/Documents/my-resume-2011.doc will cause the specified document file to open in your default word processing application. Typing xdg-open ~/Documents/my-list.txt will cause the specified text file to open in your default text editor. Typing xdg-open ~/Pictures/AuntSuzie.jpg will cause Aunt Suzie’s picture to open in the default application associated with JPG file. I’m sure you get the idea here.
Being a command line utility, xdg-open doesn’t deal very well with spaces in file names, which, although allowed, shouldn’t be used in Linux file names for this very reason. However, there are many users who do include spaces in file names, and dealing with those files is actually quite easy. Let’s suppose that, in one of the previous examples, your text file was named “my list.txt,” instead of “my-list.txt.” If you try to type xdg-open ~/Documents/my list.txt, xdg-open will fail and exit with an error, due to the space. However, if I type xdg-open ~/Documents/”my list.txt” and place the offending file name with spaces in it in quotes, all will be well and xdg-open will open the file in your default text editor.
Summary
As you can see, the xdg-open command can be a very powerful little tool. If you have a document file you frequently refer to, xdg-open makes it very easy to access that file with only one click of your mouse. If you have a web site you frequent, xdg-open provides access to that web site with only one click of your mouse.
Who needs a registry hack? We don’t need no stinking registry hacks. It makes me proud to be a Linux user.


