Alternate OS: PC-BSD, Part 1
by Darrel Johnston (djohnston)
PC-BSD is a variant of FreeBSD, intended for use on the desktop. PC-BSD was originally founded by FreeBSD professional Kris Moore in early 2005. The first Beta only had a GUI installer to get the user up and running with a FreeBSD 6 system which contained a pre-configured KDE3. This was a major innovation for the time. FreeBSD is designed as a server operating system, and anyone who wished to install FreeBSD to a desktop or workstation would have to manually tweak and run through a text installer. Kris Moore's goal was to make FreeBSD easy for everyone to use on the desktop. It has since diverged even more in the direction of usability by including additional GUI administration tools and PBI packages.
Since October 2006, PC-BSD has been supported by the enterprise-class hardware solution provider iXsystems, which now employs Mr. Moore as a full time developer. In November 2007, iXsystems entered into a nationwide distribution agreement with Fry's Electronics stores to carry boxed copies of PC-BSD in their stores. In January 2008, iXsystems entered into a similar agreement with Micro Center.
In June 2010, Dru Lavigne became the PC-BSD Director of Community Development. Dru pretty much wrote the book on FreeBSD. She is a network and systems administrator, IT instructor, technical writer and former director of the FreeBSD Foundation. She has been using FreeBSD since 1996, has authored several BSD books, and spent over 10 years developing training materials and providing training on the administration of FreeBSD systems. Dru is the author of BSD Hacks, The Best of FreeBSD Basics and The Definitive Guide to PC-BSD. She has well over a decade of experience administering and teaching Netware, Microsoft, Cisco, Checkpoint, SCO, Solaris, Linux and BSD systems. She is also the founder and Managing Editor of the Open Source Business Resource, a free monthly publication covering open source and the commercialization of open source assets, as well as being the founder and current Chair of the BSD Certification Group Inc., a non-profit organization with a mission to create the standard for certifying BSD system administrators. As I said, Dru pretty much wrote the book.
PC-BSD used KDE exclusively until version 9.0, which has been customized to support tighter application integration. While manual installation of other desktops was technically possible before version 9.0, none of them were supported, and major functionality was lost when not using PC-BSD's special build of KDE. GNOME is now offered as an alternate desktop, along with Xfce, LXDE and other desktop environments. PC-BSD supports x86 and x86-64 architectures.
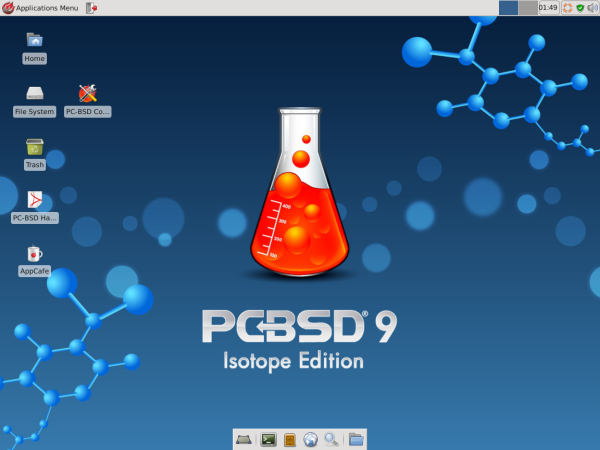
PC-BSD 9.0 Isotope Edition is the current version and the one we will be looking at. There are several versions that can be downloaded from PC-BSD’s Isotope download page. There is a DVD with all desktops and optional components, or a CD with the LXDE desktop and no optional components. There are several USB versions, as well as VMware and VirtualBox images. Torrents are also available, and all versions are available in either 32 or 64 bit designations. We will be using the 32 bit DVD.
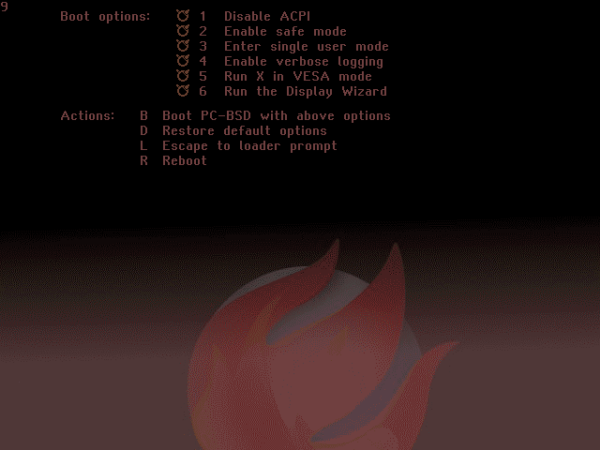
Booting from the DVD, we see the following screen.
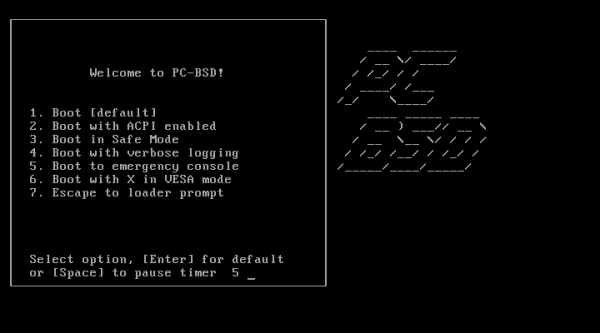
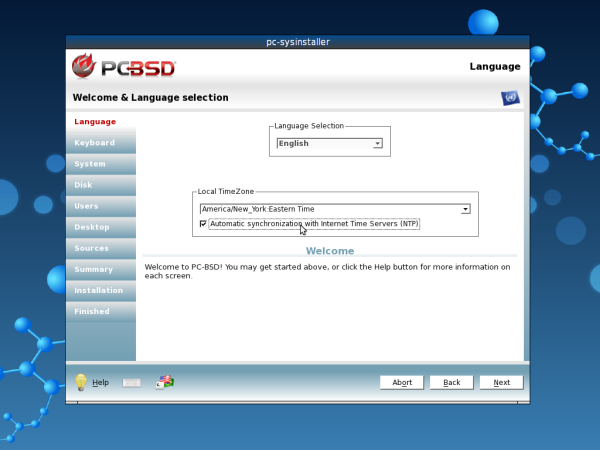
Option number one is the default, and the boot menu has a ten second countdown timer. The installer will be launched after boot, instead of a live desktop session. In the first welcome screen, we are asked to choose our language, local time zone, and whether or not to synchronize our system time with an internet time server.
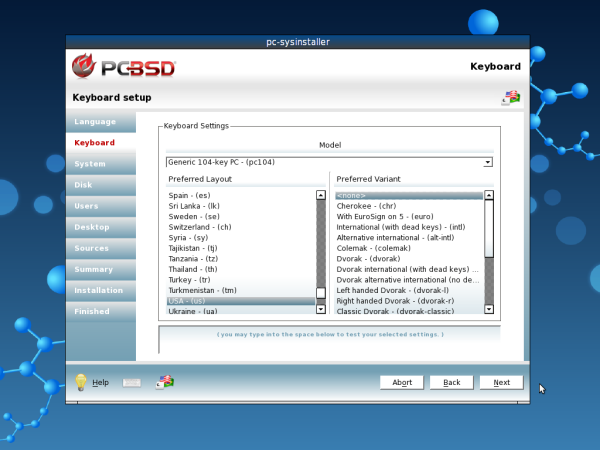
Next, we are asked to choose our keyboard type and any variant of it.
In the system installer step, we have a choice of installing either a PC-BSD desktop or a FreeBSD server. We also have a choice of installing either from a local DVD or USB or from a network or internet location. Here, we’ll choose the PC-BSD desktop and install from DVD.

In the disk setup section, there are tabs for basic mode or advanced mode. We will stick with the default basic mode. I created a 12 GB hard drive for use with the VirtualBox installation. The installer selected that disk by default as the medium to install to. I have chosen to use the entire disk. Note that if you are going to be sharing your PC-BSD installation with other operating systems on the same drive, PC-BSD must be installed to a primary partition. It cannot be installed to an extended partition. In BSD terms, a primary partition is called a “slice”. The slice is then further subdivided into BSD partitions. PC-BSD does not include a partition manager. You are expected to have a primary partition, or BSD slice, already prepared for installation. If you are sharing the installation with other operating systems, there are some additional steps to be performed which will not be shown here. Please consult the PC-BSD Users Handbook or Wiki for further information. The add and delete partition buttons are to be used for BSD partitions and are best left to the advanced BSD user. We have a choice of using the traditional BSD UFS filesystem or using the newer Solaris ZFS filesystem. It is the same ZFS filesystem previously covered in the OpenIndiana articles. However, PC-BSD recommends using the 64 bit OS, as well as having a minimum of 4 GB of system RAM for ZFS. We’ll choose the UFS filesystem. We can also choose to encrypt our user’s data. The “Partition disk with GPT” option is for use with ZFS.

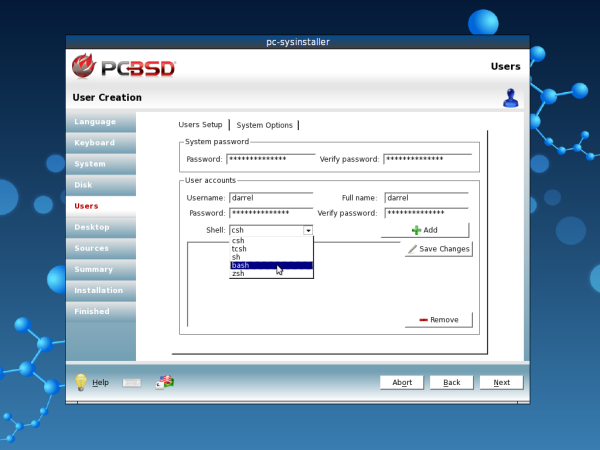
In the users section, there are two tabs. One is for users setup and the other is for system options. Advanced users may elect to change some of the system options. Here we are asked to create a system password for the superuser account, as well as a user account and a password for that user. We also have a choice of default shells. We can choose from csh, tcsh, sh, bash and zsh. I chose the more familiar bash shell for my user. Click the save changes button before proceeding to the next step.
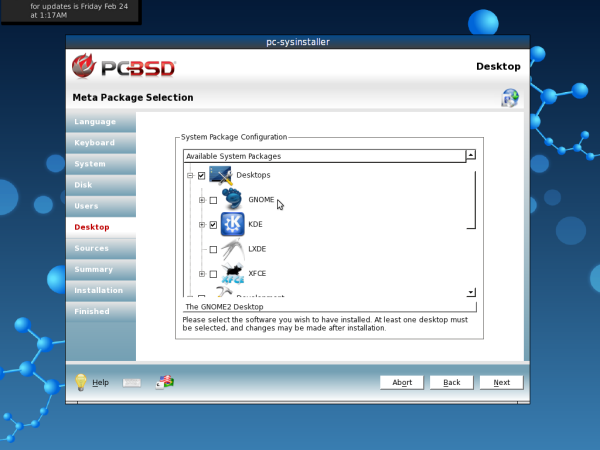
The desktop section has a lot of choices. The first is our desktop environment. KDE is selected by default, but I chose to use XFCE instead. The other choices are Gnome and LXDE.
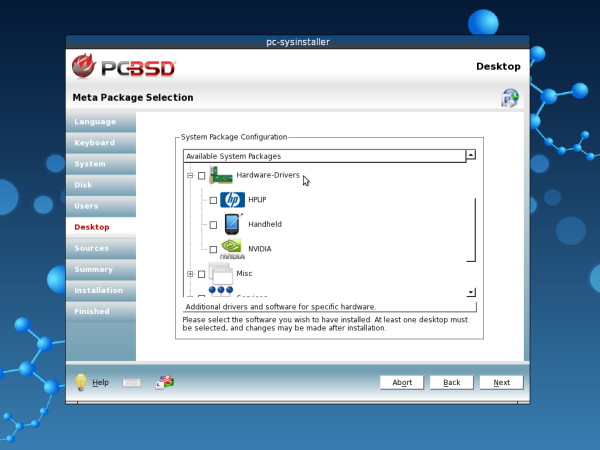
In the hardware drivers section of the desktop screen, we can choose to install HP line printer drivers, handheld device drivers, such as smartphones, tablets and MP3 players, and nVidia video drivers.
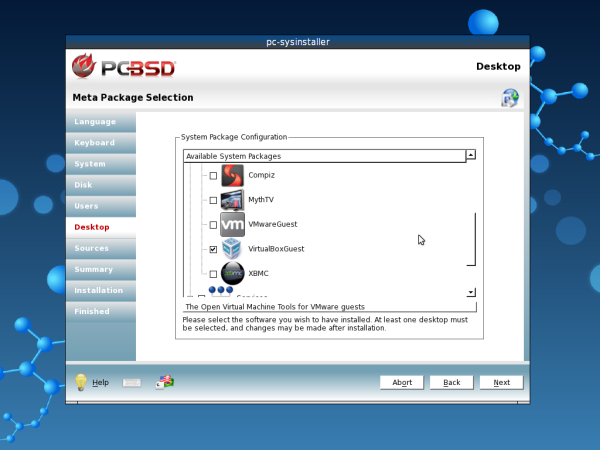
In the miscellaneous section of the desktop screen, we can choose from Compiz, MythTV, VMwareGuest, VirtualBoxGuest and XBMC device drivers. I chose to install VirtualBoxGuest drivers.
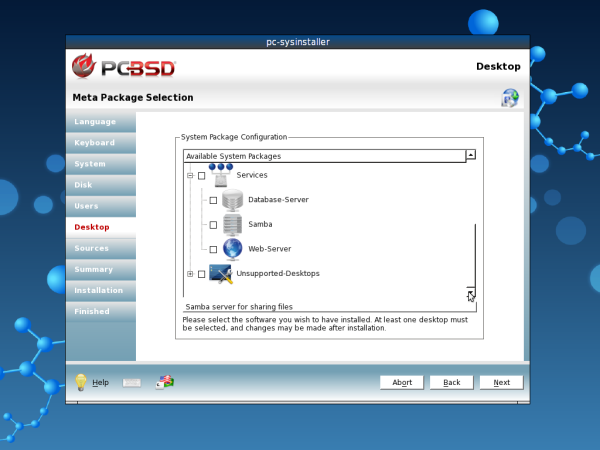
In the services section of the desktop screen, we can choose to install support for a database server, Samba (Windows ServerMessageBlock protocol) and a web server. So, one could install a FreeBSD server setup with ZFS filesystem and web services from the PC-BSD installation DVD.
The last section of the desktop screen is for unsupported desktop environments. Only experienced FreeBSD users need apply. The desktops offered are Awesome, FVWM, IceWM, Openbox, ScrotWM and WindowMaker. Hootiegibbon would be proud. Note that although Fluxbox is not presented as an option, it is installed by default in PC-BSD. It is always available as a second desktop environment.

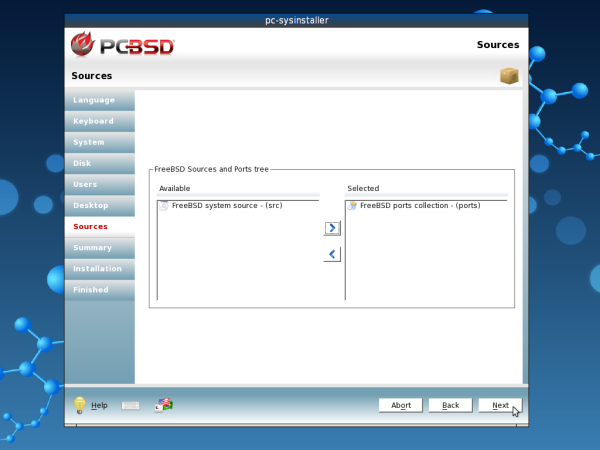
There are two possible choices in the sources portion of the installer. They are FreeBSD system source and FreeBSD ports collection. If you choose either one of them, it is best to choose only one. Both can be used, but must be carefully managed by an experienced user. FreeBSD system source is the choice for those who wish to compile packages so that applications will be optimized for their specific hardware and needs. The ports collection option is for those who wish to install pre-compiled binary packages. On a PC-BSD desktop, neither option is necessary. One can use the applications that exist on the system after installation, as well as adding self-contained PBI packages which are unique to PC-BSD. We’ll look at the ports collection and PBI packages in detail in the next article. I recommend you choose to install the ports collection in this installation step.
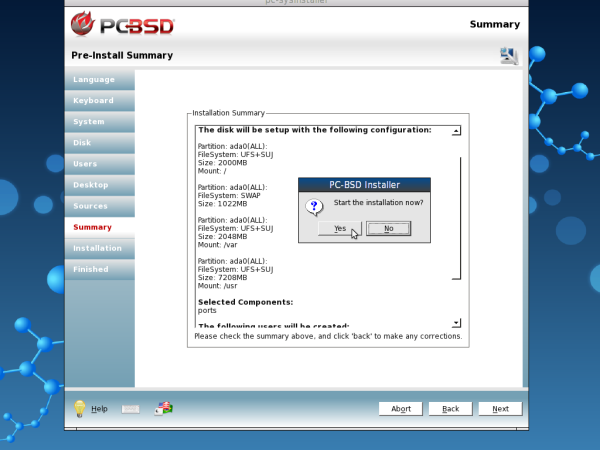
In the pre-installation summary screen, we are shown all of our previously selected installation options. We can click the back button to step backwards through the installation process and make any changes. Once we click the next button, one last dialog window pops up asking whether to continue the installation.
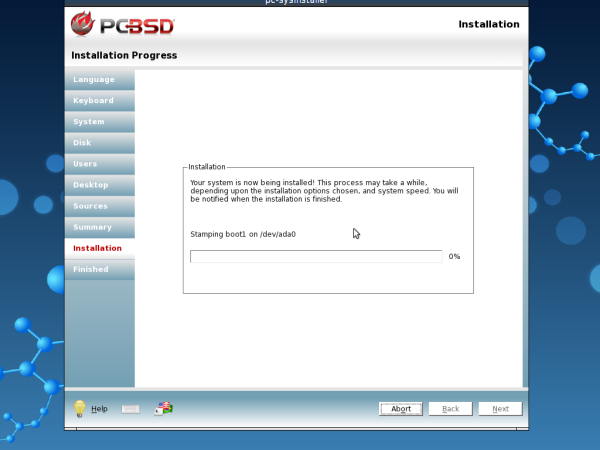
The installation screen gives us a progress bar and shows what packages are being installed. As the message in the window says, depending on your system’s speed and the options chosen, the installation may take a while.
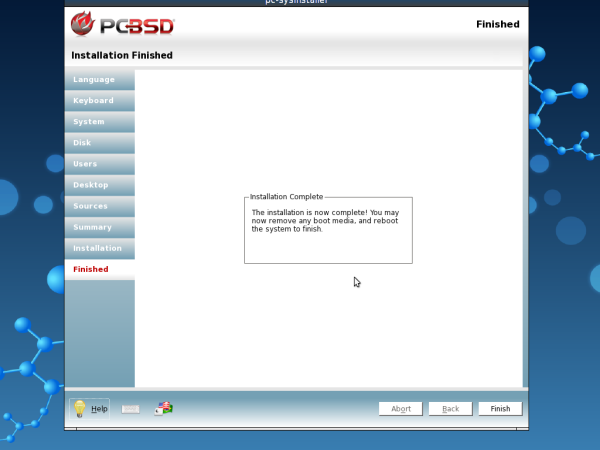
Once all files have been copied from the DVD to the hard disk, the last screen is displayed showing that the installation has completed. At this point, remove the installation DVD and reboot the computer or virtual machine to complete the installation.
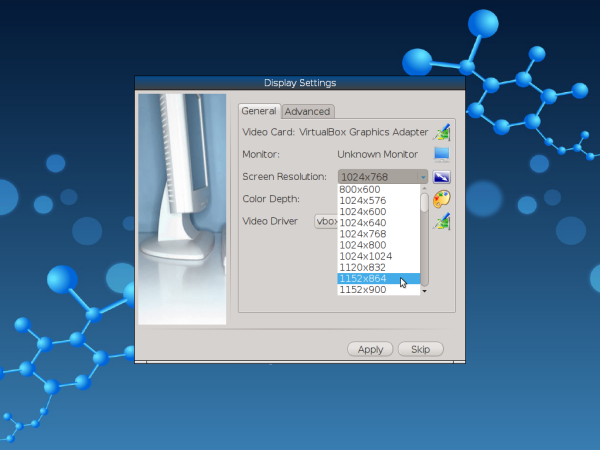
First boot from the hard drive shows a different boot screen. There are six boot options and four boot actions which can be selected. I chose boot option number six, Run the Display Wizard.
In the display settings setup window, there are two tabs, general and advanced. I was only interested in changing the screen resolution available under the general tab. I changed it from the default 1024x768 24 bit color depth to 1152x864 and the same color depth. The other option, other than screen resolution and color depth, is the video driver to use. Because I had installed the VirtualBoxGuest drivers, the vbox video driver was chosen by default.
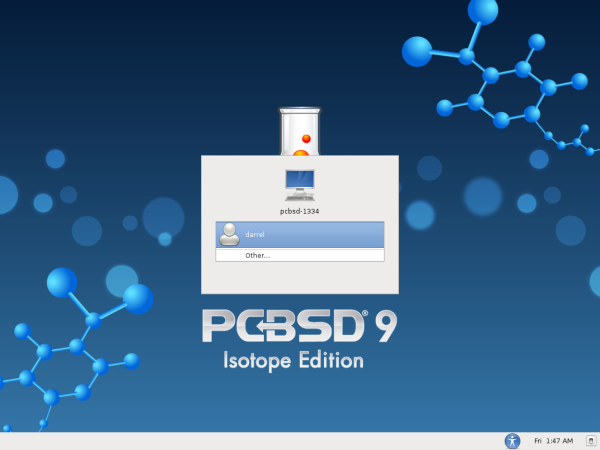
After clicking the apply button, I was presented with the user login screen.
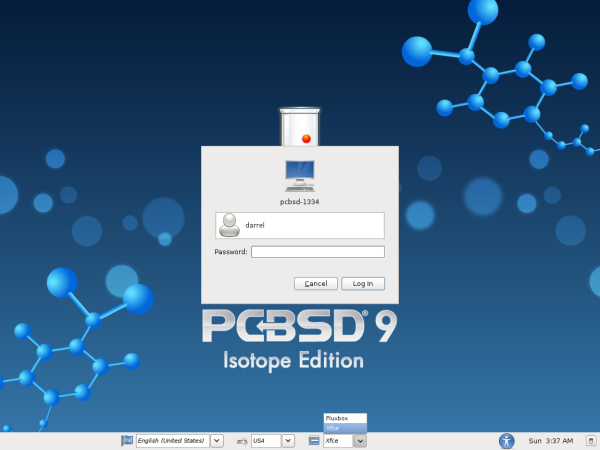
I clicked on my user name, then entered the password in the next dialog window. The desktop environment to be used for the session can be chosen from this screen. There are also language, keyboard and shutdown options.
After a few seconds, I was presented with PC-BSD’s default XFCE desktop.
In the next article, we will examine the installed package managers and applications, as well as customizing the desktop and adding more applications.
Shown below is the always present optional Fluxbox desktop.


