Move VirtualBox Drives With Ease
by Paul Arnote (parnote)
Many users, like myself, use VirtualBox to run a copy of another operating system on top of PCLinuxOS. It may be Microsoft Windows. Or it may be another Linux distro. Or, it may be one of the “fringe” alternate operating systems that the magazine’s Darrel Johnston has been writing about for a while. Whichever the case, VirtualBox allows users to run other operating systems from the comfort and security of PCLinuxOS, without having to reboot your computer. VirtualBox gives users ultimate flexibility, as well as the chance to “play” with other operating systems.
As I detailed in the February 2012 issue of The PCLinuxOS Magazine, I recently built myself a new desktop computer from scratch. On my previous desktop computer, I was running a few different installations of other operating systems in VirtualBox. I didn’t want to lose those VirtualBox installations, and I certainly didn’t want to have to reinstall all of them from a raw start – and have to apply all those updates. While the former usually takes less than an hour, applying updates to Windows installations can be an all day affair.
To avoid having to reinstall all of those different Windows installations, I simply chose to move the VirtualBox virtual hard drive files to my new machine. To do this, I first had to find where VirtualBox stored the virtual hard drive files. Fortunately for me, I always pointed VirtualBox to store them on my extra 320 GB drive, in the “vm” folder. Since I had the most space available there, it made sense to store the rather largish hard drive images there. So, I backed up all the *.vdi files stored in my “vm” folder to my 500 GB USB hard drive, prior to switching my desktops around.
Before I go much further, there are a few different ways to move VirtualBox virtual hard drive files. The method I’m going to detail here is the one I’ve used, and it has worked perfectly for me every time. Some guides tell you to go into VirtualBox’s Virtual Machine Manager and “release” the drive image from VirtualBox – which makes sense if you are only moving the virtual hard drive file and re-attaching it to the same VirtualBox installation. Otherwise, VirtualBox may nag you to death about not being able to find one of its virtual hard drive files.
I’ve also seen other guides recommend that you go into the snapshot settings for a virtual machine and “merge” those snapshots into just one image. I have to admit that I’ve never done this step, and my virtual hard drive images, along with all of its snapshots, have made the move without incident.
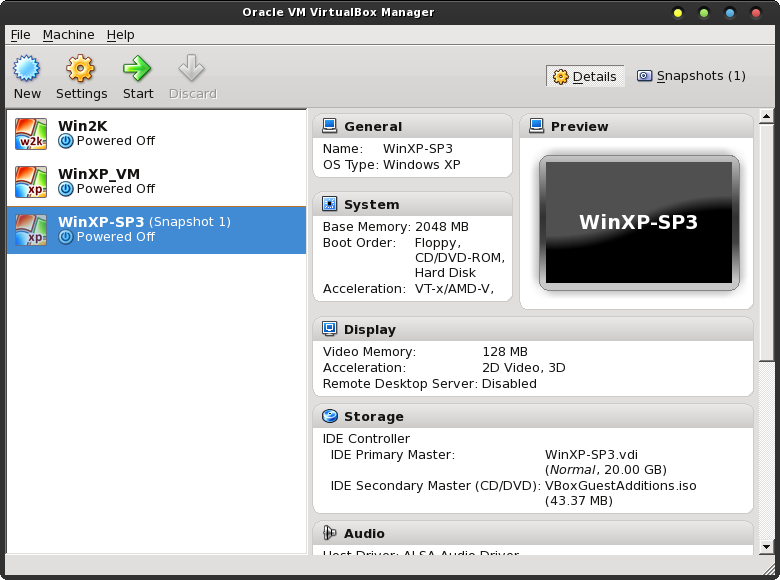
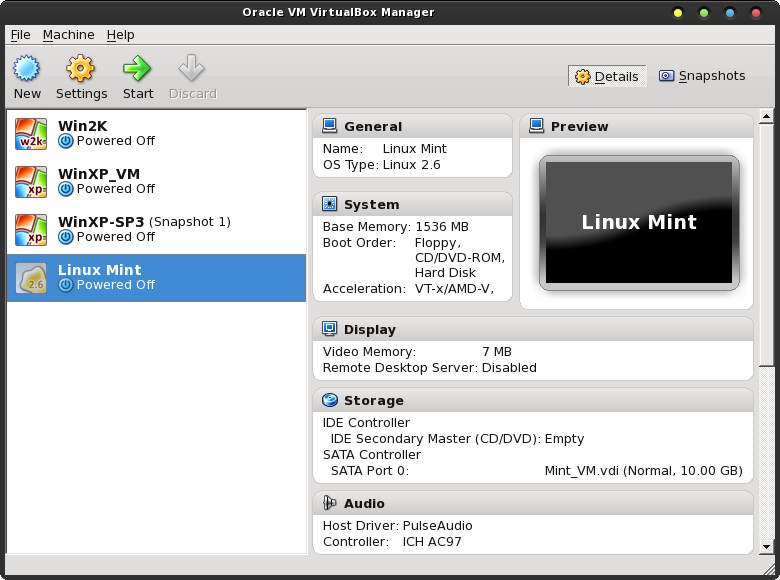
Above is how my VirtualBox window appears when I launch it (I’ve since gotten rid of the WinXP_VM image, since it was BSOD’ing me to death). When you highlight the selected virtual machine, all sorts of useful information pops up on the right side of the screen. As long as the virtual machine isn’t running, you can change many of those settings, including how much RAM and video RAM you dedicate from your host system (PCLinuxOS, in this case) for the virtual machine’s use. Notice under the “Storage” category, the “IDE Primary Master” file is called “WinXP-SP3.” That is the filename – minus the path – for the virtual hard drive file that VirtualBox is using for that particular virtual machine.
Also stored on my 500 GB USB hard drive is a virtual hard drive file for a three or four year old copy of Linux Mint, with the KDE 3.5.8 desktop. For the rest of this article, we’ll be walking through the “resurrection” of that hard drive image in VirtualBox. To get started, click on the “New” icon in the VirtualBox toolbar.
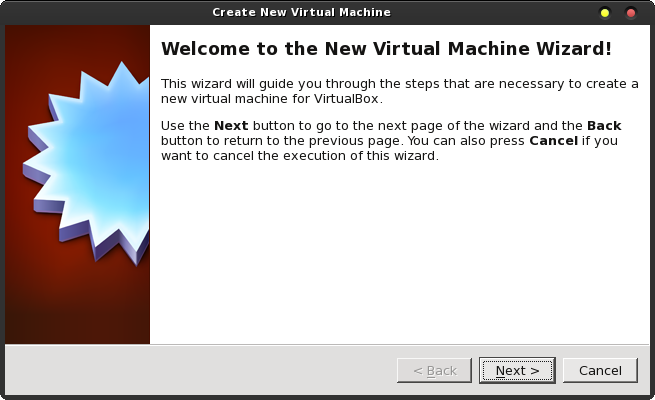
This launches the “New Virtual Machine Wizard” in VirtualBox. There’s not much to do here, other than read, so let’s click next and move on to the next screen.
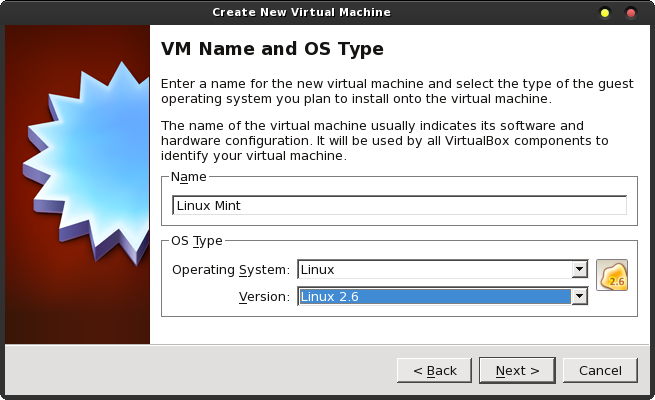
In the next window, you give the name that you want to be displayed in the list of your virtual machines in VirtualBox. If not already automatically selected, you will want to also select the Operating System type, as well as the version. When I typed in Linux Mint, VirtualBox recognized it and pre-selected “Linux” and “Linux 2.6” for me. Once you’ve done these steps, select the “Next” button to proceed to the next screen.
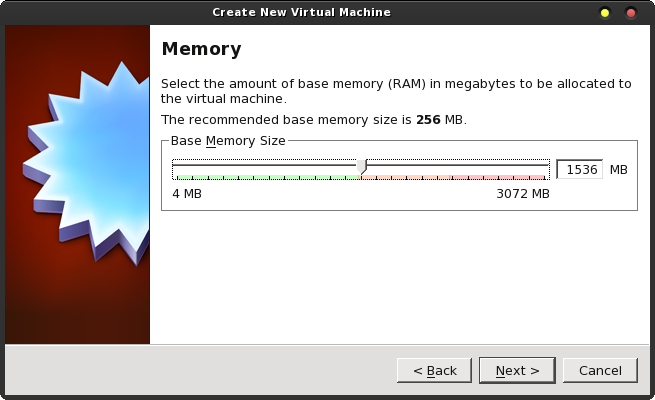
Next, you have to tell VirtualBox how much of your host’s memory you want to dedicate to running the selected virtual machine. Despite having 8 GB of RAM on my new desktop and running the 2.6.38.8-pclos3.pae.bfs kernel, VirtualBox does not see all of my RAM. So, I feel comfortable allocating ½ of the “visible” RAM to running the three or four year old version of Linux Mint in the virtual machine, since PCLinuxOS is able to see all of my 8 GB of installed RAM.
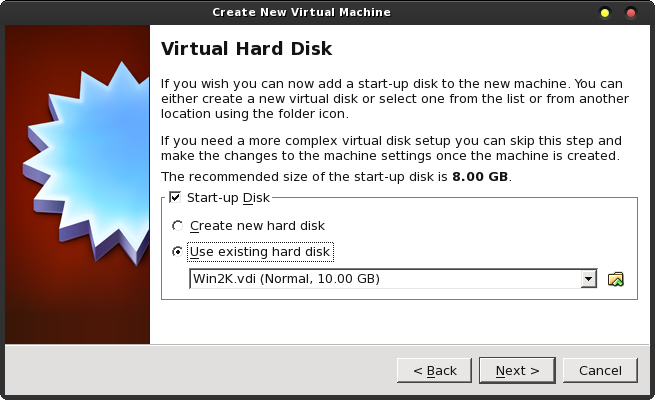
Now we need to tell VirtualBox where to find my previous virtual hard disk file. You will notice that “Start-up Disk” is checked. Right below it, your options are to “Create new hard disk” and “Use existing hard disk.” You would normally choose the first option, if you were making a new installation. However, we need to choose the second option. Select the small folder icon to the right of the drop down list box immediately below.
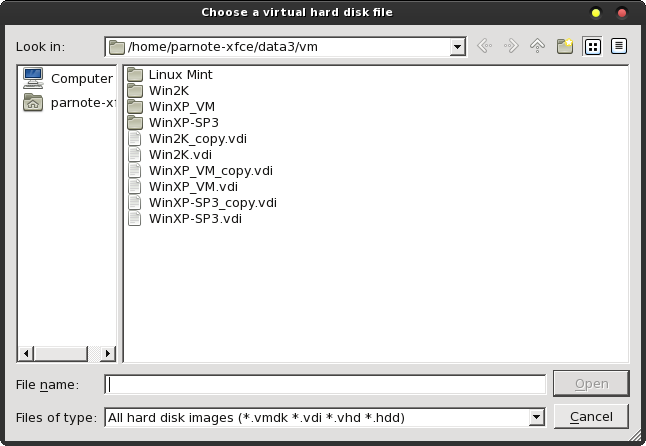
This will open up the typical “File Open” dialog box. Choose the *.vdi file that represents the virtual hard drive file you are wanting to import into VirtualBox. In our case, we need to travel into the “Linux Mint” folder, and select the Mint.vdi file. You’ll be returned to the previous dialog box once you make your selection. Click the “Next” button there to proceed through the rest of the VirtualBox Wizard.
You’ll also notice that I keep “copies” of my virtual hard drive files, just in case one of them becomes corrupted. This is a lot easier to do when you have literally tons of extra storage space. I don’t bother running anti-virus software in my Windows installations. If I pick up a virus, I simply delete the virtual hard drive file and reinstall from the copy. Of course, this only works if you are diligent about making the copies – and keeping them current. I can usually be back up and running from a clean installation in the amount of time it takes me to copy and rename the backup file – usually less than five minutes.
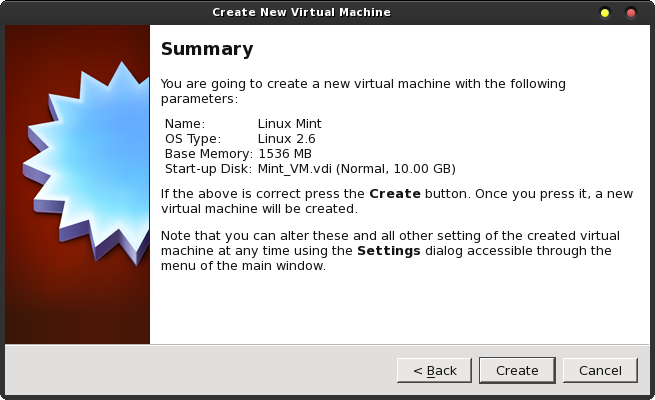
Your last window in the VirtualBox Wizard is the “Summary” window. If you are satisfied with everything that is detailed in the window, select the “Create” button.
After creating your new VirtualBox virtual machine (actually, we just imported an old *.vdi file), you’ll find your old virtual machine now shows up in the list of available virtual machines in VirtualBox. Of course, it’s always wise to check to make sure that the imported virtual machine runs as you expect.
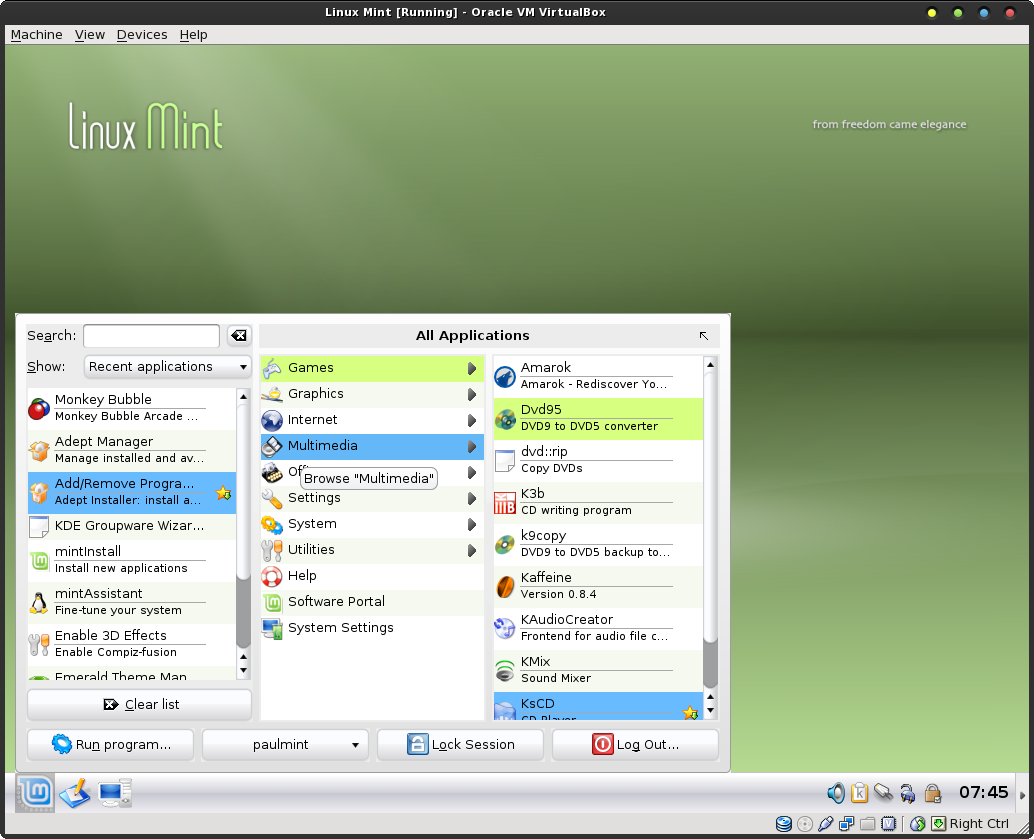
Well, of course it does, as the Linux Mint window above illustrates. Highlighting the Linux Mint virtual machine in VirtualBox, then selecting the “Start” icon on the VirtualBox toolbar launches the virtual machine.
Summary
VirtualBox is an extremely handy tool for just about any computer user – regardless of which operating system they are using as a host. It allows you to try out as many OS’s as you want, with the only restriction being the available space on your hard drive.
The method I detailed above has
never failed me. Moving to a new computer, and moving all of
your virtual machine hard drive files along with it, couldn’t
possibly be any easier.