Linux Financial Apps: Grisbi
by Meemaw
In the first installment of these articles, I stated I would review six financial apps. Since then, I have found that I missed one, Skrooge, so my articles will total seven. Skrooge will be reviewed in a later article. This month’s program is Grisbi http://www.grisbi.org/ According to the website, it is available for Linux, Mac and Windows. I also found a link to a Users Guide in English - but when you pull it up, it’s in French. The main site says there’s a developers channel in IRC at #Loot. Grisbi is in the PCLinuxOS repository, so there’s no need to go elsewhere.
Starting Grisbi for the first time, you are shown a Welcome window and asked to create an account file. There will be five more separate windows. In window two, you will name your file as you want and designate date format, number appearance and if you want your file encrypted. Window three asks for your preferred currency, while window four asks if you want to use the standard category list or none. In window five, you will enter your bank information, and window six will lead you to creating an account or importing information from other software.
Creating an account will lead you to four more windows, where you can designate the type of account (bank, cash, assets or liabilities), designate which bank is used and the beginning balance of the account. In the last window, you can give the account a specific name. For this article, I named my account file Meemaws, and using the bank name Hometown Bank, I created a Checking Account and a Savings Account.
Finishing these steps, you will see the following window, which has all the information you have already entered.
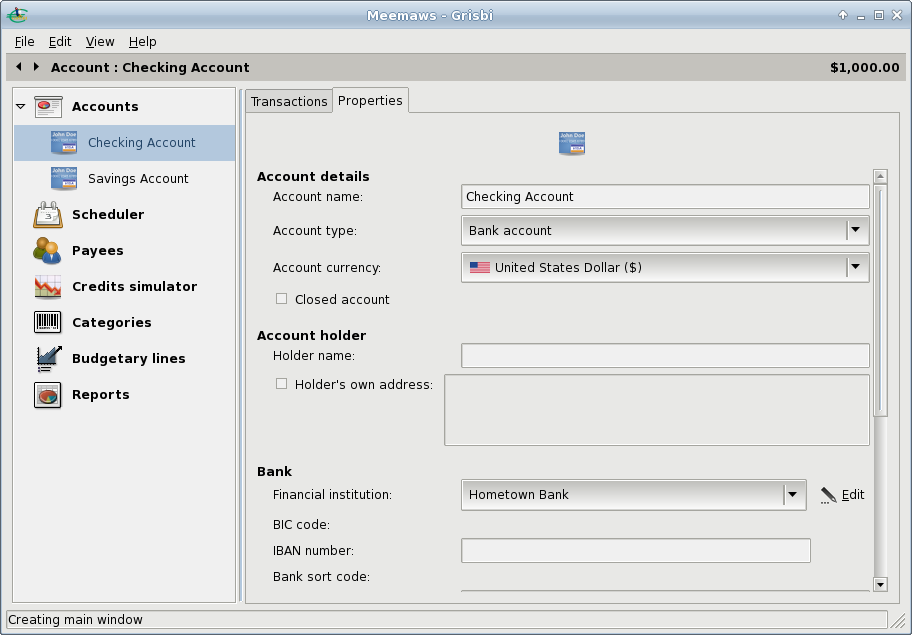
In the event that you need two separate files (maybe helping another with their banking) to keep the transactions separated, you can create another account file from File > New account file. If you want another account within your own file, you can create that from Edit > New account. Note that at the top of the window, there are two tabs, one saying Transactions and one saying Properties. the window above is the Properties tab, and the Transactions tab is where you will begin adding transactions to your check register. At the bottom of that window, you will see the line Transaction/Scheduled Form.

Click the arrow to the left of that line, and the Add Transactions window will open. You can leave it open all the time if you wish, as this is where you will enter all transactions in all accounts.
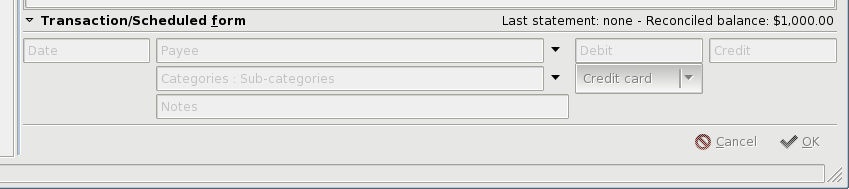
As always, you enter the Payees yourself, and if you chose the standard categories, you have them to edit however you want.
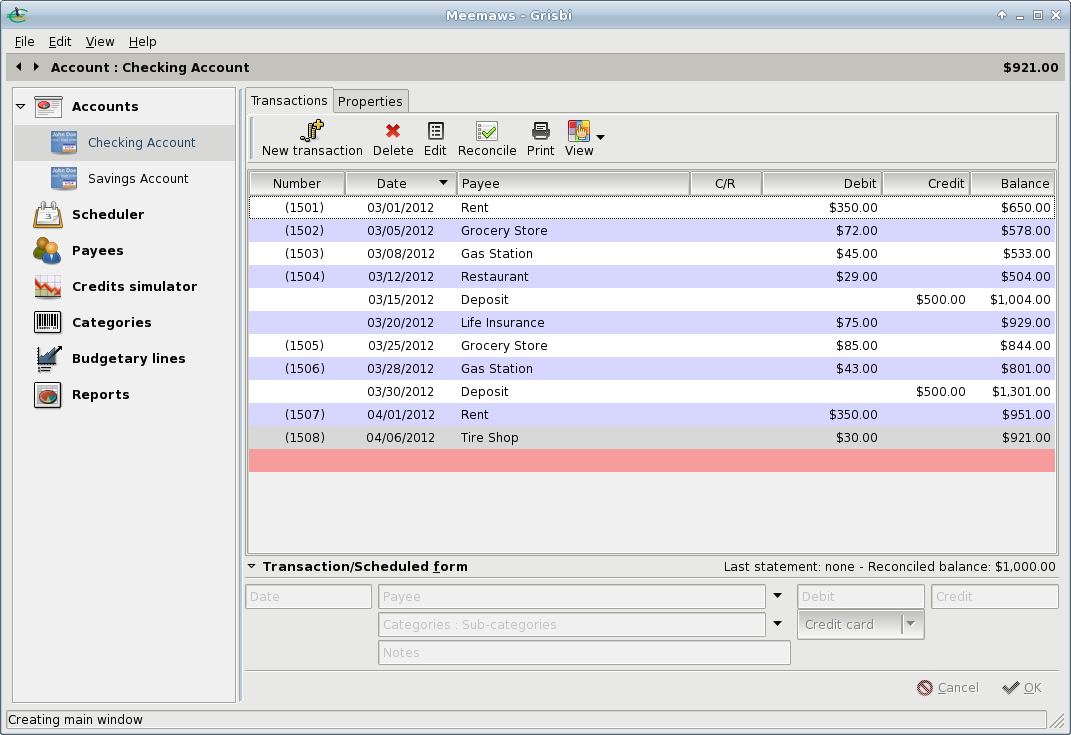
Also, each window has its own toolbar, depending on what window you are using. The Transaction window has New, Delete, Edit, Reconcile, Print and View. The View tool is very handy. It lets you decide which transactions to view, whether you want to view all of them or only those since you last reconciled your account. It also lets you choose how you want each transaction to display: a single line for each showing only the date, payee, amount and balance, double or triple line displays showing more or even a full view showing category and any notes you may have entered.
Besides your accounts list in the tree at left, you have Payees and Categories sections, and can add, delete or otherwise edit them there. The Scheduler is in the tree, and you can schedule your automatic transactions there. Also there is a Budgetary Lines section, a Credits Simulator and Reports.
The Scheduler is used to enter repeating transactions, like a life insurance premium or house payment that comes out of your account every month. Clicking Scheduler in the tree at left, you get the following screen:
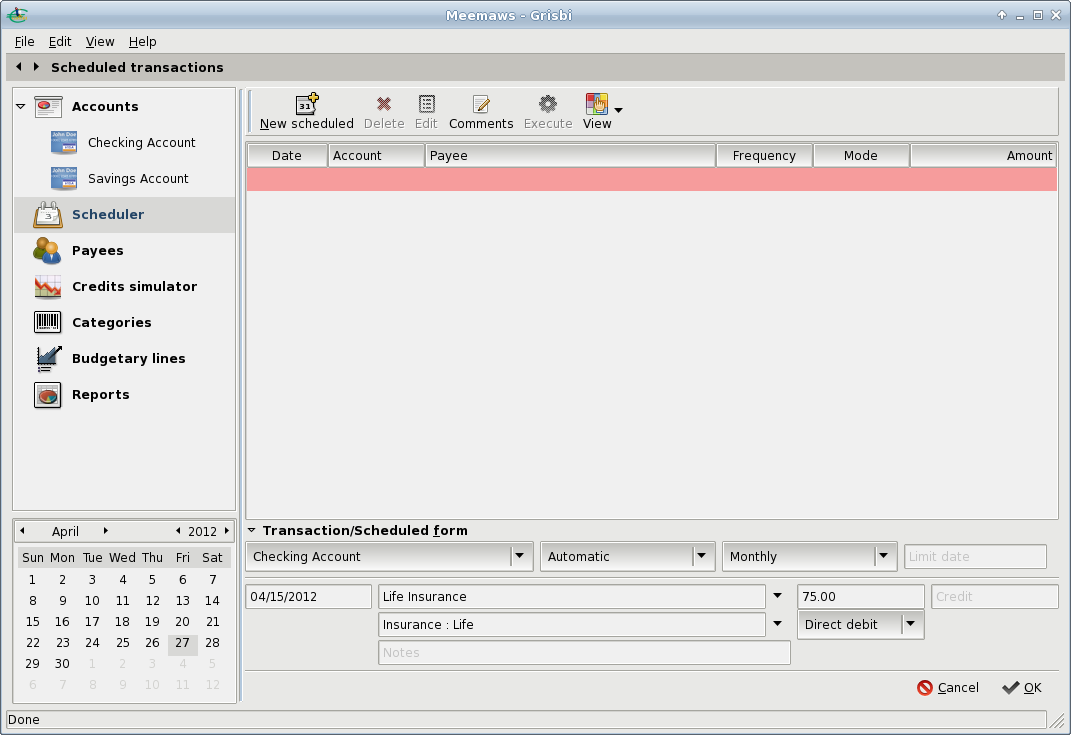
The Scheduler toolbar has New, Edit, View and Delete, as well as Comments and Execute, which enters a scheduled transaction into the proper account. You can add as many scheduled transactions as you need.
Grisbi has a feature we haven’t seen so far. The Credits Simulator is a loan payment estimator. You can put in the amount of your loan, interest rate, length of the loan and a few other options, and discover what your monthly payment will be. You can export the information and even print out an amortization schedule. In the example below, you can see information for a loan for $200,000 at 6% for up to 30 years.
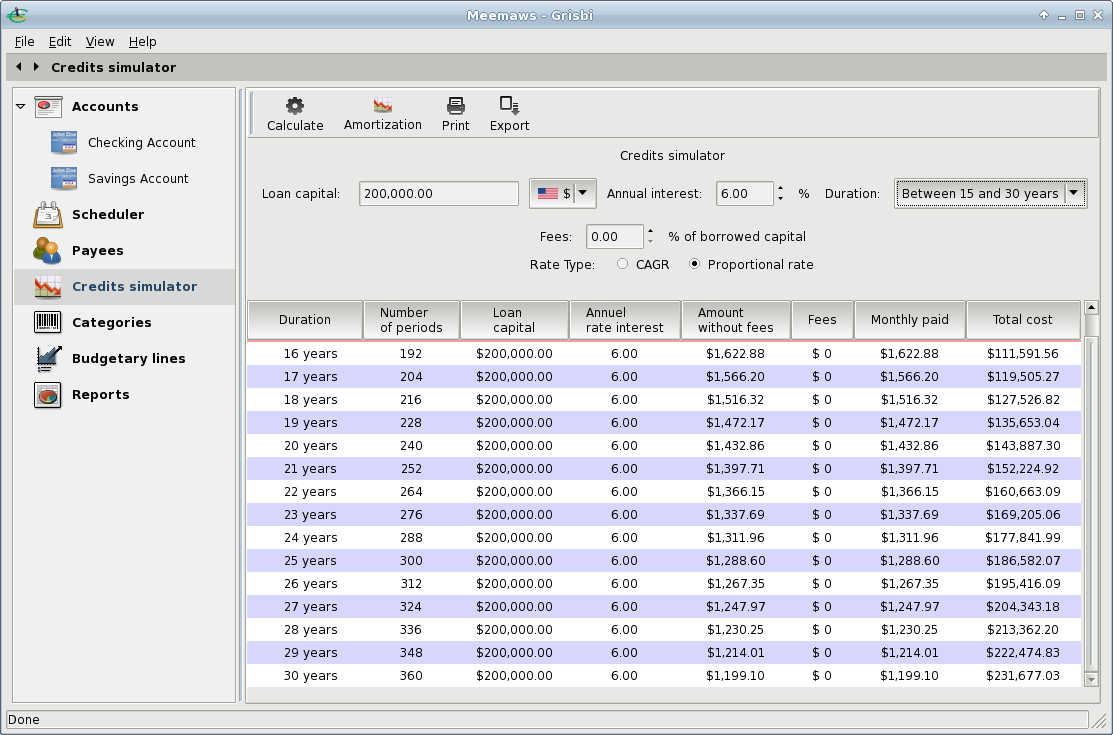
This is a different chart than those I have seen before. It allows you to compare payments for different time frames and pick the one that has the best payment for your budget.
Highlighting the line for the length of time you want, you can then click on the Amortization button at the top. You then get another screen with an amortization, or payment schedule.
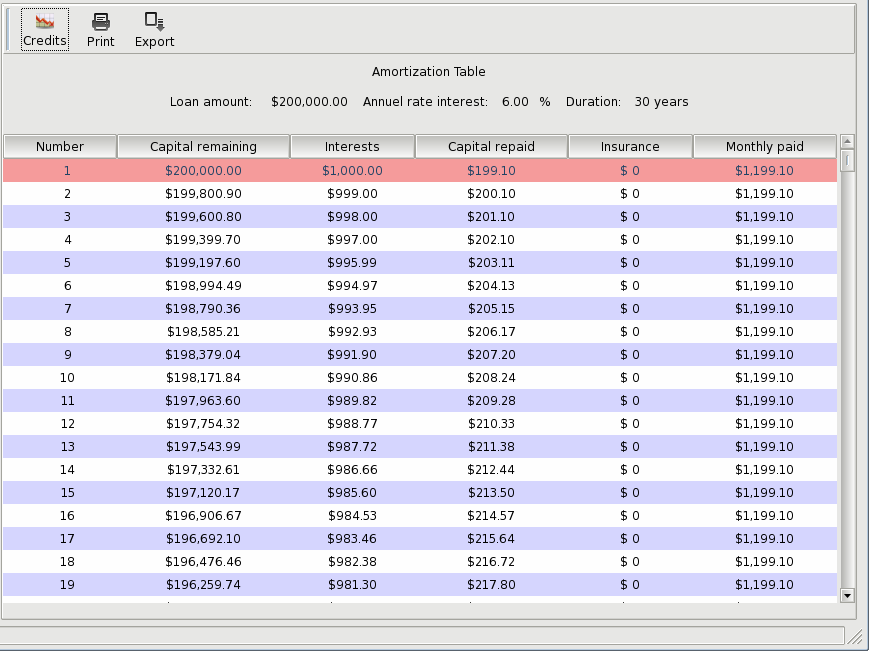
This schedule gives you every payment for the duration of the loan, and shows what part of each payment is principal and what is interest. If you want to cross off each payment as you make it, you can print the schedule, or export it as a .csv document.
Also in the left-hand tree in Grisbi is a section called Budgetary Lines. I’m pretty sure it is a form of budget planner, but to be honest, I can’t figure out how to use it. I’m sure it’s outlined in the manual, but until it is translated from French, I’m out of luck.
Summary
Grisbi is a nice program for
managing your finances. It is fairly easy to use, and doesn’t
seem to have any of the difficulties I found in a couple of
other programs. Other than the Budgetary Lines section, I like
it.