QEMU: The Other Virtual Machine, Part 2
by Patrick G Horneker (phorneker)
In the last article, we installed FreeDOS on a virtual machine with QEMU, and placed the disk image in the ~/vm directory.
We already learned some parameters that we used when invoking qemu, namely -hda to specify the hard disk image to use, -cdrom for the CD image we used to install FreeDOS, -boot d to tell QEMU to start using the CD/DVD image, and -m 32 to tell QEMU to allocate 32MB of memory to FreeDOS.
QEMU comes with many more parameters than this, as we are using QEMU to emulate a old school PC.
So far, we typed the following to start QEMU:
qemu -hda freedos.img -cdrom iso/fd11src.iso -boot d -m 32
Once installed, we will need to launch QEMU and have it boot from the emulated hard disk. For this, we only need the name of the hard disk image. Hence, we can start QEMU with the following:
qemu -hda freedos.img -boot c -m 32
This will launch QEMU and give us the following:
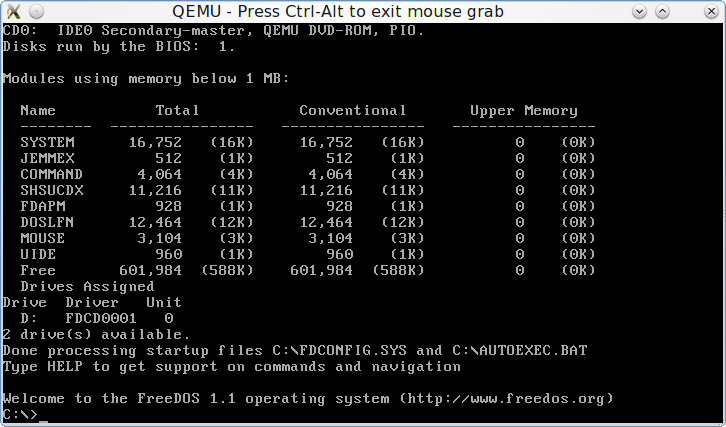
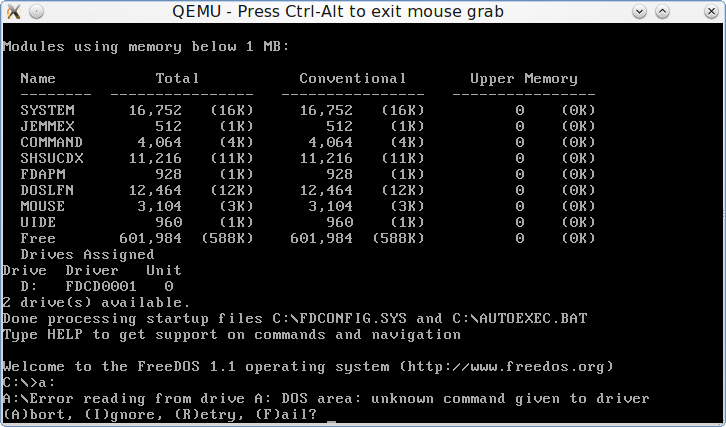
The virtual CD-ROM drive is present, but there is no virtual CD in the drive. If we supplied a CD image with the command, then you will be able to access the CD-ROM from drive D on FreeDOS. However, notice there is no floppy drive available. When we try to access the floppy on FreeDOS, we get the following:
We could add a floppy drive to our QEMU command line. There are two ways to do this, and it depends upon the physical hardware available on your machine. Older machines come with internal floppy drives, and they can be used directly within QEMU. Over the past few years, desktops do not come with internal floppy drives, and to use floppies on these, you will need an external floppy drive (these should be very inexpensive by now, if you can find them in the first place).
To use a floppy disk image, you supply -fda to represent the first floppy drive, and -fdb to represent the second floppy drive. Back in the day, internal floppy diskette controllers could only support up to two floppy drives. This was always the case for every PC built.
QEMU supports either a disk image or a physical device (internal floppy drives only).
-fda /dev/fd0 tells QEMU to use the first physical floppy drive on your machine for floppy access.
-fda /dev/fd1 tells QEMU to use the second physical floppy drive on your machine. Note: This parameter is not valid if your machine has only one floppy drive.
External Floppy Drives
External floppy drives can be used to create floppy images for use on QEMU. On QEMU, floppy images are mounted the same as physical floppies that are inserted in a internal floppy drive. Since external floppy drives are USB mass storage drives, they have device names such as /dev/sdb, /dev/sdc, /dev/sdd. The USB mass storage driver uses SCSI emulation for disk operations, and hence must be explicitly mounted before reading and writing to the disk. This is not the case with internal floppy drives.
To create a disk image from a floppy inserted into an external floppy drive, we need to find the device name for the external floppy drive. First, insert the floppy you want to use in the external drive. On most PCLinuxOS desktops, an icon should appear representing the floppy. Open a terminal window and type in ls /dev/sd* to get a list of disk devices.
/dev/sda /dev/sda1 /dev/sda2 /dev/sda3 /dev/sda5 /dev/sdb /dev/sdc /dev/sdd /dev/sdd1
On my laptop, when docked, the external floppy has a device name of /dev/sdd. /dev/sdd1 refers to the FAT16 partition on the floppy. /dev/sdd refers to the disk drive and the unformatted (raw) disk inserted into the drive. The latter is what we want to use to create the disk image.
(/dev/sdb refers to the built-in memory card reader and /dev/sdc refers to the card reader built into my Epson Stylus NX415 all-in-one device.)
With the terminal window open, go to an empty directory (I use ~/vm/floppies to store floppy disk images) and use the dd command as follows:
dd if=/dev/sdd of=<name of disk image>.img bs=512
where name of disk image is the name you assign to the disk image. The bs=512 tells dd that each block size on the disk image is 512 bytes in length.
Creating Blank Floppy Images
Just as we can create hard disk images with qemu-img, we can create floppy disk images the same way.
In a terminal window, we just type the following:
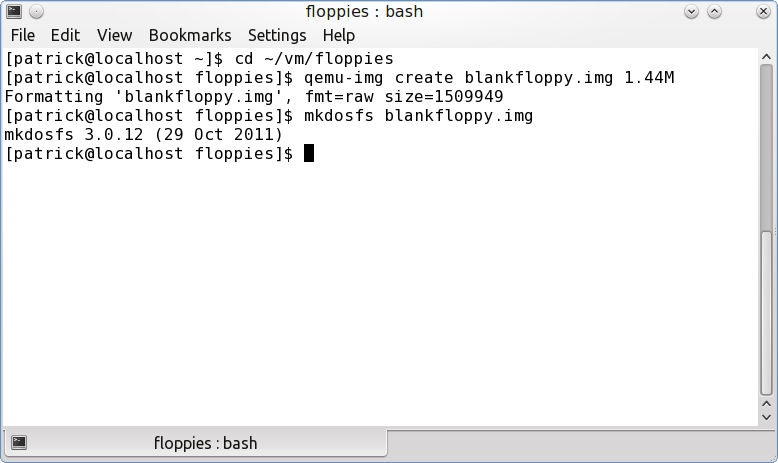
We now have a blank floppy disk image to use with QEMU. On PCLinuxOS, there is no need to run sudo or su to accomplish this as mkdosfs formats a disk image (or physical disk) with the FAT16 filesystem.
To use this disk image, we need to supply -fda floppies/blankfloppy.img to the command line, preferably before the -hda parameter. So now, our command line to invoke QEMU looks like this:
qemu -fda floppies/blankfloppy.img -hda freedos.img -boot c -m 32
Now, when we access the floppy drive (by typing a:), we get what we expected: A:>_ .
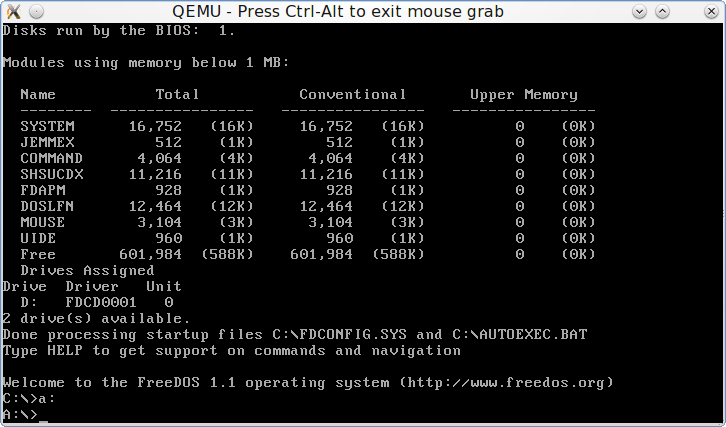
By supplying the -fda parameter, we tell QEMU that there is a floppy drive available on the emulated machine, and there is a floppy in the drive.
The CD/DVD-ROM Drive
We already know that we can use CD/DVD images on QEMU. The -cdrom parameter supplies QEMU with a CD/DVD disk image to use for the emulated CD/DVD ROM drive. The -hdb parameter is the same as -cdrom as it represents the same device. However, images and physical devices supplied with -cdrom are used as read only devices, where devices supplied with the -hdb parameter are available for reading and writing.
We already used -cdrom for installation of FreeDOS. We can use -cdrom for CD/DVD images we want to use with FreeDOS.
FreeDOS comes with a DOS ATAPI driver which was installed with the distribution. The ATAPI driver does not support writing to blank CD or DVD discs. But then, CD or DVD writing was never supported under DOS.
We can use -cdrom for production use of QEMU. To use it, we need a CD/DVD image, or we can supply a physical CD/DVD device.
On my laptop, the DVD burner has a device name of /dev/sr0, which could be used. If you are using an external drive, your device name will vary (such as /dev/sdb).
While you may use a physical CD/DVD drive, it is more efficient, performance wise, to use CD/DVD ISO images on QEMU because of the overhead needed to access the physical drive on QEMU.
For purposes of this article, let us use the original -cdrom parameter. Our command line now looks like this:
qemu -fda floppies/blankfloppy.img -hda freedos.img -cdrom iso/fdsrc11.iso -boot c -m 32
Serial and Parallel Ports
Just as old school PCs have serial and parallel ports to communicate with devices such as printers and (landline) modems, QEMU can emulate these ports using the -serial and -parallel parameters.
QEMU can emulate four serial and three parallel ports. (For FreeDOS, these are devices named COM1: through COM4: for the serial ports, and LPT1:, LPT2: and LPT3: for the parallel ports.)
For each emulated port, we need to supply either a -serial or -parallel parameter with the name of the physical device or file to be used. The order of the parameters matters here.
When you supply the parameters, the first -serial parameter supplied emulates the first serial port, the second -serial port emulates the second serial port, and so forth. The same is true for the parallel ports.
I recommend physical devices for emulaton of serial ports as they are devices that can read AND write data. The parallel port emulation can be either a physical device or a file. I recommend a file for this parameter. QEMU does not recognize the CUPS system for printing, and the use of physical devices for parallel emulation could interfere with the opeation of CUPS as QEMU bypasses the CUPS system to write directly to the physical port.
What to use for serial ports
-serial /dev/ttySx: This uses a physical serial port on your machine. Usually, this port can be found on legacy machines.
-serial /dev/ttyACMx: This appears when you wish to use a cellular phone (not a smartphone) as a modem, or have a USB landline modem plugged in.
-serial /dev/ttyUSBx: This appears when you have a serial to USB adapter plugged in. This device also appears when you begin to synchronize older PalmOS devices using a cradle or direct connection to the device. However, I do not recommend USB cradles for such devices being used because the device does not appear until the device is ready to be synced. For older PalmOS devices, I recommend using a serial cradle attached to a serial to USB cable instead. This way, the device name is always available which is what QEMU expects for serial device access.
What to use for parallel ports
-parallel /dev/lpx: This uses a physical parallel port on your machine. This parameter is invalid for machines without parallel ports, such as netbooks, Ultrabooks, intel-based Macs, and newer desktops and laptops. If your machine has a parallel port, by all means use it. QEMU bypasses CUPS and sends output directly to the parallel port.
-parallel file:filename: I recommend this parameter for emulation of the parallel port. QEMU will write any output for the emulated parallel port to filename. When you exit a QEMU session, filename will be available on the directory where you launched QEMU, and contains raw output that would have gone to a physical printer.
I recommend you make filename a PostScript file, i.e. give the filename a .ps extension. For example, we could use -parallel file:printer0.ps to emulate a PostScript-enabled printer connected to a parallel port. Then, configure DOS applications to output PostScript. After you leave QEMU, you can then view printer0.ps with Evince, Okular, or gv, or send it directly to a printer with the lpr command.
If you have an Epson printer (all-in-one or stand alone), you can configure DOS applications to print to an Epson printer (any model). In this case, you can give filename whatever you want. Why? Epson’s ESC/P-R is an object oriented superset of the ESC/P and ESC/P2 printer control languages, and hence newer Epson printers are backwards compatible with even the oldest Epson printers.
Many Hewlett-Packard printers still use the PCL 6 control language. In this case, you may configure DOS applications to print to most Deskjet and LaserJet models. You may give filename a .pcl extension so you know this file contains PCL coding.
If you configure filename to output to Epson or HP control languages, you will need to print the file using lpr -r command where -r tells lpr to send the data as-is (the r stands for raw output).
Even then, output to PostScript guarantees that output from DOS applications will print correctly after the QEMU session using the lpr command.
Building the Command Line
For purposes of this article, we shall configure FreeDOS to use a 56K modem and a PostScript printer. This was a typical configuration for an old school PC.
For actual hardware, I shall be using a Zoom 56K USB Modem for the serial port. This modem is Linux compatible and provides the /dev/ttyACM0 name we need for -serial.
If you wish to use a cellular phone (not a smartphone) as a modem, be sure to check your carrier’s Terms of Service to see if such usage is allowed before connecting your cell phone.
For the parallel port, let us configure -parallel file:printer0.ps. All output to LPT1: from FreeDOS will be written to printer0.ps. DOS applications running on FreeDOS need to be configured to write PostScript output. I recommend using any of the Apple Laserwriter drivers or Generic PostScript drivers.
Using this hardware, our QEMU command line now looks like this:
qemu -fda floppies/blankfloppy.img -hda freedos.img -cdrom iso/fdsrc11.iso -boot c -m 32 -serial /dev/ttyACM0 -parallel file:printer0.ps
Be sure to plug in the USB modem before invoking QEMU with the above command line.
Mounting QEMU disk images
Under PCLinuxOS (and other Linux systems), you can mount a QEMU image and access it like any other directory. This is useful for installation of DOS drivers without having to access a floppy drive.
Open a terminal window and login as root, then type in the following:
mkdir -p /mnt/freedos
mount
-o loop,offset=32256 /home/patrick/vm/freedos.img /mnt/freedos
cp /home/patrick/<name
of directory where DOS driver files are> /mnt/freedos
umount /mnt/freedos
For QEMU images, you need to mount the image using the -o loop,offset=32256 parameter. This is where the filesystem created by FreeDOS starts on the QEMU disk image.
This section is important as the next hardware components to be configured require DOS drivers to function. We need a way to get the drivers into FreeDOS.
Besides the above, we could download the required DOS drivers, and transfer them to a memory card, or burn them to a CD-R/DVD-R, then mount that for a hard drive and transfer the files that way.
Audio Hardware
QEMU emulates some audio hardware. Typing qemu -soundhw ? (Yes, type the question mark to get information on all sound cards supported by QEMU.)
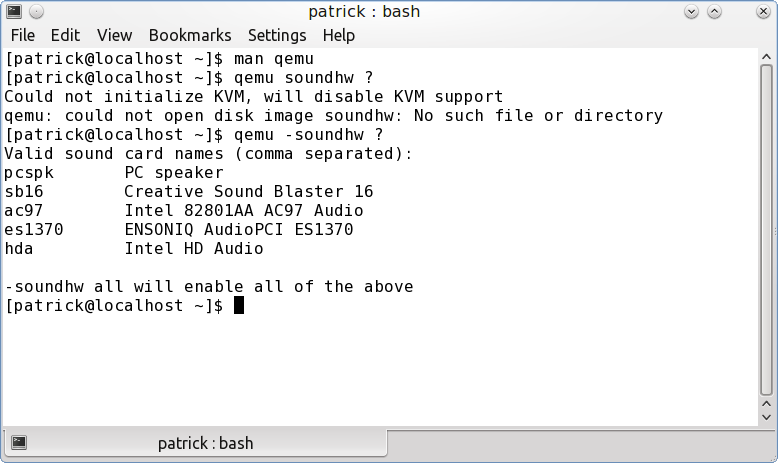
For FreeDOS, we can configure the Sound Blaster 16 device. We will need to download DOS drivers for these devices. Drivers for these devices can be downloaded from
To download, click on Sound Blaster, then scroll to the bottom of the next page. Where it says “If your Product is not Listed above”, click on the text link labelled “Please click here”.
Go to the list that appears and select Others. Then, under Archived Products, click on Sound Blaster 16. Then, click on Next. Scroll to the bottom of the next page. Under All Downloads, click where it says Windows NT 4.0, then select DOS from the popup menu. Click on Submit, the link to the DOS driver will appear in the results. The file is 1.15MB in size. On this page is the link to the driver download. Click on Download and agree to the end user license. The file will download to the Downloads directory on your user space, and is called sbbasic.exe, which is a self extracting DOS executable.
Now, let us add the audio support to the command line
Since we are going to use the Sound Blaster 16 for audio support, we need to add -soundhw sb16 to the command line. We shall insert this parameter before the -serial and -parallel parameters. So far, the following is our QEMU command line to invoke the emulator:
qemu -fda floppies/blankfloppy.img -hda freedos.img -cdrom iso/fdsrc11.iso -boot c -m 32 -soundhw sb16 -serial /dev/ttyACM0 -parallel file:printer0.ps
All of this is actually one line of code, but is formatted to two lines for clarity. We have what we need so far to emulate a old school PC as a standalone machine. Since this is a large one line command, it would be a good idea to create a shell script to run this emulator without having to type all of this code.
Shell Scripts to make QEMU launch easier
The first thing we should do is create a bin directory in your userspace (if you do not already have one). Having a bin directory here allows you to run shell scripts from your home directory simply by typing the name of the script. ~/bin has already been configured with your PCLinuxOS installation as part of the listing of directories to search for programs to run, so you do not have to configure anything else.
Open your favorite editor (e.g. kate, gedit, emacs, or vim) and type in the following:
#!/bin/bash
qemu -fda floppies/blankfloppy.img -hda freedos.img -cdrom iso/fdsrc11.iso -boot c -m 32 -soundhw sb16 -serial /dev/ttyACM0 -parallel file:printer0.ps
The last two lines are actually one line.
Save the file to whatever you want to your ~/bin directory (for example freedos) and exit the editor.
Then, open a terminal and type the following:
chmod a+x ~/bin/freedos
Now,
typing freedos will
launch QEMU with the command line options we created. Since
this is a text file, we can change any parameters we want when
we need to.