Make It Yourself
A Cheap Film Scanner
by Malcolm Ripley (malc)
A cheap scanner for archiving old snapshots for on screen viewing was desperately needed sooooo.....

I caught a YouTube video where somebody created a "scanner" from a lamp, paper, digital SLR etc. However this method creates a few problems, especially with transmitted light through the paper for a diffused light source, which highlights the grain of the paper. Also the glass used to hold the negatives highlights any dust.
Try this method:
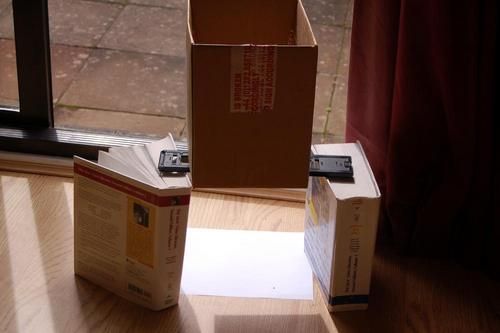
- Place a piece of white paper where the sun can illuminate it, this creates a very bright even light source. I did this at my French windows.
- Place two equal height supports either side, make sure the supports do not reflect any light nor shade the paper.
- Get hold of a film scanner negative holder (I had one from a very old SCSI scanner, now unusable) and place this on top of the supports.
- Get a box which is large enough to envelop your camera to make into a tube. Ideally the length of this tube should match the minimum focus distance of your camera.
- Place the tube on top of the negative holder with the image to be scanned off centre (I'm assuming most SLR's have the lens off centre like mine). The off centre placing is necessary to avoid distortion as you automatically tend to centre the camera at the edge of the tube, especially when your hands are in contact with the edges.
- Photograph the negative.
- Load the picture into Gimp and:
- Use Tools > Transform Tools > Rotate , to align the image. You can use the edge of the rotate dialog to get this done accurately.
- Use the rectangle select tool to select the negative area.
- Edit > Cut
- Edit > Paste as new image
- Optionally rotate for landscape/portrait etc with the quick option: Image > Transform
- Colors > Invert
- Colors > Auto > White Balance
- Optionally colors > color balance. My images tend to be a little blue/cyan so I increase the red and yellow hues.
Despite not having a macro lens on my 6Mb SLR I can get a decent 1.5Mb image using this method.
It's FAST ...... VERY FAST! It takes less than 5 minutes to scan a 24 image reel of film. You can then do all the GIMP stuff when the sun sets with a glass of red wine to help ;-)
A note about camera settings. The pictures must be clear so the usual settings are needed, namely: as low an ISO setting as possible, a minimum shutter speed of 1/125 (unless you use a tripod). I set my camera for programmed mode with a fixed ISO of 200. This worked fine even when the sun went behind the inevitable Scottish clouds!
Further experimentation indicates that the best pictures are obtained by setting the camera to Raw format and using the Gimp Raw converter. This is a Gimp plug in that is in Synaptic. Using raw images I do the following:
- Rotate landscape format so the edges are square
- Cut and paste new image
- Rotate to portrait if necessary.
- Colors - Invert
- Colors - Levels, and adjust the range on each channel to encompass the main distribution. Sometimes there is the odd values outside the main distribution.
- Still with the levels, adjust the centre slider on whichever channel has a color cast to remove that cast. In my case I usually have to adjust the blue channel from 1.0 to 0.9.
- Filters - Enhance - Sharpen, with a value of between 40-45.
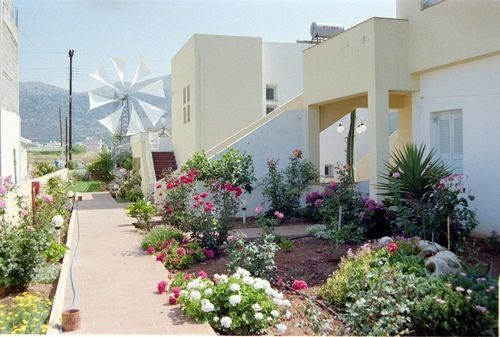
Here is an example of a negative scanned using the above methods, from a vacation to Crete in 1992.

Regards,
Malcolm
