Using Scribus, Part 4: Layers
by Meemaw
We have learned to set up our document and insert text and images. We have also made an eye-catching header for our newsletter and talked more about text frames and text flow. Now we're going to see what can be done with layers.
One of the side windows I have open all the time is the Layers window. Layers make the design of your document easier. If your text is on one layer and your graphics are on a different layer, you can manipulate the graphics all you want and not have to worry about moving your text frame somewhere it shouldn't be or deleting it by accident.

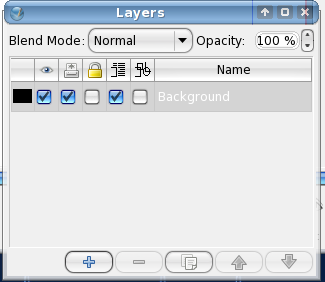
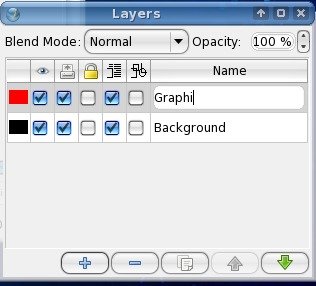
I haven't added any layers to my document yet, so I only have one, the background. For the magazine, I generally put the text and headings on one layer and the graphics on a second layer, OR the text on one, the graphics on one and the headings on a third. To add a layer, simply click the plus sign at the bottom of the layers window. Another layer will appear in your list, probably named New Layer 1. You can rename the layer, if you wish, by double-clicking the layer name and typing in a new one. I will rename mine 'Graphics.'

Don't worry, because your text on the bottom layer can still flow around any image you place on this layer. In the line above the layers you'll see some icons corresponding to checkboxes below. These are settings for individual layers that you can choose. From left to right, the eye icon is for visibilty – checking the box allows each layer to be visible; the printer icon – checking it allows you to only print certain layers; and the lock icon is for locking a layer – if checked, it can't be changed. The next icon is for text flow – you can completely turn off text flow on any layer. The last icon at right is for 'wire frame' – loading a graphic's frame rather than the big graphic will let it load faster. The default for the checkboxes is shown, as I very rarely change any of them.
The Scribus wiki talks about creating a single-page flyer in more than one language. If you have text for each language on its own layer, you could activate the layer you wanted to see and deactivate the others with the 'eye' or activate the print feature on the layers you want printed. The company I work for has created a brochure that they have done in English and Spanish: the two languages would be on two different layers.
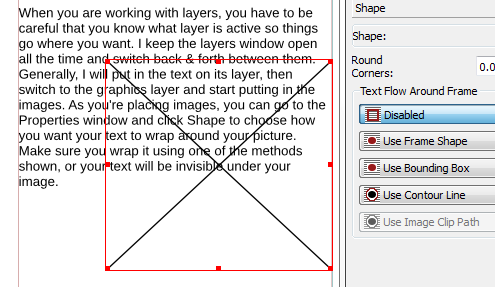
When you are working with layers, you have to be careful that you know what layer is active so things go where you want. I keep the layers window open all the time and switch back & forth between them. Generally, I will put in the text on its layer, then switch to the graphics layer and start putting in the images. As you're placing images, you can go to the Properties window and click Shape to choose how you want your text to wrap around your picture. Make sure you wrap it using one of the methods shown, or your text will be invisible under your image.

Text Flow disabled

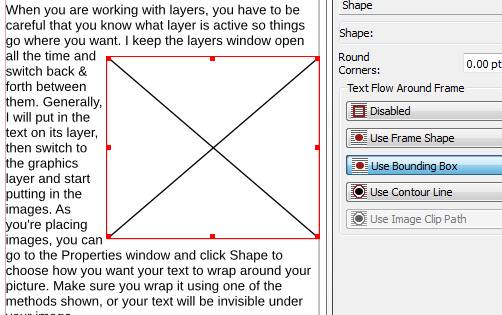
Text Flow using Bounding Box
With the choice Frame Shape, the text will follow the shape of the item you put in. If it is a circle or heart, you may have some interesting text flow! Using Bounding Box, which is what I use the most, Scribus will 'draw' a box around your item and flow the text around that. Since nearly all of my graphics are rectangular anyway, this works well. The next choice, Contour Line, does the same thing but puts a dotted line border around your graphic.
Once you get your text and graphics inserted and arranged, you can always add another layer for your titles, captions and hyperlinks, if any.
On a side note, a recently introduced bug in Scribus prevents text flow around grouped objects. Once working up through Scribus 1.3.5, the Scribus developers have told us in their IRC channel that the new bug won't be fixed until Scribus 1.5, which is literally 11 releases away, with no further explanation. Fortunately, you do have a couple of "work-arounds" to this problem, if you find the need to have text flow around grouped objects. First, you can ungroup the grouped object, and set the text to flow around the largest element of the group. The second way is to place an "invisible" polygon shape (one that has no fill or border color) around the grouped object, and have the text wrap around that invisible polygon.
After you use Scribus for a while, you will undoubtedly develop your own way of using layers. Depending on the complexity of your document, you could have as many layers as you can comfortably handle. Experiment all you want!
Next month we'll catch up with a few other important features.