My New Desktop Build
by Paul Arnote (parnote)
After many years of using hand-me-down and castoff computers that I’ve literally rescued from the trash/recycle bin, I’m finally building my own custom desktop computer. There’s something exciting about building your own, new, cutting edge computer – all without having to pay the “Microsoft tax.”
This is my first brand new desktop computer in almost 10 years. My last one was a Sony Vaio with an Intel P4 HT 3.2 GHz, 512 MB RAM, a DVD-ROM, a DVD+/-RW, a 500 GB HD, TV Tuner card with built-in MPEG2 encoder, eight USB 2.0 ports and a firewire port (huge deal, back then, it was). It came installed with WinXP Home – and the usual abundance of crapware and trialware. To top it off, the Sony Vaio was a factory refurb, purchased from the UBid auction site. Still, it was a leading edge computer for its time. By the way, I still have that computer and it’s still humming along and still in great shape.
Prior to the Sony Vaio, my previous brand new desktop computer was a no-name box I purchased on sale at Office Depot. It ran an AMD Athlon XP 1500+ processor, with 256 MB RAM, onboard video and sound, and came with Win98 installed. I also still have this computer.
Without a doubt, this new computer I’ve built should serve me well for several years to come. So walk with me, if you will, through the build of this new custom computer.
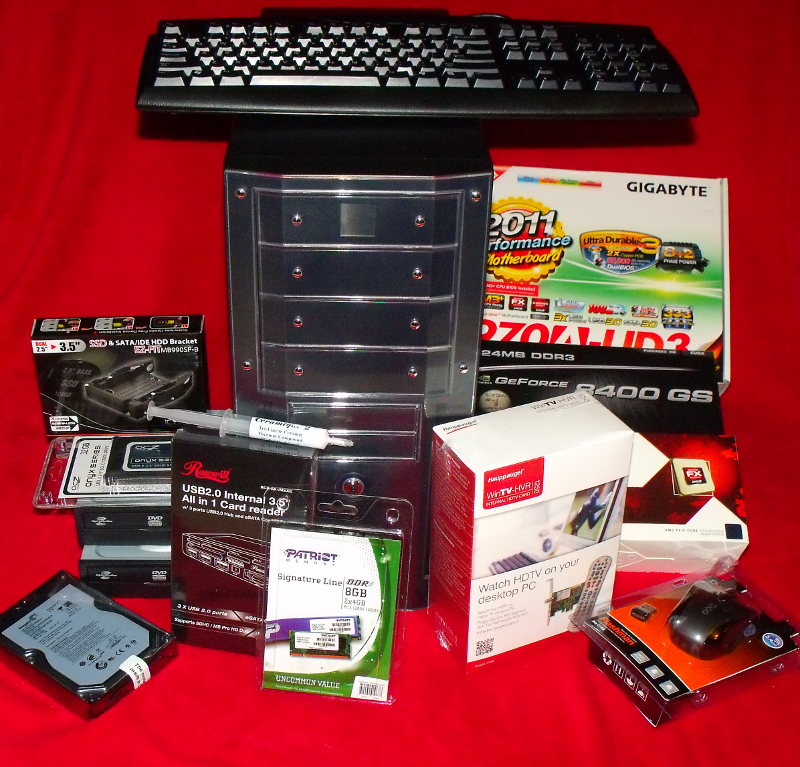
“The Parts”
Parts List
CPU: AMD 3.3 GHz FX-6100 six core processor.
Motherboard: Gigabyte 970A-UD3 AM3+ AMD motherboard with SATA 3.0, USB 3.0, and up to 32 GB DDR3 RAM.
Hard Drives: 32 GB OCZ Onyx Series SATA II 2.5” SSD as the primary drive (OS installation) and a 2 TB Seagate SATA 2 hard drive, partitioned into 4 logical partitions for data storage. Icy Dock Dual 2.5” to 3.5” hard drive mounting adapter used for the 32 GB SSD.
Optical Drives: (2) Lite-On SATA 2 DVD+/-RW. (I decided to skip a BluRay drive at this time, due to the limited support under Linux).
RAM: 8 GB (4 GB x 2) Patriot PC3-12800 DDR3 RAM, 1600 MHz.
Video Card: PCIe 16x nVidia 8400 GS with 1 GB DDR3 RAM.
Multi-Card Reader: Rosewill USB 2.0 All-In-One Card Reader.
TV Tuner Card: Hauppage 1250 HDTV TV Tuner Card.
Thermal Paste: Ceramique 2 Tri-Linear Ceramic Thermal Compound.
Mouse: Pixxo Wireless USB Mouse, model MA-C1G5.
Keyboard: Lite-On 104 Key USB Keyboard.
Computer Case: Rosewill TU155-II mid-size AT/ATX case with (4) 5 ¼” drive bays, (5) 3 ½” drive bays, and 500 Watt power supply.
Assembly
I know that for a lot of computer users, sitting there looking at a pile of computer parts – in their boxes or not – can elicit tons of apprehension and push them towards, er, panic. But I’ve always been one of those people who love taking things apart and putting them back together again. In fact, one of my other interests, (albeit one that I can’t seem to find much time to indulge in), is woodworking. I love looking at a pile of raw lumber and envisioning what I can make from it. Well, I approached this computer build with that same type of vision.
For those brave-at-heart souls who wish to undertake a similar build on their own, I strongly suggest keeping the individual components boxed until you are ready to install them, to help keep them from being damaged before you get around to installing them. Oh, and please don’t look at this as a formal how-to on building your own computer. I’m just going to walk you through the general process, and hopefully give you some “food for thought” along the way.
The first piece of wisdom I want to impart to you, if you choose to tackle this (or any time you tinker around inside your computer’s guts), is to be ever vigilant to keep static electricity drained from your body. In the northern hemisphere, it’s winter, which means that static charges build up easily in the cool, dry air. Scoot your feet across a carpeted floor and touch a metal door knob, and you’ll experience that static electricity first hand. So your vigilance in keeping that static electricity discharged is even that much more important than ever.
The best way to do this is to wear an electrostatic discharge strap, attached to your wrist at one end and to a good ground at the other. If you don’t have an electrostatic discharge strap, then position yourself near a ground and be sure to touch it with your hand often, and without any components in either hand. Perform this act faithfully before you pick up the next component, and you will go a long way to insuring that your build is successful and that you don’t ruin any brand new parts before you even get the chance to enjoy them.
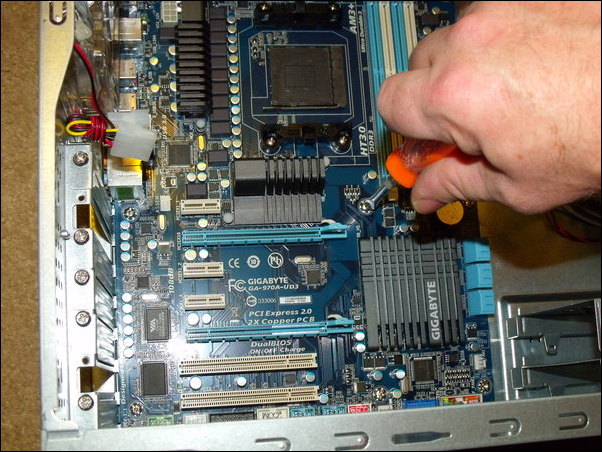
Securing the motherboard in the new case
First, we need to install the new motherboard into the case. Be sure you install the posts in the case to support the motherboard and to keep the back side of the motherboard from coming into contact with the metal case, causing a short circuit – and probable early death of your new motherboard. Line up the screw holes on the motherboard with the installation posts and carefully tighten each of the screws. The screws should be snug. Take care not to over tighten the screws, or you could damage your new motherboard.
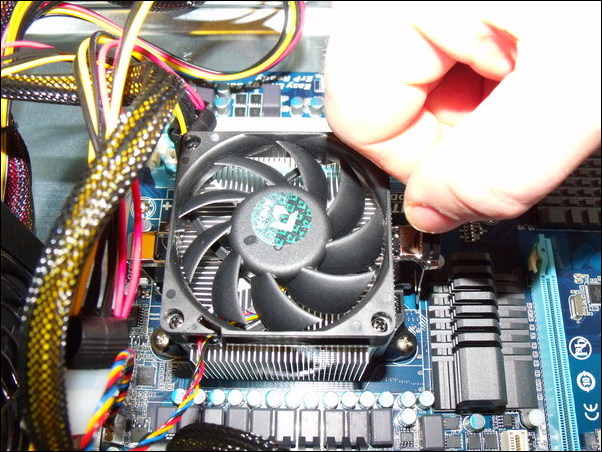
Installing the CPU cooler atop the CPU.
Next, install the CPU and the CPU cooler. After installing the CPU in the zero-force CPU socket, put a thin coat of thermal paste on top of the CPU. This helps improve the contact between the CPU and the CPU cooler, facilitating heat dissipation. Place and lock the CPU cooler on top of the CPU, and connect the fan wires to the appropriate connector on your motherboard.

Inserting the RAM modules.
Now, you need to install your RAM in the RAM sockets. My motherboard has four RAM sockets, supporting up to 32 GB RAM. I chose to go with two 4 GB RAM modules, for a total of 8 GB RAM. This leaves two empty RAM slots for future memory expansion, should I need or desire more memory. Notice that along the bottom edge of the RAM module that there is a notch. This notch is designed to prevent you from installing it backwards. Press down on the top edge of the RAM module with firm, even pressure, until the latches click along the sides of the RAM module. Repeat this process for each RAM module you are installing.
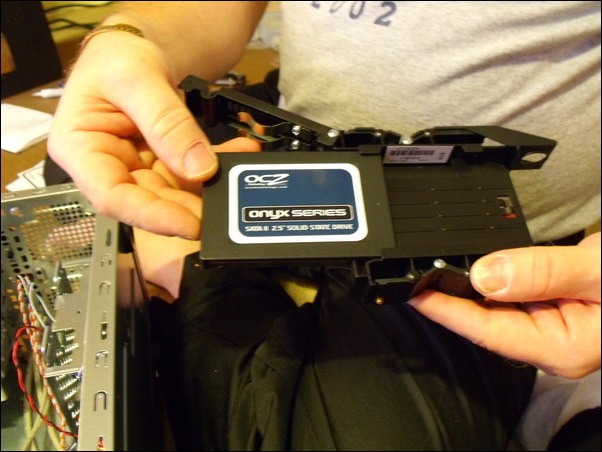
Assembling the 2.5” SSD into the IcyDock.
Next, it’s time to insert and hook up the drives of your system. For my particular build, I chose to use a 32 GB SSD (Solid State Drive) to host my operating system on. Most – if not all – the SSDs on the market are 2.5” drives, which is the size most commonly used in notebook computers. Built for notebook computers, they traditionally don’t fit into a desktop build. Fortunately, there are an assortment of 2.5” to 3.5” adapters that allow you to install a 2.5” drive into a desktop form factor. I chose the Icy Dock (above), which allows you to place two 2.5” drives into the space occupied by one 3.5” drive.
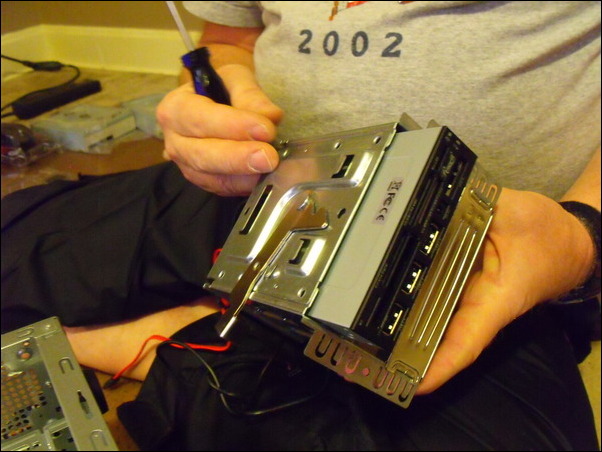
Securing the multi-card reader in the 3.5” drive bay.
I also installed a multi-card reader, along with two DVD+/-RW drives. To store my data, I installed a Seagate 2 TB SATA 2.0 hard drive that my wife bought me for LAST Christmas, which also happened to be the first piece I collected for my new build. She followed that up this Christmas with my motherboard and video card.
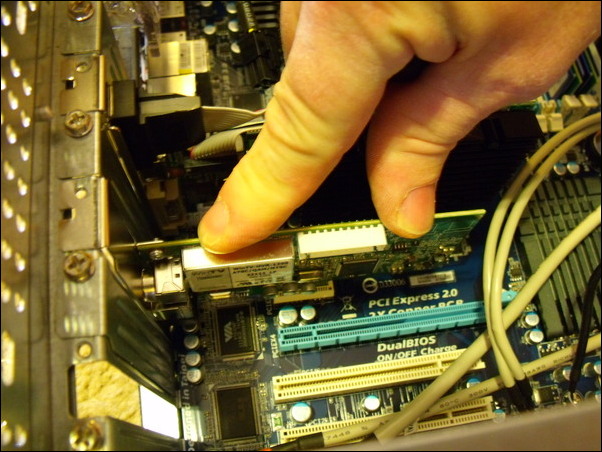
Installing the video card and TV tuner card.
The next items to be installed were the new video card and HDTV tuner card. Carefully line up the card connector edge with the card slot, and apply firm and even downward pressure to seat the card into the card slot. Be sure to secure the cards in place by screwing them to the computer case chassis.
Since that was all of the items I needed to install, it was time to close up the case and start installing the operating system.
Firing It Up & OS Installation
Now it was time for the moment of truth. Unceremoniously unhooking and disconnecting the “old” desktop system, it was time to hook up the new computer and slide it into the space vacated by the old system. One press of the power button and – quietly – the new computer hummed to life. A blue glow shone through the clear Plexiglas insert in the side of the computer case and a the power button was bathed in a blue glow. The screen displayed the Gigabyte motherboard graphic. The phrase “Searching for OS...” was subsequently emblazoned boldly on the screen. Success!
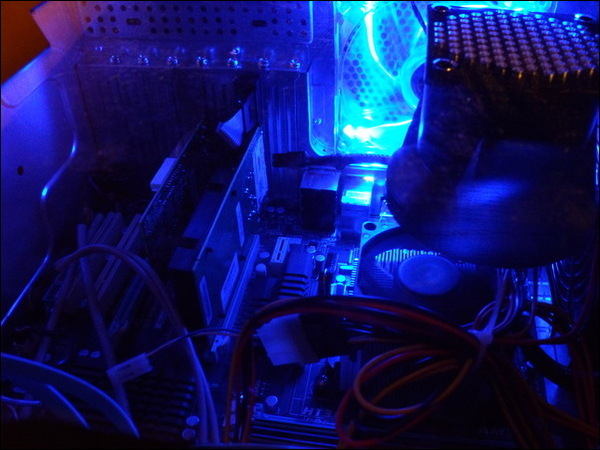
A view through the Plexiglas insert in the side of the computer case.
I chose to install Phinx on my new computer. Even though it’s a lighter version, I’m a real fan of the Xfce desktop. Plus, installing a lighter desktop on my more modern computer just means a faster responding computer in the long run. While my new computer is way more than capable of running a flashy KDE desktop with all the flash, glitz and eye candy, I feel much more comfortable with the Xfce desktop. I find its simplicity very attractive.
I opened up the top DVD+/-RW drive and placed the Phinx 2011.08 installation CD in the tray. I closed the tray and gave the system a “three fingered salute” on the keyboard (Ctrl - Alt - Del) to cause a reboot. Just a brief moment later, the Phinx grub boot screen appeared. Confident that everything would be recognized, I moved straight to the “Install Phinx 2011” grub menu entry. I was very careful in picking out my individual components, doing my homework to make sure the components I chose were compatible with Linux.
Another moment later, and I was at the hard drive partition stage of the installation. Since both drives were new, raw and previously unformatted, I selected “Custom Partitions” so that I could set up the partitions on the new drives. I set up a 4 GB Swap directory (even though it’ll mostly be a waste of space with 8 GB of RAM on the system) and the remainder of the SSD as my root partition. I also set up the 2 TB SATA II drive into four partitions, three with 450 GB each, and the fourth with the remainder (approximately 512 GB). The first 450 GB partition was set aside as my /home directory, with the three remaining partitions called data1, data2 and data3.
Less than 15 minutes after I started, the installation of Phinx on my hard drive was complete. I removed the installation CD and rebooted the computer. After entering the root password and setting myself up a user account, I was greeted by a clean Phinx Xfce desktop.
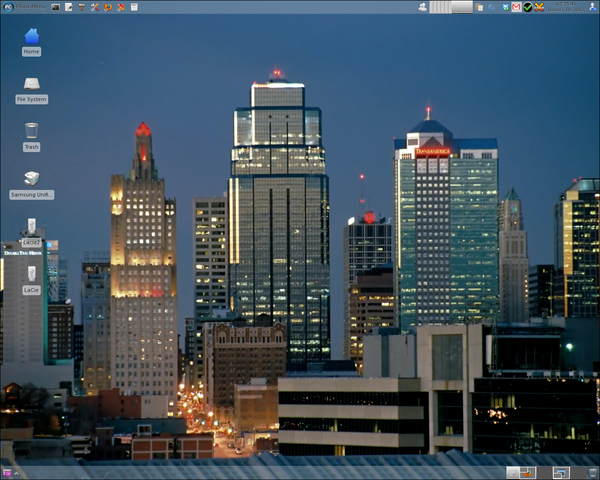
My Phinx Xfce desktop, after some tweaks. Wallpaper shows downtown Kansas City skyline at dusk.
The last time I installed Phinx on one of my computers, it took me a solid week or more to get the desktop set up even close to how I want it. I have a list of personal tweaks (stored in my head) that I customarily apply to my Xfce desktops immediately after installation. These include setting up various window manager themes, wallpaper, launchers on the top panel, applications to start automatically when my desktop loads, installation of a core set of applications that I use, setting up the graphical server, setting up the sound system, etc.
While I pretty much have my desktop set up mostly like I want, my personal “tweaking” of the desktop on my new computer is still evolving and ongoing. It usually takes me three to four weeks to get everything “just so.”
As is the case in many custom computer builds, I do have some “issues” left to iron out. For one, TV tuner cards are a hit-and-miss proposition under Linux. Nearly all of the manufacturers build their TV tuner cards for Windows, often leaving users of “other” operating systems out in the cold – or at best, with a TV tuner card that only half works. Such is the case with my new Hauppage 1250 HDTV TV tuner card.
First, the new TV tuner card does not work under Linux with analog signals, such as the type sent to the card from my cable converter box (tuning it to channel 3, then using the TV tuner card to surf the channels). In fact, I’ve discovered that it ONLY works with purely digital signals, and even then, only with MythTV installed from the repos. It seems that MythTV is the only “TV” application that can properly recognize the card.
I don’t know if the fact that it uses a PCIe 1x slot is a part of the problem, but it’s appearing that TV tuner cards using the older, plain PCI slot are better recognized under Linux. Mind you, this is just an observation, since I don’t have a lot to go on but the reports in user reviews on Newegg.com and Amazon.com. I wish I had realized this when I purchased the Hauppage TV tuner card. It would have altered my buying decision.
I will most likely be purchasing a HDTV tuner card that uses one of the PCI card slots in the very near future. Until then, I plan to install my old analog TV tuner card (an old ATI TV Wonder Pro), so that I can access the output from my cable converter box. I’ll also be purchasing a separate aerial antenna to pick up terrestrial OTA HDTV broadcasts on the Hauppage 1250. In the end, I may end up giving the Hauppage 1250 away to one of my friends who are still stuck in the Windows world, where that particular TV tuner card will work as it was designed to do.
Another issue I have to “iron out” is getting power to my multi-card reader. Since I hooked up four SATA drives in my new computer, I ran out of SATA power cables. My computer case had only four such cables, so something had to give. I chose to leave the multi-card reader power cable unattached, preferring instead to get the two optical drives and the two installed hard drives running as they should. So, I will also be purchasing a power splitter cable very soon to enable me to deliver the necessary power connection to the multi-card reader.
Summary
While I’ve rebuilt many computers over the years, this computer was my first build from scratch. I spent the better part of a full year buying the parts, bit by bit, as I could afford them. Over that time, I estimate that I spent less than $700 on my new computer system. Spread out over a year’s time, it makes it much easier to build a system with the parts you want, since you’re not spending large amounts of money at one time – just a little here and there. I’ve seen computers with fewer features selling for well over $2000.
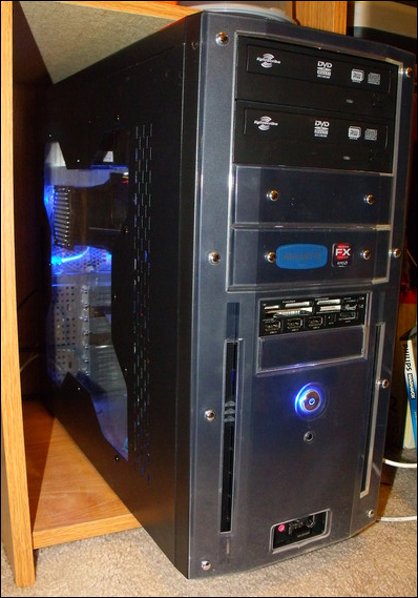
My new computer in its bay in my desk.
Overall, I’m very pleased with my new computer build. What I find especially pleasing is NOT having to pay the “Microsoft Tax” when you purchase a new, pre-assembled system. Like many Linux users, I’m through putting money into the Microsoft corporate coffers. Before I discovered Linux, I probably paid enough for Microsoft products over the years to put one of Bill Gate’s kids through a semester of college. No more. Regardless of anything else, the fact that I contributed nothing else to funding “the enemy” leaves me extremely satisfied.


