
| Previous
Page |
PCLinuxOS
Magazine |
PCLinuxOS |
Article List |
Disclaimer |
Next Page |
Inkscape Tutorial: Inkscape 1.0 New Features |
|
by Meemaw  May 4, 2020 "After a little over three years in development, the team is excited to launch the long awaited Inkscape 1.0 into the world. Built with the power of a team of volunteers, this free and open source vector editor represents the work of many hearts and hands from around the world, ensuring that Inkscape remains available free for everyone to download and enjoy." Finally! Inkscape 1.0 is out! Reading the release notes, we can see that there are several new features. I'm going to review just a few. Rotate the Entire Canvas Nice! A cool feature I never knew I wanted. While pressing <SHIFT> + <CTRL>, scroll with your mouse to rotate the canvas to your desired angle. The bottom right corner of your window now has a box labeled "R" that shows your angle of rotation. 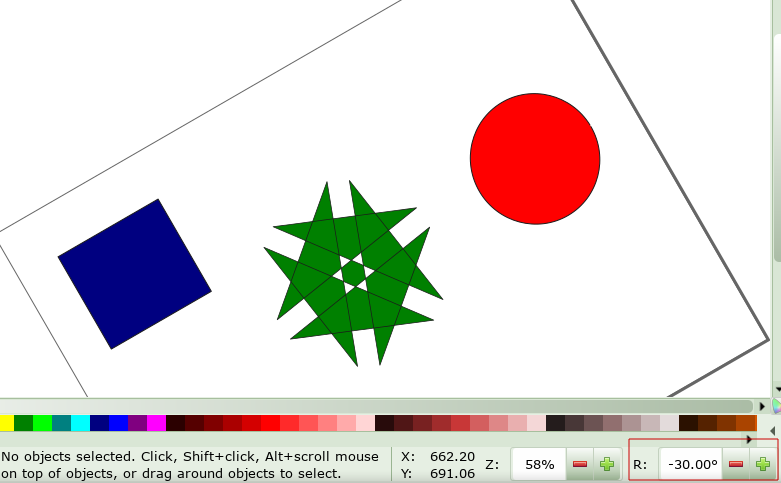 On-Canvas Alignment On-canvas alignment allows you to use many alignment options on the fly, rather than opening another window with Align & Distribute. To enable this, open Object > Align and Distribute and toggle the on-canvas button, located just under the word Align in the tool window. After that, the window won't need to be opened. Clicking the selection 3 times shows the handles (click 1 is select/resize, click 2 is rotate, and click 3 is align) 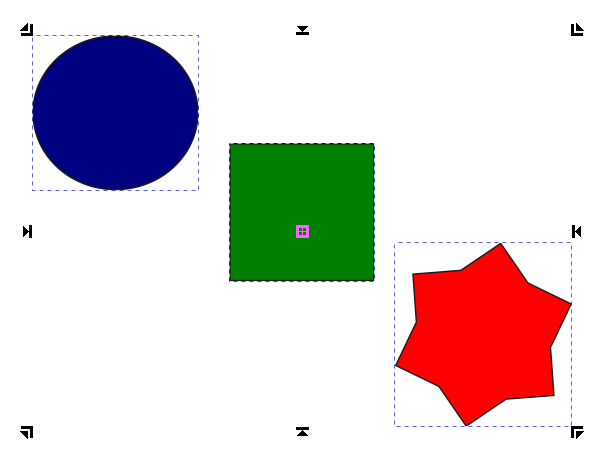 You'll notice the handles are different now. The ones in the corners align the objects to that corner. The ones on the sides, top and bottom are to align left and right, top and bottom. The square in the center is the align center. Clicking the square aligns horizontally to center. If you hold down the Shift key, it aligns to center vertically. Custom Inkscape Themes Earlier, there were only one or two ways to personalize certain things on your Inkscape interface, without actually hazarding a trip to root and file alteration. Now you can just go to Edit > Preferences, select the Interface drop down, and select Theme. Here you can change the entire way Inkscape looks and adjust icon themes and sizes separately. Live Path Effects Makeover! The live path effects tool has been changed considerably. If you want to tinker around with these, select Path > Path Effects to bring up the menu. Then just select any path and hit the "+" icon to Add Path Effect, which brings up this window shown below. 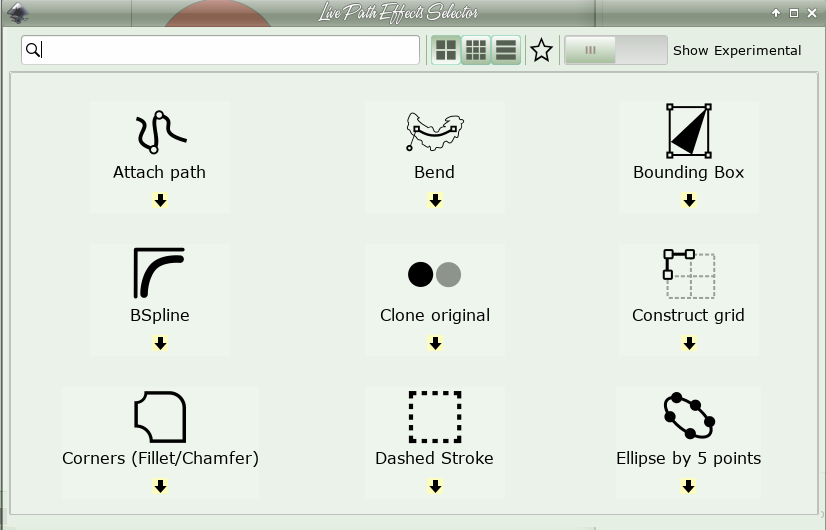 In previous versions, the window only had a list of the live paths you could choose. Now they are in a different window that shows a sample of the effect, so you know you are getting the right one. In the box above, you can see three different ways to display the effects (top center of window). You can choose icons, smaller icons or a list (which has icons on the left end of the description). More Compact Tool Controls Bar Some control buttons that have been mutually exclusive (e.g. right-aligned, left-aligned, justified) have been combined into drop-down lists, so they now take up less space. Context menu The menu that appears after a right-click on the canvas has been extended at the bottom with the following items, which makes locking/unlocking and hiding/unhiding individual objects much easier:
Pinch-to-zoom On supported hardware (trackpad, touchpad, multi-touch screen), the canvas can be zoomed with the two-finger pinch gesture. My laptop touchpad doesn't work, but you should try yours. My daughter has an older Wacom Bamboo (CTH-661) and the pinch-to-zoom works when it's connected to my husband's laptop running PCLinuxOS Xfce. Split View and X-ray Modes Both of these tools make it easier to see what you have in your drawing, especially if you have several things stacked. With the Split View and the X-ray, you can see them and it will be easier to grab the one you want and edit it, without having to use trial and error to grab what you want or unlayer objects to find the correct one. Split view divides your page in half and shows one side as it is, and the other side with just the frames of your objects without the colors. The line can be moved left & right or up & down using your mouse. X-ray view puts a resizable transparent circle on the drawing that lets you look past all the color and only at the frames of each object. 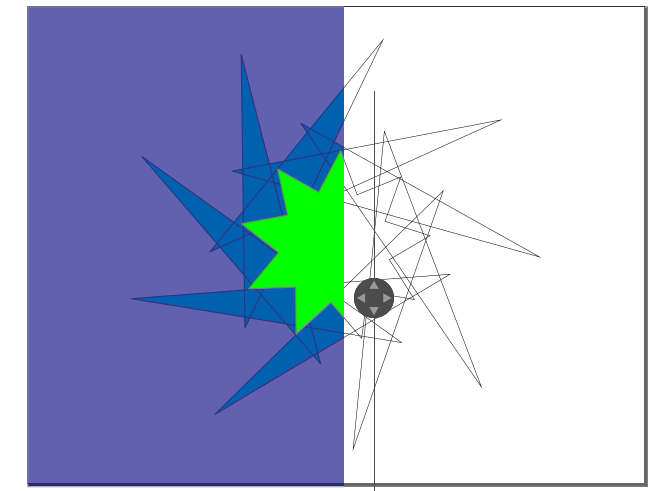 Split view is found in the View menu or can be activated by pressing <Ctrl> + 6. 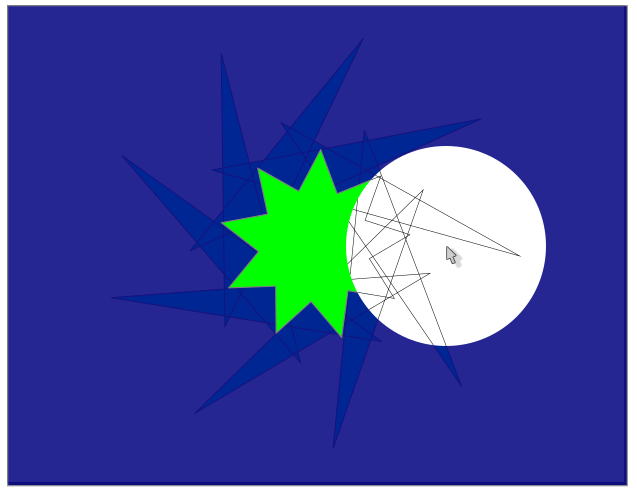 X-ray view is found in the View menu or can be activated by pressing <Alt> + 6. The circle that you use can be made larger or smaller by pressing Edit > Preferences > Rendering > Rendering XRay radius. Snapping In Edit > Preferences > Behavior > Snapping, a new option was added to disable snapping in new documents or files that are opened with Inkscape for the first time. It's a checkbox saying Enable snapping in new documents. 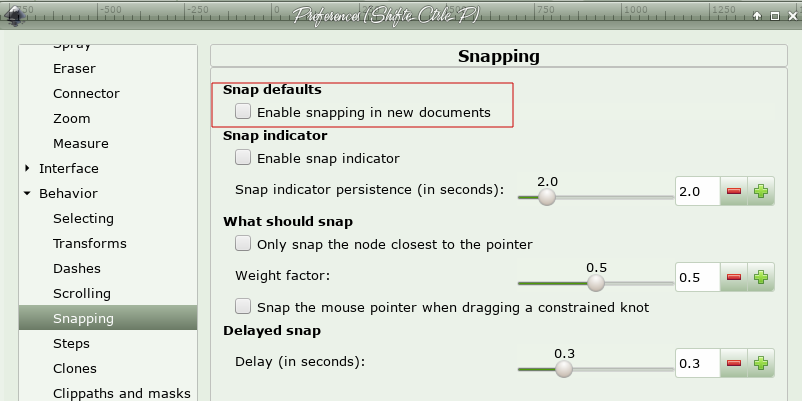 Center Page in Window You might have noticed a new tool up in the toolbar with the Zoom buttons (Zoom to fit selection in window, Zoom to fit drawing in window, and Zoom to fit page in window). Now there is also a tool that allows you to center your zoomed object in the window. If you have zoomed in on an object, you can center that in your window without altering the zoom you have. 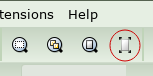 It looks like we're all going to be doing some experimentation. This isn't the limit of the new features! |