| Previous
Page |
PCLinuxOS
Magazine |
PCLinuxOS |
Article List |
Disclaimer |
Next Page |
GIMP Tutorial: Remove A Background |
|
by Meemaw Sometimes you are working with a photo and think it would be better if the background was different, or just gone. I found a tutorial that outlined several ways to remove the background from an image. Let's look at a couple of methods. Fuzzy Select One of the methods you may already know is using the Fuzzy Select tool. It's used best when the background is fairly different from the part you want to keep. I used the Fuzzy Select tool on this photo in order to put a different sky in. 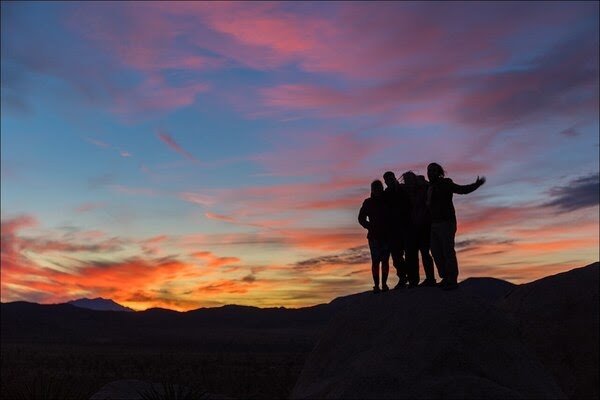 This is a really pretty photo, but suppose you want to add a sky that indicates a later time? You can take out the present background fairly easily (without having to erase everything by hand). Load your photo into GIMP, and in the layers dialog, right-click on the layer and check the box in front of Add Alpha channel. If that menu item is greyed out, your photo already has one. 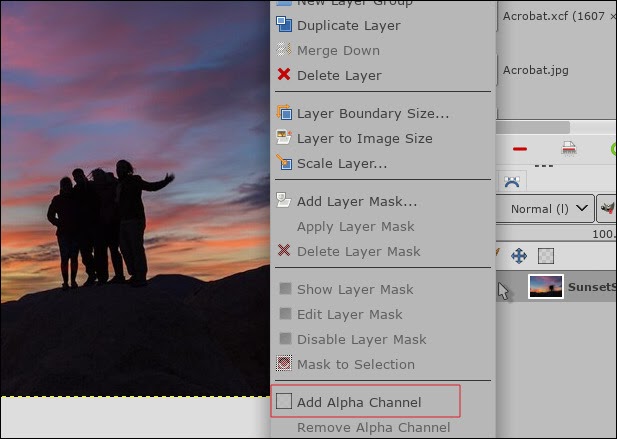 The Alpha channel allows transparency to be present in your image. If we're taking out the background, it will have to be replaced with transparency. Now choose your Fuzzy Select tool. (It looks like a magic wand.) In my photo, I clicked on the blue area first. You should check the antialiasing box and the feather edges box (and set the feathering to maybe 0 - 5), and then can change the threshold up and down until much of your blue is selected. In the image below, my threshold setting was 82, but every image is different. 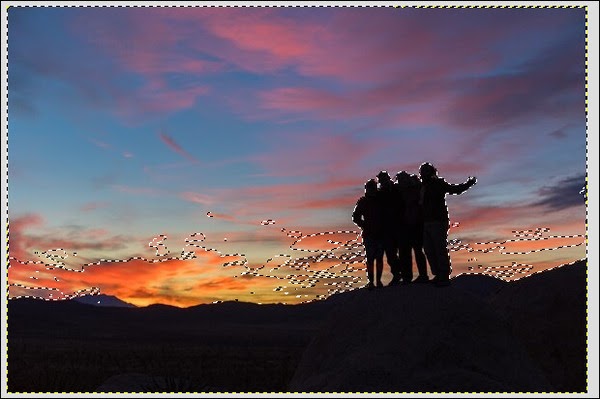 Pressing the Delete key, I get the following:  Click on Select > None to clear your selection. Now go back and choose the orange cloud part, and delete it, too. If you have separate places that both need to be deleted (like the orange on either side of the people, hold down Shift and click your other area. Notice in this photo that there is sky showing between the people's legs that needs to be removed as well. I did this separately by zooming in to make sure I had everything. 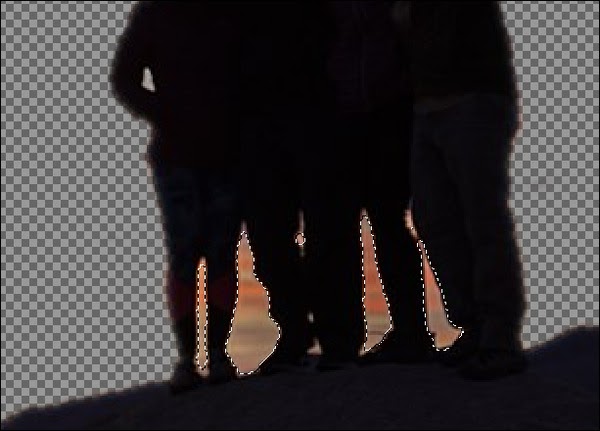 It may be necessary to use your eraser as well, but by now, you won't have much to erase. I added a white layer so I could see what still needed to be removed. I'd rather erase that little bit rather than the whole background. 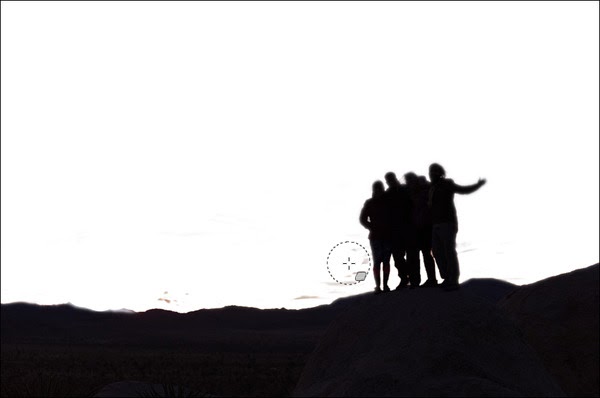 Then I proceeded to add a different background. I added a layer and filled it with a gradient. 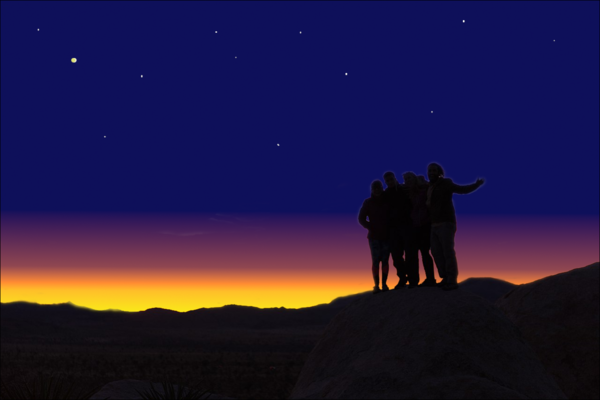 Paths Tool Some things are a bit easier. I want to cut out all the audience watching this cutie do a backbend, but leave the cutie and the mat. 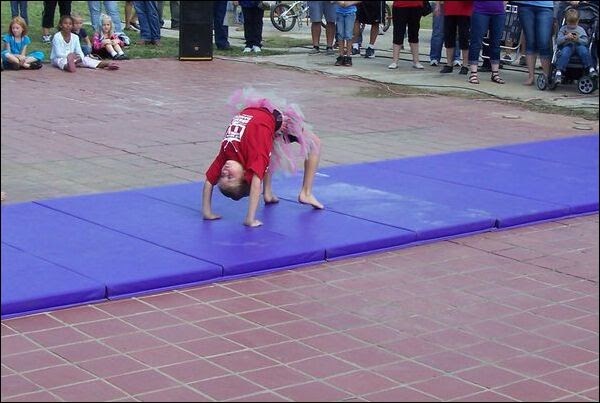 Choosing the paths tool, I can draw around the part I want. The paths tool allows me to curve those lines that need to be curved. 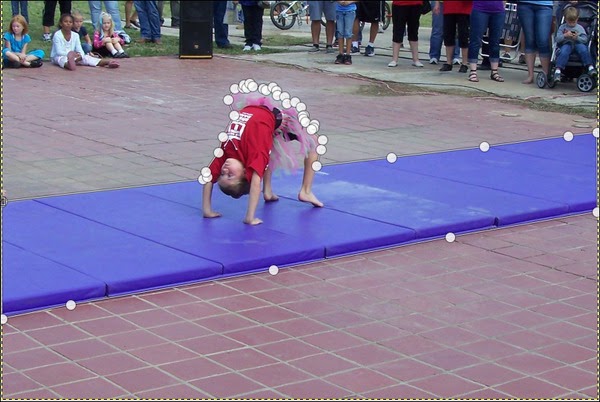 When you get around to the beginning again, and click in your first point, hit the Enter key to finish your path. Now, choose Select > Invert to change your selection to the background rather than the path you just drew. Then hit Delete. To get rid of the path, choose Select > None. 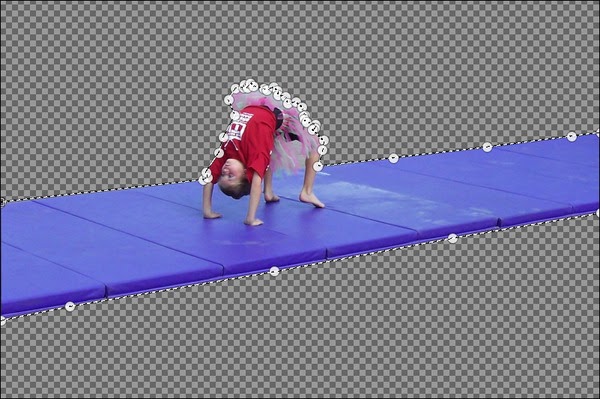 I then added a new layer and put a rather plain background in, but you could put anything in you want. 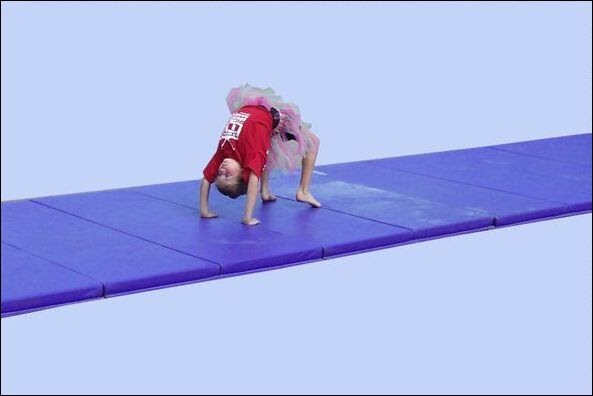 Next time we do GIMP, I'll describe a couple more ways to erase a background easily. |