| Previous
Page |
PCLinuxOS
Magazine |
PCLinuxOS |
Article List |
Disclaimer |
Next Page |
Inkscape Tutorial: Creating A Rainbow |
|
by Meemaw I saw this the other day and thought I'd share. Sometimes you need a rainbow. There are actually two ways to do this. One way to do it is to create a rainbow color gradient and fill a semicircle with it. Using the Spirals tool, draw a semicircle. When you choose your spiral tool, set the Turns to 0.50, the Divergence to 0.000, and leave the inner radius at 0. It will look like this: 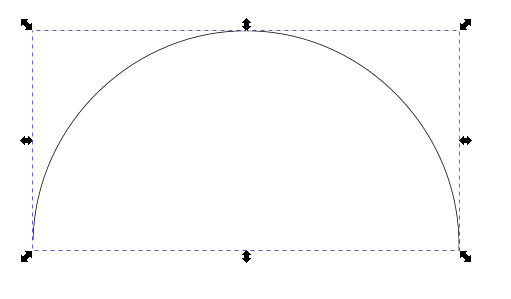 If it doesn't, you can go to Path > Object to Path, and click the Nodes tool, and push the nodes around until you get something closer. I also changed my stroke to a light red because I'm going to start my rainbow with red. Now, choose radial gradient for fill. You should click on the gradient tool as well to get the L-shaped indicator you get with a radial gradient. Double click on the L-shape to insert and edit several stops, choosing your desired rainbow colors at each stop. The bottom of your L-shape should be at the bottom of your semicircle. Before you finish, make your last gradient color white, and move your stops until your drawing looks like the rainbow you want. 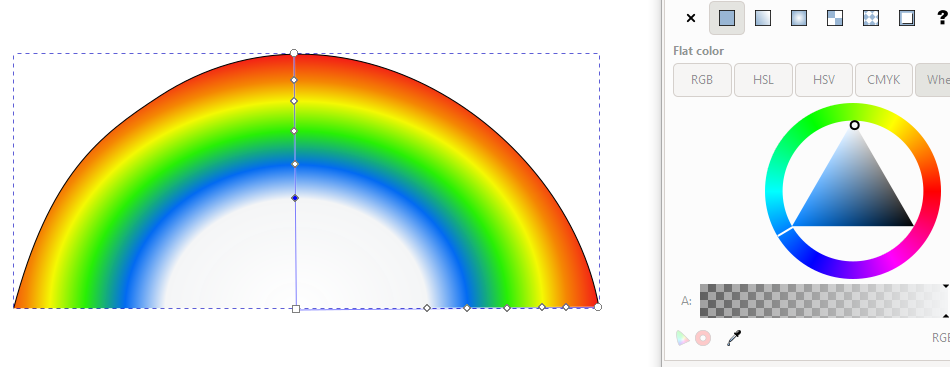 With a little further stop-moving, I think I have the one I want. You can change the opacity to make it a little fuzzier if you wish. 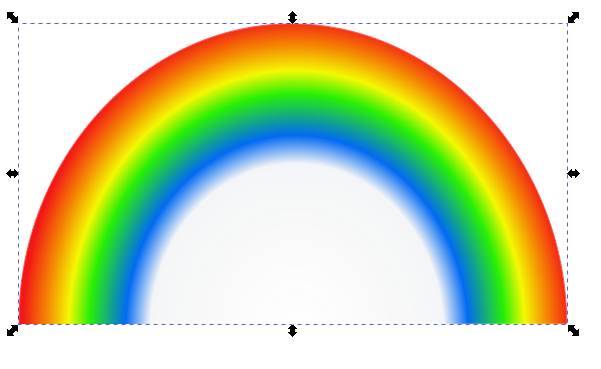 Method number 2 uses the Tiled Clones tool. This tool is one of the most powerful tools in Inkscape. Again, select the Spirals tool and draw a semicircle. The settings should stay at Turns: 0.50, Divergence: 0.00, Inner radius: 0.00. Make the semicircle 200 px wide and 100 px high, and in the Fill & Stroke window, change the stroke width to 3.5 px. Now change the stroke color to ? in the stroke paint tab. We need to do this so we can change the colors of the clones. Since the paint is undefined for the object, the semicircle will be invisible. I circled the ? to press, but I haven't pressed it yet. 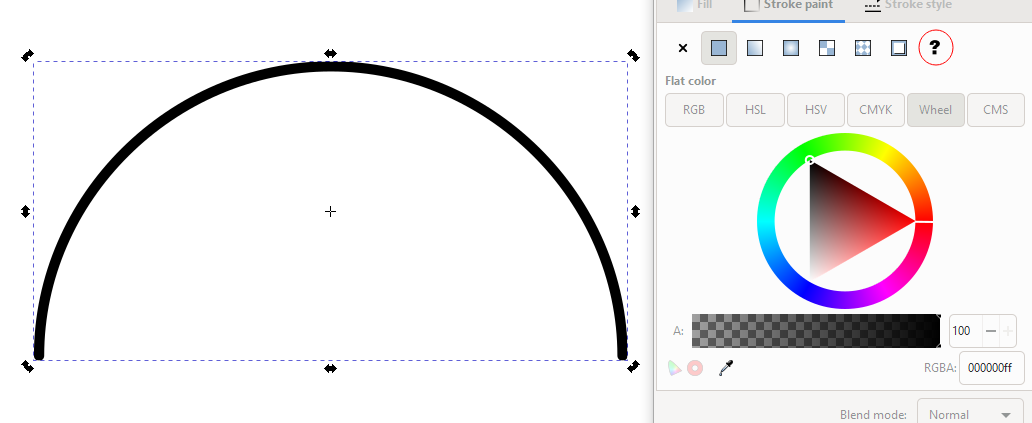 Keeping the arc selected, go to Edit > Clone > Create tiled clones. You should use following settings:
Symmetry: P1 simple translation.
Shift: for X all the values are zero. for Y the per row field should be -98.5
Scale: scale X per row is -1.6
Color: Initial color be red, for per row field, change the H value to 13.5. Leave all other tabs alone. Press create, and you should see a rainbow. 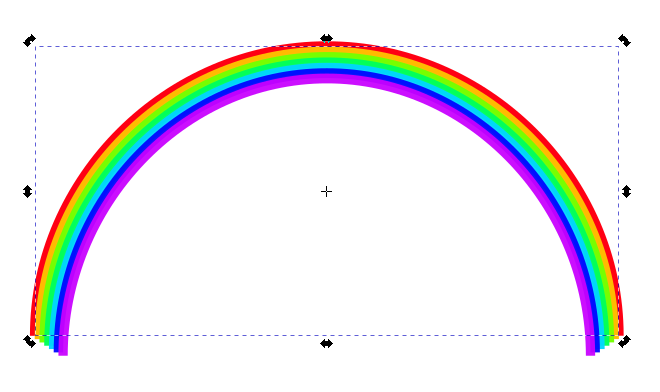 Blur it a bit, and set the opacity down to your liking. 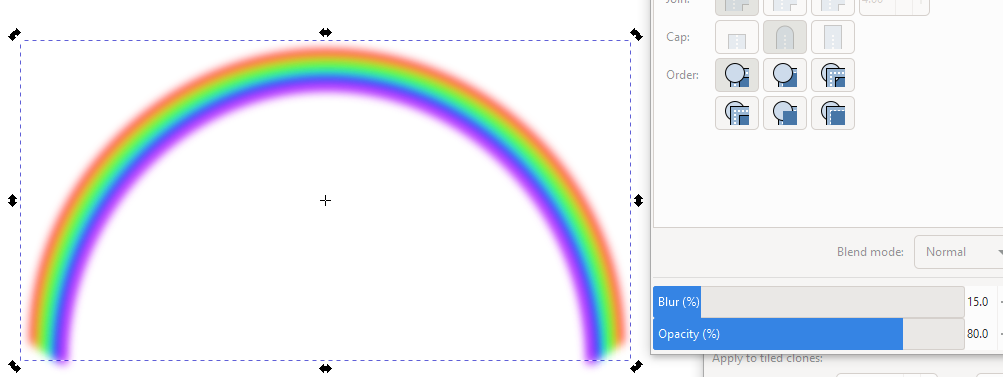 Experimenting with the tiled clone settings may give you completely different designs. Remember! Your tiled clones are separate from each other, so you'll have to choose all and group them if you want to resize or move them together. |