| Previous
Page |
PCLinuxOS
Magazine |
PCLinuxOS |
Article List |
Disclaimer |
Next Page |
Back In Time: Getting Started with Linux's Time Machine |
|
by David Pardue (kalwisti)
During the pandemic, I have become more conscientious about my backup regime on our two desktop PCs; I use the combination of Timeshift (for system files) and Grsync (for documents and personal files). I recently saw in the PCLinuxOS forum that Texstar recommended Back In Time [BiT] as a backup application for your personal files. After a bit of searching, I found that the Timeshift developers also rate BiT as an excellent tool. Since I did not have a backup solution in place for our old -- but trusty -- Dell Latitude E4300 laptop (used as a secondary computer), I installed Back In Time to learn more about it. I hope that my article will help you get started with BiT and encourage you to explore its flexible yet powerful features. Back In Time is a mature application, originally released in 2008; it is supported on all major Linux distributions. BiT was written by a team of developers including Dan Oprea, Bart de Koning, Richard Bailey, Taylor Raack and Germar Reitze.1 BiT was inspired by the now discontinued FlyBack project, which was a backup utility modeled loosely on macOS's Time Machine. BiT is based on the classic rsync CLI utility; it is written in Python and comes with a Qt5 GUI which will run on both KDE and GTK-based desktop environments. The beauty of Back In Time is that although it is highly customizable (as we will discuss shortly), it is also suited for people who want a simple program for backing up their data. Configuration can be done entirely via the GUI; only three requirements for BiT must be specified: where to save snapshots; which folders to back up; and when to perform the backup. A Two-Pronged Backup Solution My simple backup strategy for this Dell laptop is to use Timeshift to take care of the operating system files (i.e., everything except for my /home folder), and Back In Time for my personal data (i.e., documents, pictures, music, videos). You might be wondering ... "Why do I need two different backup applications? Can't I just use Timeshift for everything?" If you use a single solution such as Timeshift, then when you need to restore your system (after a borked upgrade, for example), Timeshift will also overwrite your documents to a previous / earlier state -- something you definitely do not want. However, if you have separate backups for your OS and your personal files, you can just have Timeshift revert to a previous working state without affecting your current documents. Install Back In Time The first step is to install these two packages from the PCLinuxOS repositories:
The current stable release is ver. 1.2.1, which dates from 2019. Although it is possible to run BiT exclusively from the command line, I suspect that most users would be more comfortable with the GUI version. Prepare a USB Flash Drive as Backup Storage Medium (Optional) This laptop is primarily used for Web browsing and word processing, so it does not have a lot of data stored on it. I decided that a 16 GB USB flash drive should suffice for my backup medium, and that I would designate it exclusively for this machine. The USB flash drive came formatted with the FAT32 file system by default. However, Back In Time recommends the use of a reliable, Linux-friendly file system such as ext4. With GParted, I wiped the flash drive by creating a gpt partition table and a single, large partition formatted as ext4 . If you would like some guidance, this brief article provides instructions: "How to Format USB Drives and SD Cards on Linux." Linuxize 7 Jan. 2021. I also used GParted to set a name for the USB backup partition ("Backup") following these steps: https://gparted.org/display-doc.php%3Fname%3Dhelp-manual#gparted-name-partition 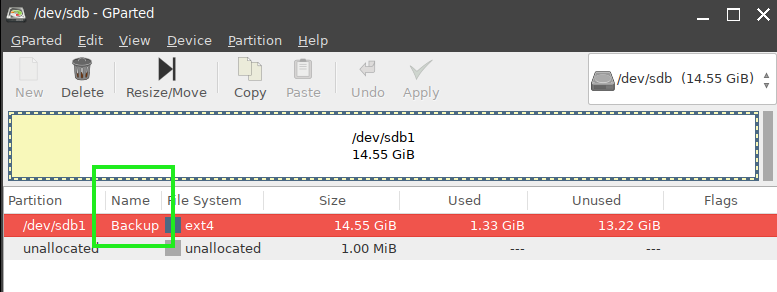 After plugging the flash drive into a USB port and mounting the drive, I ran the chown command from the Terminal, to set the user and group ownership to myself (username david). (I am the only user on this computer). # chown david:david -R /media/770841ba(...)5ea03 As a final test, I tried copying a small text file from my /home folder to the USB flash drive; this operation was successful. Then I issued the $ ls -l command to check the file's owner and show read/write permissions. The output looked as expected:
[david@localhost ~]$ cd /media/770841ba-ae6e-4cbd-8b66-b3694ea5ea03 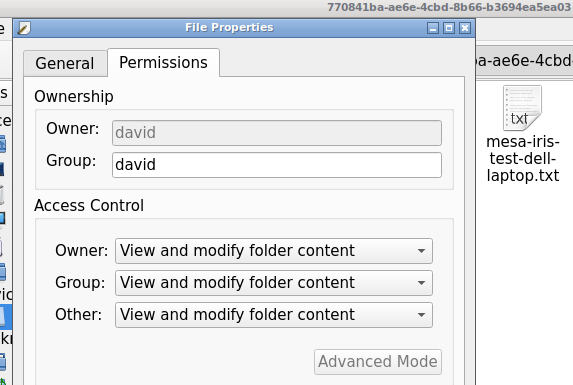 Using Back In Time Before starting BiT, plug in your external drive (whether USB flash drive, HD or SSD): 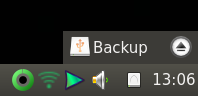 Launch BiT with a Shortcut The program installs two shortcuts under the Archiving menu (in the PCLinuxOS LXQt Community Release): Back In Time and Back In Time (root). The root version runs with root permissions, which are required to access system folders and files (i.e., do a full backup of your OS). Since you will only be backing up your personal / standard files, choose the Back In Time shortcut: 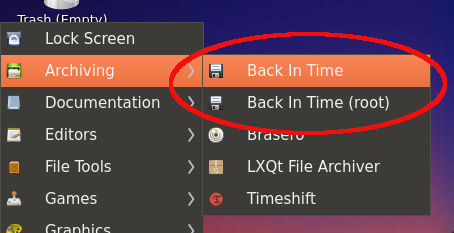 First-Run Dialog When Back In Time runs for the first time, a pop-up dialog appears, asking if you want to restore a previous configuration. Since we do not have a previous configuration, choose "No" to proceed: 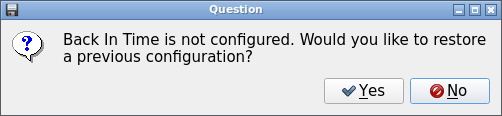 Settings Dialog The Settings dialog is the configuration section of BiT. It includes several tabs which we will navigate through: General; Include; Exclude; Auto-remove; Options; Expert Options. (Don't worry ... The process is not as intimidating as it appears, although it takes some time to carefully examine the available options). I will discuss each tab separately. You will not have to repeat the configuration process after you have taken your first snapshot; all the information will be retained in your BiT Profile. 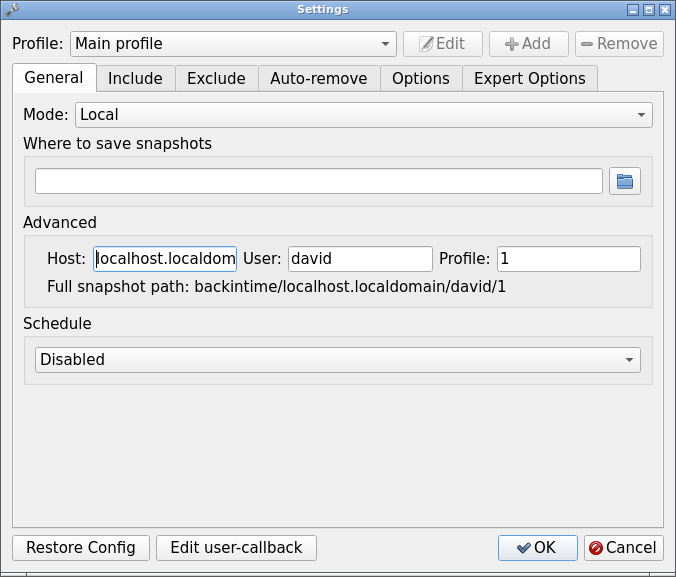 Profile  BiT allows you to create different profiles with separate backup settings. For example, the Main profile could back up internal data drives, which include specific data folders; the Second profile could back up an external hard drive. Another possible scenario could involve the Main profile backing up your /home partition, while the Second profile could be set to back up a separate Data partition. (Your Main profile must be defined / completed before you can create additional profiles. To add another profile, click the Add button, supply a profile name in the New profile dialog, and choose your desired settings via the configuration GUI). To keep things simple, I accepted the default setting: Main profile.
General Tab
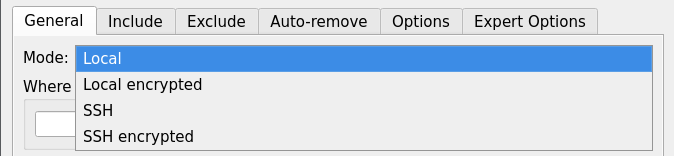 The Local mode is for a local drive -- either internal drive (HD or SSD) or an external drive plugged into your PC. I chose Local because my USB flash drive counts as a hot-pluggable external drive. SSH and SSH encrypted are intended for Remote use, i.e., with a network drive or storage in the cloud. If you are interested in configuring BiT for backups via SSH, please consult Jack Wallen's brief article, "How to configure Back In Time to back up over SSH" TechRepublic 18 July 2019. Where to Save Snapshots  Next, select the location where you want to save your backups. Click on the folder icon and navigate to your backup drive. (If it is an external drive, you should have already inserted it). In my case, its location was /media/770841ba(...)5ea03 (labeled with its UUID): 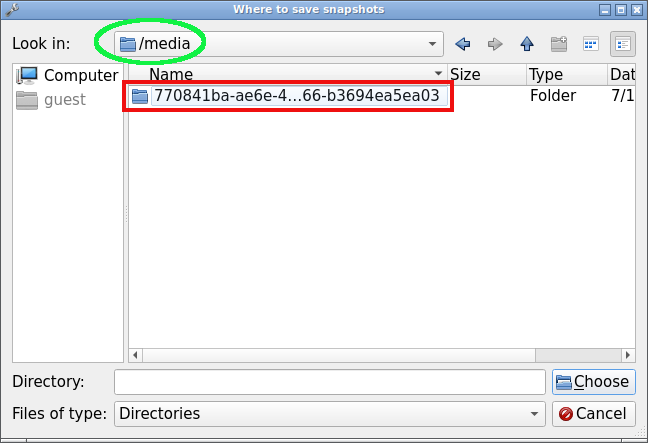 Advanced The Host, User and Profile fields will be auto-filled, so you do not need to change them:  Schedule The Schedule section has a drop-down menu listing a variety of backup frequencies: 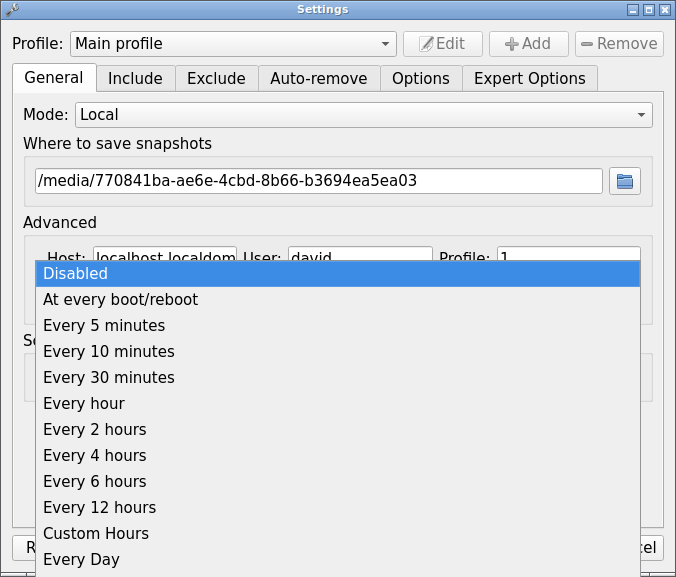 Note: If your backup drive / medium is not always attached to your PC, you cannot do scheduled snapshots. However, this is fine -- as long as you are reasonably disciplined about manual backups.
The Include tab allows you to select which folder(s) to back up. Click the Add folder button, then navigate to the desired folder(s). 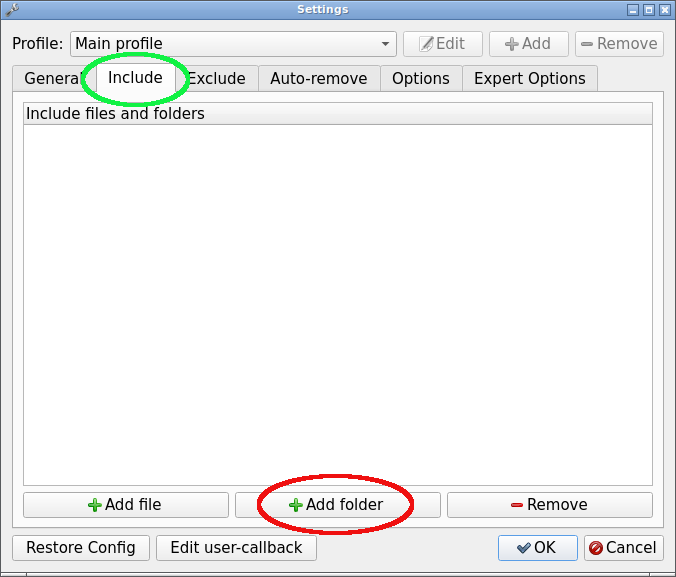 I went to my /home/david folder, then clicked on the Choose button: 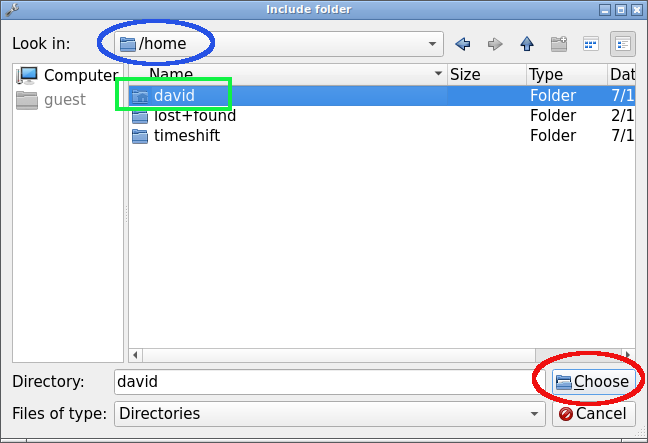 When you finish this step, your choice will display in the Settings window: 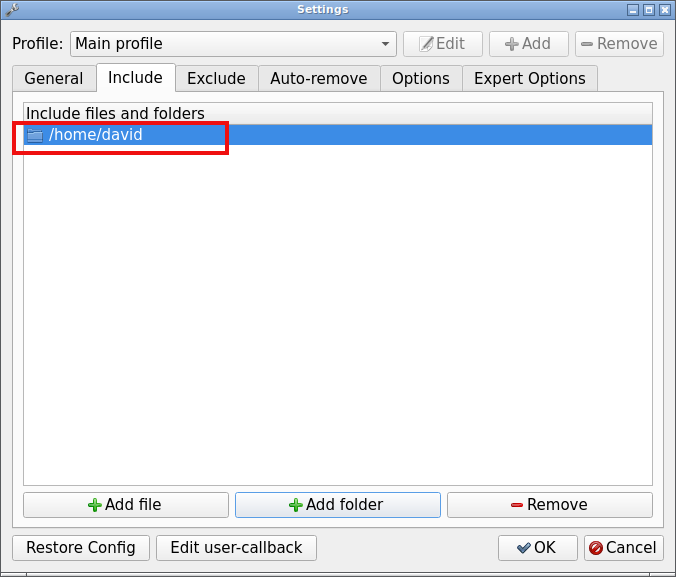 Since you decide which folders to back up, you can configure a custom backup solution that is more tailored to your needs. Exclude Tab This is pre-populated and the defaults are reasonable/fine. Nevertheless, you can add more folders, if you wish. You can exclude an entire folder, a single file or a group of files based on a regular expression. 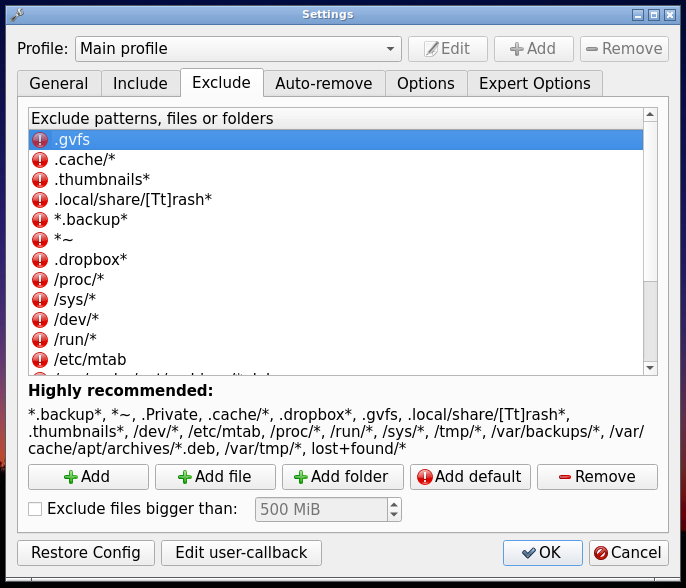 A helpful option is that files larger than a user-specified size can be excluded. For example, I typically keep current .iso images of multiple PCLinuxOS versions (MATE, Xfce, LXQt, Trinity, KDE) in my Downloads folder; I prefer to exclude them from backups because they can easily be re-downloaded when / if I need them. 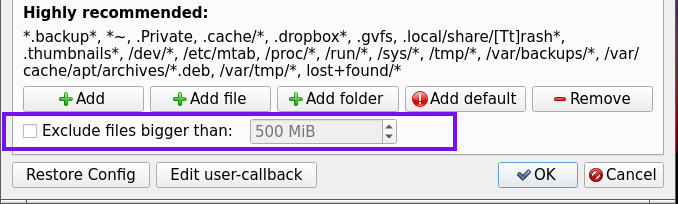 Auto-remove Tab The Auto-remove feature offers fine-grained control of your snapshots. You can remove backups automatically, based on their age and the amount of free / available storage space. The defaults are satisfactory for my needs, so I left them all unchanged: 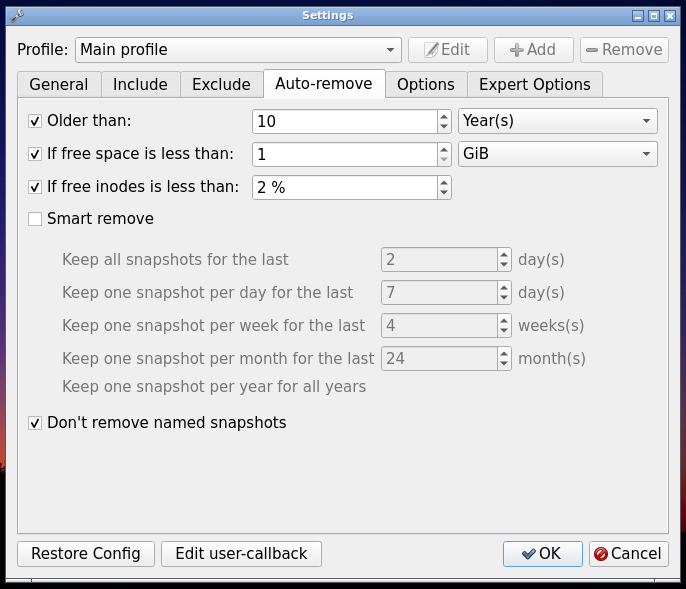 Options Tab This provides an opportunity for further customization, although the defaults are fine for most users. One option which laptop users might appreciate is: Disable snapshots when on battery: 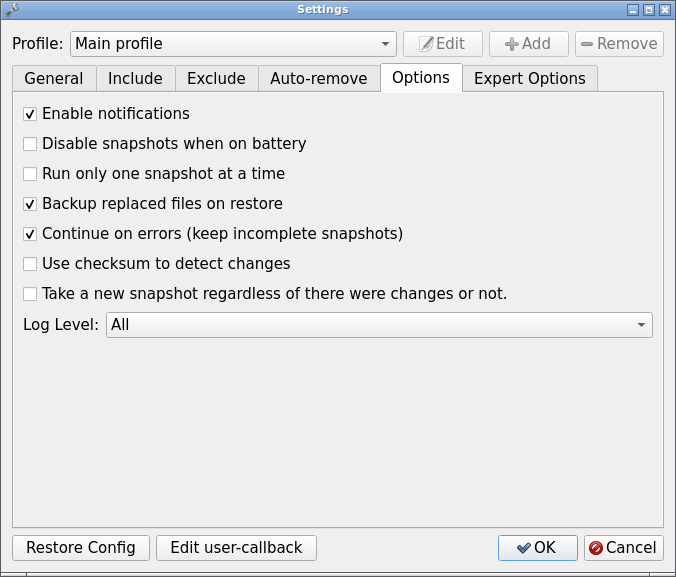 Expert Options Tab This tab has an ominous, boldfaced warning: Change these options only if you really know what you are doing! Therefore I did no tinkering and accepted all the default settings: 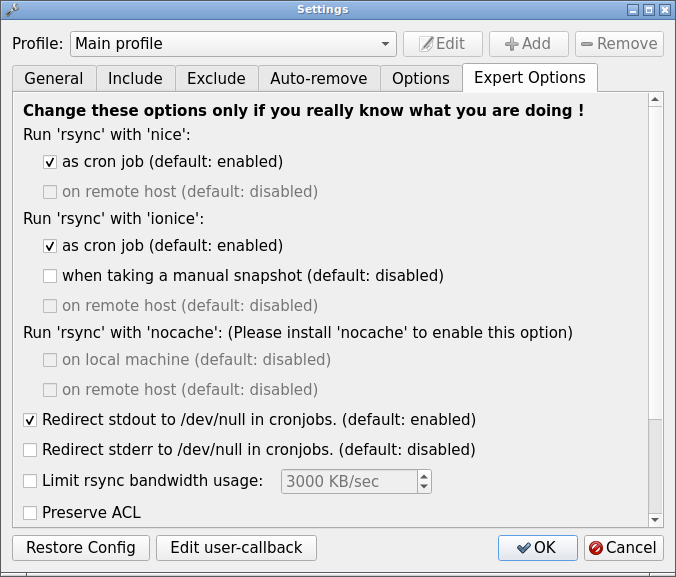 Congratulations! The main configuration of BiT is now done. The next step is to take an actual snapshot. Take a Snapshot Click OK in the Settings dialog (lower right corner) to finalize your configuration. This will launch the main BiT window: 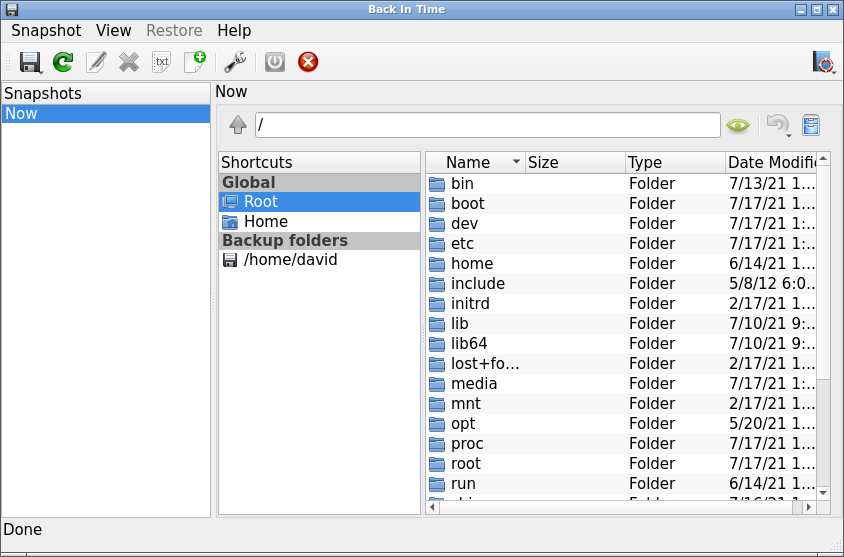 Click on the floppy disk icon to take a snapshot: 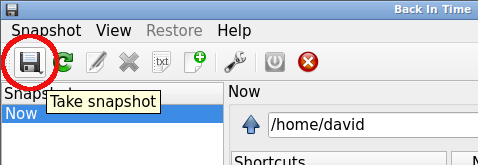 Note: The first backup will most likely take a while ... This is normal, so please wait patiently. Subsequent backups happen more quickly because they are incremental, i.e., BiT only saves files which have changed since the previous backup. When the backup finishes, you will see two entries under the (left-hand) Snapshots column: one is labeled Now; the other is a time-stamped snapshot (i.e., the backup). Now is a live view of the local file system; it shows exactly the same files that you would see in your DE's file manager (Dolphin, Caja, Thunar, PCManFM-Qt, etc.): 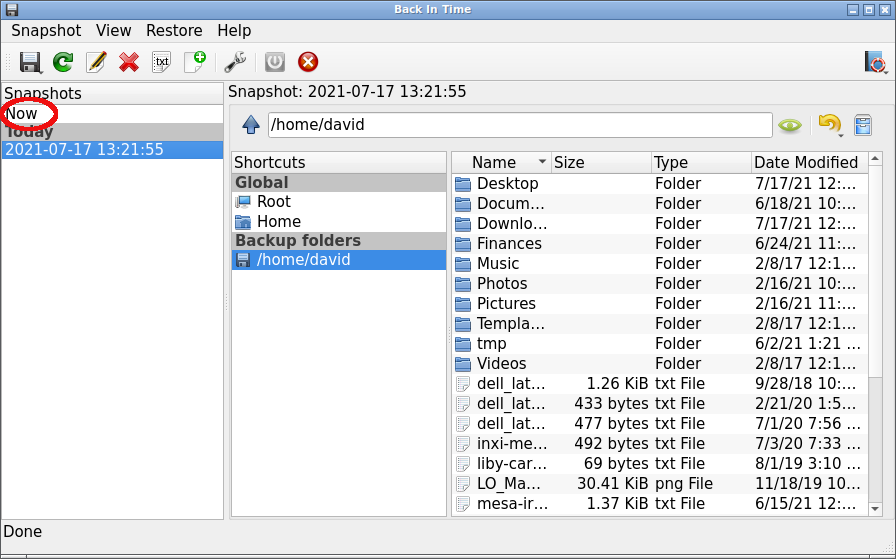 The Timeline lists the backup snapshots which have been taken: 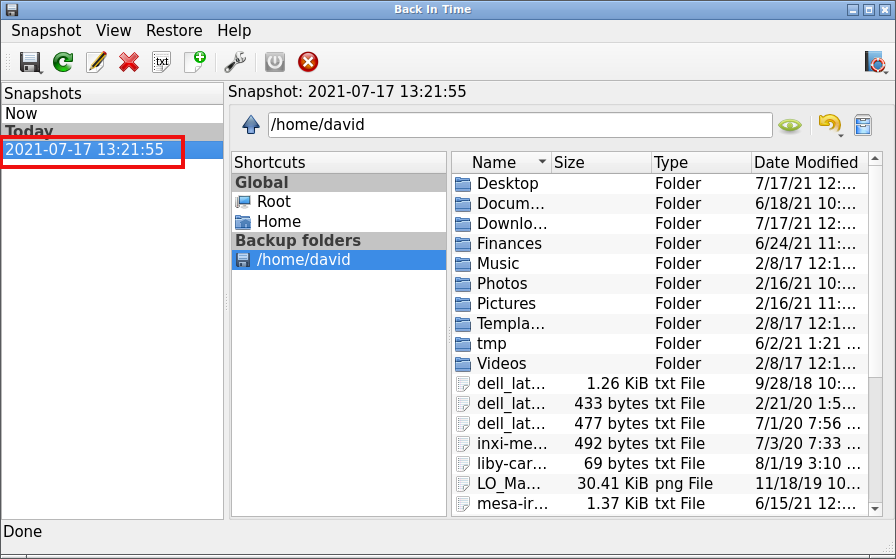 After its first run, BiT creates a backintime folder on your backup medium: 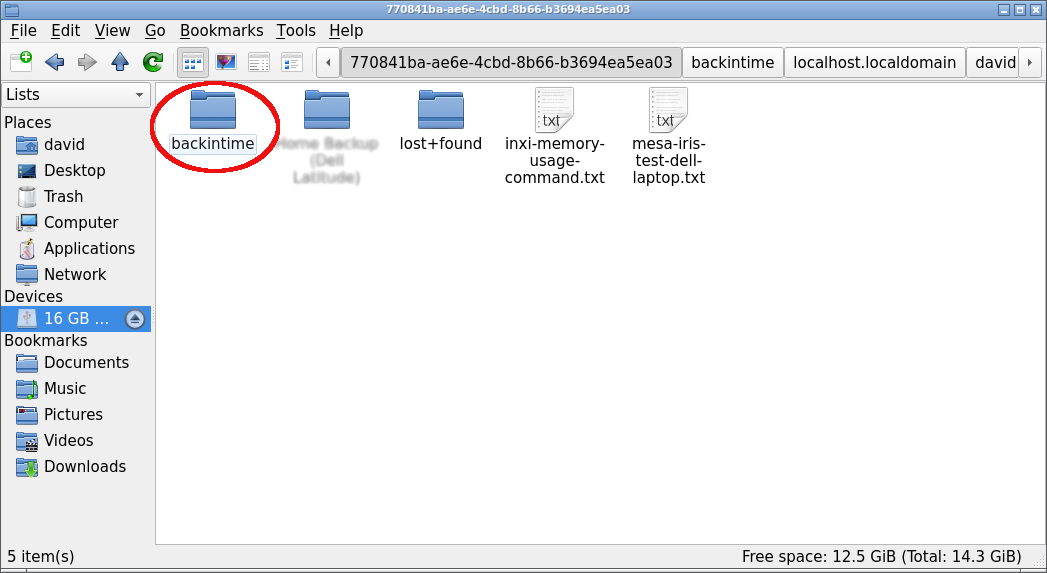 Restoring Back In Time stores its backups in plain text. This enables the restoration of files without using BiT, if necessary. Backup snapshots are stored as files and folders, so you can browse them directly. If your backup is on an external HD, you can connect it to another Linux PC, and access your files without converting them or extracting anything. File ownership, group and permissions are stored in a separate, compressed plain text file named fileinfo.bz2. 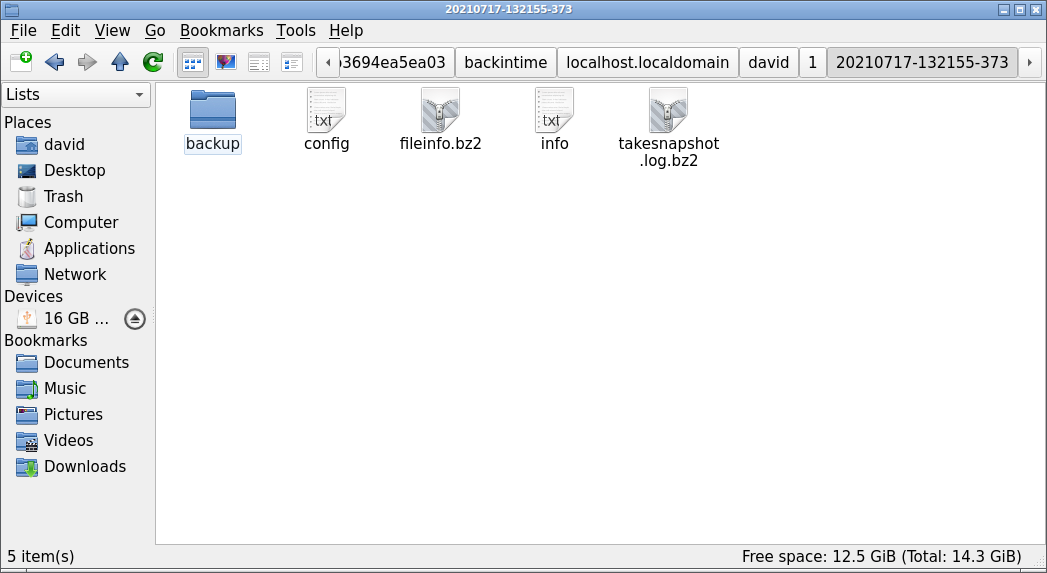 Back In Time can restore files either at the individual level, or at the folder / directory level. Restore Individual File(s) There is no substitute for seeing BiT's Restore feature in action, to fully appreciate it. I provide links to two video tutorials (with timestamps) in the "Additional Resources" section below; they include brief demonstrations of file restoration. However, the general procedure works thusly: select the snapshot date; browse through the backup's folders; find the file you want to recover; select it; and click the Restore button. As an example / test, I deleted a file from my current Documents folder: a recipe booklet named ADP_recipe_bk_full.pdf. I know that file exists in my backup snapshot of 2021-07-17, so I highlighted / selected the snapshot in BiT's main window. I navigated to my (backup) Documents folder and selected it. Next, I found the recipe booklet's file and clicked to select it. I right-clicked and chose the Restore option: 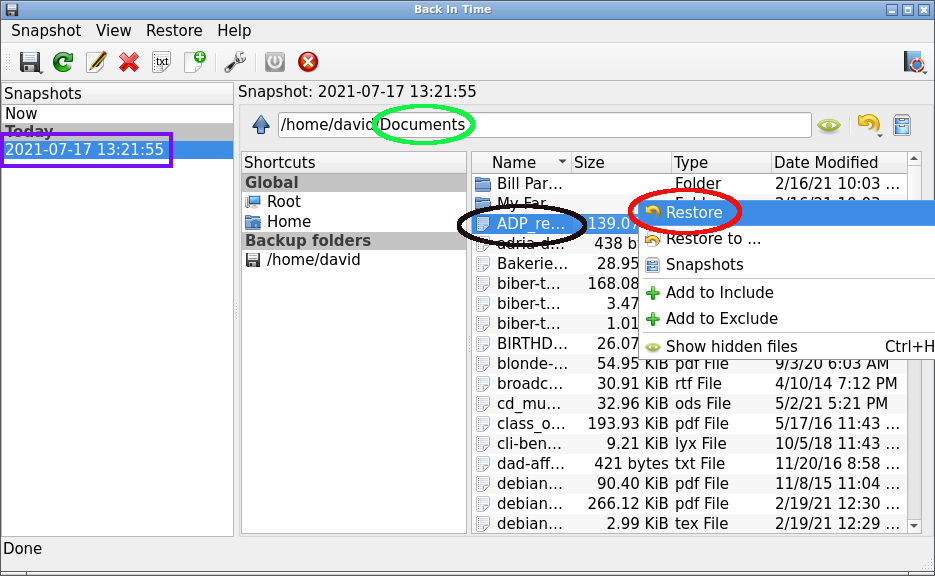 A pop-up dialog appeared, asking "Do you really want to restore this file?" In most cases, the first option (which is the default) is the best choice. 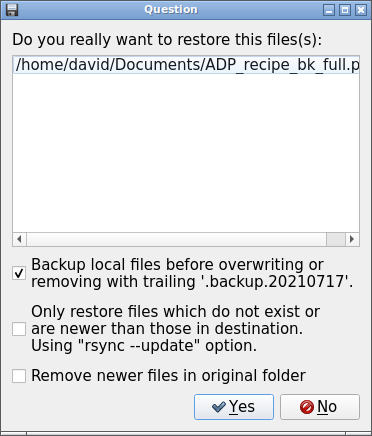 Then I clicked Yes to proceed. The Restore process ran while a pop-up window displayed log information. I clicked the Close button when the process finished. 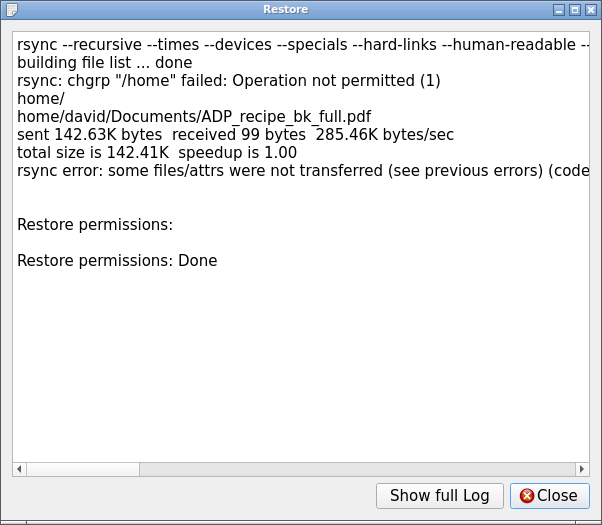 Voilà! When I rechecked my current Documents folder, the file had been magically restored: 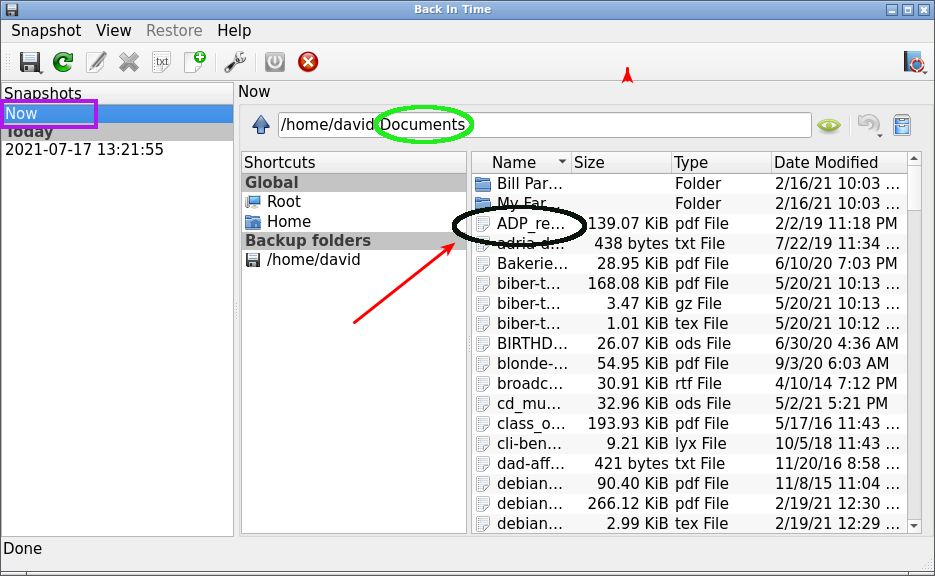 Exit Back In Time

Additional Resources If you would like to read more about Back In Time, you can consult the program's documentation here: https://backintime.readthedocs.io/en/latest/ Although the mechanics of using the application are not discussed, many of the configuration options are explained in detail. The most recent, thorough and beginner-friendly video tutorials I found on YouTube were created by EF-Linux (Ermanno Ferrari) and Optimal Cadence (Kirt): https://www.youtube.com/watch?v=Mnfz6gBFhi8 EF - Linux Made Simple. "Arch Linux post-install: Backup and restore your personal files with Back In Time." 1 Apr. 2020. (7 min., 26 sec.) The presenter actually starts working with Back In Time at 2:25. Although he is running Arch Linux, BiT's functionality is identical regardless of the distribution. An example of BiT's Restore feature is demonstrated from 5:38 until 6:05 of the video. >https://www.youtube.com/watch?v=nbly4RS_EZc Optimal Cadence. "Back up and restore Elementary OS and other Ubuntu distros using Timeshift and Back In Time." 15 Feb. 2020. (31 min., 39 sec.) The host begins discussing Back In Time at 5:02 and continues until 14:45. He shows how to perform a BiT Restore in user mode from 22:04 until 24:03. In conclusion, Back In Time is a great tool for helping you establish a backup routine. According to World Backup Day's website2 and other online sources, losing your files is more common than you might think. Considering that 60 million computers will fail this year, and 30% of people have never backed up, it's not a question of "if" you're going to lose your data, but "when." A word to the wise is enough -- Happy Backing Up with BiT! 
1 Germar Reitze, now the primary developer of BiT, is also an architect. He designed the "Zyklus" ('Cycle') water feature for the courtyard of the German Children's Hospice Association (Deutscher Kinderhospizverein) in Olpe, Germany. The water's course can be changed using sliders, thus symbolizing that life -- like water -- sometimes takes a different path yet still continues to flow. Some photos of the fountain can be seen at: https://www.deutsche-kinderhospizstiftung.de/ueber-uns/historie 2 World Backup Day highlights the importance of data protection through backups. The geeky holiday is celebrated each year on March 31st. The original idea -- from a couple of concerned Reddit users in 2011 -- was a humorous reference to April Fool's Day. (If you don't want data loss to make you look like an April fool, you need to create regular backups [by March 31]). |