| Previous
Page |
PCLinuxOS
Magazine |
PCLinuxOS |
Article List |
Disclaimer |
Next Page |
GIMP Tutorial: Create A Bokeh Effect |
|
by Meemaw When I search for tutorials, I always find something from a different site than I have seen before. Starlight86 does tutorials as well, and posts them on his blog. He has done a tutorial for a bokeh effect in GIMP and it looks fun. He has a brush that he created to do the effect, so I went to Deviant Art and downloaded it (you have to sign on to get it - here's the link). I also noticed that this was a Photoshop project that he tested to see if it would work in GIMP. OK. Open GIMP and start with a black rectangle the size you want it. He used 1600 x 1200 px, but I'm using 800 x 600 on this one. The next thing you want to do is add a transparent layer, then fill it with a radial gradient. Make your foreground purple and your background black, then choose FG to BG. Lower your Opacity to 50 and offset your gradient a little.  Now we're going to add a transparent layer. Change your foreground color to white and use the brush. Change it to the Bokeh brush and make a few Bokeh circles on the layer in different sizes. Click on Filters > Blur > Gaussian Blur. Your setting for this layer should be 4.50 at least (using the newer tools). We're going to do this two more times and you want some to look like they are farther away. This is one where you use your own judgment.  (without the blur)  (with the blur) You want to make two more layers of brush strokes, each with less blur. I used 2.50 on the second, and 0.50 on the third.  Create a new white layer. Click on Render > Noise > Difference Clouds (it is an older tool that used to be in Render > Clouds). Use these settings:  After it is applied, go to the layers settings and change the Mode to Overlay. It should now look like this:  There is a bit of difference, but it looks sort of like it did before and not how the clouds settings window looks. Now, create a new transparent layer (I named mine Gradient2). Choose your Gradient tool and use a linear, multi-color gradient. Make sure the Opacity is 100. After you apply the gradient, go and change the Layer Mode to Overlay. Go to your top Bokeh layer and change the layer mode to Grain Merge. Then go to your 2nd Bokeh layer and change the layer mode to Hard Light (I didn't see much of a difference on the 2nd one but you might). You can export it now. I hope yours turns out kind of like this.  It'll change depending on the gradient you use. I did three.  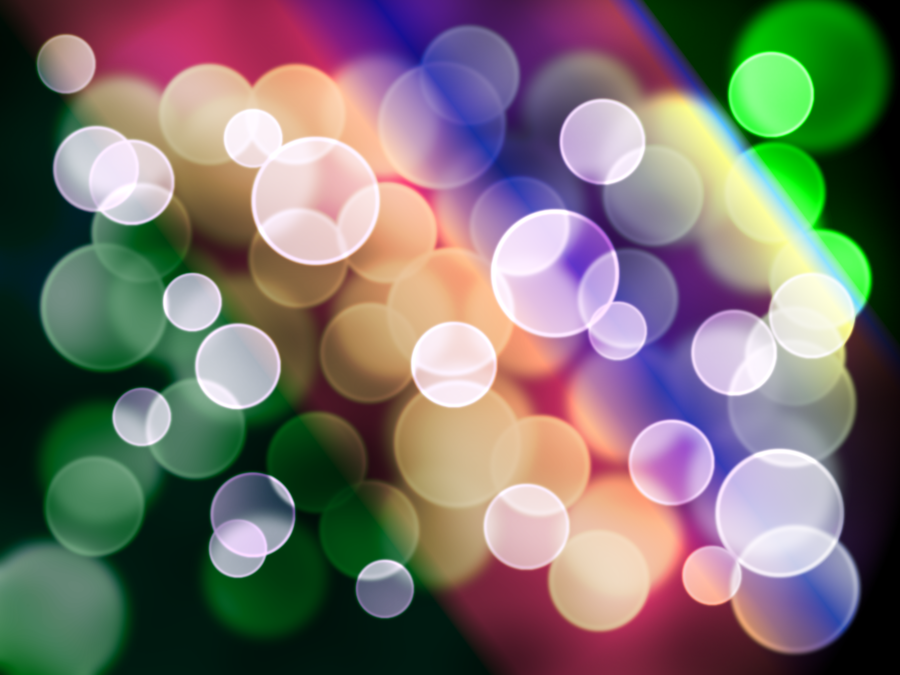
|