| Previous
Page |
PCLinuxOS
Magazine |
PCLinuxOS |
Article List |
Disclaimer |
Next Page |
Art Project In GIMP 2022 |
|
by tuxlink Recently, in the 'Camera Talk' section of the forum, TheCrankyZombie posted a great photo of the full 'Sturgeon' Moon. It had lots of great sharp detail, and most importantly, it was huge in the frame. If you'd like to see and save it, you can find it right here: https://www.pclinuxos.com/forum/index.php/topic,152772.msg1363205.html#msg1363205 Seeing this wonderful shot, and with his generous permission, it gave me an idea for a wallpaper to use on my desktop. I started to think if the moon was in the background, what graphical item would I most like to capture in a silhouette if I was behind the viewfinder of the lens and camera. A bird, a plane, or maybe something natural like trees or animals. This got my inspiration going, so I decided to go look for some silhouettes online. There are plenty of pieces of clip-art available for use online. Steer clear of anything copyrighted, and look for pieces that clearly state for 'free' or 'personal use' only. I decided a wolf howling at the moon would be a nice touch. So after typing in 'free wolf clip-art silhouette' at Google's Image search bar, I found a site with a few silhouettes that would work well for what I had in mind, and saved some. You can, of course, pick whatever subject you like as a central figure. In fact, I think I'll add a few Pine trees to our project also. So, a quick visit back to www.Clipart-library.com for some pine trees would yield a few nice choices. Before we start in Gimp, I'd like to encourage you to keep all the elements for this project in one folder. That way, as you search, save and use, you'll only have to deal with one location. When the project is finished, it's an easy matter to drop and save this folder into your online cloud location as well as your local hard drive, whether it's PCLOSCloud, Dropbox, MEGAsync, Google Drive etc.... All the images used in this project can be downloaded and used from here. http://mypics.findmoore.net/?cmd=gallery&u=tuxlink&g=MoonProject2022 I like listening to music when working in Gimp. Here's links to three 'Moon' themed songs you can listen to while working on this project. Enjoy!
https://www.youtube.com/watch?v=zUQiUFZ5RDw Let's Get Started! Let's fire up Gimp, and get things started. First, you're going to open the full moon image. After we open the moon shot, then open the file wolf1.png. This file has a white background that we do not need in our silhouette, so, using the Fuzzy Select Tool (or magic wand), click once on the black area only. Now that it's selected, open the 'Edit' menu and choose 'copy' or hit Ctrl+C. Next, go back to and click on the moon image you opened earlier. Open the 'edit' menu again and this time choose 'paste as new layer'. When the wolf shows up, select the 'Move' tool, then click on it to move it where you'd like it to be. 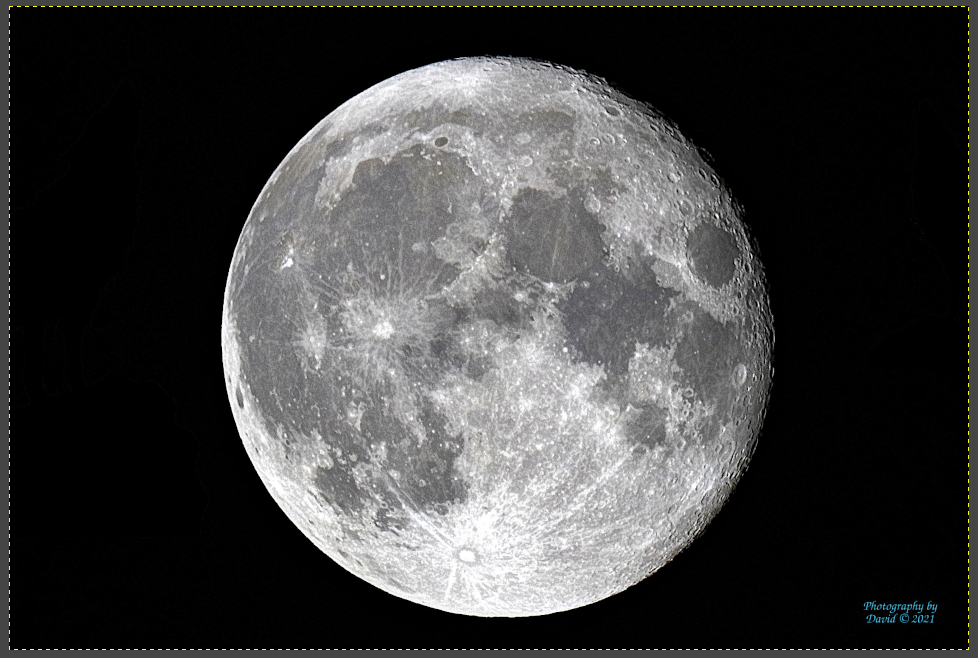 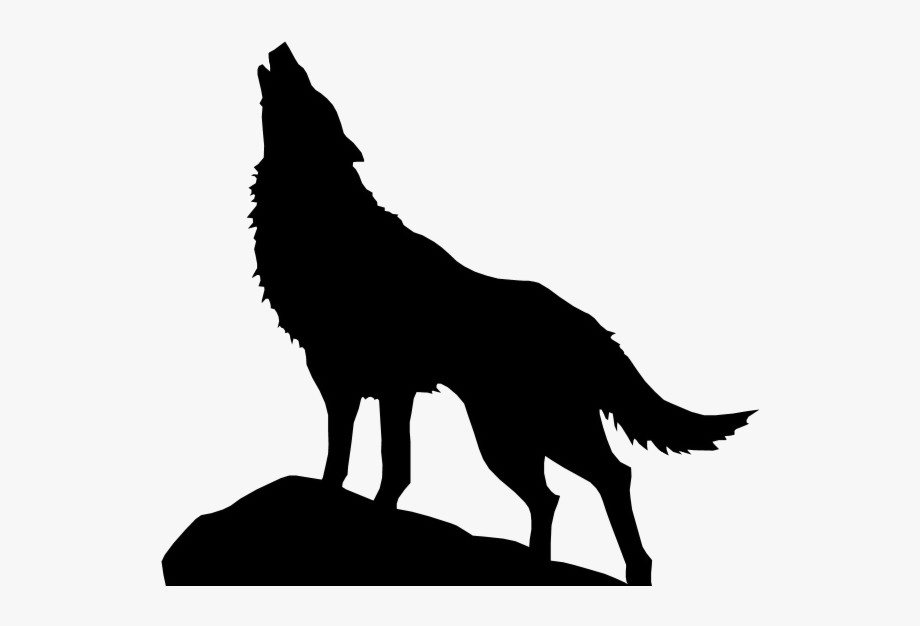 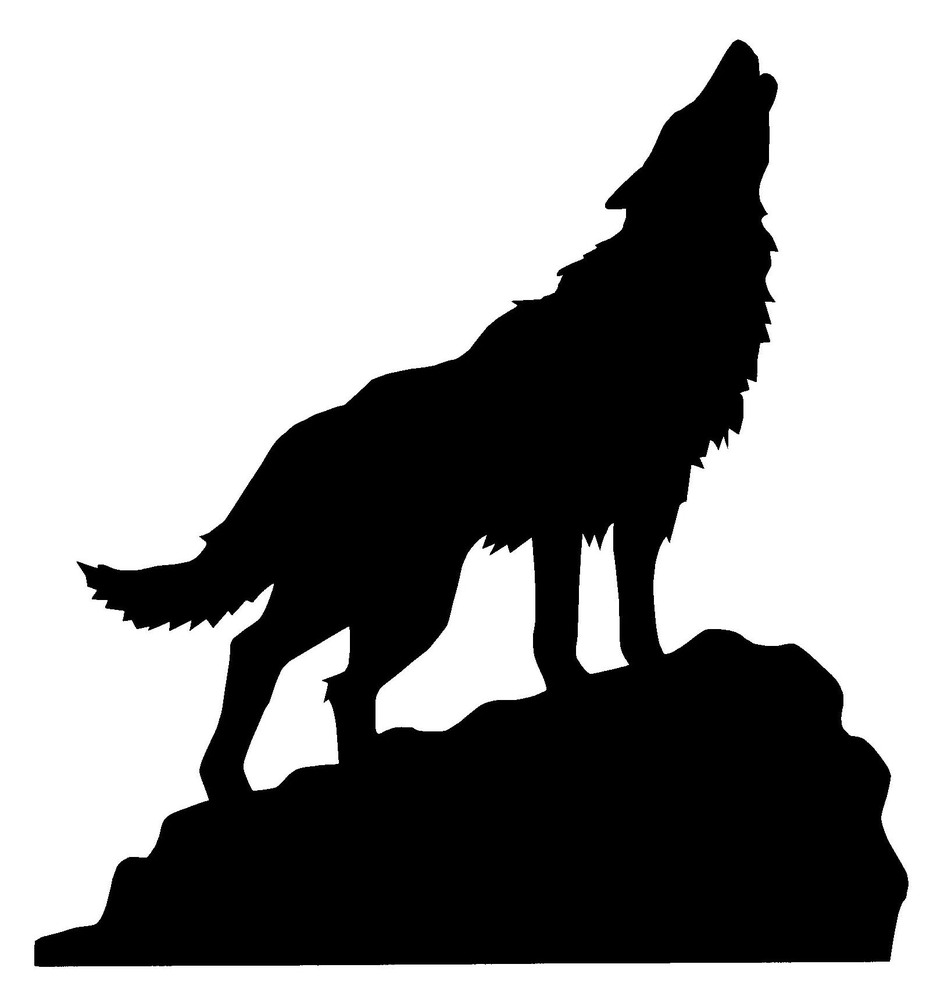 Next, go back to the project folder and open the file wolf2.png. Do the same thing again, using the Fuzzy Select Tool to select only the black area and copy and paste it into the moon image as well. Now, the first thing we see here is that both wolf images are a tad too big for what I had in mind. So, using the Scale Tool, which is found in the 'Transform' group of tools, select the wolf image over in the 'Layers' palette, then click on the image, grab it at the corner and push it inwards. Resize the image to the size you need, then hit the word 'Scale' to make it happen. Do the same thing for the second wolf image if it's not the correct size. We're going to place the wolves on the moon background loosely for the time being. After we choose and place some pine trees, we will finalize where everything will end up. 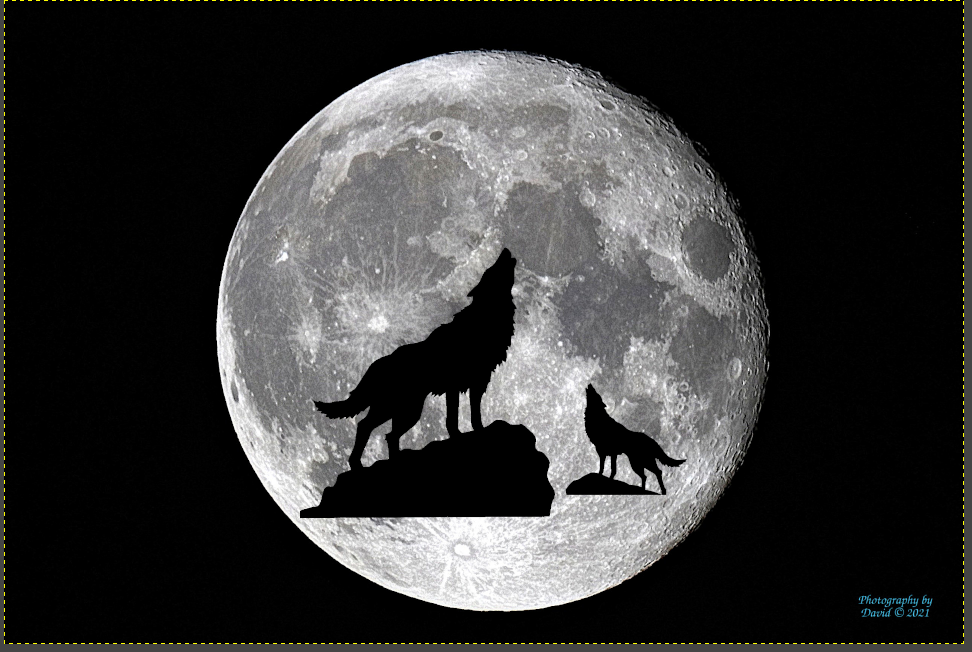 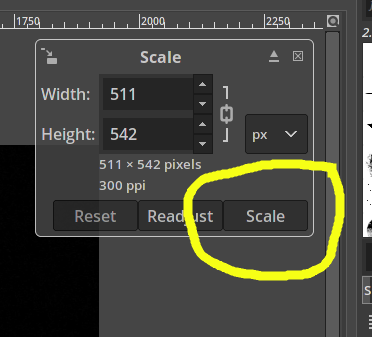 Now, for our trees. Open the file pine1.png and place it on the left or right side of the moon. Clearly this tree is far too big for our needs, so using the 'Scale' tool again, first click on the tree item in the 'Layers' palette, and reduce its size as we did with the wolf images. One good feature to using silhouettes, is that any item may be 'flipped' if the direction it arrived in is not working. Once again, open and choose the pine3.png file, and after sizing it, place it where it looks best.  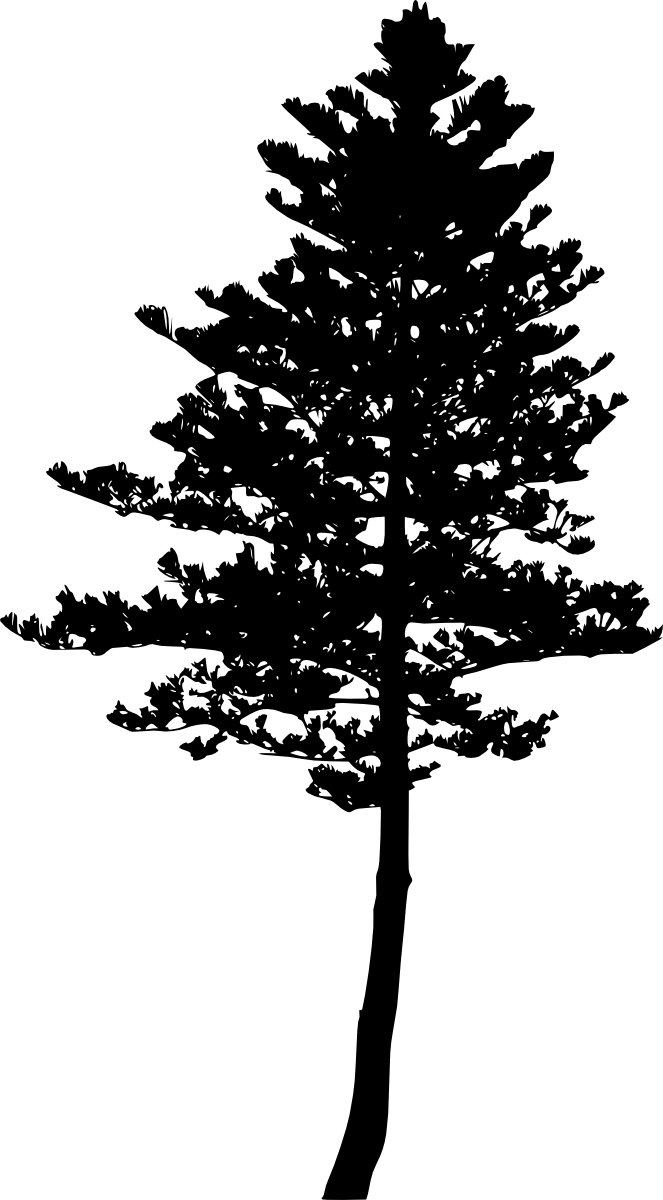 Next, we are going to fill in the remainder of the bottom area that shows the moon. Make sure you have the bottom level layer of the moon only selected before you start. Using the Brush Tool, select a large hard edged brush and start filling in the portion of the moon we don't want to see. You will have the color on the brush selected as black, and you will be painting on the background image of the moon. If you make a mistake, just open the 'Edit' menu and choose 'Undo' as many times as you need.  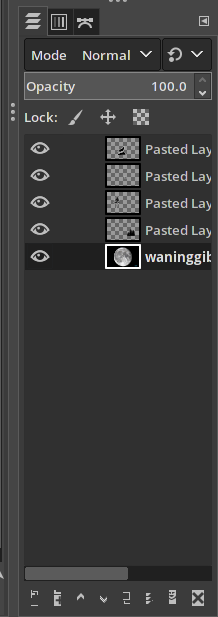 Actually, what I ended up doing was creating a bridge with the Brush Tool. Just use the brush to shape the bridge. The brush has a round shape, so use that to create a bridge under the wolves. It helps here to get in close, so you can make sure to place the brush as accurately as you can. I like to use the 'Magnify' Tool to draw a box over the area in question, and then you can zoom in and place the brush exactly where you need it. 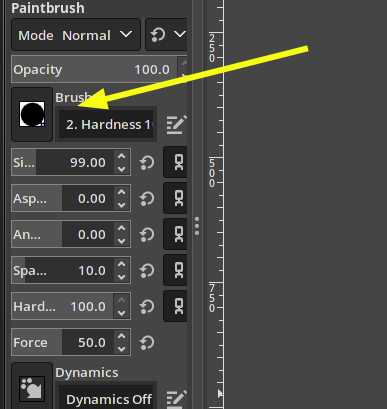 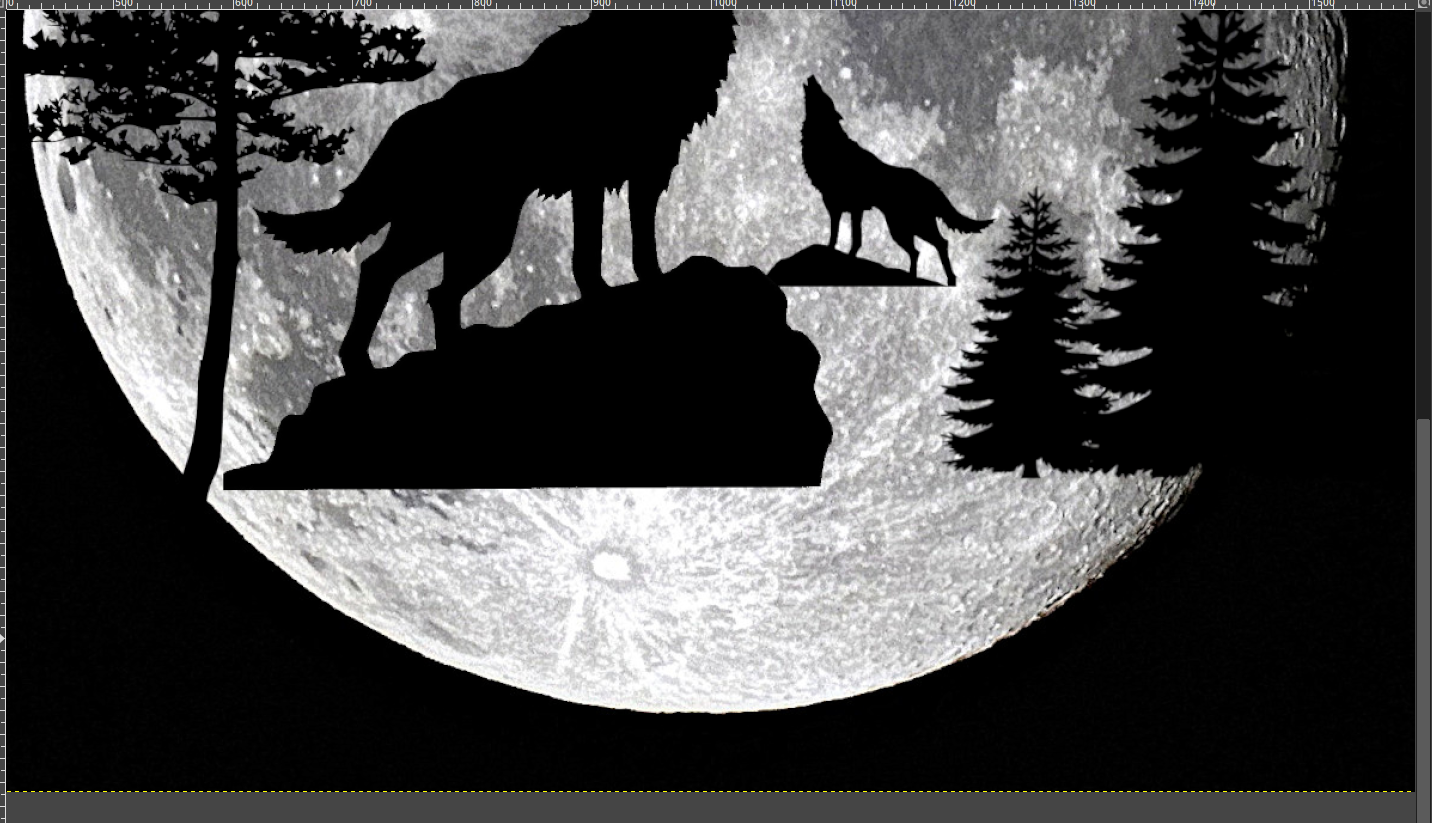 After you've finished and are happy with the final positioning of all elements, make sure to open the File menu and use 'Save As' and save the finished image in Gimp's native format filename.xcf. This way, in the future should you need to revisit this project, you can open it up and add or move the elements around again. Once more, I would suggest you save this file to the project folder. This file is for archival purposes only. The next step will be to make a duplicate, and change the final format extension.   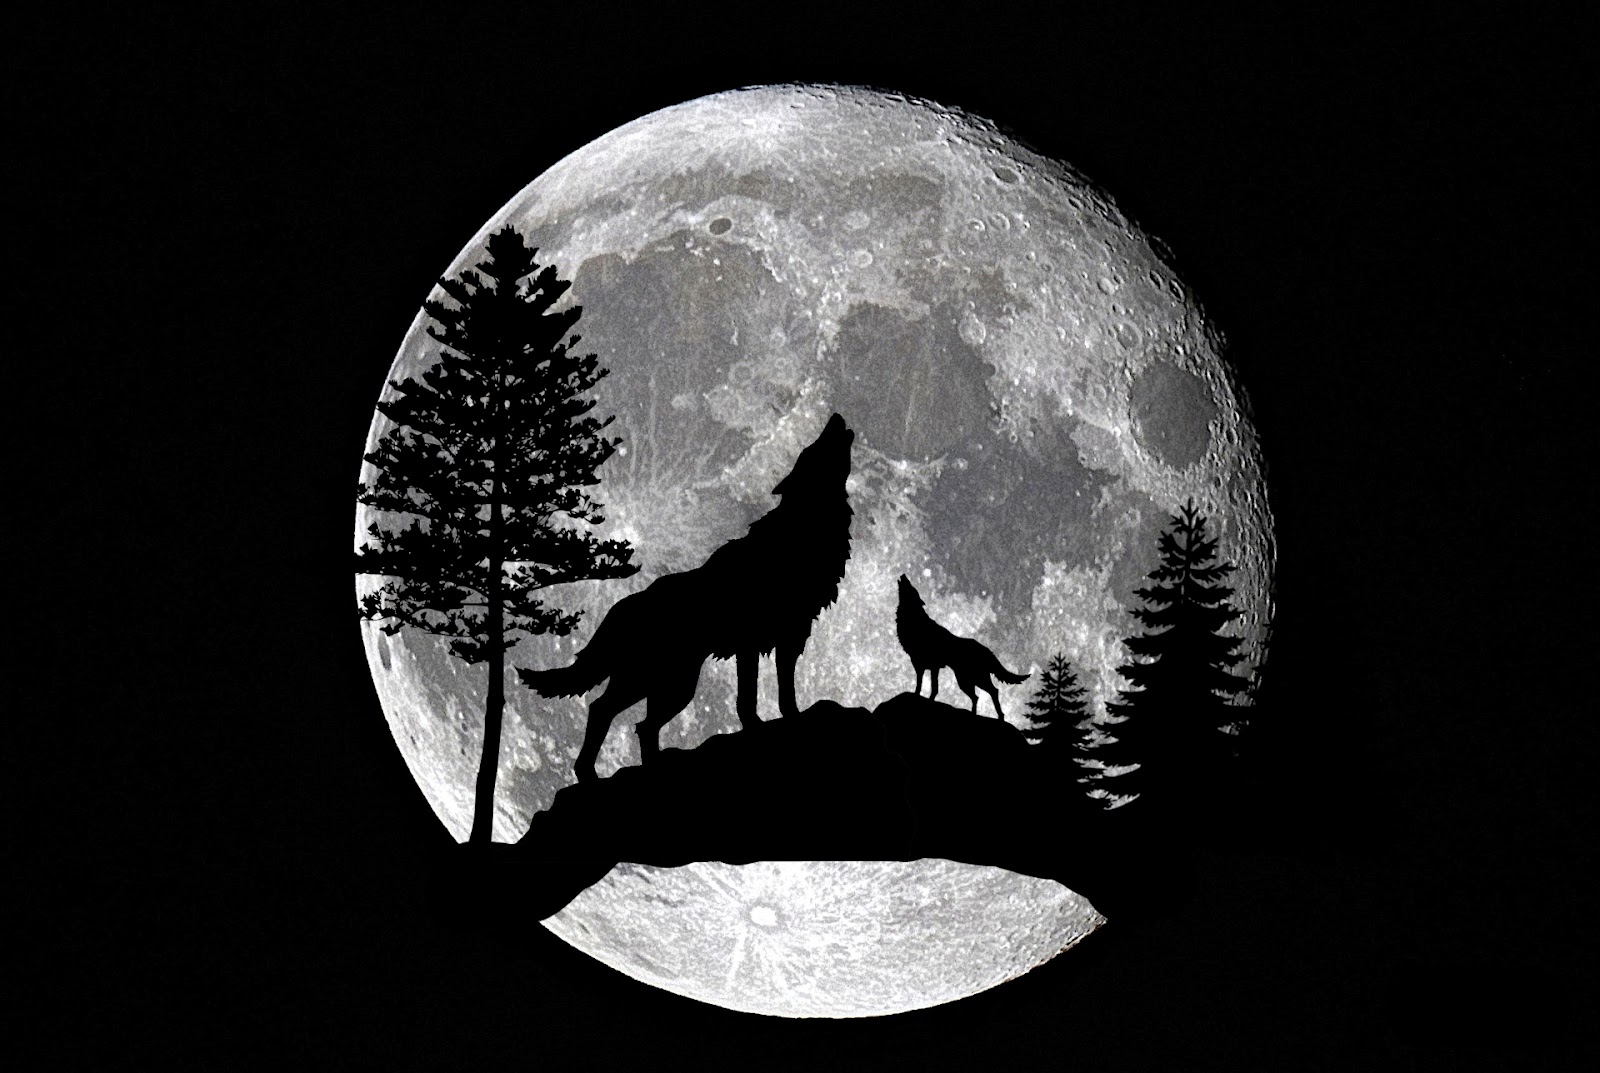 Before you save the final image, the original Moon photo comes with CrankyZombie's signature and year on it in light blue on the lower right side. Whether you want to keep or remove this, the choice is yours, now would be the time to paint over it with the brush. After the next step, if you need to change something, you will have to go back to the .xcf file and do it there. The final step is to open the 'Image' menu and choose 'Flatten Image'. This will lock in all the layers and allow you to save the file in a usable format for use elsewhere. 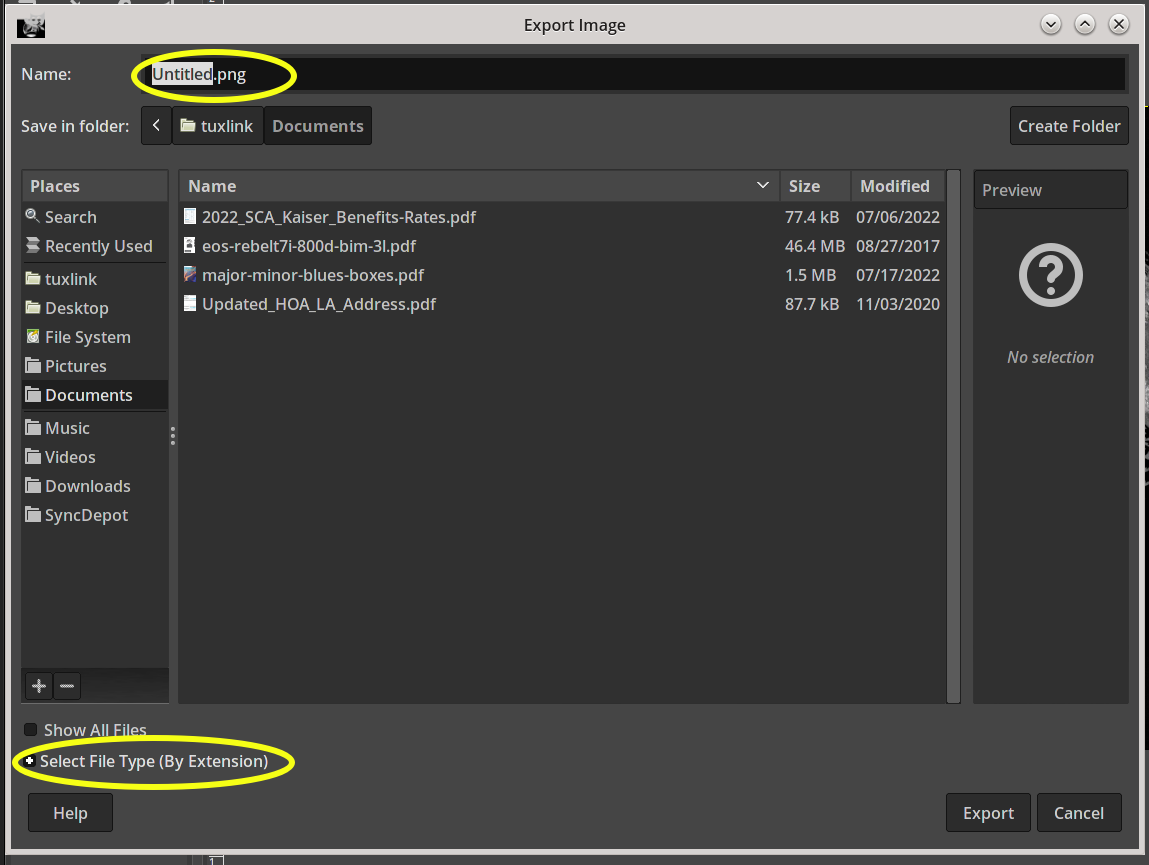 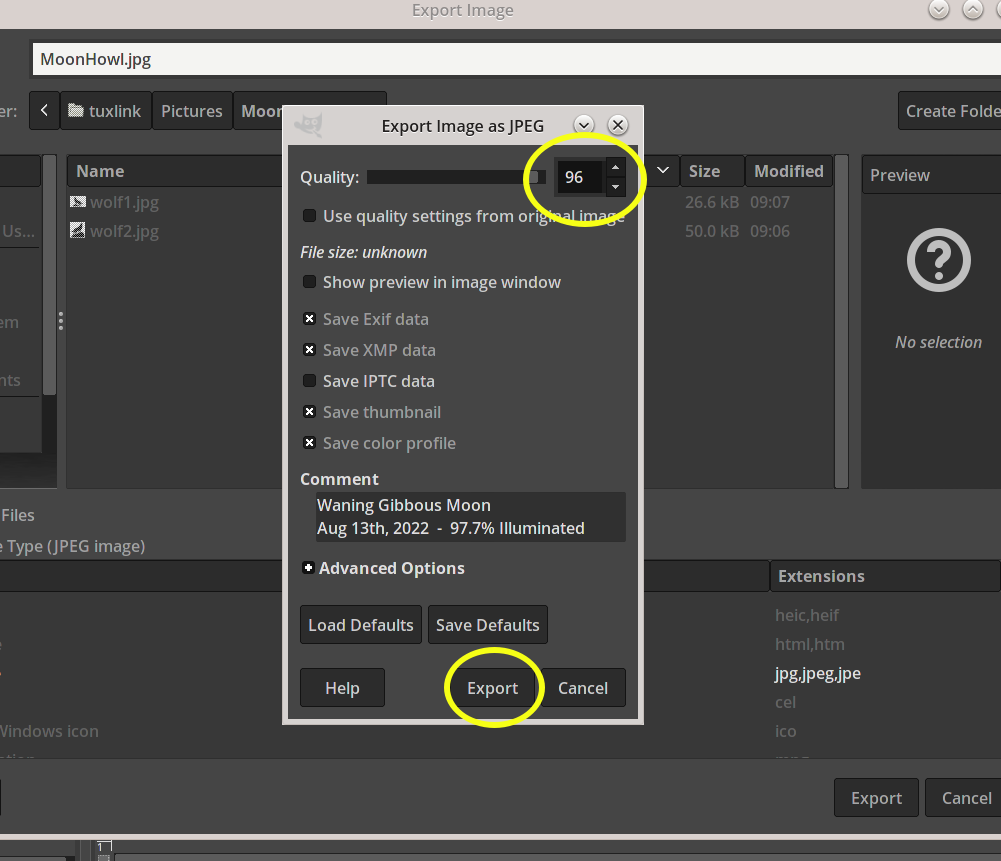 Open the 'File' menu, choose 'Export As......' In the dialog box, set the extension to .jpg, and then fill in a unique name for the final file that makes it easy to remember and find. When the next dialog opens, choose the quality level for the file. Here I chose 96. That should yield a decent quality image for the extension used. (JPG) Now you can display your new creation on your desktop. A big thank you to TheCrankyZombie for allowing use of the original Full Moon image. The clip-art used in this project came from www.clipart-library.com. |