Chapter 9 - Internet E-mail
Published by the United Nations Development Programme's Asia-Pacific Development Information Programme (UNDP-APDIP)
Kuala Lumpur, Malaysia
Web: http://www.apdip.net
Email: info@apdip.net
© UNDP-APDIP 2004
The material in this guide may be reproduced, republished and incorporated into further works provided acknowledgment is given to UNDP-APDIP.
This work is licensed under the Creative Commons Attribution License. To view a copy of this license, visit http://creativecommons.org/licenses/by/2.0 or send a letter to Creative Commons, 559 Nathan Abbott Way, Stanford, California 94305, USA.
This guide has been modified by Papawoob to reflect the Linux distribution of PCLinuxOS 2007.
Internet e-mail has become one of the most popular applications on the Internet. An Internet experience is not complete without the usage of e-mail. In this chapter we shall be describing two commonly used e-mail software: Kmail and Mozilla Thunderbird.
Email Requirements
There are two main types of Internet email systems: webmail and POP3. Webmail, as the name implies, makes use of a web browser to read, compose, send, and manage your mail. POP3 e-mail makes use of a POP3 email client to download your email from a server housing your email mailbox. The main difference between a webmail system and a POP3 e-mail system is that for the former, generally, you have to be online to the server housing your mailbox to access and manage your mail. For the POP3 system, you need to be online to the server only to download your mail, after that you can go offline to read, reply and manage your local mail storage. You only need to go online again when you want to send out your e-mail.
In addition to having a webmail account somewhere on the Internet, webmail needs only a web browser and Internet access to work. Examples of popular webmail services are those from Yahoo and Hotmail. Most ISPs also offer webmail services in addition to their traditional POP3 e-mail services.
To use POP3 email you will need to have a POP3 email client software running on your computer. Linux has many different email programs which support POP3 email. In addition, you will also need to know the name of the server on which your POP3 mailbox is located (the POP3 server), as well as the name of the server which allows you to send out (relay) mail through it (the SMTP server).
Note: Of course you will need to know your Internet email address irrespective of whether you are using webmail or POP3 e-mail!
Since the usage of webmail involves using your browser mainly, all you have to do is go to the website of your e-mail provider (ex. Yahoo.com) and after logging in, click on the mail tab. Next, we will be looking at the POP3 setup and usage of KMail and Mozilla Mail.
KMail
KMail can be launched from the Main Menu:
Main menu -> Internet -> Mail -> KMail
Invoking KMail for the first time will bring up a dialog box that informs you that this is the first time you have used Kmail and asks if you would like to set up your e-mail account.
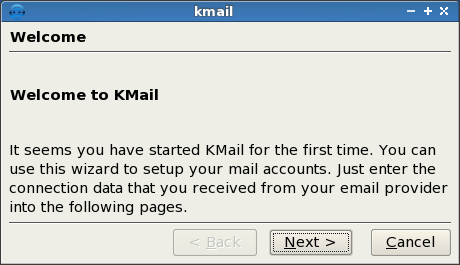
Fig. Kmail Welcome
If you click "Next", a new dialog box will appear. This box contains five choices that represent the different types of mail accounts that you would be likely to use with Kmail. Since most people use POP3 we will cover setting this choice up.

Fig. Account Type
Highlight "POP3" by left clicking once on it and then click "Next." This will bring up the next dialog box which will allow you to enter your account information.
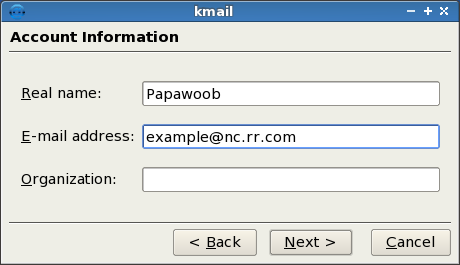
Fig. Account Information
In this dialog box you will enter the information needed for Kmail to identify the account that you wish to use to send and receive mail.
In the "Real name" box you should enter the name that you want to identify who you are when sending mail.
In the "E-mail address" box you need to type in the e-mail address that was provided by your ISP.
In the "Organization" box you can enter the name of your business, organization, or leave it blank if this is for use with your home computer. When you have finished entering your information click "Next." You will now see the Server Information dialog box.
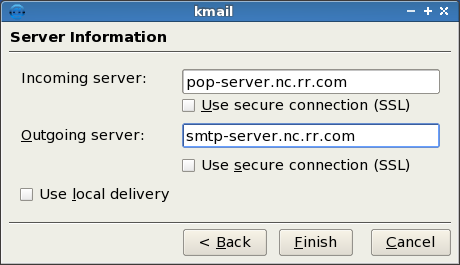
Fig. Server Information
In this box we will enter the names of the servers that will be sending and receiving your mail for you. Your ISP should have provided you this information so just type in the name of your POP server (this one retrieves your mail) and then your smtp server (this one delivers your mail.) If for some reason you would like to use a secure connection you can mark the box next to "Use secure connection (SSL)." This will require you to configure SSL which is beyond the scope of this article. When finished click Next.
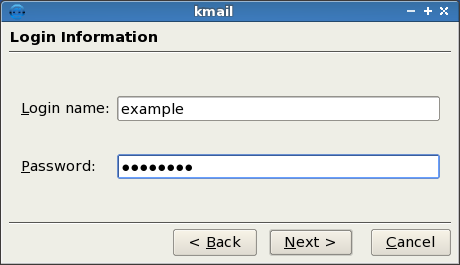
Fig. Login Information
As you can see from the figure above, our next dialog box is for your login information. You probably chose your own login name and password, and your ISP approved it, so you should have this information at hand. Go ahead and enter your login name first and then your password. Kmail will use this information to gain access to your ISP´s pop-server to bring your mail to your computer and also to send your mail through your ISP´s smtp-server. Once this information is entered, click next, and you should see Kmail main screen as seen below:
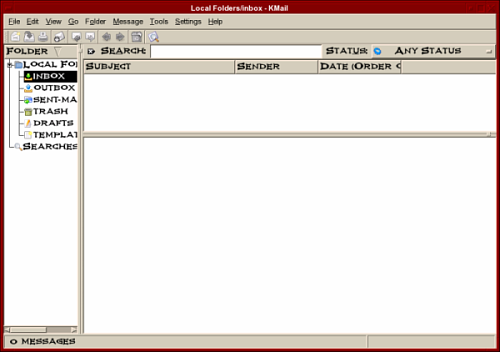
Fig. Kmail Main Window
Optionally, once you have reached the main window you can use "Configure Kmail" to modify almost every aspect of Kmail. You can find it by clicking on "Settings" in the toolbar at the top of the window.
Receiving Mail
To receive your mail you can click on the "Check Mail In" button. It is the fourth button from the left, on the second toolbar as seen below:
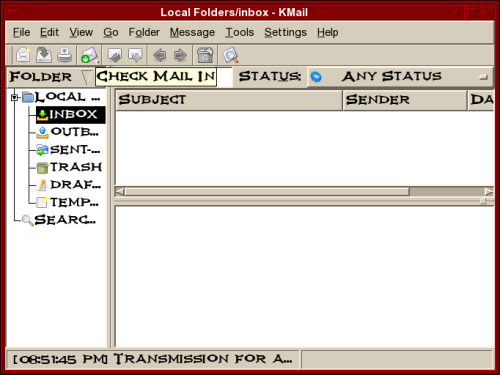
Fig. Receiving Mail
If you would like Kmail to fetch your mail automatically each time you open it, you will have to go to:
Settings ->Configure Kmail
and then click on the "Accounts" tab as seen below:
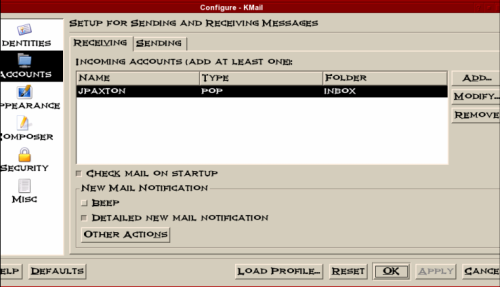
Fig. Receiving Mail 1
Once you have reached this window simply click on the box to the left of "Check Mail On Startup" and then click "Apply." Clicking on OK will close this window and the next time you open Kmail, your mail will show up automatically.
Only a very brief description of the functionalities and features of KMail are given here. The user should refer to the Help button on the menu bar for more details.
Inbox Folder
The Inbox houses the email sent to you which you have downloaded from the POP3 server. To see what is in your Inbox click on the Inbox icon. If you have emails in your Inbox, they will be displayed here. To read an email select it by clicking on it in the Subject Window.
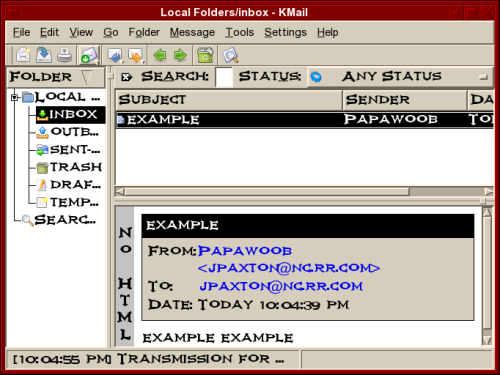
Fig. KMail Inbox
Composing Emails
To compose an email, from the Inbox screen, click on the New button.
Enter the email address of the recipient as well as the subject. The latter should be a few words describing the contents of the mail, but it should also not be too long. If you need to CC the mail to another email address, click on the View button on the top Menu bar and select CC field which will be displayed. After composing the email, you can send it.
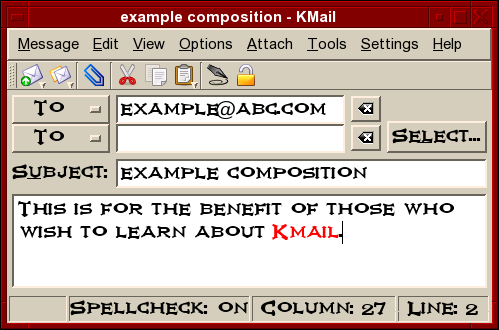
Fig. KMail Composing Email
Offline Mode
If you are on a dial-up connection, it is very likely that you will want to compose all the emails that you want to send offline first before actually going online to send them. To do this, click on the File item on the menu bar at the top and select "Work Offline"
File -> Work Offline
(if the File menu shows the item Work Online then it means that you are already offline, i.e. It is a toggle between online mode and offline mode.)
In the offline mode, when you compose and send your mail they will not be sent out, but rather they are stored temporarily in your Outbox folder. You can send them off later after connecting to the Internet by selecting:
File -> Send queued messages
Sending and Receiving Emails
To send the emails you have composed, connect to the Internet first and then select Work Online from the File menu. Click on the Check Mail In button to receive mail, and click on the File -> Send Queued Message menu item in the menu bar. Unsent mail in your Outbox will be sent out and any incoming new mail will be placed in your Inbox.
Deleting Emails
Any mail deleted from your Inbox will be placed in the Trash folder. You should periodically empty the Trash by clicking on File from the menu bar and selecting Empty All Trash Folders. Alternatively, you can right click on Trash and choose Empty Trash.
Folders
Mail messages in KMail are organized in folders similar in concept to the File Manager. To view your KMail folders, click on them in the left side of KMail.
By default the following email folders are created under the Local Folders: Inbox, Outbox, Sent , Drafts and Trash. There is also a Templates folder. You can create a new folder by right-clicking on Local Folders, selecting New Folder and enter the Folder name. You can move and copy mail messages between folders by right-clicking on the message in the Subject Window and selecting "Move to Folder" or "Copy to Folder".
Mozilla Thunderbird
Mozilla Thunderbird has been around a few years now and has evolved into an awesome desktop e-mail application. Below are a few features from the Thunderbird website.
Advanced Folder Views
Thunderbird 2 offers a variety of ways for you to organize and display your folders, whether by favorites, recently viewed or folders containing unread messages. As always, you can also set up RSS and newsgroup folders to stay on top of news and your interests. Thunderbird 2 also allows you to maximize your message view pane by opting for a folder drop down menu instead of the traditional sidebar.
Message Tagging
Thunderbird 2 allows you to "tag" messages with descriptors such as "To Do" or "Done" or even create your own tags that are specific to your needs. Tags can be combined with saved searches and mail views to make it easier to organize email.
Message History Navigation
Thunderbird 2 offers message history navigation that allows you to click "forward" and "back" much like in your Web browser. You can now quickly toggle between messages and folder views.
Improved Search
Thunderbird 2 features a find as you type pane that speeds up searches within displayed messages. Thunderbird also offers quick search, which starts showing search results as soon as you start typing in search terms.
Stay Informed
Thunderbird 2 has been updated to provide more informative and relevant message alerts containing sender, subject and message text for newly arrived messages. Folders provide a pop up summarizing new messages in that folder.
Easy Access to Popular Web Mail Services
Thunderbird 2 makes it even easier to integrate and use various Web mail accounts from one inbox. Gmail and .Mac users can access their accounts in Thunderbird by simply providing their user names and passwords.
Phishing Protection
Thunderbird protects you from email scams which try to trick users into handing over personal and confidential information by indicating when a message is a potential phishing attempt. As a second line of defense, Thunderbird warns you when you click on a link which appears to be taking you to a different Web site than the one indicated by the URL in the message.
Cutting out the Junk
Mozilla has updated Thunderbird's popular junk mail folders to stay ahead of spam. Each email you receive passes through Thunderbird's leading-edge junk mail filters. Each time you mark messages as spam, Thunderbird "learns" and improves its filtering so you can spend more time reading the mail that matters. Thunderbird can also use your mail provider's spam filters to keep junk mail out of your inbox.
Open Source, More Secure
At the heart of Thunderbird is an open source development process driven by thousands of passionate, experienced developers and security experts spread all over the world. Our openness and active community of experts helps to ensure our products are more secure and updated quickly, while also enabling us to take advantage of the best third party security scanning and evaluation tools to further bolster overall security. Thunderbird's update system checks to see if you're running the latest version, and notifies you when a security update is available.
Outfit Your Inbox
Thunderbird users can increase Thunderbird's functionality and appearance using hundreds of add-ons. A Thunderbird add-on can let you manage contacts, place voice over IP calls, listen to music, and keep track of birthdates all from your inbox. You can even change the appearance of Thunderbird to suit your tastes.
Message Templates
Thunderbird 2 allows you to easily set up message templates to save you time - especially if you have to send the same mail message repeatedly.
Add-ons Manager for Extensions and Themes
The new Add-ons Manager improves the user interface for managing extensions and themes, making it even easier for you to customize Thunderbird 2. Install, uninstall, enable and disable your add-ons in a single place.
As you can see, Thunderbird has enough features to satisfy just about everyone. Now that you know a little about this wonderful application, lets move on to set it up. You can find Thunderbird by going to the menu.
Menu -> Internet -> Mail -> Mozilla Thunderbird
The first time you open Thunderbird you will see a window like the one below:
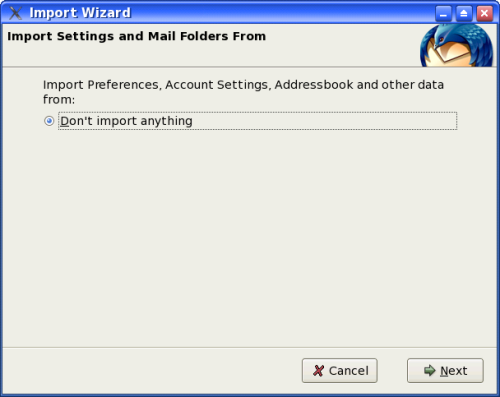
Fig. Import Wizard
In this window you can choose to import your mail, address book, preferences, and account settings from another e-mail client, if you have one. If Thunderbird detects any other e-mail clients it should list them in this window. Simply choose which one you want to import from and click Next.
If you chose one, the next window you would see would inform you if the importation was successful or not. If it was a success, then you would click Next. This will bring up the next window which looks like the one below:
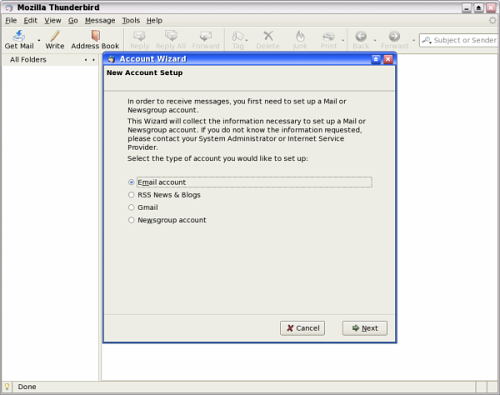
Fig. Account Wizard
The Account Wizard is where you can setup your e-mail account(s), RSS news feeds, Newsgroup accounts, and even use Thunderbird to manage your Gmail account locally. As we did in Kmail earlier, we will be setting up a POP3 e-mail account. If you need guidance setting up one of the other types of accounts there are plenty of answers in the "Help" tab located at the top of the window or at the Mozilla Thunderbird website. Choose "Email account" as in the figure above and then click Next.
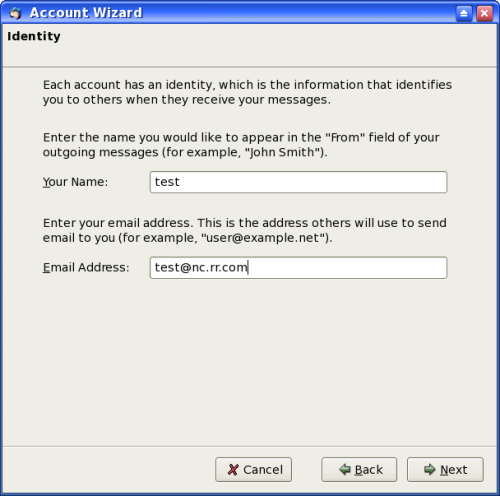
Fig. Identity
Our next window will be where we establish our identity. In the box next to "Your Name" you need to type in the name that you would like others to see when they receive mail from you. The next box is the one where you will enter your e-mail address. When you have finished, click Next.

Fig. Server Information
This next window is where you will enter names of the servers that will fetch (pop) and send (smtp) your mail. You should have received this information when you set up your ISP account. If not, you can ask your ISP for this information. Under "type of incoming server", click on "POP." In the box next to "Incoming Server" type in the name of your incoming server. This will usually be "pop-server" and then the address of your ISP.
Now we need to check the box next to "Use Global Inbox." Doing this will save your incoming mail on your harddrive which will allow you to work with your mail offline. This will be especially important to those of you on dialup connections. The last thing we need to do in this window is enter the name of your outgoing server. Type the name in the box next to "Outgoing Server." As with the pop-server above, the server name will usually be smtp-server and then the address of your ISP. When you have finished, click Next.
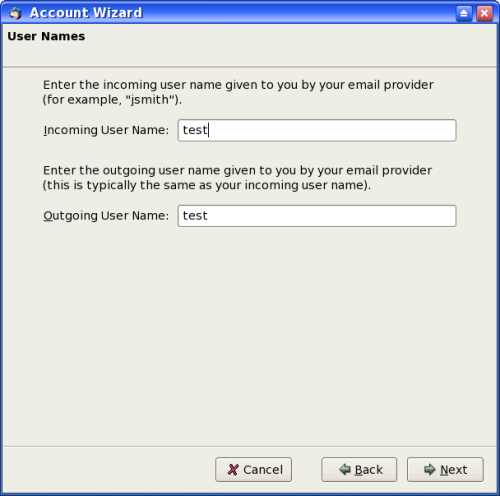
Fig. User Names
In this next window, as you can see above, you will need to enter your incoming and outgoing user names. In most cases these will be the same. After entering these, click Next.
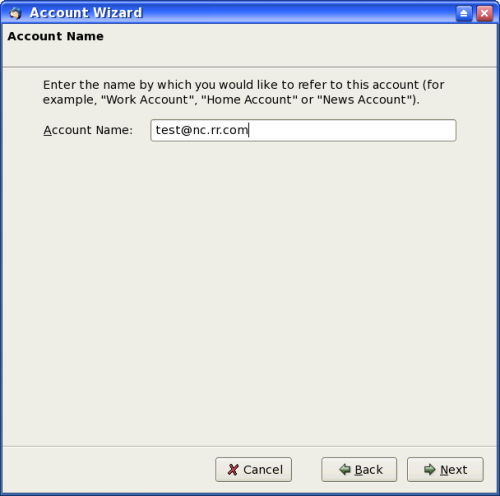
Fig. Account Name
In this window you need to name this account. As you can see in the window above, you can name it anything you like. For people who use different accounts for different aspects of their lives, this is where you can name it for whatever purpose you will use this e-mail address. After entering the name you prefer, click Next.
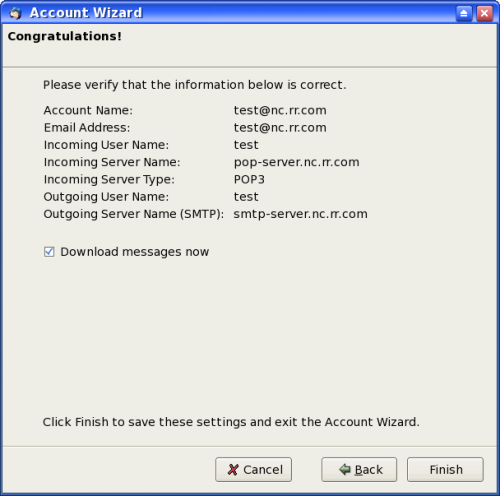
Fig. Congratulations
As the window above says, Congratulations! This page displays all of the information that you have entered in the last few windows. This is your opportunity to review the information and check for any errors. If everything looks good, go ahead and click Finish.
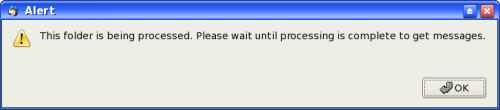
Fig. Processing
When you clicked Finish, the window above will appear and when the processing is finished it will ask you for your password. Enter your password and if you want to, check the box that will save your password. Press the Enter (Return) key on your keyboard and you will then receive any mail that you have on your mail providers server.
Using Mozilla Thunderbird
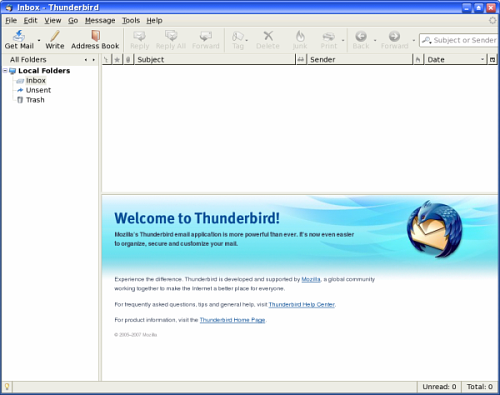
The default startup screen has three main sections:
left panel displaying mail boxes and folders
right main mail display panel
top panel containing the main menu bar and buttons
The left panel displays in a tree-directory format the email accounts that have been configured for the system and the mailboxes under it. The Local section contains the folders and messages that are not from any of the accounts created and associated with an Internet email account and thus considered local to the system. Note that this includes any unsent mail messages.
Reading Mail
To read any email in your Inbox, select the Inbox folder under the desired mail account in the left panel. A list of the messages in your Inbox will be displayed in the top part of the right panel showing the email sender and subject header. To view the mail content click on the desired message in the top right panel and the message body will be displayed in the bottom right panel. Scroll as required to read the entire message.
Composing Mail
To compose a new email click on the Write button on the top menu. Alternatively you can also click Message on the menu bar and choose "New". "Compose". (Ensure that you have selected the appropriate email account on the system by clicking on the appropriate account name in the left display panel.)
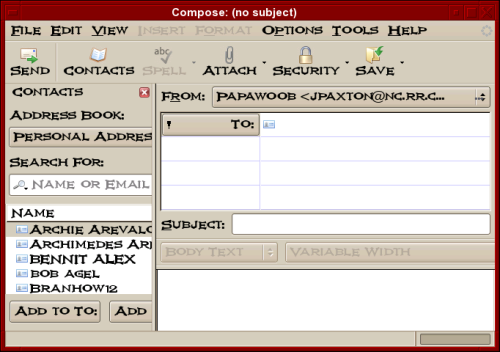
Fig. Composing Mail in Mozilla Thunderbird
The From field is automatically filled in for you from the email address you provided in the setup for the account currently being used.
The To field has to be filled in with the email address (es) of the recipient(s). Highlight a name from your address book and click on the "Add to To" button and it will show up in the To window. You can also double click a name to accomplish the same thing. Repeat this process as many times as necessary.
The other email header fields like Cc and Bcc can be selected by clicking on the To field button.
The Subject field should also be filled in with an appropriate subject header. You should avoid being too verbose for the subject header.
The mail message body can be entered in the right bottom panel provided and any file attachments can be added by clicking on the Attach button at the top and then selecting the file.
Sending Mail
After composing the email, you can either send it off immediately if you are already online, send it later, or keep it as a draft to be edited later.
To send it off immediately select the Send button. If the message was sent successfully it will be stored in the Sent folder.
To send it later, select from the main menu at the top,
File -> Send Later
The message will be stored under the Unsent Messages in the Local Folders section. In this way you can compose all the emails first and store them before sending them all in one go. Later on you can send all the unsent messages by selecting from the main menu at the top,
File -> Send Unsent Messages
This method of sending is especially useful if you are on a dial-up Internet connection where you can compose the messages offline and then dial-up later to send the messages.
To save it as a draft, select from the main menu at the top,
File -> Save As -> Draft
The email message will be saved in the Drafts folder under the current account section. Later, to edit the saved draft, select the Drafts folder under the account, click on the draft message to edit that is being displayed in the top right panel and select from the top menu,
Message -> Edit Message As New
After editing the message you can send it off as discussed above.
Receiving Mail
To receive mail, click on the Get Mail button at the top. When prompted, enter your email password (POP3 password) and the email will be downloaded from your Internet mailbox and stored into the Inbox folder. Of course you will have to be online to perform this.
Deleting Mail
To delete mail messages, select the folder in which the messages are stored in, and in the top right display panel where the list of messages are displayed, select a message by clicking on it and then click on the Delete button at the top.
The deleted mail is moved to the Trash folder in the account currently being used. To permanently delete them you can either delete them from the Trash folder or click on the Trash folder, and from the main menu at the top, select,
File -> Empty Trash
You can also right click on the trash folder and choose Empty Trash.
Folders
The various folders allow you to organize your email so that you can group and file them under appropriate folders. By default, when you create a new mail account, the Inbox, Trash, Drafts, and Sent folders are created automatically for you. To create a new folder perform,
File -> New -> Folder
You can file or move your messages from one folder to another by clicking on the list of messages displayed in the top right panel when the source folder is selected and dragging and dropping them into the destination folder in the usual manner.
Account Configuration
You can customize your account email settings by selecting,
Edit -> Account Settings
There are several important settings which you should be aware of.
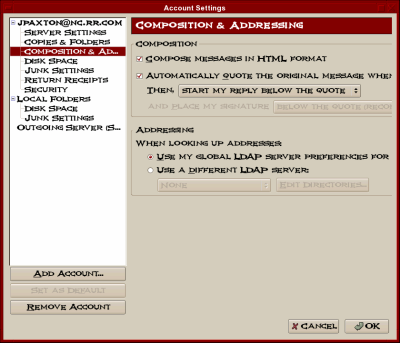
Account Settings
In this main configuration screen, you can configure your name, Internet email address and organization name to use as well as the account name which refer to these settings under Thunderbird.
In particular, the "Compose messages in HTML format" box should not be checked if you want to compose and send your email messages using just plain text. Optionally, you can leave the box checked and when you send it you will see a box that gives you the option to send it as plain text.
Server Settings
Here you can configure the name of your POP3 mail server. You can also configure whether you want the mail to be deleted from the POP3 server after downloading them into your computer. Usually you will want them to be deleted and so you should ensure that the "Leave messages on server" box is not checked.
Outgoing Server (SMTP)
This is where you can configure the outgoing mail server which will process your outgoing mail.
All other Configuration
The account configuration affects only the account in question to enable you to configure multiple email accounts each with possibly its own servers. The global configuration affects the entire mail subsystem. To access the global configuration, select,
Edit -> Preferences
Under this configuration, you can set global preferences which will affect all the accounts configured by you in Thunderbird. These will include the look and feel of Mail itself, the way messages are displayed, format for sending etc.
