Printing To a Vista Machine From PCLinuxOS
by Robert Stahl (Hairyplotter)
I ran in to a very interesting problem when I was trying to get my laptop running PCLinuxOS 2009.2 to print to my wife's machine running Windows Vista. After configuring both computers, I sent a test page to her printer. Her printer queue displayed the job and claimed it was printing, yet the job stopped showing only 64kb had been sent to the printer. After double checking both machines for settings and the proper drivers I went to Google to see if anyone else had this same issue. I found several pages dating back 5 years where people asked for help on this very same problem, yet the replies were of little to no help. I did manage to stumble across a couple pages that did more than suggest updating drivers, and from these pages I discovered the solution to my problem.
The following is a walk through on setting up PCLinuxOS to print to a printer connected to a Windows Vista machine.
The very first step is to make sure your printer is connected to the Vista computer, and the proper drivers are installed. The manuals and CD that came with your printer will walk you through this process.
The next step is to tell the Vista computer that it needs to share it's printer with others on the network, for this step, you will need to open the start menu and select "Control Panel".
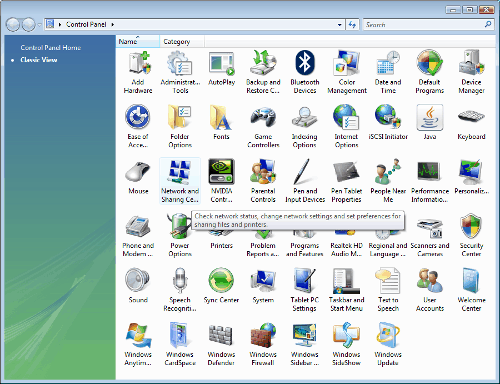
Illustration 1.1
Once the control panel is open you need to select the "Network and Sharing Center" highlighted in illustration 1.1. The following dialog box will open allowing you to make all of the necessary changes to the network settings.
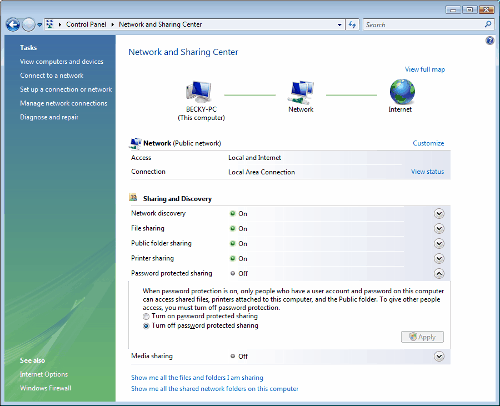
Illustration 1.2
This option is more a matter of personal preference. If you leave password protected sharing on, then you will need to supply a valid login and password for the Vista computer before you will be allowed to print.
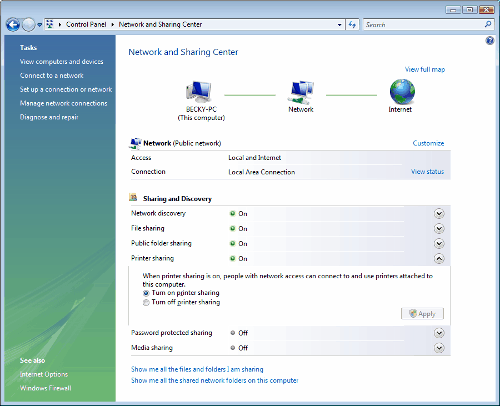
Illustration 1.3
This option needs to be turned on to allow users on the network access to the printer.
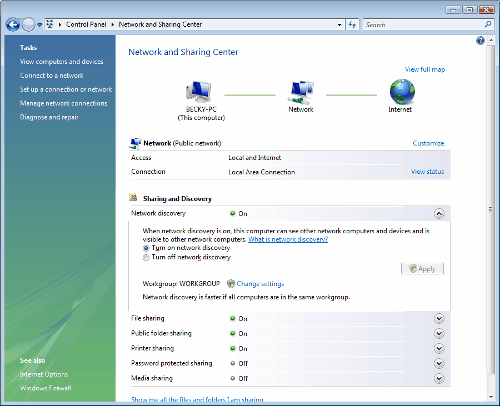
Illustration 1.4
Turning on network discovery will allow printdrake to see the printer on the network making it a little easier during the linux setup. If you feel comfortable manually specifying the workgroup, computer name and print share name then you can leave this turned off.
This is the last option we need to look at in this window. Once these 3 options are configured to your liking, you can close this window and go back to the control panel.
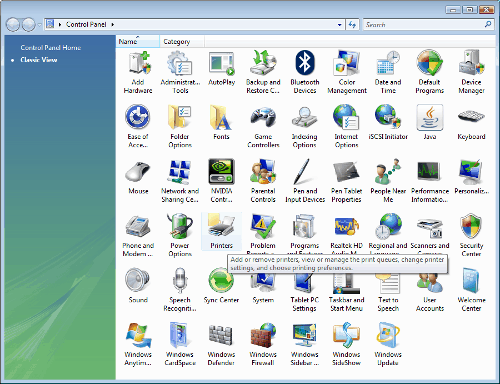
Illustration 1.5
Opening the "Printers" icon will give you a window listing all of the printers installed on the Vista computer (see Illustration 1.6). When you get to this point, the printer should already be installed on the Vista computer. All we need to do now is share it with the network and change a couple of options.
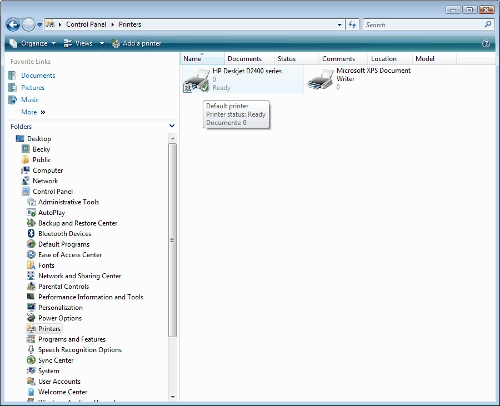
Illustration 1.6
Right click on the printer you want to enable sharing for, then choose "Run as Administrator" -> "Properties". See illustration 1.7 below.
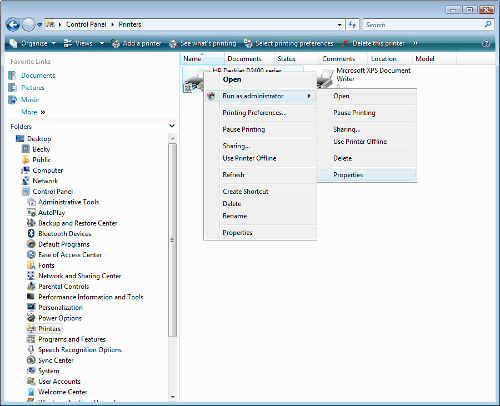
Illustration 1.7
After confirming that you want to continue as administrator, the following dialog box will open.
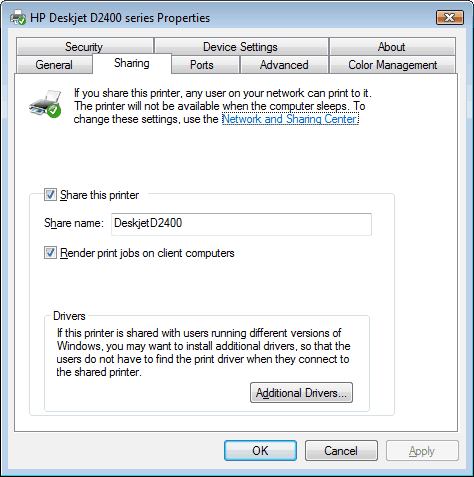
Illustration 1.8
Choose the "Sharing" tab and check the box for "Share this printer", then type in a name for the printer that will be used when you configure the PCLinuxOS computer.
The next step is to configure the PCLinuxOS computer to take advantage of the printer.
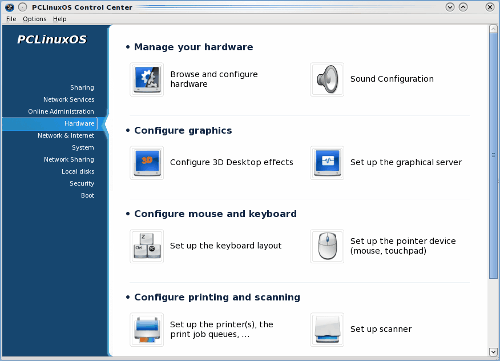
Illustration 2.1
The first step is to open PCC or "PClinuxOS Control Center", on the left side of the window that opens, choose "Hardware" then click the option "Set up the printer(s), the print job queues, …"
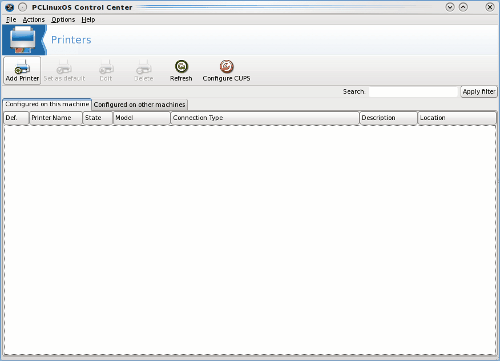
Illustration 2.2
From this window, click the "Add Printer" button on the top left.
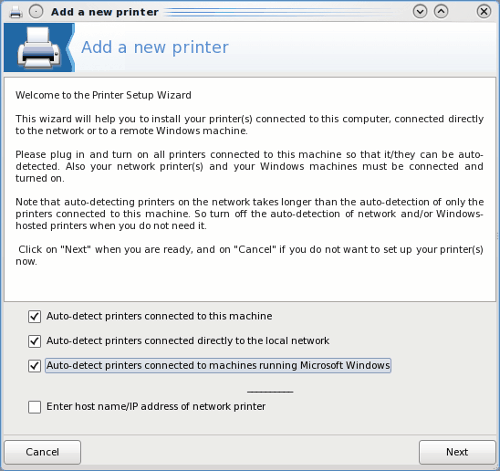
Illustration 2.3
Make sure that the 3 options are checked as in illustration 2.3 then click "Next".
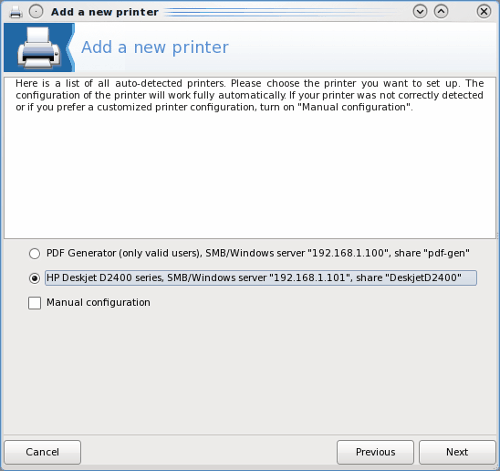
Illustration 2.4
Your printer "should" show up in this window. If it doesn't, try rebooting the Vista computer. Verify all of the previous settings once the Vista machine is back up and running. If you still can't see the printer, refer to the NOTES below.
If your printer is shown, make sure its selected then click "Next".
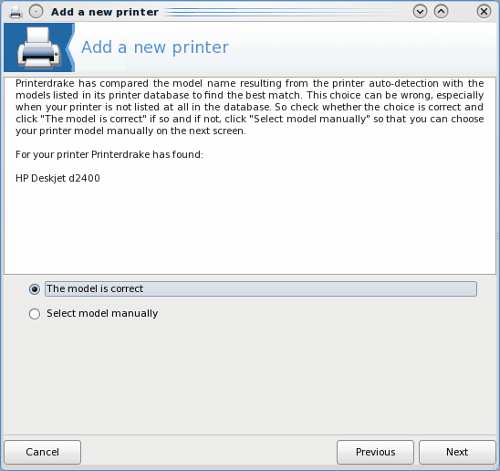
Illustration 2.5
Verify that the printer is the correct model or one that is compatible, then choose "Next". If your printer isn't listed, will have to "Select model manually" and choose your printer from a large list of available printers. If you don't find your printer, then you may have to do some searching to find if one of the available drivers will work with your printer.
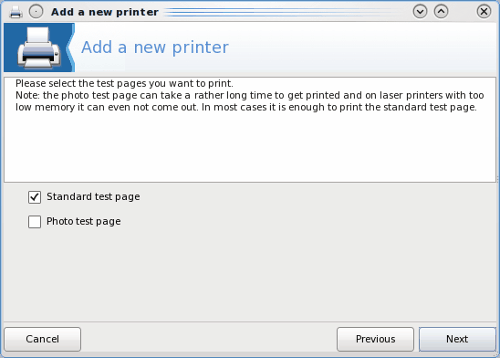
Illustration 2.6
Congratulations! Your printer is installed and configured. Now all you need to seal the deal is print a simple test page to verify that everything is in good working order. Seems like a very simple matter almost worth skipping, Don't! This is where I ran in to my troubles. I sent a test page to my printer and the Vista computer showed that only 64k of the job was sent to the printer and it hung there. The following is what I had to do in order to get it working.
Go back through the steps illustrated in 1.5 - 1.7. When the printer properties dialog box is open, click on the "Ports" tab, then uncheck "Enable bidirectional support" (illustration 2.7).
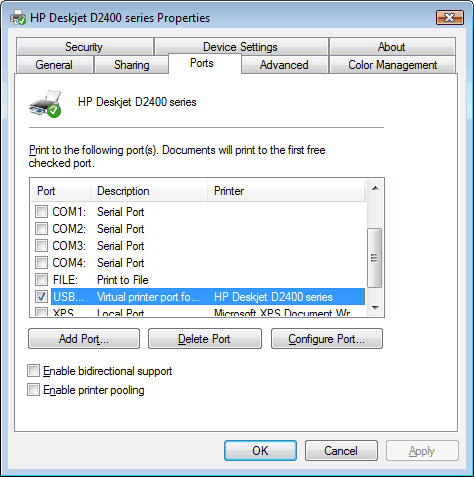
Illustration 2.7
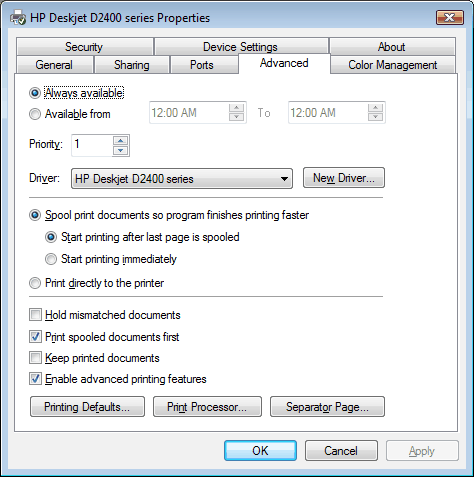
Illustration 2.8
Next, choose the "Advanced" tab then change the radio button to "Start printing after last page is spooled". Click the "Apply" button. Once I had that done I was able to print flawlessly.