Photo Viewers Galore - Part 5
by Meemaw
We have come to the last four viewers in this series. These are the four that do the most in terms of viewing, editing and manipulation.
Gwenview
Since Gwenview is part of the KDE graphics package, it closely resembles Konqueror (at least it does to me). It also requires many KDE files when you install it.
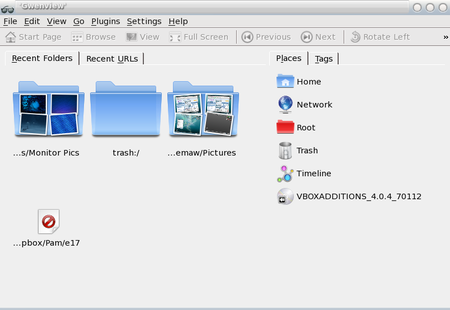
When you open Gwenview, you will see a window similar to the one above. As you view pictures, Gwenview will add icons for those folders on the left side of the window. When you want to view images in one of the folders, simply double-click the folder.
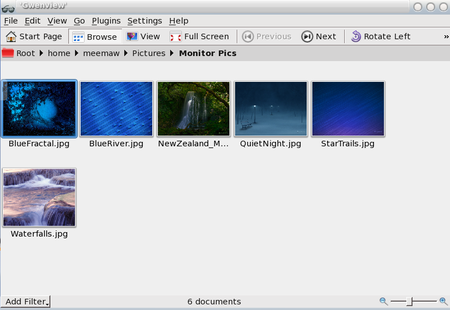
You will see the images as thumbnails. You can configure Gwenview to view only the thumbnails or can view a sidebar with tabs for Folders, Meta Information, and Operations. Image Operations include crop, rotate, and resize and File Operations include rename, trash, delete, copy and move, and the ‘Open with...’ command.
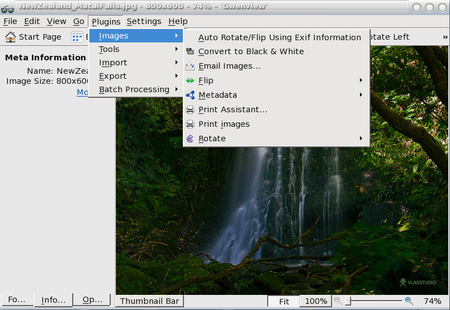
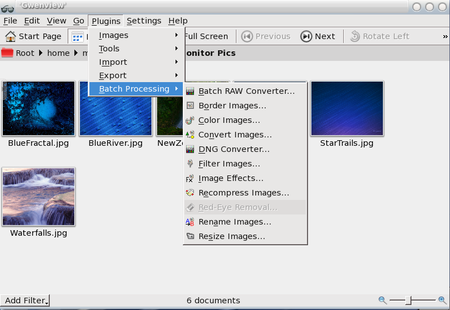
The plugins menu contains loads of image manipulation items. Under Plugins > Images you will have the same Flip and Rotate functions along with Convert to black & white, Print Images and Email Images. In Plugins > Tools, you see Advanced Slideshow, Create Calendar, Blend bracketed images, OpenGL Image Viewer and Raw Image Converter. Plugins > Import will let you import from several Internet sites, as well as your scanner and a remote computer. Plugins > Export allow you to export your photos to even more Internet sites, and to a remote computer. The last section, Plugins > Batch Processing, gives you many processing operations you can perform on a group of images if you wish. I generally only batch rename or batch convert, but there are more here.
DigiKam
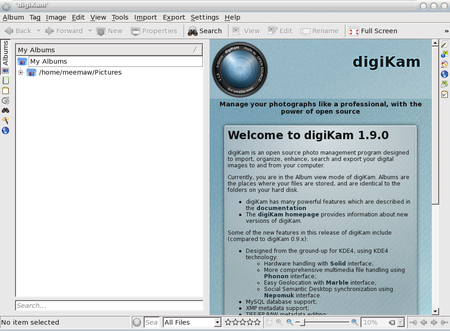
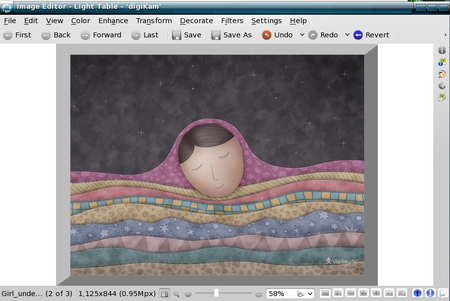
DigiKam is a full-featured program, allowing you to transfer photos from your digital camera to you computer, then organize and edit them as well. Like Gwenview, it’s a KDE graphics viewer and editor, and it also has a lot of KDE library dependencies. When you open digiKam for the first time, you will be asked a series of questions regarding setup and how you want newly imported images handled by the program. Then you will get the following window, plus a Tip of the Day.
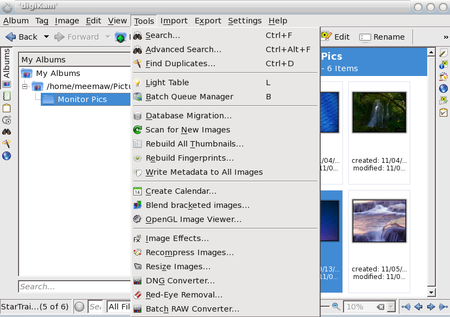
digiKam has many image manipulation tools. You can create a calendar or edit your photos (including red-eye removal.) You can also search, print and email your photos.
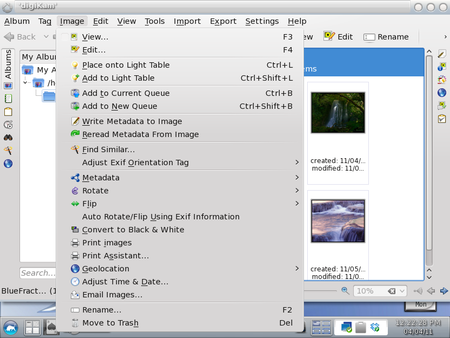
As you can see, the Image menu has even more tools (rotate, flip, convert to black & white, print, email, rename and even move to trash).
I was curious about the entry in the Image menu - ‘Place onto Light Table’, which I had never seen before. You can choose one or more pictures and place them on the light table. From there you can manipulate them further.
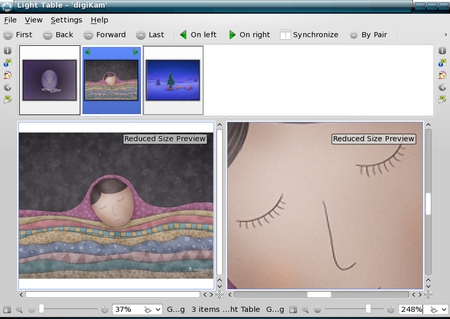
Unchecking ‘Synchronize’ in the tool bar, you can zoom in on an aspect of your picture. Going to File > Edit gives you yet another window where all the editing tools are located.
I put a frame around this image.
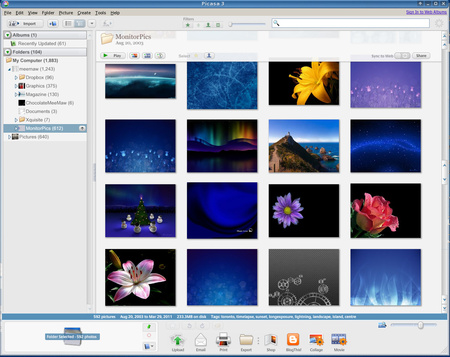
Picasa
Picasa is Linux, Mac & Win compatible, with lots of editing and viewing options. When you first open it, Picasa will, by default, scan your entire computer or some selected folders to build a database of photos. If you add a new folder to your /home, you can add that folder to Picasa to include those photos in your database. You will have a sidebar that will include all your scanned directories.
If you choose a photo to edit, it will show in a window with a tabbed section on the left. The three tabs are in the illustration which follows:
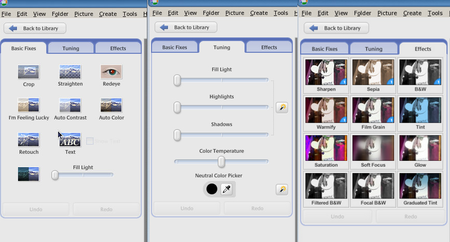
As you can see, there are many ways you can edit your photos. You can also export, print or email them, and also post them to websites and make a collage with them.
Picasa is a very complete program. It is designed to keep your photos scanned and organized, not only by folder, but by date. If you wish, you can disable the setting where it opens and immediately scans for new photos by clicking Tools > Folder Manager. From there, you can choose Scan once, Scan always, or Remove from Picasa for each folder. My personal preference is to choose for myself when I want my folders scanned, so many of mine say Remove from Picasa.
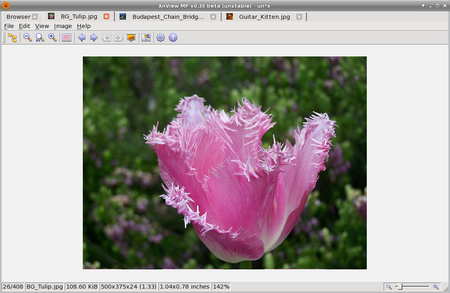
XnView
The first thing I discovered about XnView is that there are two versions in the repo. You will find XnView (v. 1.70) and XnViewMP (v. 0.35beta). Even though it is labeled as unstable, the beta version looks much better to me. It seems to be more complete, and better arranged.

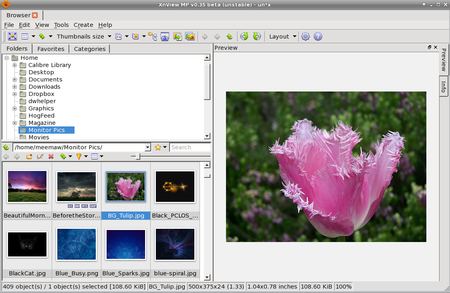
The main browser has a folder list (top left of window) along with a section showing the thumbnails in whatever folder you have highlighted (top right). When you choose a photo, you will see a larger version of it (lower right of window), along with all sorts of information to the left of the photo.
If you don’t like the way the windows are arranged, go to View > Layout and choose one you like better. Notice in the layout below, the Info tab is with the Preview tab at the right edge of the window.
The menu bar and toolbar are under the area for tabs across the top. The tools are Fullscreen, View As.... (Thumbnails only or thumbnails with labels or icons, etc), Sort By (Name Date, Size...., Thumbnail size (You can choose different sizes to view) , Ratings and Colors (to rate or color-code your pics), Category (can sort people from flowers, for example), Show files in subfolder, Capture, Export, Batch Convert, Back, Forward, Up (to a higher directory), Rotate Counterclockwise, Rotate Clockwise, Layout save, Settings and About.

Also notice that there is a separate toolbar above your icon group on the left. You have Back, Forward, New Folder, Edit, Delete Sort By, Filter, and View As (thumbnails, icons, etc.) along with a slider which makes those thumbnails larger if you wish.
If you want to edit photos, simply double-click on that photo and it will open in a new tab (the tabs are at the top of the main window). Then you can switch back & forth between your open photos.
The menu is different now and also includes all the tools for editing your photo.
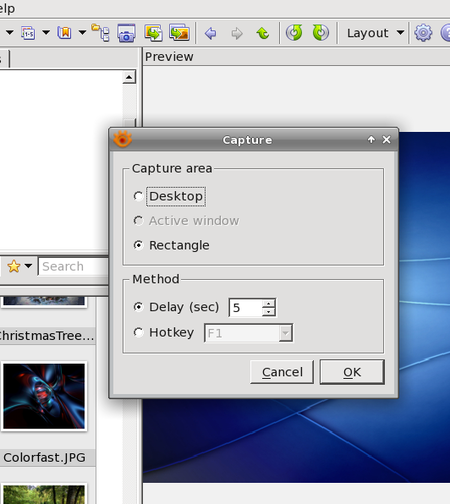
Going back to the browser tab and clicking Tools > Capture or clicking the camera icon on the toolbar, you are able to take a screenshot of whatever you want.... except for an XnView window! When you configure your capture parameters and click OK, the whole XnView window disappears until the screenshot is finished and then it reappears with your screenshot.
In this five-part series, I have covered twenty-four photo viewers, from some that are simple viewers up to those that import and export your photos from different sources, edit and catalog your photos and make posters, calendars, collages and albums. I hope you have found one or two photo viewers that fit your needs. From all those covered, I’m sure the choice wasn’t easy, as I’m still experimenting myself!