KompoZer, Part 3: Special Formatting
by Paul Arnote (parnote)
In our short series about KompoZer, the Gtk+ based WYSIWYG HTML editor in the PCLinuxOS repository, we’ve covered the basic layout of the KompoZer application window, and how to use KompoZer to create a rudimentary web page. This month, we’ll learn about special formatting you can do to your HTML page to add even more features.
Tables
Tables are ideal for presenting information in a very organized manner, and keeping similar content grouped together under a common heading.
For as long as I can remember, I’ve always dreaded creating tables in HTML. They always seemed to be unnecessarily complex – so much so, that one mistyped command just sent it over the edge. Fortunately, KompoZer makes the creation of tables very simple.
Open the HTML file we created last month, and position your text caret at the end of the text we previously entered. Hit the Enter key a few times, then select the “Table” icon on the KompoZer toolbar.
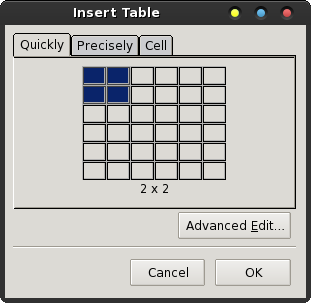
Clicking on the “Table” icon on the KompoZer toolbar causes the “Insert Table” dialog to be displayed. Here, you can decide how many columns and rows you will need in your table. Just as it is when you start to lay out your web site, having a good plan in place helps in helping to make a proper HTML table.
In the graphic above, the default value is a 2 x 2 table. That means that you have two columns and two rows. The dialog box allows you to select a table with up to a 6 x 6 table, or as small as a 1 x 1 table.
So you may be asking yourself, “why would I want a 1 x 1 table?” The easy answer is so that you can have more control over how your text appears in the web browser. In fact, I use 1 x 1 tables when I produce the magazine’s web site. It enables me to limit the width of the text I’m entering, without resorting to inserting a “hard return” in the text. I do this to help achieve a cleaner look, where the text and data are all the same width. Using the 1 x 1 table as a formatting tool has worked to help achieve the look that I was after.
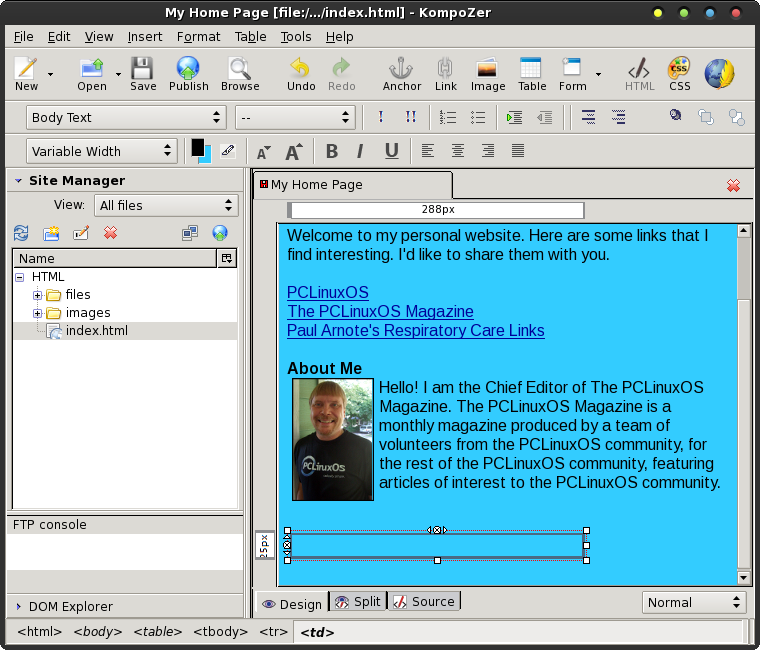
You should now have something on your screen that looks similar to that in the image above. Right click your mouse in the representation of your table, then select “Table Properties” from the context menu.
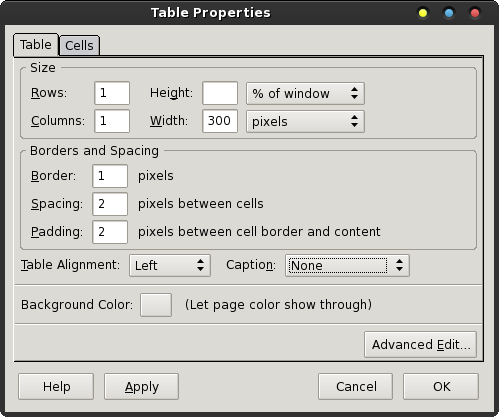
Click on the “Table” tab in the Table Properties dialog box, and your dialog box should look similar to the one shown above. We have to alter a few settings. First, under the “Size” settings, set the width of your table to how many pixels you want your table to be. The default value is “% of window.” Just click on that dropdown listbox and change it to “pixels.” Then enter the number of pixels for the width of your table. In the example above, I have set that value to 300 pixels.
Next, under “Borders and Spacing,” you can optionally change the “Border” setting to zero (0) pixels. This will make your table invisible to your website visitors, yet allow you to use the table to help your format the text on your website. Feel free to “play around” with the “Spacing” and “Padding” setting values until you achieve the look and feel that you are after.
Now, click on the “Cells” tab.
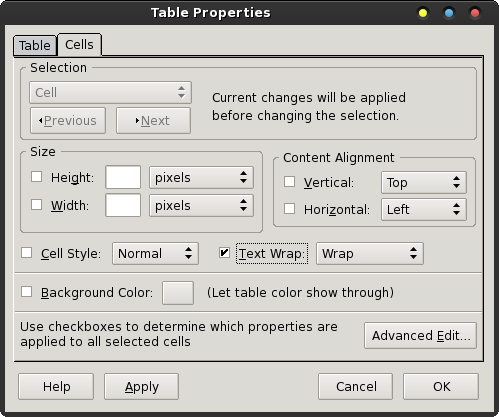
Under the “Cells” tab, you can change the height and width of individual cells, as well as the vertical and horizontal alignment of items that appear within the cell. One thing that you will most likely want to enable is “Text Wrap.” Place a checkmark in the box next to “Text Wrap,” and insure that “Wrap” is selected from the dropdown listbox. Click on the “Apply” button to apply your settings, and then the “OK” button to dismiss the dialog box.
Now, all that’s left is to enter the text you want to appear in the table. Since I’ve created a 1 x 1 table, that allows me to essentially use a table as a text/content formatting tool. You can place whatever you want within the table, and any/all content within a table is subject to the formatting set up in the Table Properties dialog box.
It may take you a time or two to get the hang of using tables, but once you do, I think you will soon see the worth of using tables to help you format the content of your web page.
Anchor Links
Sometimes you want to give your website visitors quick access to a particular section of your web page. The use of “anchor links” makes this easy.
On my website for respiratory care practitioners, I have a “menu” of sorts, listing all of the sections of my web page. In part, it looks like this in Firefox:

Each one of those links in the “menu” link directly to that specific part of my web page. That makes my web page “menu” act very similar to a table of contents. Quite simply, anchors allow you to link to different areas of a web page.
Within KompoZer, an “anchor” appears just as that – it has an image of an anchor in front of the text. Here’s one such example, taken from my respiratory web page loaded into KompoZer:

Notice the “anchor” symbol right in front of “Government Sponsored Sites.” That indicates that the text that follows (or part of the text) is an anchor. That text can be linked to, either from within the same HTML document, or via an external web link. For example, to link directly with the “Publications” section of my respiratory care web page, the address would look like http://home.comcast.net/~parnote/#Publications. The last part of the URL – the part that contains the “#” and the text after it – links up directly with that specific portion of my web page. Go ahead and try it. Just click on the link and you’ll see how it works.
Creating an anchor is very easy in KompoZer. Simply highlight the text you want to use as an anchor point, then click on the “Anchor” icon on the KompoZer toolbar.
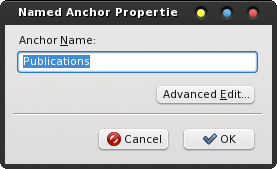
Typically, you’ll find the “Anchor Name” field already filled in with the text that you highlighted. If you’d prefer, you can give it another name. However, I tend to just accept what already appears in the “Anchor Name” field. It helps to keep things simple. If no text appears, just give it a name that closely resembles the text you highlighted. It makes it much easier to find the proper anchor when you go to link to it.
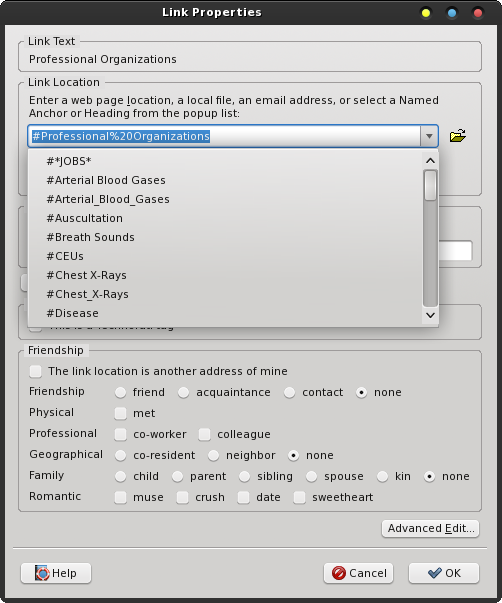
Now that you have the anchor defined, you can create an anchor link. When you create a link, select the anchor you defined from the dropdown list. That’s pretty much all there is to it.
Publication
One of the nice features about KompoZer is that you can not only create your entire website using the WYSIWYG editing environment, but you can also publish your website – or just the changes to individual files – to your web host, right from inside KompoZer when you are finished.
Before you can publish your website to your web host, you will first need to set up the necessary information for KompoZer to use to connect to and negotiate file transfers between your computer and your web host.
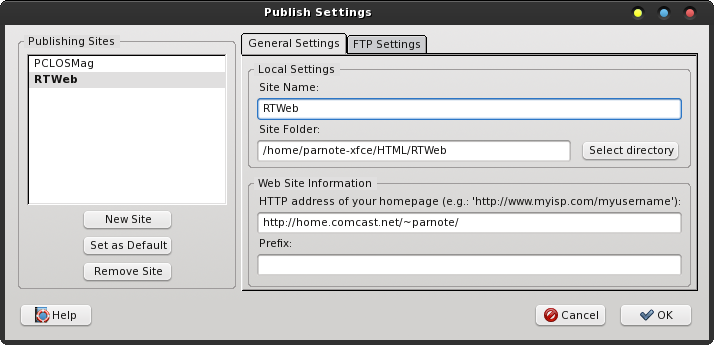
First, go to “Edit > Publish Site Settings...” and you will see a dialog box similar to the one above. Under the “General Settings” tab, fill in all of the information that you can. Then, click on the “FTP Settings” tab.
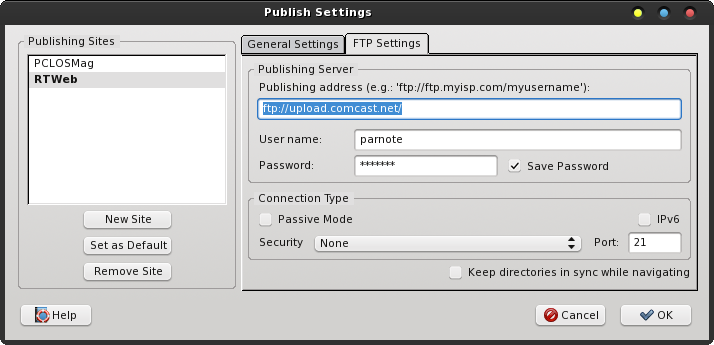
Fill in all of the settings you can in this tab, as well, much as I’ve done above. You will need to check the “Save Password” box if you want KompoZer to remember your password.
Under “Connection Type,” be sure to check with your web host provider whether or not their server settings allow you to use “Passive Mode.” If so, place a checkmark in the box. If you are using IPv6, place a checkmark in that box. FTP is typically an insecure file transfer protocol, and you’re usually fine with not messing with the “Security” settings. Since “Port 21” is the typical port to use for FTP transfers, you should be fine with leaving the port number assigned to 21, unless your web host provider specifies otherwise.
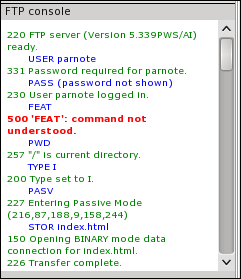
Once you’re ready to publish your website content, click on “Publish” on the KompoZer toolbar. The entire directory contents of your web site will be uploaded to your web host. Alternatively, if you’re updating only a few files, right click on the files as they appear in the left hand pane of your KompoZer window, and select “Publish” from the context menu for each file you want to update.
Summary
As you have seen, KompoZer is a very good and useful tool to use to create your web pages. Since KompoZer uses an older version of the Gecko engine (as we discussed in the first article), there are a few slight differences in how the current Gecko engine displays things. But that difference is not represent a huge or insurmountable issue. Generally, I’ve found KompoZer more than up to the task for creating and maintaining a website.
There’s a lot more to learn about HTML, along with web page and website creation. There are entire sites and books devoted to the topic. This short article series is not meant to be a complete or full tutorial over HTML. Rather, its intent is to showcase some of the capabilities of KompoZer, which is a very useful tool to help facilitate the construction of web pages and websites.
If you
want to learn more about HTML, I would recommend that you start
with the tutorials at w3c.org, since
they are the body that sets the standards for HTML. You can then
use the information you gain there to branch out to other,
deeper discussions and tutorials about HTML.