| Previous
Page |
PCLinuxOS
Magazine |
PCLinuxOS |
Article List |
Disclaimer |
Next Page |
Windows Migration: Fine Tune Your PCLinuxOS Installation
|
|
by Paul Arnote (parnote) Now that you have PCLinuxOS installed on your computer, it's time to "fine tune" your PCLinuxOS installation. If you bought a new violin or guitar, you will want to tune them before you play them. They will produce music if you don't tune them, but not optimally. Thanks to the excellent hardware recognition in the PCLinuxOS installer, your PCLinuxOS installation will most likely run just fine. Just as with a new violin or guitar, you should also fine tune your PCLinuxOS installation. By fine tuning your new installation, you can make your PCLinuxOS installation run optimally and provide the best performance from your hardware, old or new. Without a doubt, hardware recognition and compatibility under PCLinuxOS -- and Linux, overall -- has improved by leaps and bounds in recent years. When I first started with Linux, there were simply some hardware configurations you avoided at all costs. You avoided them because they were either extremely difficult to configure, or the hardware manufacturers didn't support Linux in any shape, way or form.
However, thanks to the growing popularity of Linux, many more hardware manufacturers that formerly shunned Linux support are now jumping on board with driver support. Hardware manufacturers, such as Broadcom and Lexmark, both whom were steadfast in their refusal to support Linux, now produce Linux drivers for their hardware. Granted, they haven't written hardware drivers for their older hardware. (And much of the older stuff remains problematic, although less problematic, despite advances of the Linux community "roll-your-own" drivers). But the new hardware items they produce now typically include Linux drivers. Setup Video Card While the PCLinuxOS installer does a very good job at detecting and properly setting up your video card, there may be times when you will want to change the video card driver in order to help improve performance. Besides the free and open source Xorg drivers, PCLinuxOS also makes the proprietary, closed source drivers for ATI and nVidia graphics cards available through Synaptic. Once you've installed them, you may need to re-setup your X server to use the proprietary graphic drivers. Also, once installed, they should appear among your choices. 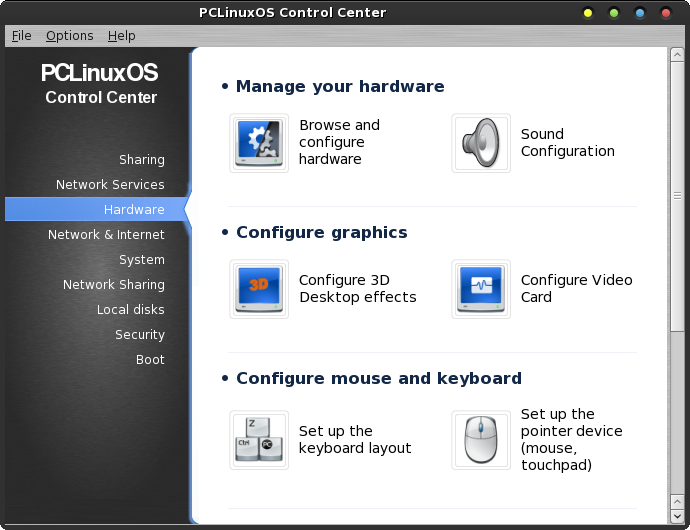 Launch the PCLinuxOS Control Center (a.k.a. PCC). You will need to have root user access, and you will be asked for the root password when you launch PCC. Go to the "Hardware" section, and select "Configure Video Card" from the choices. 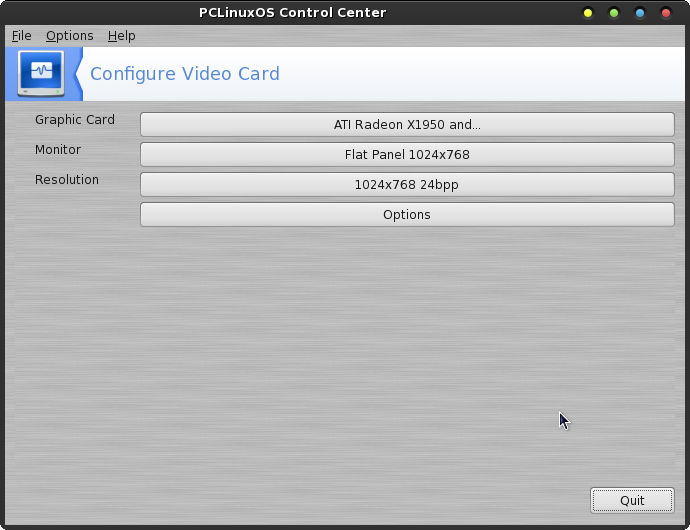 You will see a window appear, similar to the one above.  Selecting the "Graphic Card" button will cause the window above to appear, with your currently configured graphic card driver selected. Unless you know better, or you have been advised differently, and unless you are changing to the proprietary drivers (after installing them), you are strongly advised to NOT change from the default graphics driver that is selected by the PCLinuxOS installer. Selecting the wrong driver here could cause you to be unable to boot into your graphical desktop. Use extreme caution here. The fix is sometimes difficult, even for seasoned, experienced Linux users. 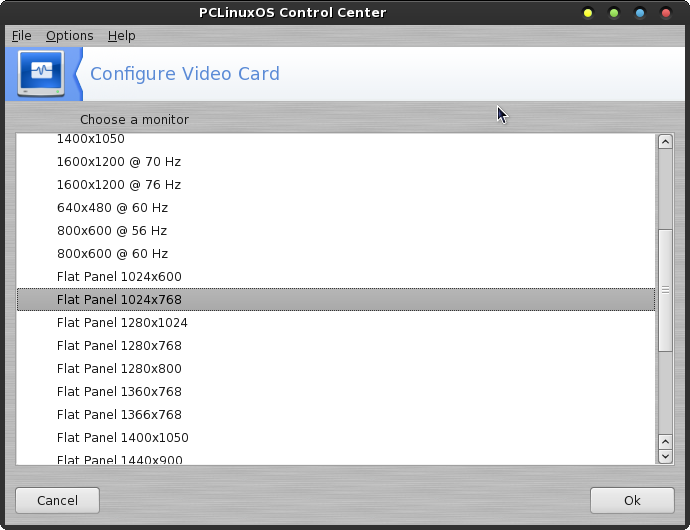 Selecting the "Monitor" button will display the monitor selection choices. Not all choices will apply to your system! The currently selected monitor choice will appear, preselected in the list. 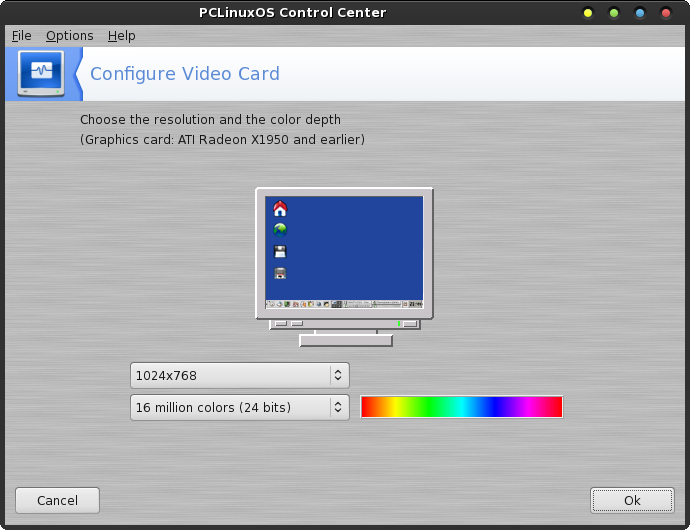 Selecting the "Resolution" button will display a window similar to the one above. Here, you can select the display resolution and color depth for your monitor display. One thing you should realize is that under Windows, the 16 million colors setting is called 32 bits. Under Linux, the very same thing is called 24 bits. The different naming is on account of a difference between how the bits are counted, between the Windows and Linux camps. Don't let this trip you up. They are one and the same. 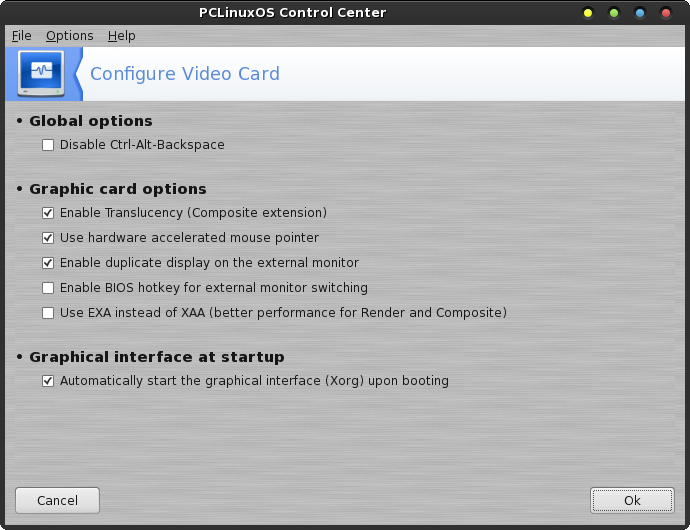 When you select the "Options" button, you will see a window displayed that is similar to the one shown above. The options displayed may differ slightly from what is shown, based upon the different capabilities of your graphic card. Generally, you are safe sticking with the default options, unless you are directed to make changes or until you are better acquainted to tweaking an Xorg video driver (which is beyond the scope of this article). After making changes to your video display, it is a good idea to enable those changes by restarting your computer. Set Up Your Sound For most users, sound will be set up properly. However, due to the wide variety of sound cards out there -- both those built into a motherboard and those added on -- you may find it necessary to perform a manual configuration. 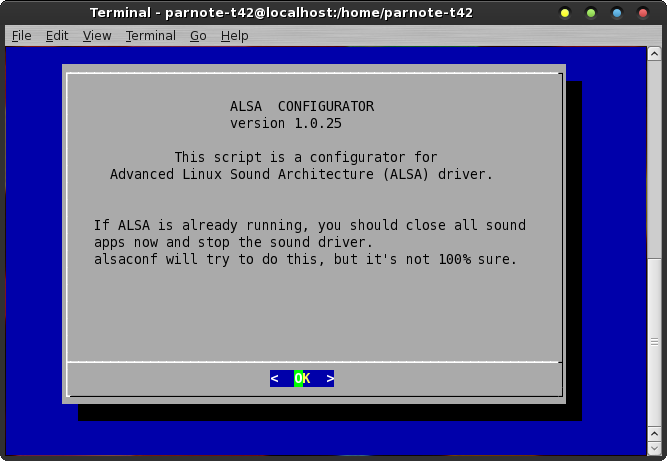 Open up a terminal session, and at the command prompt, enter the following:
su <Enter> You will notice that your command prompt has now changed to red text, to indicate that you are now entering commands as the root user. Because of this, exercise an extra level of caution. Double check your command line entries. The root user has access to all parts of the system, and can make system-wide changes. Performing actions as the root user, you can wreak some havoc on a system. Don't be afraid. Just be cautious. Now, enter alsaconf at that red command prompt. This is the ALSA Configurator. ALSA is the default sound system for Linux. ALSA stands for the Advanced Linux Sound Architecture. You should have a display in terminal similar to the image above. Press "Enter" on your keyboard. 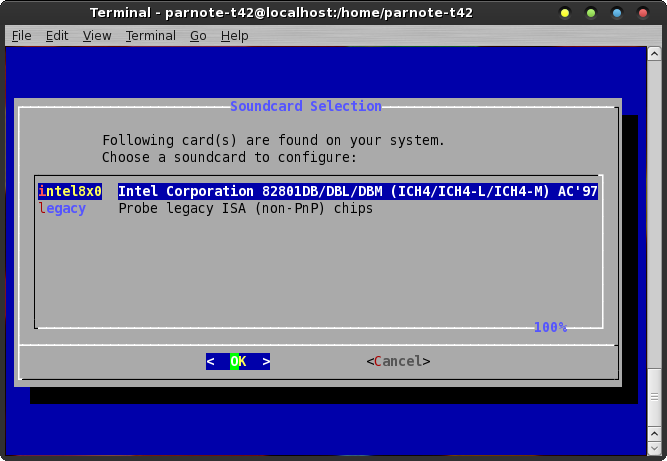 After a brief period, a screen similar to the one will be displayed. Typically, the highlighted choice is the best one to choose. Again, hit the "Enter" key on your keyboard. 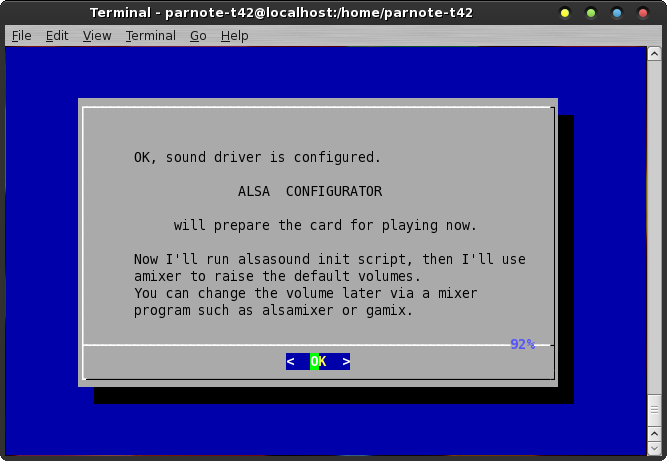 Again, hit the "Enter" key on your keyboard. ALSA Configurator will run the initialization script to set up the defaults for your sound card. When you are returned to the red text prompt in your terminal session, type exit to end the terminal session for the root user. If all went well, your sound card should now be properly configured. Within the past couple of years, a new Linux sound project has emerged, called Pulse Audio. Pulse Audio's goal is to make sound configuration under Linux much easier, while insulating the end user from having to drop to a terminal session and running alsaconf from the command line. Pulseaudio also allows you to set up sound defaults on an application specific basis. This means that if you want a louder volume from one application than another, you can easily configure it to do so. If you are interested in exploring more about Pulseaudio (which is in the PCLinuxOS repository), I strongly recommend doing a search in the PCLinuxOS forum and reading the relevant threads there. Set Up Your Printer For many of us, making a paper copy of data is still a fact of life. If you are like most of us, you will have a printer that you will want to set up under Linux. Fortunately, PCLinuxOS makes it relatively easy to set up a printer. The first step you should take, before even connecting your printer to your computer, is to install task-printing from Synaptic. This will install the Linux printing system, called CUPS (Common UNIX Printing System), along with printer drivers that will cover many printers that you might have. 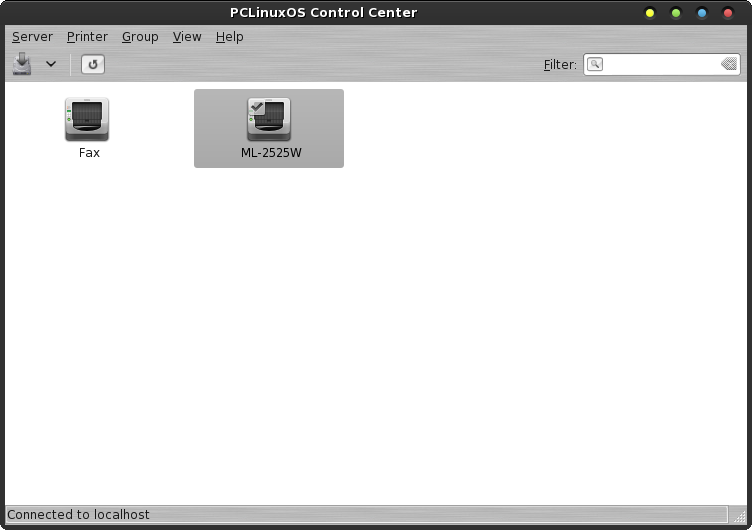 Once you have installed task-printing, turn your computer off, connect and turn on your printer, then turn your computer back on, rebooting into PCLinuxOS. This will give the CUPS printing subsystem an opportunity to initialize and prepare, so you can properly install and find your printer. While some users swear by setting their printers up using a method that circumvents the installation and use of CUPS, we'll focus on using CUPS. Using CUPS is often easier, and it offers up easy access to your printer from other computers on your network. 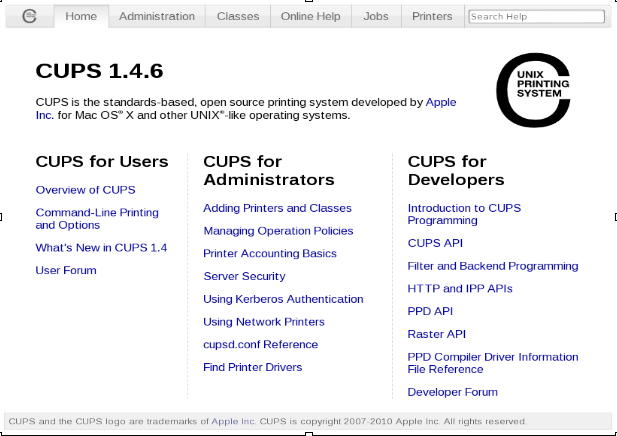 Enter http://localhost:631 into your favorite web browser's URL bar. You will see a page similar to the one shown above. Select the "Adding Printers and Classes" link (first choice in the "CUPS for Administrators" column). You will be prompted for your root username (usually just "root" without the quotes) and your root password on the computer you are starting CUPS on. 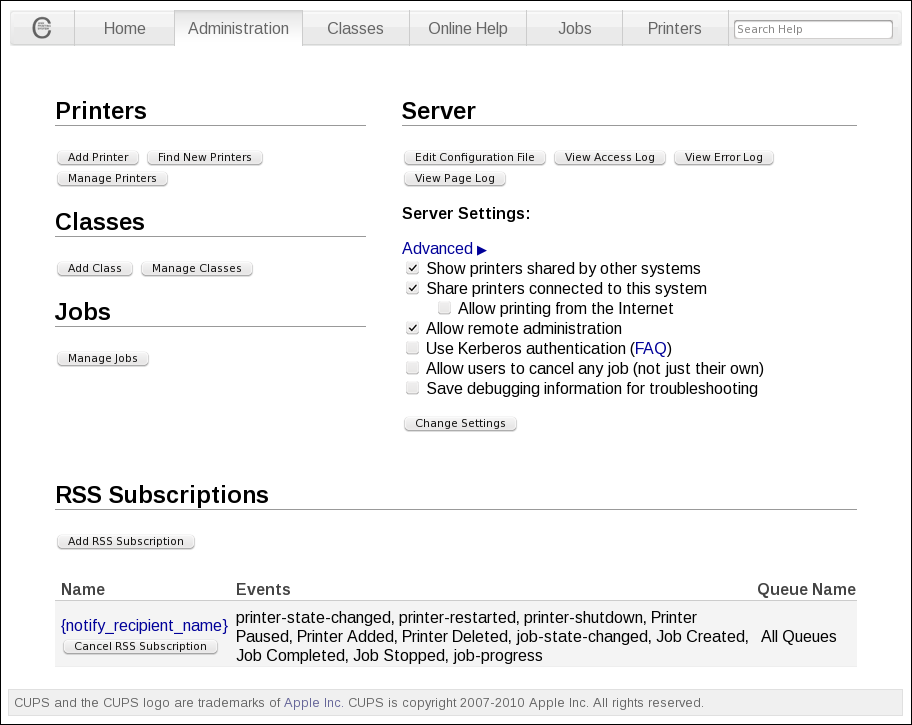 If you wish for your new printer to be made available to other computers on your network, be sure to check the second checkbox under "Server Settings" (right). Next, click on the "Add Printer" button under the "Printers" section (upper left). 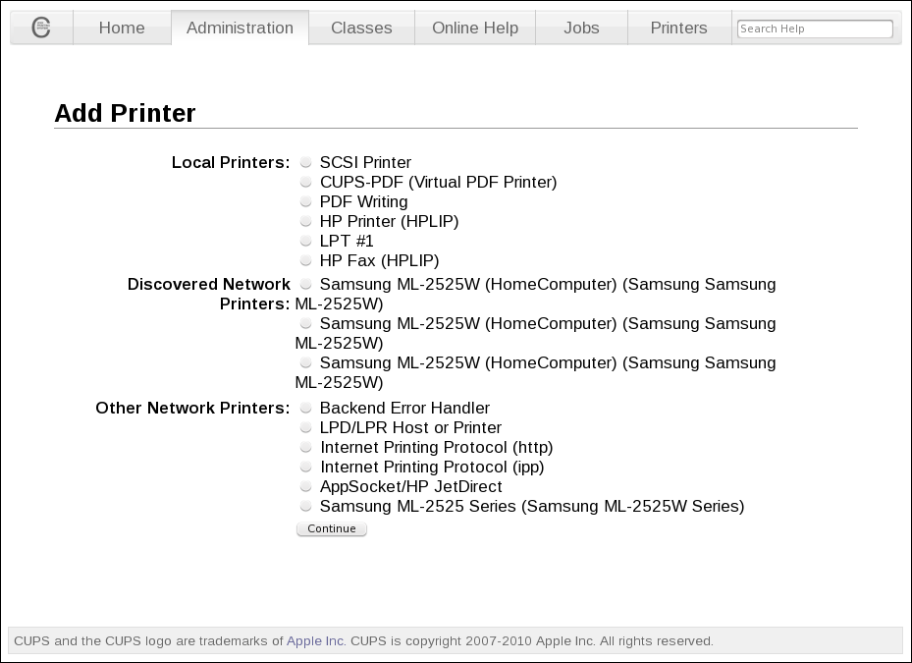 What you see next depends on how your printer connects to your computer. If it connects using a USB port, you will see choices for a USB connection. If it is a network printer that connects via an ethernet port or wirelessly, then you will probably have better success setting up your printer via CUPS native Internet Printing Protocol, a.k.a. IPP. With so many options here, coupled with the large number of different printers out there, it's virtually impossible to cover them all in this article. Rather, I would strongly recommend looking toward the PCLinuxOS forum for assistance, should you need it. The other thing you might want to try is to select "Find New Printers," instead of the "Add Printer" button. Be sure your printer is turned on and connected, and see if CUPS auto-detects your printer. 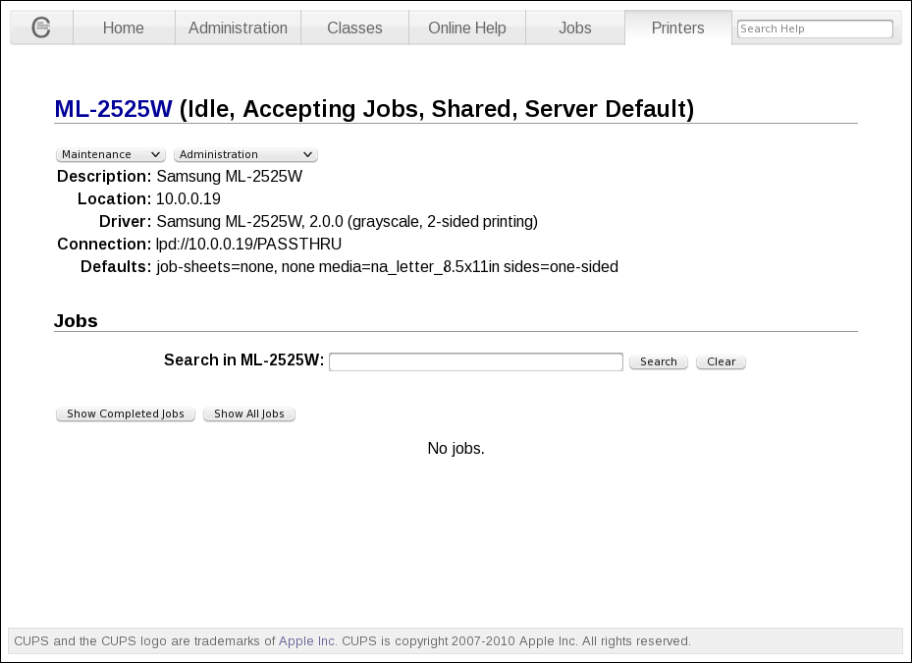 One other thing that CUPS can help with is managing printing jobs in your printer's printing queue. From this screen, you can hold or delete errant print jobs. Set The Time There's little else that's as annoying as your computer's clock displaying the wrong time. It's even more annoying when your computer's clock either loses or gains time. Fortunately, you don't have to tolerate either situation. Launch PCC (remember, you need to have root access), and select the "Network Services" category. Find and select the "Configure time" icon. 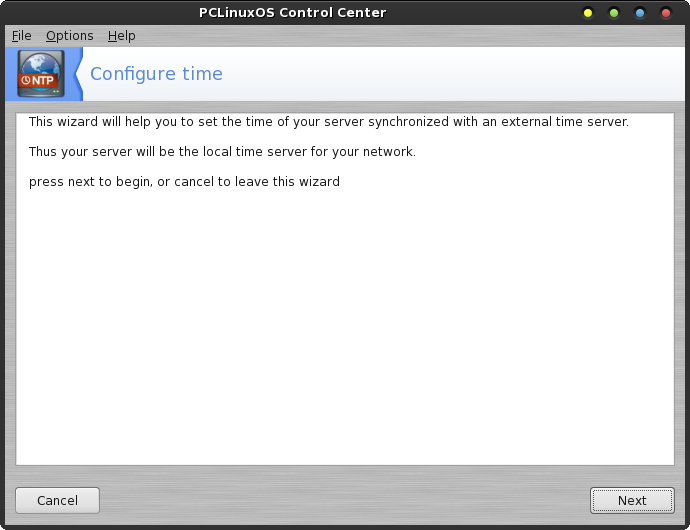 This starts the NTP wizard. Select the "Next" button in the lower right corner. 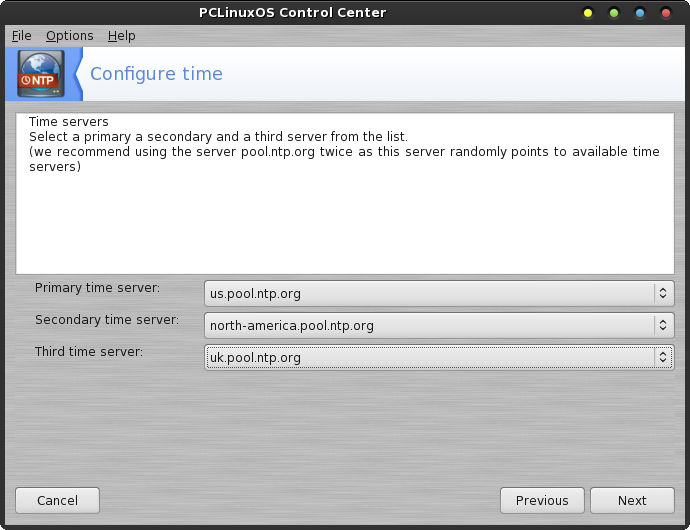 In the lower half of the window, select each of the three time server drop down lists, and choose a NTP time server. While you can choose from any of the available time servers, I recommend making your primary time server as the one nearest to your geographical location, your secondary time server the next closest, and your third one any of the time servers you wish. 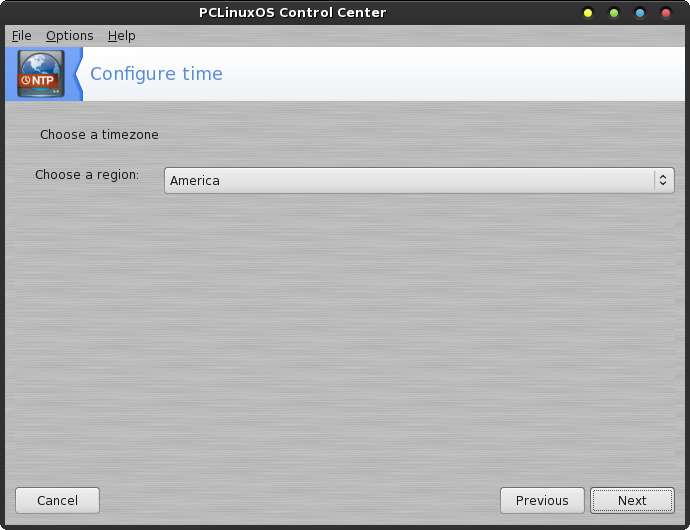 Next, choose the region that is the closest match to your geographical location. 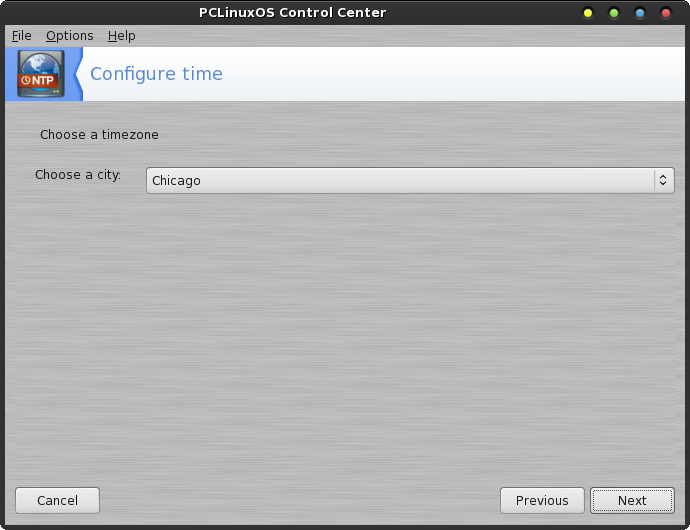 Now, choose a city that is in your same time zone. Even though I live in the Kansas City area, it isn't a choice. However, Chicago, which is in my same time zone, is available as a choice. 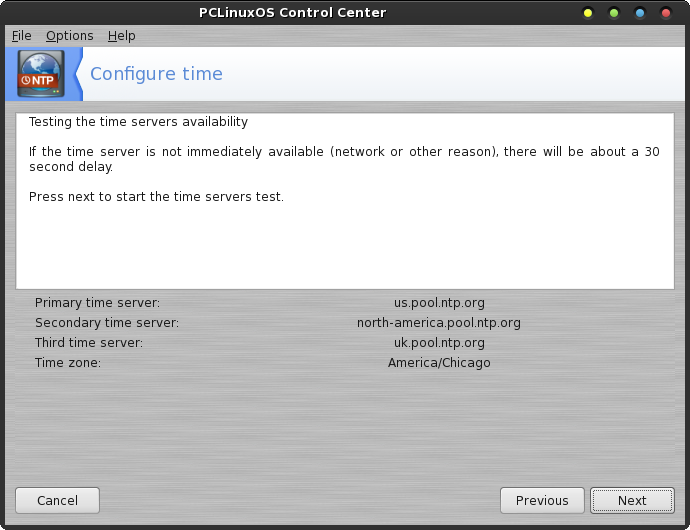 You should now see a "summary" window, displaying all of your chosen settings: your three time servers, and your time zone. Select the "Next" button. 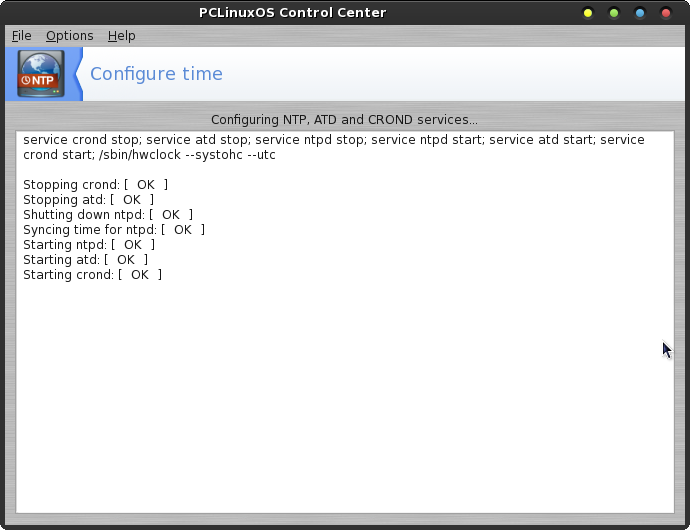 You should now see a listing of text in the window as PCLinuxOS tests and sets up your sound server synchronization. Just wait for this window to complete. 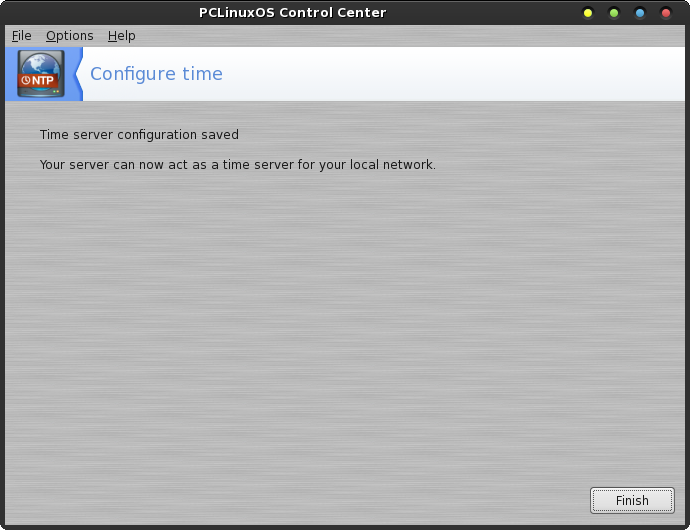 If you see the window above, you have just successfully set up your computer to sync with the time servers that you've chosen. Networking One thing you're going to want to get set up and running almost right away is your network connection. Few users run a static installation these days that isn't connected, in one way or another, to a network of some kind. Usually, that connection is to the internet. Luckily, if you are using a wired ethernet connection, your connection is pretty much automatic. There won't be anything left for you to do, after plugging in your ethernet cable. Setting up your wireless connection is a little more involved, however. Before you get started setting up your wireless (wifi) connection, it would be a good idea to have all the information that you will need gathered together. Minimally, you will need the SSID (network name) for your network, the type of encryption used, and the password for the network connection. 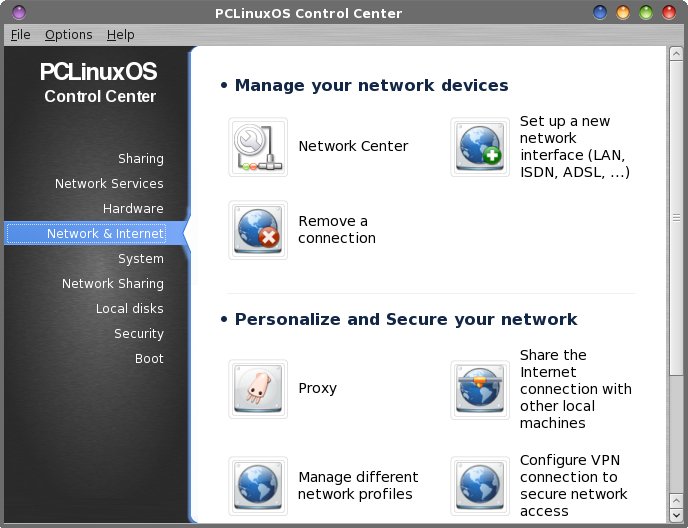 Open PCC (PCLinuxOS Control Center). Enter the root user password when prompted, and go to the "Network & Internet" section. Select the "Setup a new network interface" icon. 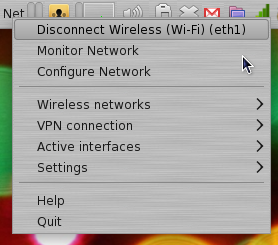 You can also arrive at the same place by right clicking on the Net Applet icon in the system tray, (which will be an X in a red circle, if there are no current network connections), then selecting "Configure Network" from the menu that appears. 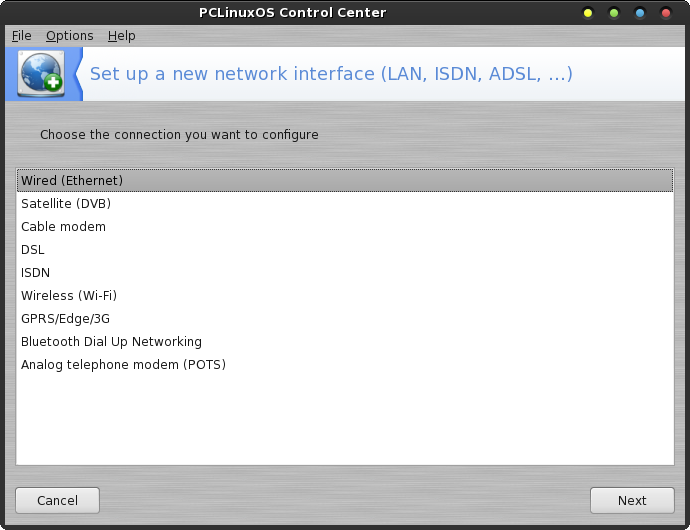 You will see the window above displayed. While most of you will select "Wireless (Wi-Fi)," you can also set up a cellular connection (GPRS/Edge/3G) or a dialup (POTS) connection. Select the type of network interface you are wanting to configure. For the purpose of this article, we'll focus on setting up the most common connection, a wifi connection. 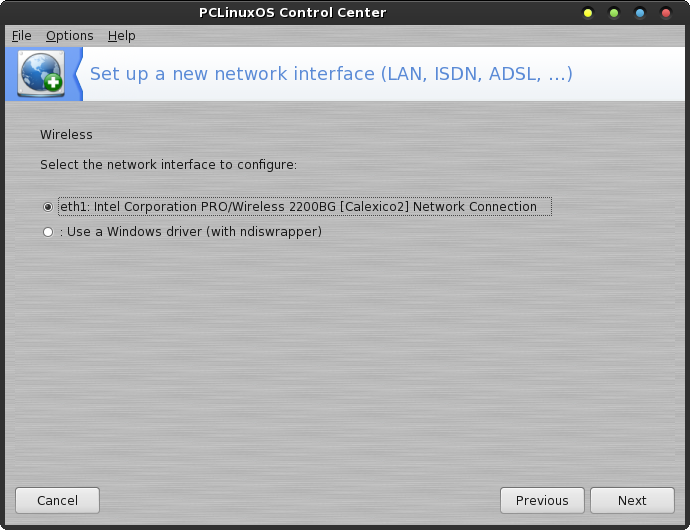 Select the network interface that you want to configure. Fortunately, Linux support for the many varied wireless cards and chipsets has vastly improved over the past five years. Still, there may be instances when you run across a wireless card or chipset, (typically an older one), that doesn't have direct support under Linux. You'll know you have one of these animals if "Use a Windows driver (with ndiswrapper)" is your only choice. Never fear, however, because we can most likely still get it up and running. To use ndiswrapper to get your wireless card running will require you to find the Windows *.inf and *.sys files for your particular wireless card. You can get these from your Windows partition (if you are dual booting), or download them from the internet on another computer. If you use the latter method, save the files to a USB flash drive, and transfer them to your /home/yourusername/Downloads directory. When prompted for the Windows driver file, point PCLinuxOS towards the *.inf file for your wireless card. The rest of the ndiswrapper configuration is pretty straight forward. Just follow the prompts. 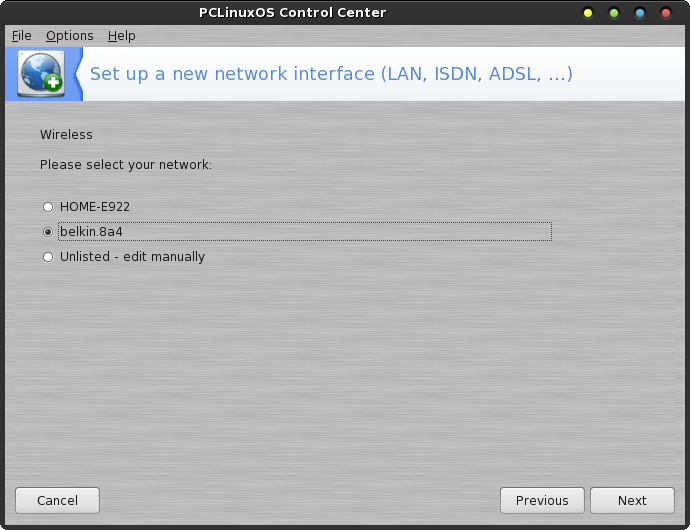 In the next screen, select the router you want to connect to. I have two (well, actually three) wireless routers on my home network (one is in the basement and not shown in the image above).  If you use some form of encryption on your wireless network -- and these days, that's nearly everyone -- the "Operating Mode" will be "Managed." Common options for "Encryption mode" include WEP and WPA/WPA2 Pre-Shared Key (PSK). WEP is much less secure than WPA/WPA2 PSK, and can be easily broken in under two minutes by a determined hacker. Most of the time, the wireless network wizard will have the proper encryption mode already preselected for you. On the next line, enter the encryption key for your router. If you want to see the key that you are entering, clear the check in the "Hide Password" check box. Otherwise, all you will see are a bunch of big, black bullets. After you've entered your encryption key, select the "Next" button. 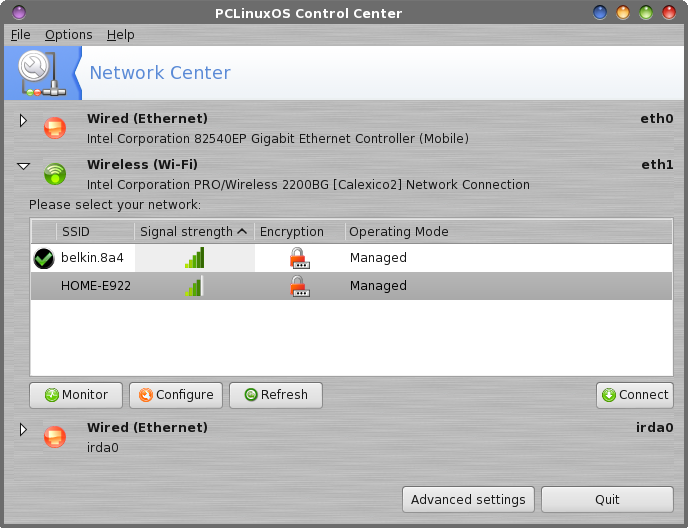 You can also get to the "Wireless Settings" window (previous image) by selecting "Network Center" from PCC, selecting the triangle next to "Wireless (Wi-Fi)," then selecting the "Configure" button. 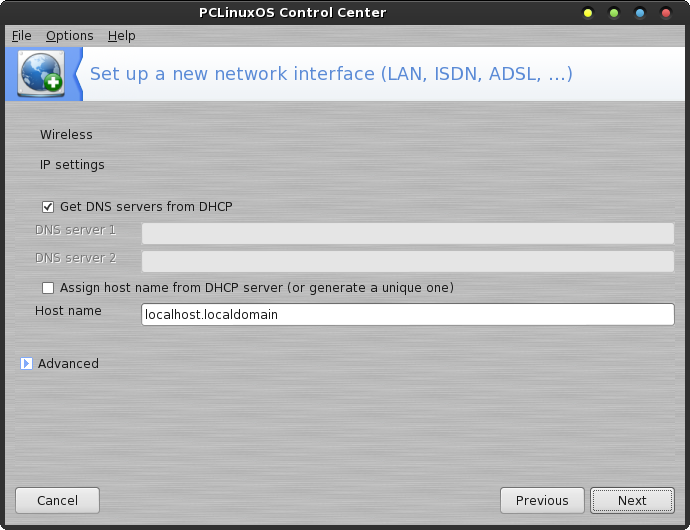 Accepting the defaults in this window will work just fine. But if you would like to use OpenDNS or Google DNS services for your connection, clear the checkmark next to "Get DNS servers from DHCP" and enter the primary and secondary DNS addresses on the DNS server lines. We'll discuss the "host name" function a little later. For now, just accept the defaults and select the "Next" button. 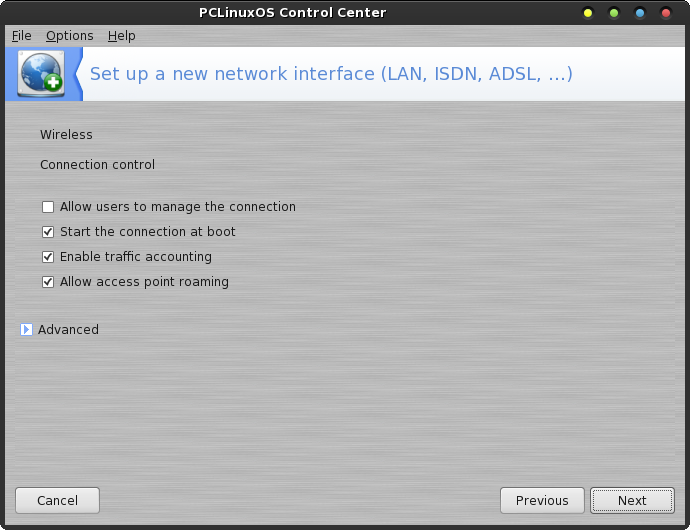 Accept the defaults (which may differ from the selections above), and select the "Next" button.  Select if you want the connection to start up now, then select the "Next" button. 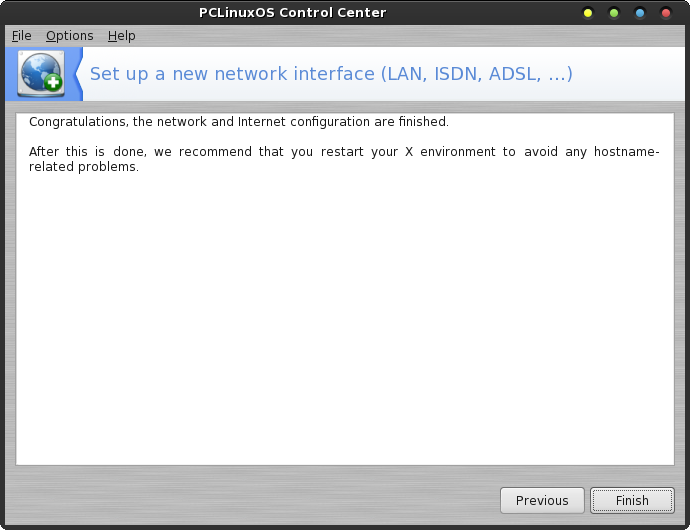 If everything was successful, you see the "Congratulations!" window, as shown above. However, if you see a message that there was a problem configuring your wireless connection, go back and review your settings to insure that everything is correct. Often times, the problem is an improperly entered encryption key. While the explanation sounds complicated, the entire process is actually very easy. Often times, a step-by-step instructional article can make the process sound a lot more complex than it really is. Hostname The hostname is the name that a network connected device (your computer) is known by on a network. By default, your hostname is set as localhost.localdomain on PCLinuxOS. This makes your PCLinuxOS box easy to identify on your home network -- provided you don't have more than one computer running PCLinuxOS connected to your network. However, if you have more than one computer running PCLinuxOS connected to your network (I have up to eight connected at any given time), it can quickly become confusing to see multiple computers named "localhost" on the network. Fortunately, you don't have to accept the default value of "localhost.localdomain." You can personalize each and every PCLinuxOS computer on the network to have its own unique name. While there are ways to do this with the aid of a graphical user interface, I'm going to show you a different way to do this -- the sure fire, easiest, fastest way. Trust me. It's not hard to do. Most of it uses GUI tools, too.  If you are using the KDE desktop, press the Alt + F2 key. You'll see a window like that pictured above at the top of your screen. Enter the following: kdesu kwrite 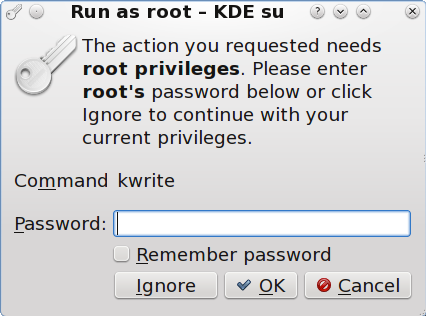 Enter the root password in the box above, and press OK. 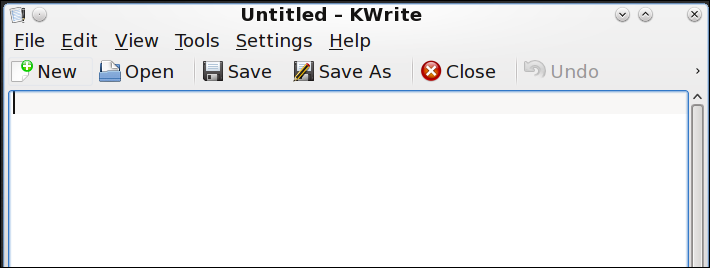 KWrite will open, as above. Select File > Open, and traverse the directories to /etc/sysconfig. Find and select the "network" file. Under the LXDE and Xfce desktops, select the application menu, then Run Program. Enter the following: gksu -l leafpad (LXDE), or gksu -l mousepad (Xfce) The -l contains a lowercase L -- not the number one. Enter the root password, as described above. This will cause either the Leafpad or Mousepad text editors to open (just like it did with KWrite under KDE). In either text editor, select File > Open from the menu, and traverse to the /etc/sysconfig folder. Find and select the "network" file. At this point, the processes merge, regardless of which desktop environment you are using. The first line in the network file will be HOSTNAME=localhost.localdomain. Change the line to include the name you want to assign that particular computer. As an example, on my IBM Thinkpad T42, I changed it to read thinkpad-t42.localhost.localdomain. So, if you have a desktop and a laptop on your network, you might want to change the hostname on each to read desktop.localhost.localdomain and laptop.localhost.localdomain, respectively. Save the file, and restart your computer. Your computer will now have a much improved and unique name on your network. Localization Manager Even though PCLinuxOS is a Linux distro based in the United States, and thus uses English as its default language, it's also understood that PCLinuxOS users reside all over the globe. As a result, it stands to reason that not every PCLinuxOS user is a native English speaker. 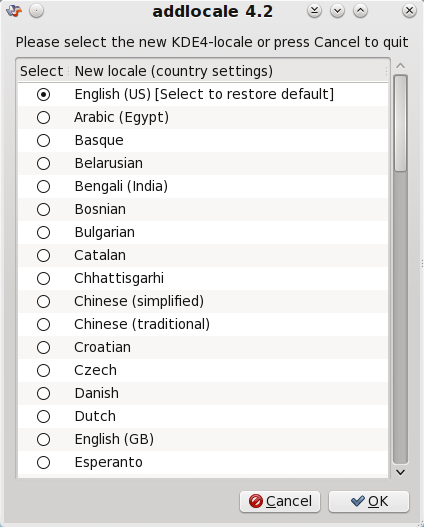 Launch "Localization Manager" and select your native language from the list of over 80 different languages. When you select your language, the language files for your selected language will be downloaded to your computer. Reboot your computer, and your copy of PCLinuxOS will now appear in your native language. Summary By fine tuning your PCLinuxOS installation, you can tailor it to your unique and specific needs. Spending just a little extra time tuning your copy of PCLinuxOS will help you be more productive, and will make your PCLinuxOS experience more enjoyable. |