| Previous
Page |
PCLinuxOS
Magazine |
PCLinuxOS |
Article List |
Disclaimer |
Next Page |
Enhance Your Home Brews With Brew-Target# |
|
by loudog Tis the season to be jolly, and what better way to do that than make some home brewed beer. We can be certain that Tux enjoys an occasional refreshing malt beverage, because his friends have created this exceptional beer brewing database for us. Although Brew-Target# is not a beginner's guide to beer brewing, it contains all the necessary information for the novice to try their hand at different recipes. Using my prior experience at home brewing, it is my intention to provide all the information needed to utilize this program, even if you are a complete newb. I believe Tex, err I mean Tux, is in agreement with me and is awaiting a complete, comprehensive, and enjoyable tutorial on how to use Brew-Target#. Let's start by opening the program, shall we? 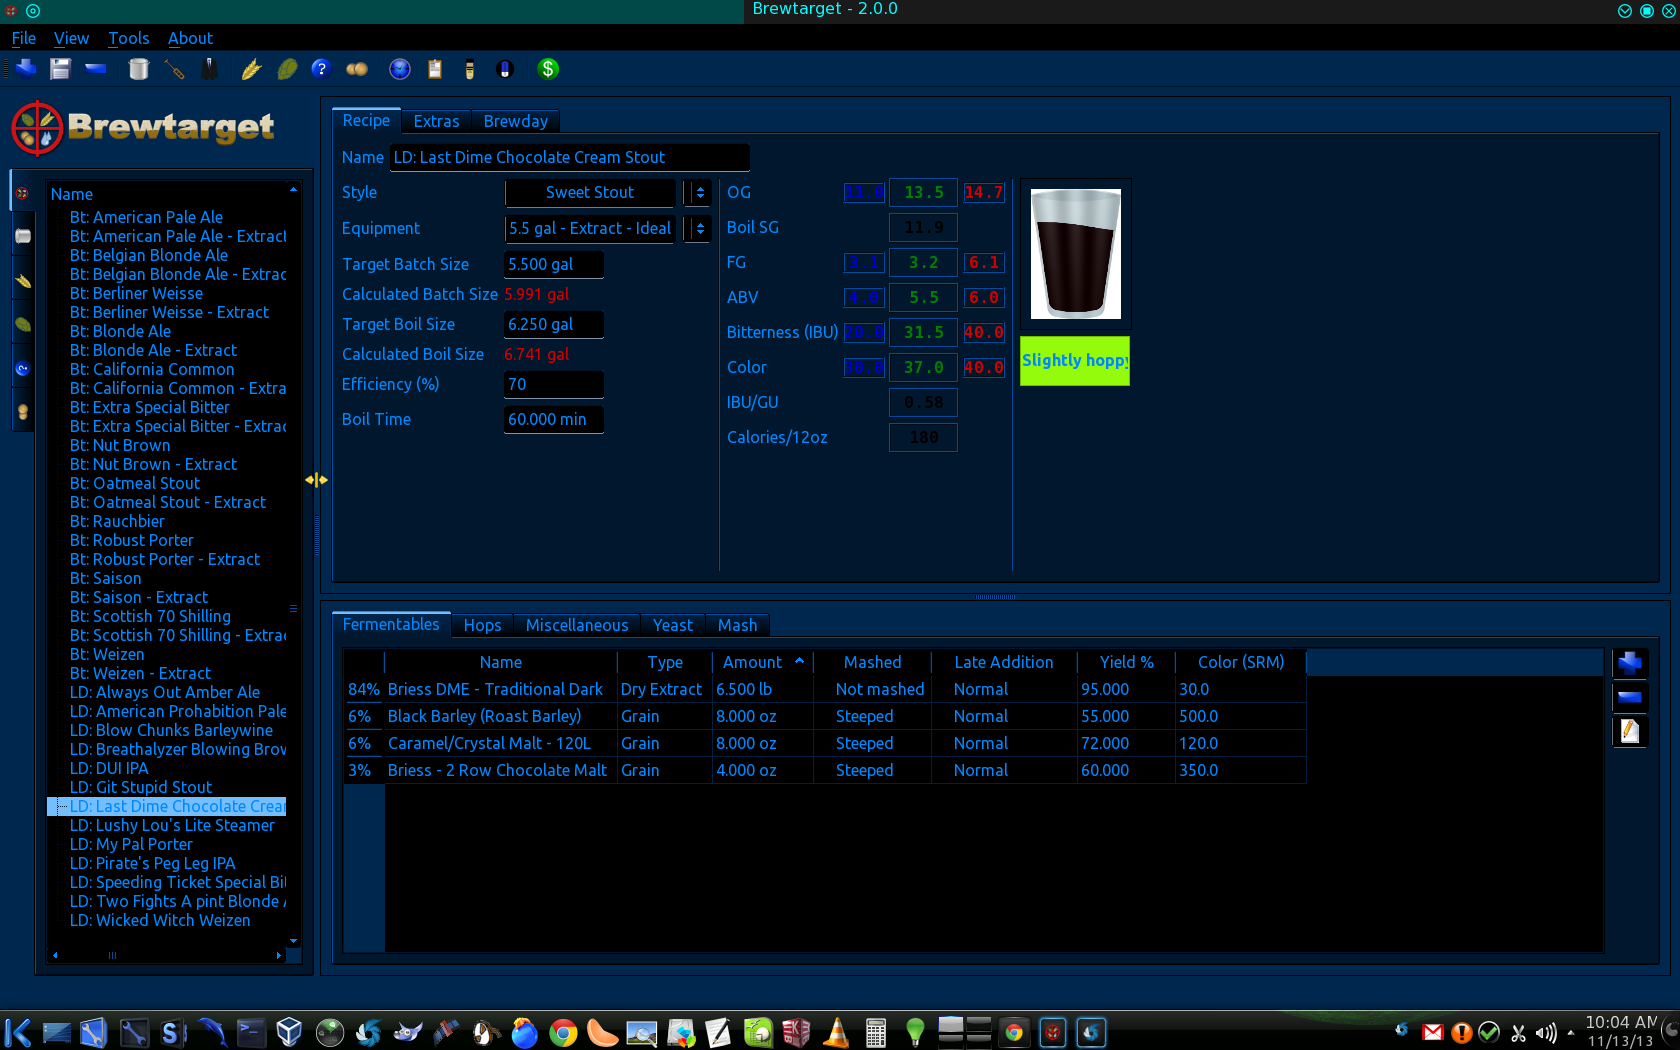 The first thing I would like to draw your attention to is the window to the left side of the image. This is the general information window. As you can see by my cursor, the window is expandable. The recipe tab (upper left) is currently selected. Brew-Target# has many recipes loaded by default, from a heavy Barleywine to a light bodied Belgian Blonde Ale. It also allows you to add your own recipes to the database (more on that later). If we check the tabs for the general info window, we see selections like hops, fermentables, yeast and the like. Clicking on any of these tabs brings up plenty of information on the particular subject. The image shows a partial fermentables list. 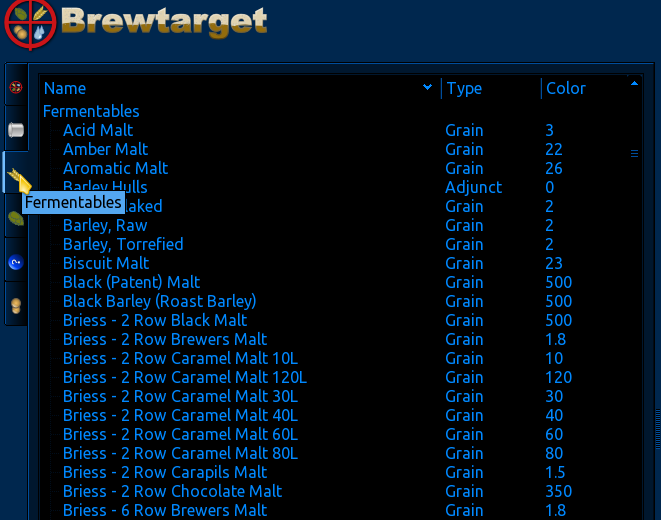 Double clicking on most items opens up a new window with a detailed analysis of the item. This new window is editable to suit your particular needs, and some of the items have their own sub menu. 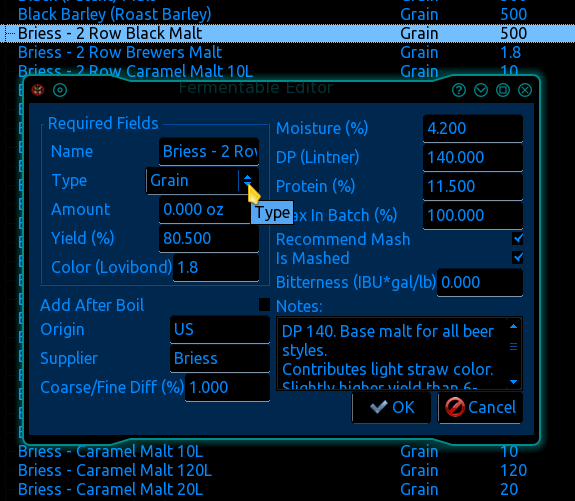 As we examine the choices at the top of the program window, we see new recipe, a save button, delete recipe, and the list goes on. One very important button not to miss is the donate button. We all know the value of donations, and many open source projects would not exist without them. An experienced brewer will know what most, if not all, the information contained in these options means, being able to utilise them readily. A couple of buttons that I thought were interesting were the timer and the refractometer choices. The timer is versatile, with 3 different timers that you can configure independently. The timers can also be set for different audible notifications that you select from the dropdown menu. 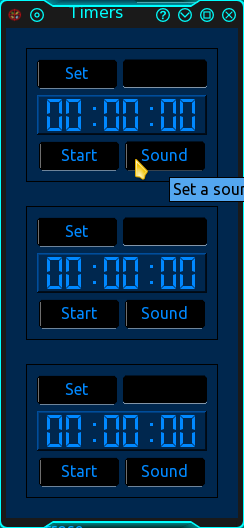 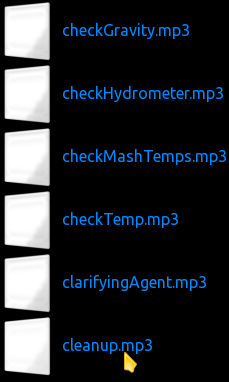 I'm sure the ladies appreciate the cleanup notification option. They might even be willing to set it for you, but don't worry guys: there's also a "have another homebrew" notification. For some reason, a few of the other notifications bring to mind the BFS scheduler. Hmmmm. The reason I enjoy the refractometer option is because that's the tool I prefer to use. 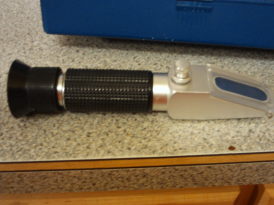 The standard tool for reading SG (specific gravity) and FG (final gravity) is a hydrometer, which allows you to know how much dissolved solids, primarily sugars, are in the liquid. If you know how much sugar is in the mix, then you will have a pretty good estimate on how much ABV (alcohol by volume) will be in the final product. It will also give you an indication when the sugar is all used up in the wort. The refractometer, on the other hand, gives the amount of sugar the liquid contains whether fermentable or not, in the form of a brix reading. The refractometer is primarily used for the harvesting of fruit, the farmer squeezes a couple drops out of the fruit onto the lens, looks through the eyepiece, and depending on the amount of sugar the brix reading tells him is in the fruit, he knows if it's ready for harvesting or not. The same can be said for the beer except on the opposite hand; the less sugar in the liquid the closer the beer is to harvest. I also enjoy the cleanliness and sanitation benefits the device provides. Another handy item is the configuration option located in the tools menu. This allows you to change languages and measurement standards to fit your geographical location. Now let's look at the recipe window. Double click on any recipe in the list and it will load into the recipe viewer. 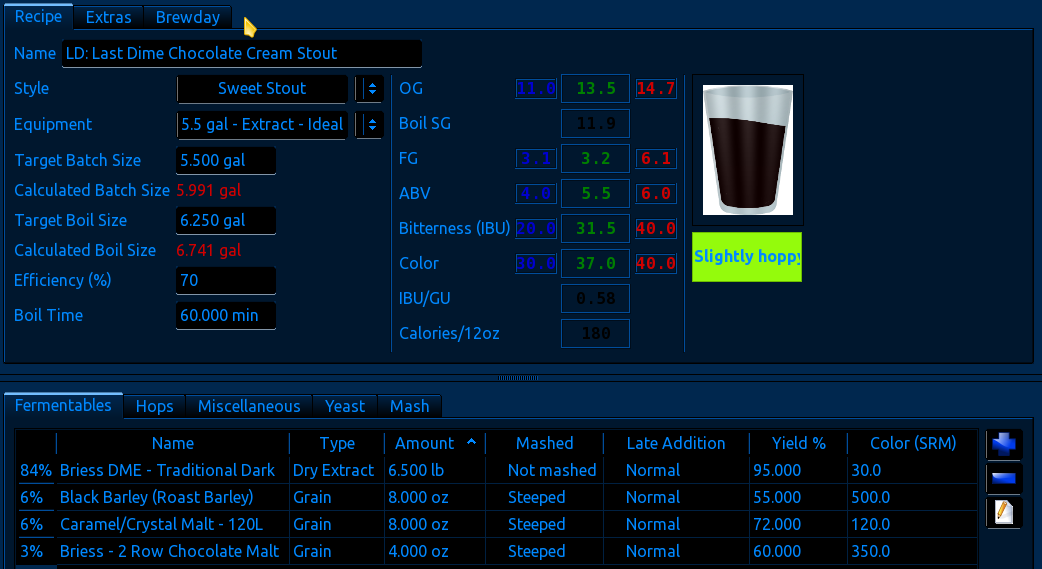 You will see the basic information about the beer you are thinking of brewing, from the color, taste, ingredients, OG, FG, ABV etc. Now this will be Greek to many of you, but will become clearer as the article proceeds. I told someone once that I understand every language but Greek. He quickly rattled off some Spanish to me and all I could say was, "sounds Greek to me." Okay, all joking aside, let's get back to Brew-Target#. For those that have some experience, this is an exciting playground of information. At the top we see three tabs: recipes (open now), extras, and brewday. If we select the extras tab, we find information on the brewer, time to age in the fermentors, temperatures, etc. This is also the place to record things you did while brewing this recipe in the notes section. The Brewday tab gives instructions on actually brewing the beer, although it will be slightly vague to beginners. We will focus on the brewday tab later in the tutorial. This is a recipe I added to the database and we will now go through the steps to add your own. First, go up to the new button (top left main window), and click it. This will bring up the "name the recipe" window. 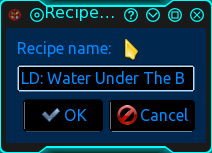 Make sure to start with your initials for future identification, then the name of your brew. After clicking OK, it will be added to the recipe list and show in the main recipe window. Next, we select the style of beer it is from the dropdown menu. 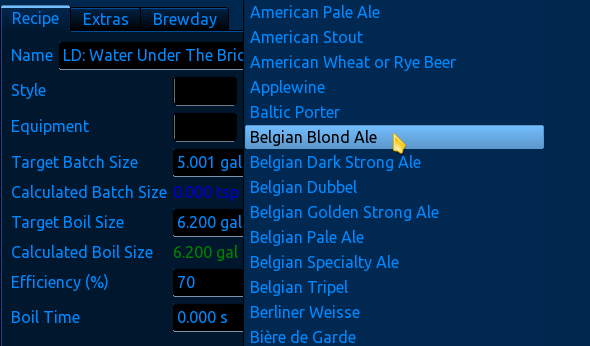 From the equipment menu, we select Extract-Ideal, as this is an extract brew. Next, you see another window asking if you want volumes calculated, etc. Select yes. This will give some information on water volumes/evaporation, etc. that is helpful for getting the proper water to malt extract ratio, plus a whole lot more. Now its time to add the ingredients. In the lower section, select the fermentables tab, then over to the right click the big + button (add a fermentable) to bring up the fermentables menu. This menu is expandable. 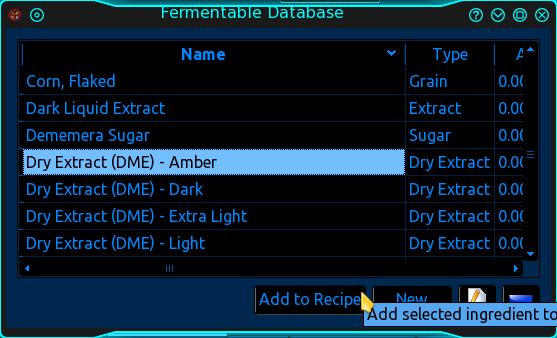 Select your fermentable and click the add to recipe button. It will show up in the list. You must enter the amount of extract, grains etc. the recipe calls for.  Continue to add your ingredients, hops, misc, yeast and the amounts required as you go. Each ingredient tab will bring up a similar selection menu when you click the + button. Note: I have encountered a bug in the miscellaneous add ingredient menu. After selecting the ingredient and clicking add to recipe, it adds something different than what you had selected. Other strange behavior has been reported with the misc. section. You can get around this by the drag and drop method. 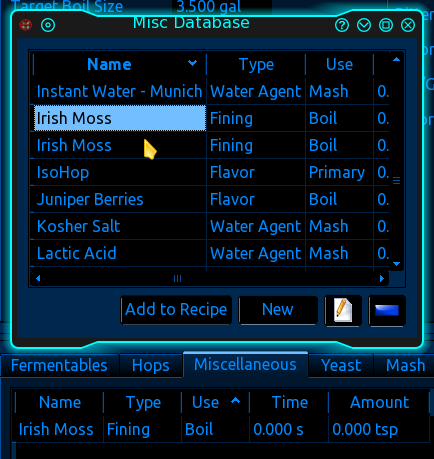 Update:This bug has been fixed in the updated version but was not ready for distribution as of the time I contacted the developers. When you are done adding all the ingredients, we will take a closer look at the parameters table. 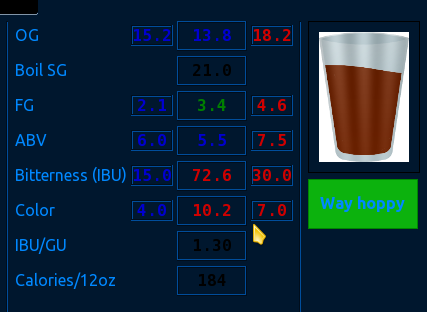 The parameters table is full of useful information about our recipe. The center column shows the characteristics the final product will possess based on our input into the database (I tend to ignore the bottom box). The left column shows the minimum criteria, and the right column the maximum for the style (belgian blonde ale) that we specified in the beginning. Looking at the glass of beer, it says, "way hoppy!" Hmmmm. If we look in the bitterness row we see a rating of 72.6. According to the min/max values our recipe either has too much hops or too bitter of a hop. Other parameters are also not within tolerance for our selected style. Something is really wrong with our recipe. No wonder it never tasted like a belgian ale. Whoever made this recipe must have had one homebrew too many. Actually, I purposely chose some wrong ingredients to get these results to illustrate the depth of the database. Now you may begin to understand some of the really exciting potential of the database. You can create your own recipes from scratch, check an existing recipe for possible reasons why it doesn't taste quite "right." Experiment with existing recipes, while checking to see if you're staying within the style parameters. If you happen to have some leftover grains, hops, etc, lying around and decide to brew a camper's mix beer, you can search through the style menu to find out what to call it based on the ingredients. All without brewing one single drop. You can also load the recipe, go to the brewday tab and select generate instructions to get a simple step by step brewing guide, although you will have to do some sorting out in the steps order. Brew-Target# is an absolute joy to play around with, and at the same time, provides everything a novice needs to get to some serious home brewing. I am by no means an expert home brewer, and some of the methods and information I will be presenting here may not be in the traditional fashion, but my friends all enjoy my brews. Speaking seriously, did I mention I was going to include an in depth tutorial for the newbies, so they would possess enough information to brew at home, by themselves, with the help of this program? Why yes, by golly, I did! |