| Previous
Page |
PCLinuxOS
Magazine |
PCLinuxOS |
Article List |
Disclaimer |
Next Page |
KDenLive, Part Six |
|
by loudog Hello friends, and welcome to another segment in our KDenLive series. In this article we will cover an interesting effect called Rotoscoping, as I finally found my camera tripod. There are countless things that you can do with this effect after you get the hang of it. We will also be going a little deeper in depth on the audio gain, "keyframable" effect. In my first video clip, I have some undesirable background sound I need to turn down. I also have some spoken words towards the end I need to turn up. So, why don't we dive right into the sound issue first and fix it. The first thing I will need to do is select the audio portion of the clip. Right click on it. 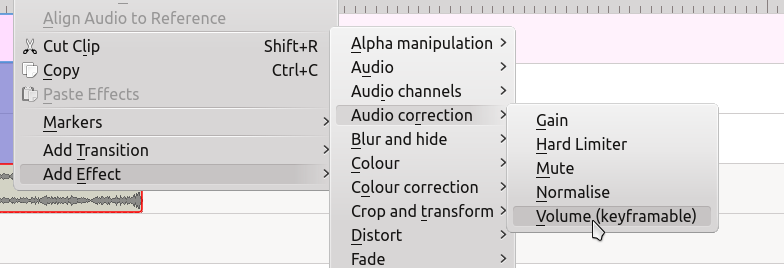 The effect will show up in the effect stack window. Notice the little clock in the top left side. 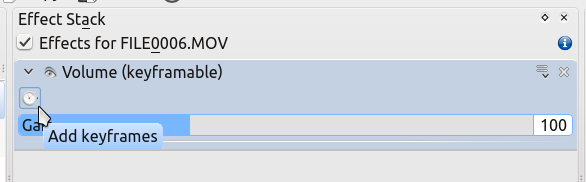 We want to click on that, which will bring up the keyframe options that you should be familiar with by this point, although they are a little different in this effect. You will see this: 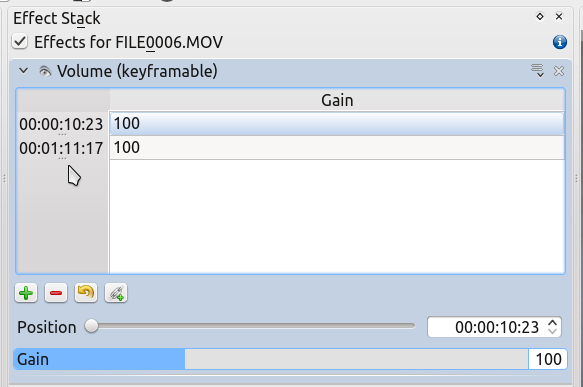 Let's go over this effect bit by bit and discover how it works. The gain at the beginning of the clip is 100% (I have this clip cut at address 10:23, so that is my beginning) and the end of the clip (1:11:17) is at 100%. Let's change the beginning gain. In my case, I want to turn the gain (volume) down. I will select the beginning keyframe readout and move the gain slider until it reads 15, turning it way down. 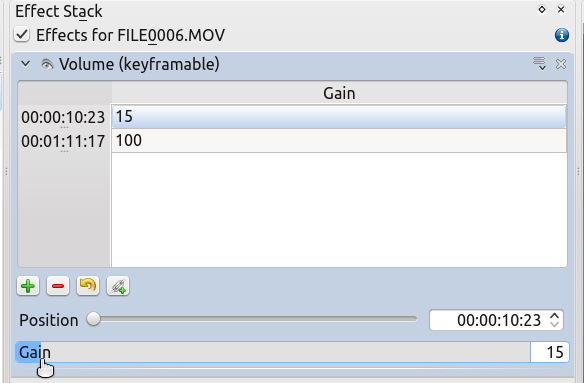 You can see the gain is at 15 for the beginning of the clip. Now we want to determine where we want the volume turned back up. To do this, I generally look at the audio track and estimate the position by utilizing the audio signature. 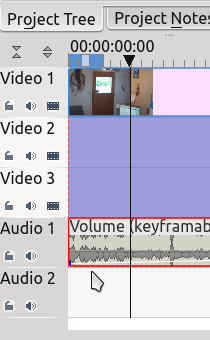 The cursor clearly points out that nasty background noise we are editing. Also notice the timeline marker is where we want to turn the gain back up. Time to add a keyframe. Go to the green + and add one. With this keyframe we also want the gain to be at 15%. If we put it to 100 the volume would gradually increase from 15 to 100 between the two keyframes. You should understand this concept concerning keyframes at this point from our previous lessons. Now, very close to that keyframe we will add another with the gain at 100%. This essentially turns the volume back up to normal. The effect stack will look like this: 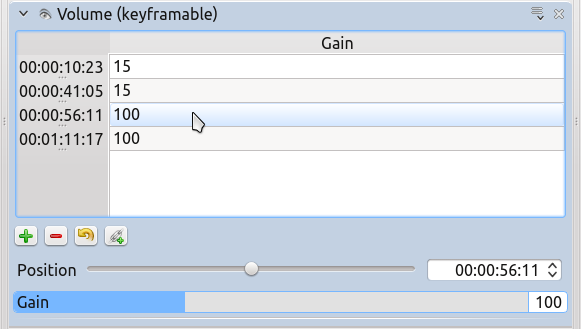
Between 41:05 and 56:11 the volume will increase from 15% to 100%. Review the clip to make sure the sound is as you like it. If it isn't, don't worry. With this effect you do not need to delete the keyframes and redo them, just grab them with the cursor and adjust up or down and forward or back in the audio track as necessary, the effect stack will auto update. Look at this image and you will understand a little better. 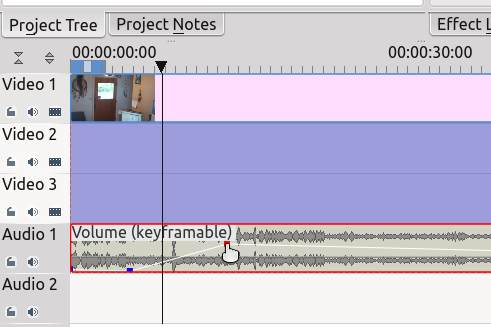 Now I need to increase the spoken words towards the end of the clip, because the microphone did not pick them up well. Moving the project timeline marker, I will navigate to the area where I need the gain increase. I will add a keyframe here at 100% and another one very close to that one at 170%. At the end of the spoken dialogue I will add another keyframe at 170%. Quickly after this keyframe, I will add the last one, turning the gain back down to 100%. My completed effect stack looks like this: 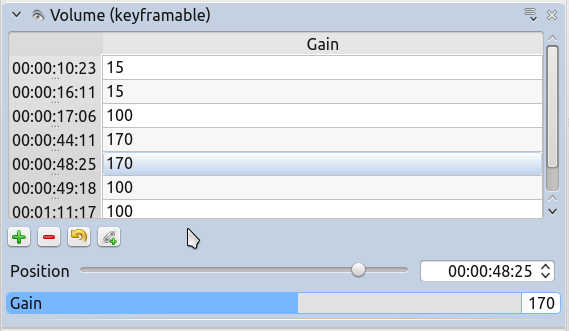 And the audio track shows the keyframe markers as thus: 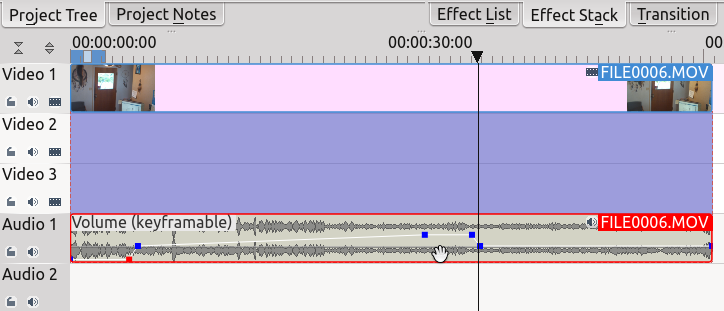 Now you know how to manipulate the audio gain in your videos if the occasion arises. Now let's have a look at rotoscoping and do a simple clone. It is important to understand that the use of a camera tripod is a must for this to work properly. The camera angle, zoom and lighting must also be kept very close to the the same. Any panning or zooming should be done after the clone video is rendered for best results. First, we want 2 clips of the person or thing we are wanting to clone in the project timeline and aligned. On the top clip, add the composite transition and stretch it out to the full length of the videos, as we learned in previous articles. Next add the rotoscope effect to the top video clip also. 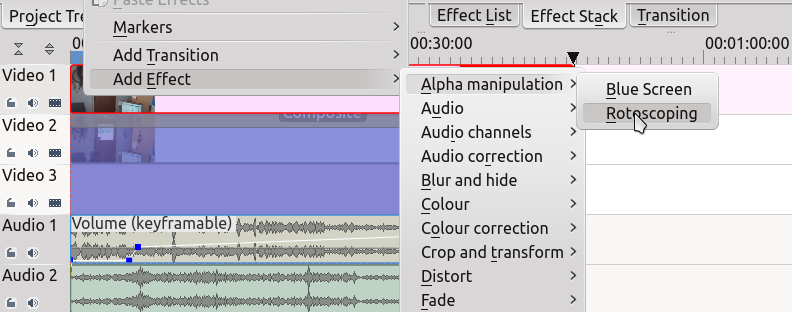 When the rotoscope effect appears in the effect stack, click the invert box. Ignore the other options for now because we will cover them in the future. Now, for the real fun. In the preview window, reduce the image a little with the slider at the right side for ease in mapping out the cut area. Unlike the old time movie effects you do not need to select a straight line for good results; the digital world lets you select any area you wish. For this simple clone, my cut area will be just a rectangle on one side of the video. Just click the borders of the cut zone you want and connect the dots to finish the borders. It will look like this: 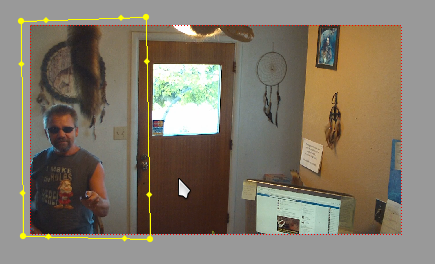 Play the video and see how things are looking. Now, unclick the invert box and review again. Now you're getting it. I will leave you with this final screenshot of me saying to me "I know you from somewhere" to ponder while we wait for next month's magazine where I will cover this effect in more detail and give a link to the final product. Until then, it's summertime. Go swimming with Tux -- he loves it. 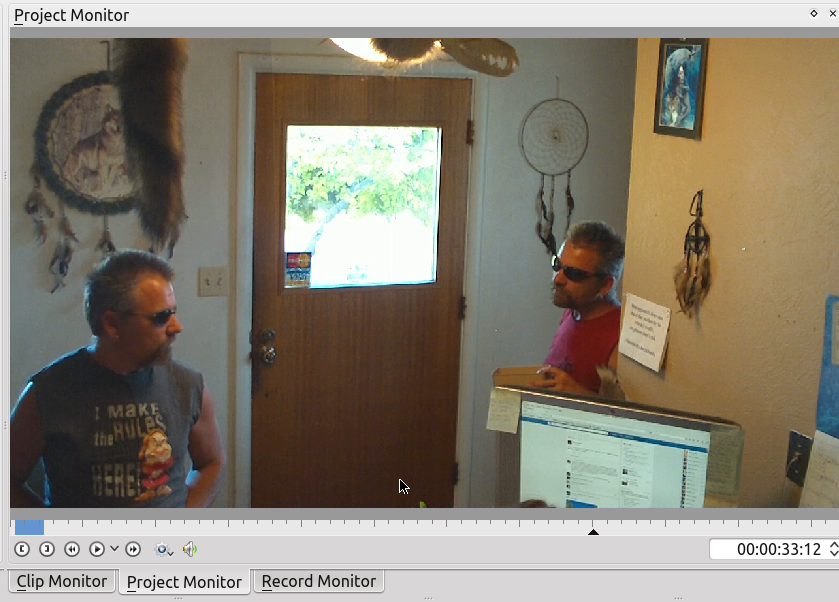 |