| Previous
Page |
PCLinuxOS
Magazine |
PCLinuxOS |
Article List |
Disclaimer |
Next Page |
GIMP Tutorial: An "Out-Of-The-Frame" Effect |
|
by Meemaw I saw this tutorial a while ago and thought it was interesting. Your finished product gives the effect of your subject emerging from a photo. 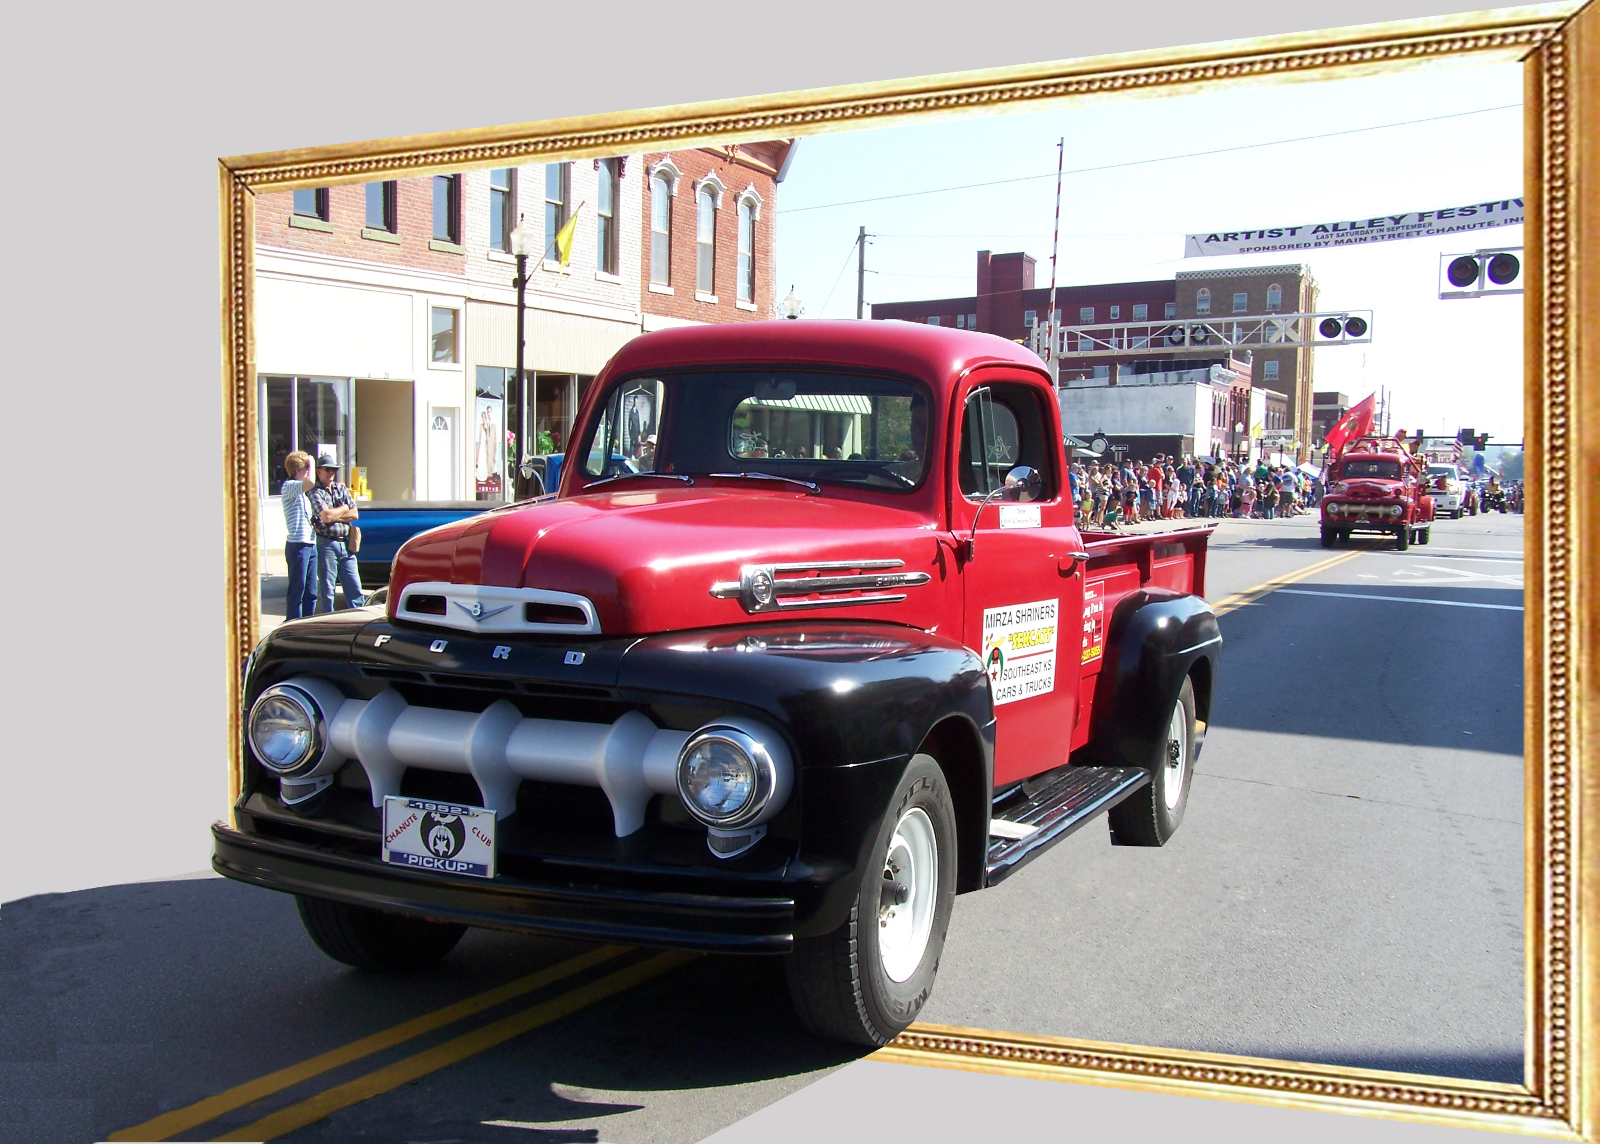 You want to start with a photo of something that is moving toward you. Since I went to a parade recently, I have several photos of trucks and cars taken from the front. For this you will also need an image of a picture frame. I downloaded a framed painting image from Wikimedia Commons and cut the photo out, leaving the frame. You can also make a picture frame using the method from my earlier tutorial in Inkscape. Now you are ready. 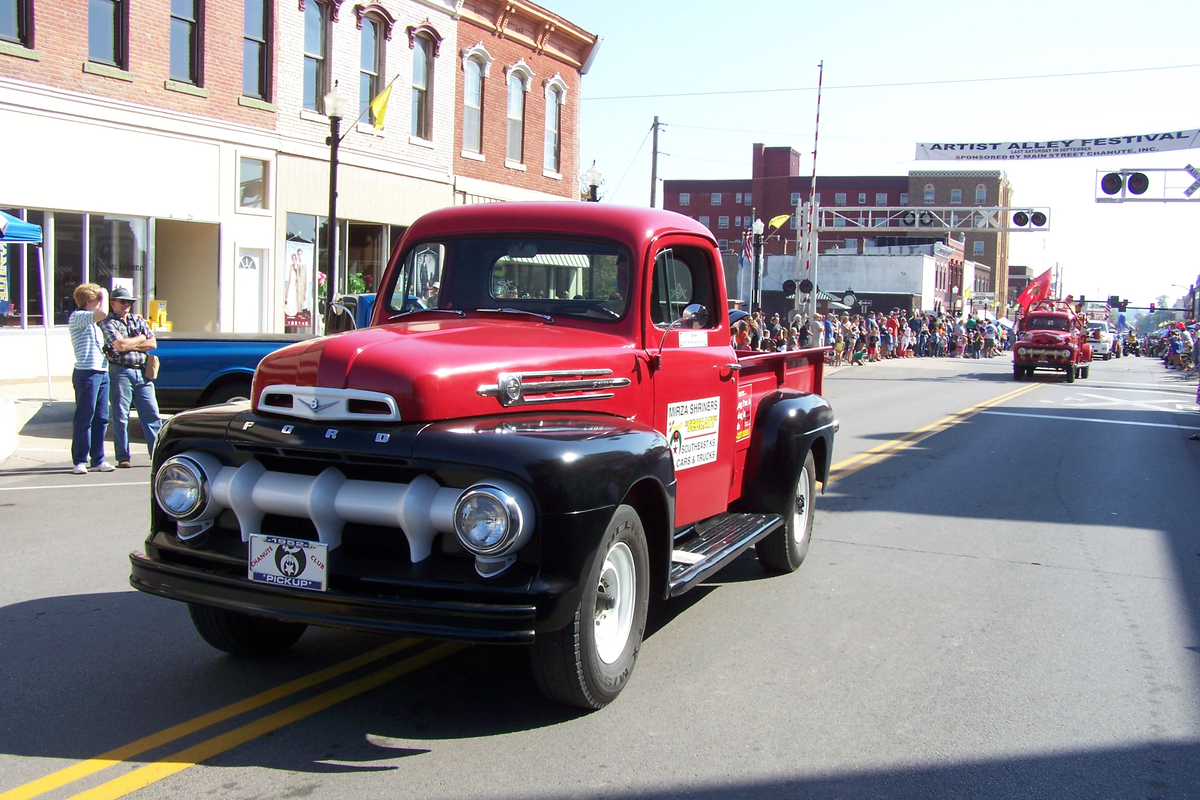 Open your photo in GIMP. You can resize it to approximately the size you want your finished image to be. Using the lasso tool, outline the object you want to bring out of your photo. In mine, it is the red truck in the foreground. I grabbed part of the shadow, too. 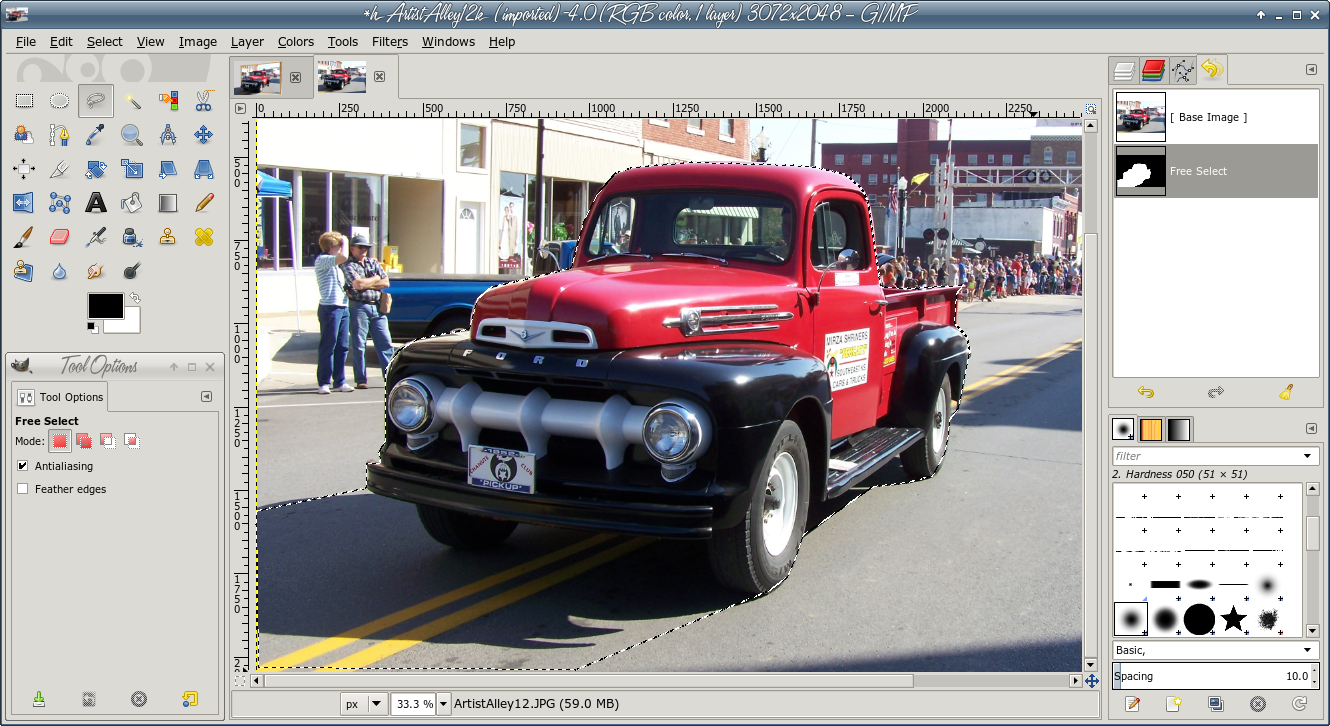 While that is selected, click <CTRL> + C (Copy), but before you paste it, create a new, transparent layer and paste it there (<CTRL> + V). Also, create a new layer filled with a light grey (or whatever background color you think might look good) and send that layer to the bottom. 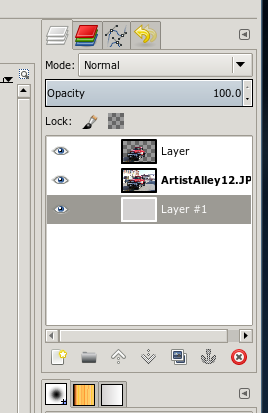 Select your layer which contains the original photo, and open the photo frame graphic. Copy and paste the photo frame onto your original photo, resizing if necessary. This might be a good time to save your project. 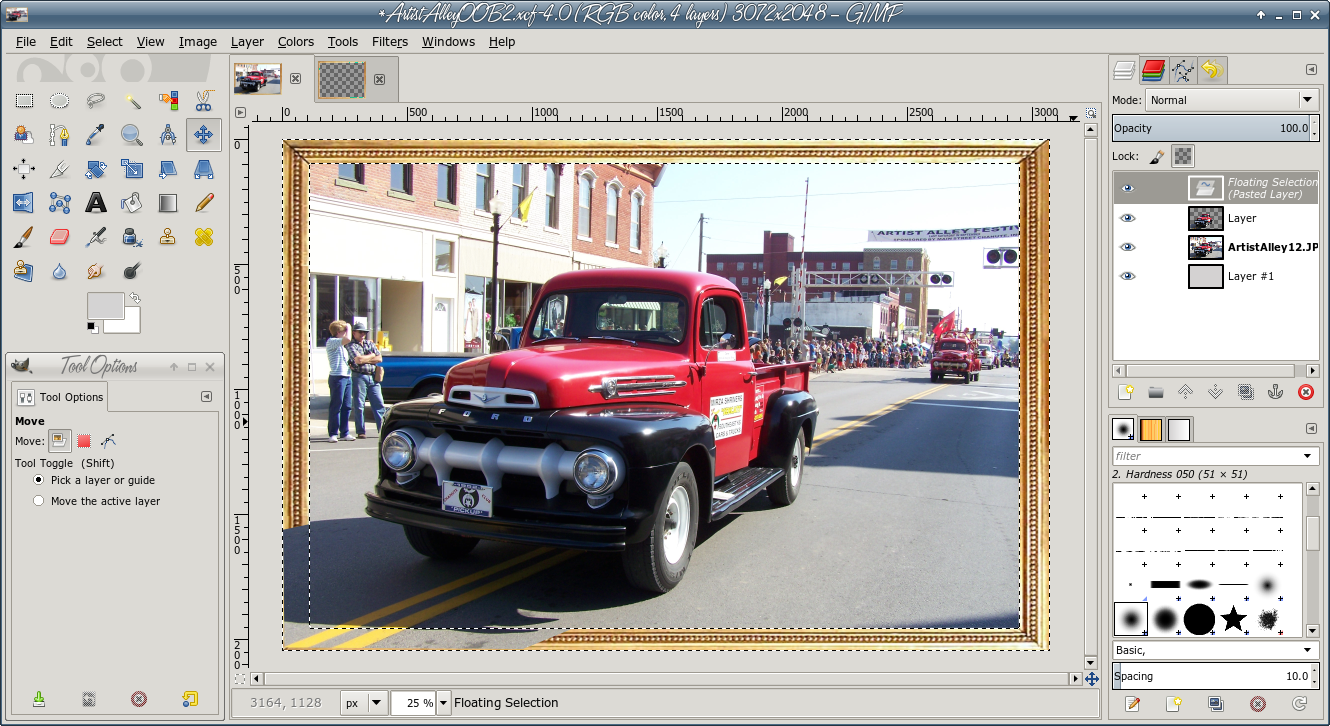 Still on that layer, click on the Perspective tool, then click on your picture. The Perspective tool will cover it with gridlines. 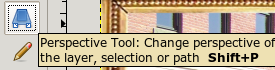  I am going to grab the left side of my photo and move it in, making that side of the photo look like it is farther away. You might have to move it around a bit to make it look like you want it, but until you click Transform in the window that pops up, you will be able to manipulate it. If you click Transform, and discover you don't like it, you can always undo it (<CTRL> + Z). Don't let it fool you either. As you move your photo, you will see the image in its original position behind the one you are moving. When you click Transform, it will disappear.  Check your project carefully as you may have to move your out of bounds layer a bit to cover the original photo of the same thing. I had to move the truck a bit to cover the other image in the original. It might even be necessary to clone background colors over something that you can't cover. If your lasso tool was off at all, you might just use the eraser tool (in one spot in mine, I erased a bit of background I had selected by mistake to make the front end of the truck look smoother). 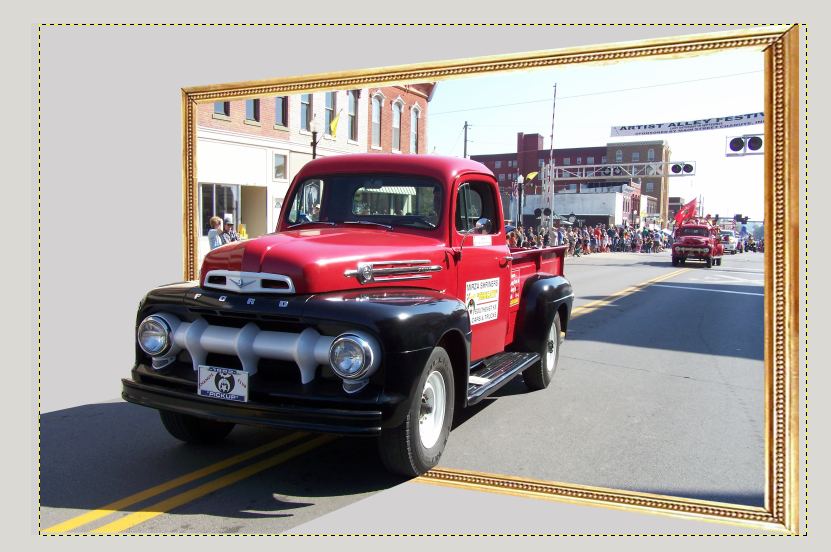 You might need to crop your photo if you moved the one level around very much. Save your work, merge your levels down and export your project to your preferred graphics format. 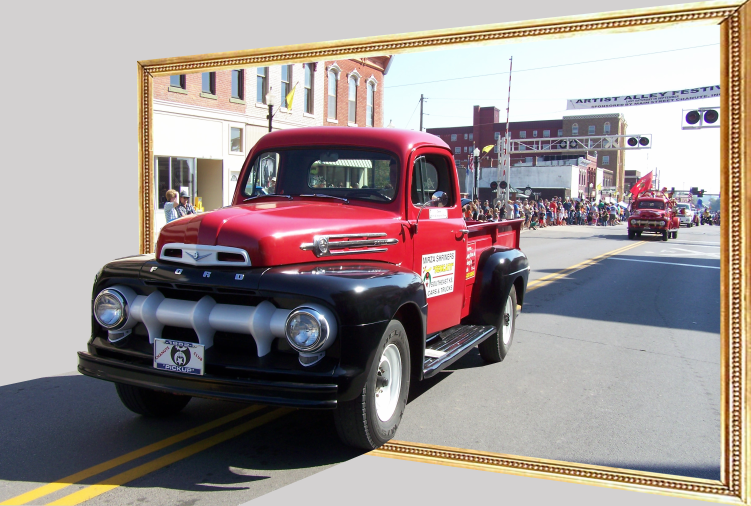 This one was fun, too, but gives a little different effect. I went to Monument Valley in 2012 and took the original photo. I just moved the rocks and the ground outside the frame. 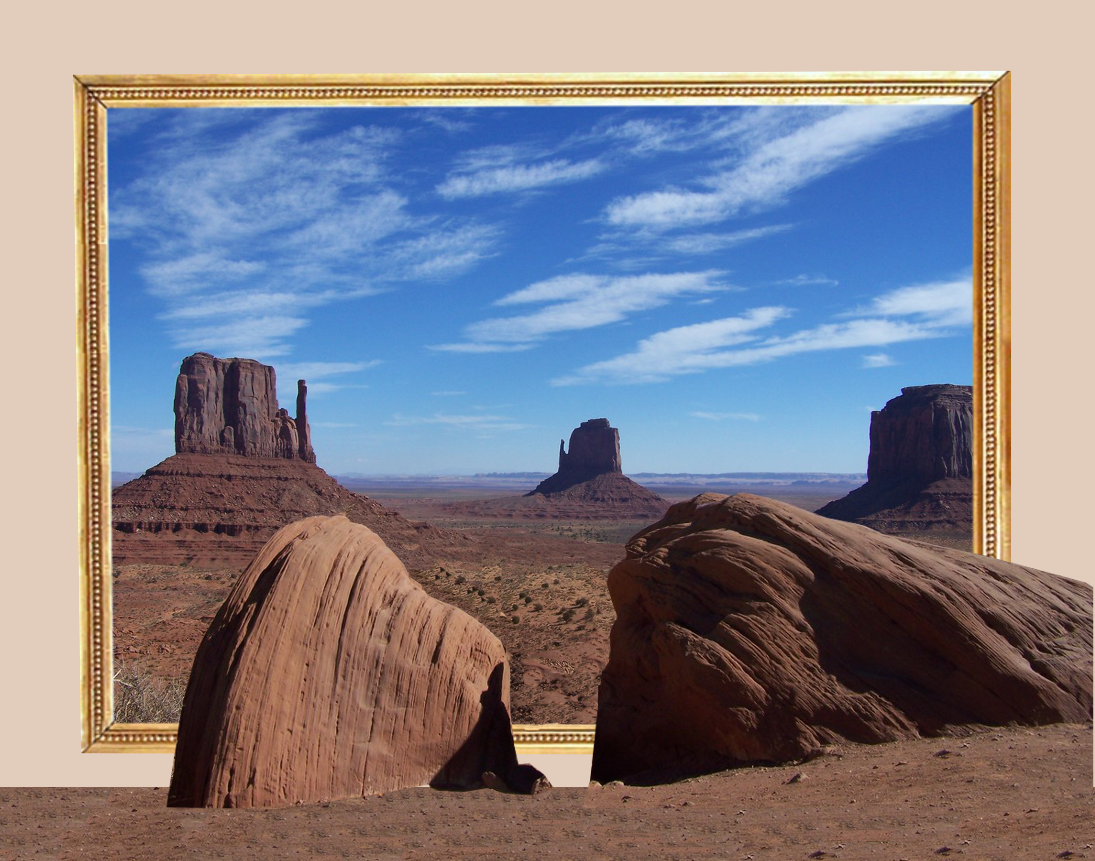 I have also seen this wallpaper, which is also very interesting. I downloaded it from deviantart.com. I'm sure it was made in much the same manner. Deviantart has several similar designs. 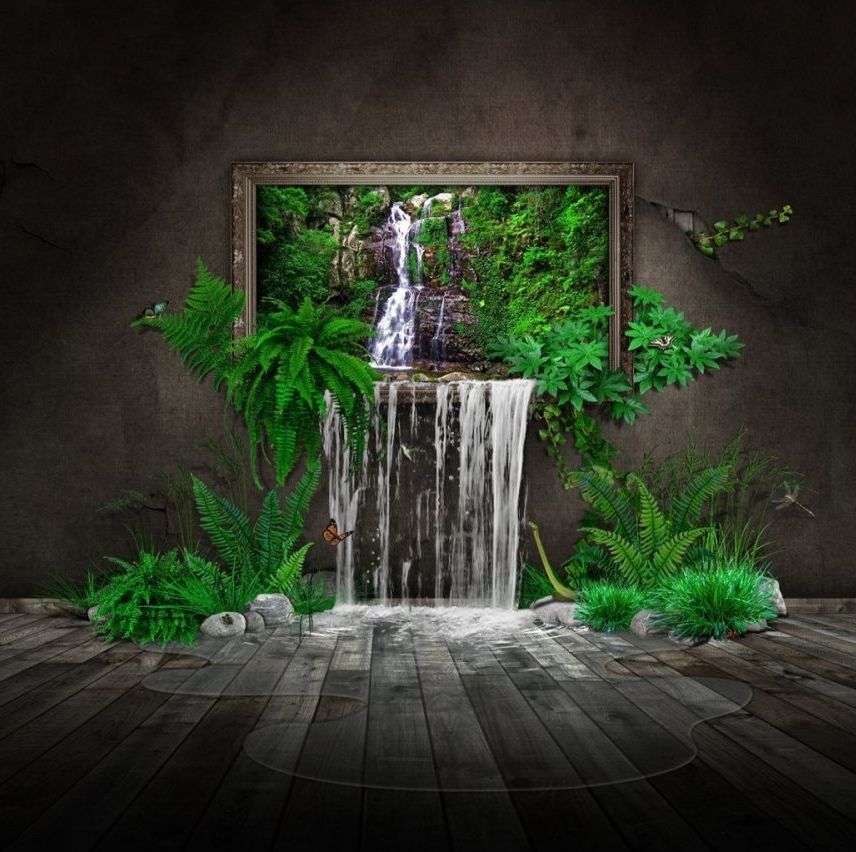 Let your imagination go, and I'm sure you can make something wonderful! |