| Previous
Page |
PCLinuxOS
Magazine |
PCLinuxOS |
Article List |
Disclaimer |
Next Page |
Inkscape Tutorial: Abstract Wallpaper |
|
by Meemaw Many of the wallpapers we see have circles that look like they are different sizes, but all look similar. We have now worked with clones enough to know that the Tiled Clones tool can do that pretty easily. I saw this tutorial not long ago, and thought it looked pretty fun, so let's play a bit.  Open Inkscape and edit your Document Properties. My page will be 1200 X 900, but yours can be whatever you want. Start with a rectangle the same size as your page, and make it whatever color you want. My preferred color is blue, and I'm going to make it a bit dark to start. When you have your color in, change the stroke to none, and the fill to a linear gradient, with your original color on the top of the page, and a lighter shade of that color on the bottom. 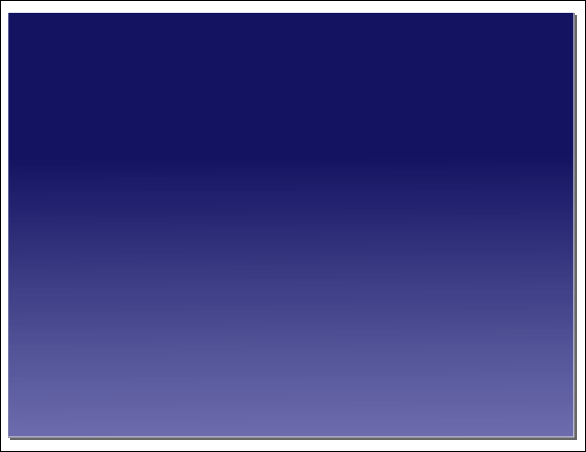 Choose the circle tool and draw a circle with fill the same color as the bottom of the gradient (or at least a color that blends well with it) and no stroke. Make the circle about two-thirds as wide as your page. My page is 1200 pixels wide, so I made my circle 800 pixels. Remember, after you get your circle drawn, you can adjust the size in the boxes along the top of your workspace. Put it about halfway off the top of the page, and center it horizontally using the Align and Distribute tool. Finally, change the Blur to about 25% and the Opacity to about 50% (but you are free to play with these numbers and choose what looks good to you - we are just looking for a highlight at the top of our page). 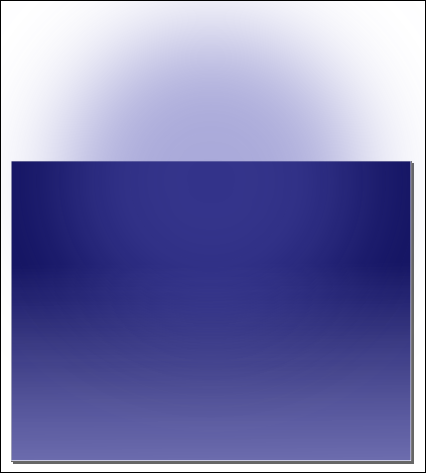 Also remember that when you export your wallpaper, you will choose Export Page, and the part of the circle not on the page will be omitted. Next, let's add a layer to our drawing. I want to be able to put more objects in without moving or changing anything I have already drawn. That's the great thing about layers. Generally we add a layer above the one we have been working on, so when you choose the Add Layer tool, the pop-up that appears has that as the default. Click Add. 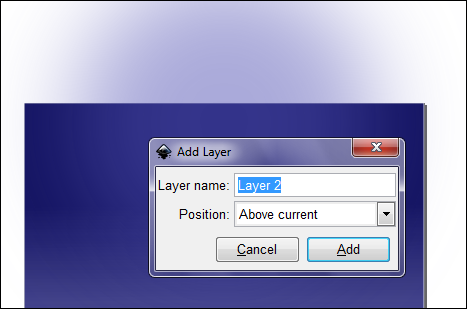 As an extra safety precaution, you can go back to Layer 1 and lock it by clicking the little lock on that line. 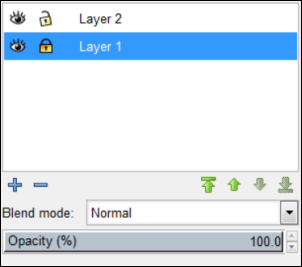 If for some reason you added the new layer below the original, you can move your rectangle and circle to the bottom by selecting them both and then choosing Layer > Move Selection to Layer Below or pressing <Shift> + <Page Down>. Now let's add more on the top layer. Make sure that layer is selected, then draw a circle that is about 40 or 50 pixels wide. Make the fill one color, and a 3-pixel stroke using a lighter shade of the fill color. All of mine will be different shades of the blue I started using on the background. Change the opacity on your circle to 50%. 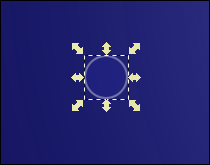 Let's multiply this circle by creating clones of it. Select it, then click Edit > Clone > Create Tiled Clones. The window that appears has several tabs and can be quite daunting. The best way to figure out what it does is to play with the settings and see what happens. For this tutorial, I got some help and will give you the settings I used. When we did the stars in our sunset project, we put in rows and columns of clones. This time we will designate an area that we want to cover. On my 1200 x 900 pixel drawing, I used a 400 px width and 200 px height. Then the following tabs were set as shown below:
Shift - 50% in Randomize x and y, 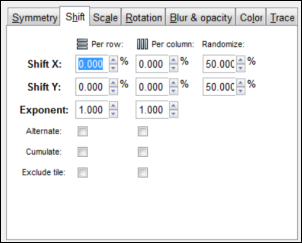 When you get all the settings in, click the Create button at bottom right. This is another place you can experiment: if you don't like the array that appears, you can click Remove and click Create again until you see something that's more pleasing to you. 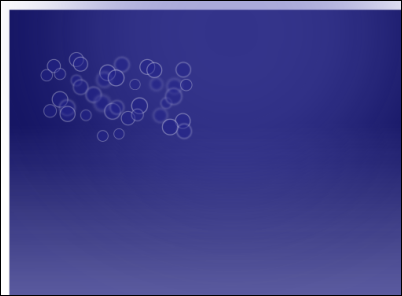 Wow, I've decided that I need to change the fill color of my objects! Remember, if you change the original, all the clones will be changed. OK, which one of those is my original? None are selected! This is cool.... choose one of the clones, then press <Shift> + <D>, and your selection will change to the original item. Now you can edit the fill. If you haven't saved your file yet, this is a great time to do so. This is the basic tutorial, but I'm going to do more. First I will select all my clones , then duplicate the whole bunch of them (<CTRL> + <D>). Then I'm going to move them into another part of my drawing. I also want to flip mine and change their opacity so they don't look identical to the others. I also increased the size of both groups. Increase the original first, because the change to the original circle will affect them all since they are all clones. Then if you want your duplicates bigger or smaller again, select the second group and change them.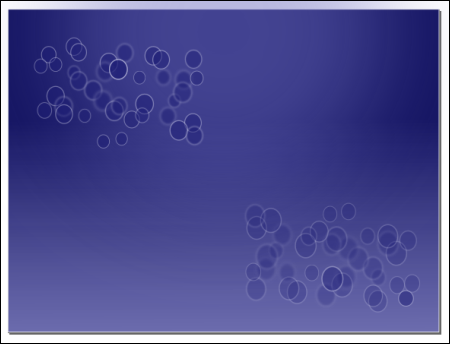 The next thing I am going to do is put a couple of swirls through the picture. I will use the pencil tool and make the stroke one of the lighter colors we are using. I also changed the Opacity to 75% and the Blur to 3%. After I get a line I like, I will duplicate it and flip it so I have two lines. Since I only duplicated the first line to get the second line, I can change the Opacity and Blur to something different on the first without altering the second. 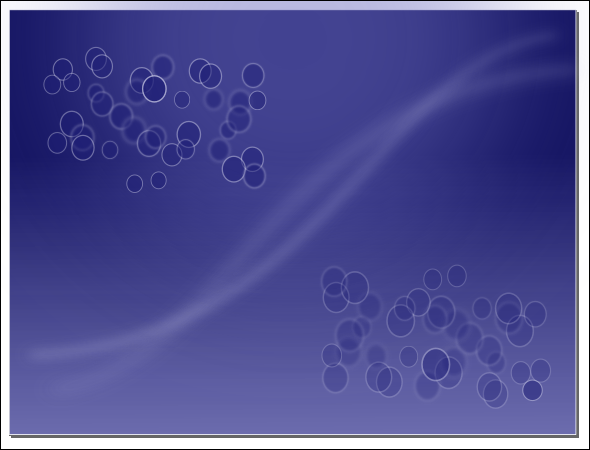 Another thing that you can do is place a rectangle or triangle on your wallpaper. My triangle will be in the bottom left of the page, and will be the darkest of the colors. I also positioned a line along one side of the triangle, and made it much lighter with a radial gradient as an accent.  You can do much more or much less than I have done. It's your project, so make it the way you want it.  |