| Previous
Page |
PCLinuxOS
Magazine |
PCLinuxOS |
Article List |
Disclaimer |
Next Page |
Turn A Sequence of Images Into A Movie |
|
by Paul Arnote (parnote) While I don't advertise it much, I actually love to hunt. I love to hunt for deer, squirrels, rabbits, quail, pheasant ... pretty much any and all wildlife that is legal to hunt in my neck of the woods. Until this year, I've always hunted with a rifle or a shotgun. But this year, I've purchased a compound bow. It'll give me a chance to finally learn how to bow hunt, as well as expanding my deer hunting "season" considerably. I'm also not a "trophy hunter." I'm more about hunting to help provide meat for my family, so we eat the meat from my successful hunts. The meat is leaner and more healthy than anything you can buy in the local supermarket, as nature meant it to be, and free from artificial growth hormones and excessive antibiotic use. While it's nice to bag "trophy" game, in the end it's all about harvesting the meat. See? Get me on this topic, and I'll ramble on forever. My best friend and I set up a feeder to draw the deer onto his land at the Lake of the Ozarks, and get them into the habit of coming to the property long before deer season begins. We were curious about what wildlife was showing up at the feeder, since the feeder was being literally drained every couple of weeks of 50 lbs. (22.7 Kg) of cracked corn. Plus, deer are very plentiful in this area of Missouri. So, I purchased a game camera from one of my favorite online merchants, Sportsman's Guide.  This game camera (some people call them trail cameras) takes 5.0 MP color images by day, and 1.3 MP infrared images by night. The night images are aided by the use of a black infrared flash. It's motion activated, so any motion in front of the camera causes it to take a photograph. It stores its images on a SD memory card. We had put a 4GB card in, thinking it would be sufficient to store a couple of weeks of images. Boy, were we ever wrong! When my friend went to swap out the SD card after a couple of weeks, he discovered that the game camera was "turned off." He thought that the batteries must have been exhausted. Doubtful, he put in the new, blank SD card and noticed that the camera turned on again when he pressed the power button. Upon closer examination, the game camera turned off because the SD memory card was full! In three days, we captured over 3,500 images of wildlife coming to the feeder. Below are a couple of images from the first SD card. 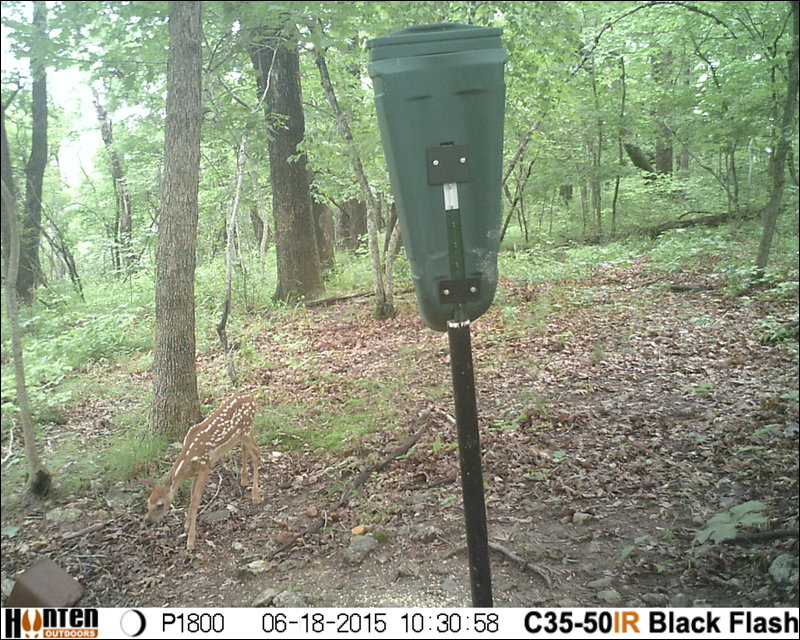 A fawn makes its way across the camera's field of view (lower left) during this daytime color image. 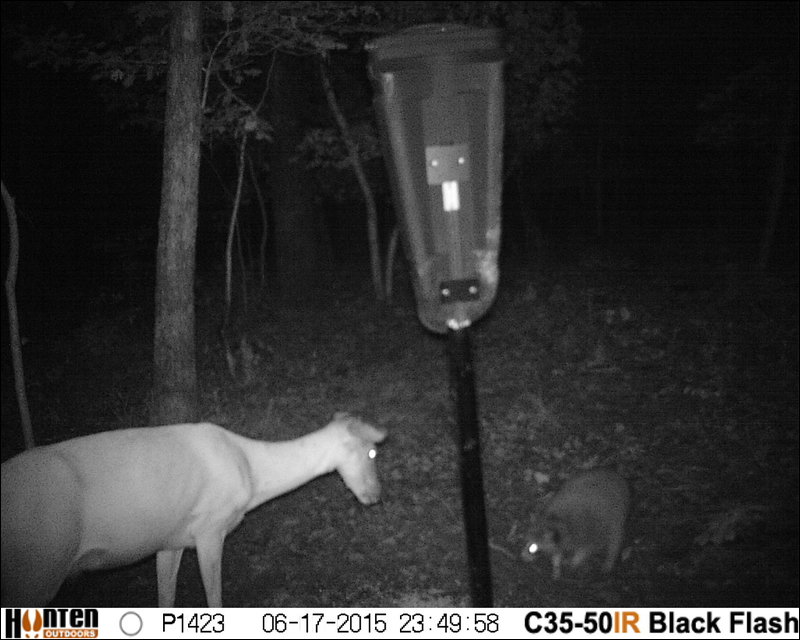 Late at night, an infrared image shows a deer running off a raccoon from the feeder. We captured images of not only deer coming in to feed, but also raccoons, squirrels and birds taking advantage of the feeder to gain access to an easy meal. We even captured the images of a few bats that flew across the camera's field of view. Now, 3500+ images are a lot to look through. Even after eliminating the images with squirrels, raccoons, bats and other critters, I was left with almost 1200 images of deer coming in to feed. That is still a large number of images to view. So, it got me to thinking ... what if I could turn all of these images into a movie? That would be easier to view the images, en masse, than clicking through each one of them, one at a time, in GPicView (my favorite picture viewer on Xfce). Are there other ways to view a slideshow of images? Yes, there are. In fact, GPicView has the built in ability to do it. But what's the fun in that? What would/could I stand to learn by merely changing the amount of time to display each image in the slideshow controls? Fortunately, there are multiple ways to create a movie from a sequence of images. I first tried Avidemux, which can import sequentially numbered image files. Unfortunately, Avidemux didn't work so well, for me. Your mileage may vary. To start off, Avidemux didn't like the JPG format that the game camera used to save the files. So, I had to convert the images all to PNG files, which did work better. But then, after importing 400 or so images (I did it by dragging 99 images at a time from my file manager, then dropping them on the Avidemux window), Avidemux would crash. Poof! It just went away, disappearing from my screen. I tried this four times, with the same results each time. So the Avidemux route was a bust. Still seeking a way to do this with a GUI program, I then tried Winff from the repos. While it "appeared" to go through the motions of creating the video, no video was created in the end. But it sure put on a good "show" in the process. So, Winff ended up being a bust, as well. The next two methods involve using the command line. The first method uses ffmpeg. To get started, open up a terminal session, and cd to the directory containing your image sequences. Next, enter the command, as below: ffmpeg -f image2 -r 1/1 -pattern_type glob -i './*.JPG' -c:v libx264 -pix_fmt yuv420p gameout-1fps.mp4 The -f image2 part of the command is optional. It tells ffmpeg to force the input format to image files. The -r 1/1 part of the command tells ffmpeg to display one picture every one second. If you replace this with 2/1, it will display two images per second. Similarly, if you specify 1/2, ffmpeg will display each image for two seconds. The -pattern_type glob -i ‘./*.JPG' part of the command tells ffmpeg to find each image with the JPG file extension in the current directory. The -c:v libx264 part of the command tells ffmpeg to use the libx264 video codec to create the video. The -pix_fmt yuv420p part of the command tells ffmpeg how to reproduce the pixels of the images in the resultant movie. Finally, the gameout-1fps.mp4 part of the command specifies the name of the output file. 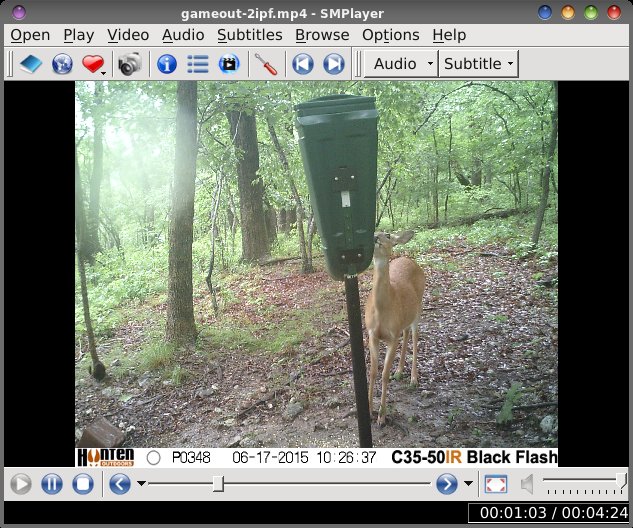 The second method uses the mencoder command line utility. To use it, open a terminal session and cd to the directory that contains all of your sequential images. Next, enter the command as follows: mencoder mf://*.JPG -mf fps=2:type=jpg -ovc x264 -x264encopts bitrate=1200:threads=2 -o outputfile.mp4 The mf://*.JPG part of the command tells mencoder to use all of the JPG files in the current directory to make the movie. The -mf fps=2:type=jpg sets the frames per second to two. Since each image counts as a frame, setting the fps to two means that two images will be displayed every second, each one for half of a second. If you replace this with -mf fps=1:type=jpg, each picture will be displayed for one second. Similarly, if you replace this with -mf fps=3:type=jpg, each picture will be displayed for one third of a second. The -ovc x264 part of the command tells mencoder to create the output movie using the x264 video codec. The -x264encopts bitrate=1200:threads=2 part of the command tells mencoder to encode the video at 1200 bits per second, and to use two threads to complete the task. Finally, the -o outputfile.mp4 part of the command tells mencoder the name of the output file to which to write the resulting movie file. 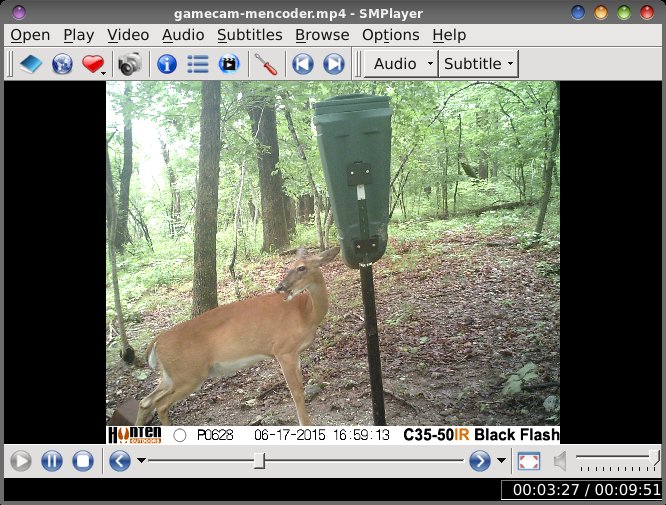 If you want to see the actual "movie" I made, you can view it here, on YouTube. Subsequently, the second SD card filled up with 4,920 images (more 1.3 MP nighttime images than 5.0 MP daytime images, hence the greater number of images stored on the card), over the course of about five or six days. I sent my friend off with a 16GB card, which should take between 10 and 14 days to fill up (judging by the rate at which the 4GB SD cards were filled up). The first 4GB SD card filled up in about three days. So, the 16GB SD card should do the job. Summary Are there more command line parameters you can add to either of the commands? You betcha! It all depends on how complex you want to make your movie. You can add audio to your movie by including audio settings for either of the commands. While I used a hunter's game/trail camera to produce my image sequence, you could easily do this with any group of images you want to turn into a movie. Have a bunch of vacation photos you'd like to share with friends and family? Have a bunch of personal photos you'd like to turn into a movie? This method can be used to turn any group of images into a personalized movie. With the addition of a soundtrack (the addition of sound adds very little to the overall file size), you can easily make viewing your photos a very unique and memorable experience. Since ffmpeg will basically import the images at basically full size (resizing them so that they are a multiple of 16), you can add a -s 800x640 parameter right after the -r 1/1 parameter to resize the images -- and the resulting movie -- to 800 x 640 pixels. You can also add the -aspect 16:9 (or aspect 1.7777), -aspect 4:3 (or aspect 1.3333) command in a similar location within the command line structure to control the display aspect ratio of the movie you create. Use caution, because you could cause your resulting movie to be distorted. You can also control the video bitrate in the ffmpeg command by inserting the -b:1200 parameter in the similar position within the command line. The -b:1200 parameter will restrict the video output to 1200 bits per second. With the mencoder command, you can also change the bitrate, which will alter the finished size of your movie file. Increase the bitrate, and the size of your movie file will increase. Decrease the bitrate, and the size of your movie file will decrease. Be careful to not decrease the bitrate by too much, though. Decreasing the bitrate will have an adverse affect on the quality of your image. Personally, I would consider a bitrate of 1200 the minimum level that preserves adequate quality. You can also add the -aspect 16:9 (or -aspect 2.35:1) command just before the -ovc command to stretch your movie out to 16:9 display aspect ratio. Again, use caution, because you could cause your resulting movie to be distorted. Additionally, you can set the command(s) up in a bash file, if you like. You can make it as fancy as you want, or as simple as you want. Fancy would be adding either Zenity or YAD dialog boxes to prompt for input and to display output as the movie is processed. Using critter's (Pete Kelly's) excellent articles as a guide, I'll leave it as an exercise for you to pursue, should you choose (and I'd love to see what you come up with, if you choose to pursue this route). Simple would be just placing each command (set up in whatever manner works best for your needs) into its own separate bash file, then calling that bash file from whatever directory contains your image sequences, via a terminal session. One final thing ... executing these commands are CPU and memory intensive. They really give the CPU and your memory a workout. So, if you have the option, perform the conversion on a multicore processor with ample amounts of memory. If you do, you'll save yourself a considerable amount of time. Will it work on a single core processor with as little as 2GB of RAM? Yep, it sure will. In fact, the movies I created here were on a laptop with a single core Celeron processor and only 2GB of RAM. It took a bit longer, but it still got the job done ... so don't shy away from this, even if all that you have is a single core processor with modest amounts of RAM. However you decide to do it, making a movie file of your favorite image sequences is relatively easy to do, and a lot of fun. You have the added benefit of being able to watch your images the same way, every time, without having to click through each individual image. |