| Previous
Page |
PCLinuxOS
Magazine |
PCLinuxOS |
Article List |
Disclaimer |
Next Page |
Inkscape Tutorial: Creating A Bubble |
|
By Khadis Well, I have just got inspired to create a bubble illustration on Inkscape after seeing many bubble-style wallpapers. So, I tried to create my own bubble. Let's go! Open up your Inkscape and draw a circle of any size. Give it no fill and a stroke with a color you like. I chose green as the stroke color. 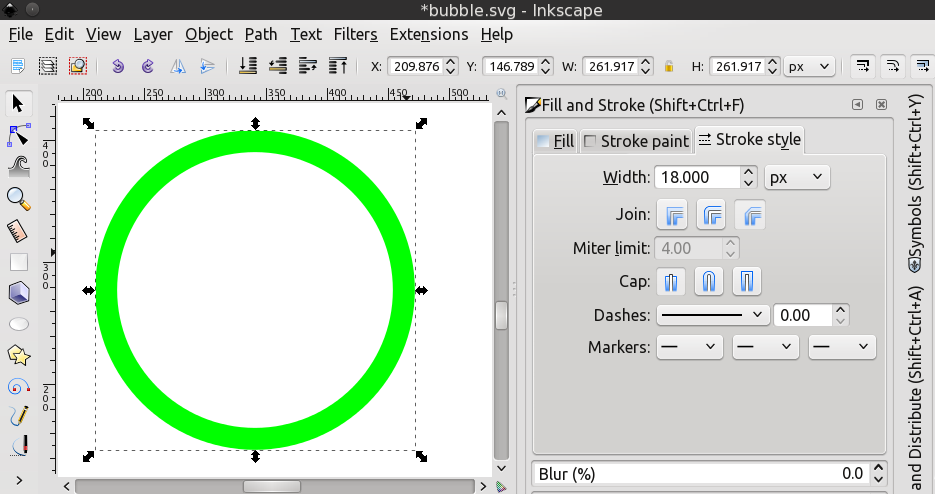 Set the stroke width as wide as you like. Just ensure that it is thick. Then, make it blur using the blur effect in Fill and Stroke Panel (Shift + Ctrl + F).  Create a new ellipse and put it above the previous blurry circle. Give it the same color as the stroke color of the previous circle, but set the stroke to none. Adjust the size to match your preferred size.  Now, set the color to transparent. Use Edit paths by nodes tool (F2) to change the direction and the distance of the transparency. 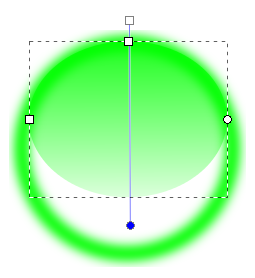 Duplicate the blurry circle by pressing Ctrl + D. Remove the blur effect (set the blur effect back to 0). Make sure that this new circle is above all of the other objects. Click this circle and press Home button on your keyboard if you are unsure. Now, press Ctrl + A to select all objects and then, go to menu Objects > Clip > Set. Finally, add a small white ellipse like in the following picture. You can rotate this white ellipse to make it look nicer. Blur the small ellipse, and you are finished.  You can also change the bubble color, as well as the stroke and the gradient of the ellipse. As this bubble-shape is not only representing a bubble itself, but also a water/rain drop, later, you can test the "realistic level" of your creation by putting it in front of a textured background.  
|