| Previous
Page |
PCLinuxOS
Magazine |
PCLinuxOS |
Article List |
Disclaimer |
Next Page |
Sort & Find Duplicate Photos On Linux |
|
by Paul Arnote (parnote) If you're anything like me, you take and have thousands of photos. Many of those photos have been downloaded to my computer's hard drive. Thanks to the explosion of digital photography, it has caused us to take many pictures that we might otherwise have not shot when using film, due to the cost associated with having the film developed and printed into physical prints. Pocket cameras, cell phone cameras, digital SLRs, and a whole host of other tools now put thousands and thousands of digital photos directly at our fingertips. Many people tend to shoot away, and edit later on the screens of their computers. Long gone is the cost associated with having to develop and print five or eight or 12 rolls of 36 exposure 35mm rolls of film after a vacation. Now, we can edit through all of those vacation pictures and birthday pictures and graduation pictures, and only print out the "good ones." (For what it's worth, I do not advocate printing them out at home on an inkjet printer. Rather, you will get far superior quality by taking your digital prints to a photo finisher and having REAL photos printed out. It's far cheaper, too, since inkjet prints done at home can easily cost you more than $1 each, after you take into consideration the cost of the special photo paper and the extremely high cost of inkjet printer inks. Compare that to the $0.29 cost you can often find at a photo finisher. That's a whole separate topic from what we're going to be talking about here.) However, what happens more often than not, in our haste to get out the door with our busy schedules, we end up just dumping the contents of an SD card onto our hard drive, leaving a mess of sorts to wade through later. This can often result in duplicate photos being stored on your hard drive. Once we get around to sorting through the SD card dumps, it's often difficult -- if not impossible -- to remember to check for duplicate images. In very short order, it becomes a very overwhelming task that is easier to just keep postponing. Thankfully, there are a couple of tools to help us deal with situation this under Linux. Mind you, while we're primarily talking about photos here, this can also apply to any other group of files you might have stored on your computer. Finding and eliminating duplicate files on your computer frees up precious hard drive space. As you might expect, a word of caution is in order here. Before doing ANYTHING with your precious photos (or any other files of importance to you ... and they must be important, or you wouldn't have saved them), make sure they are backed up (like to an external hard drive or large capacity USB thumb drive ... and verify that they are indeed backed up) before working on your original files! Imagine how heartbreaking it would be to mistakenly delete the only copies of the photos from your last vacation with grandma, taken the year before she passed away. I think you get the idea. FSlint 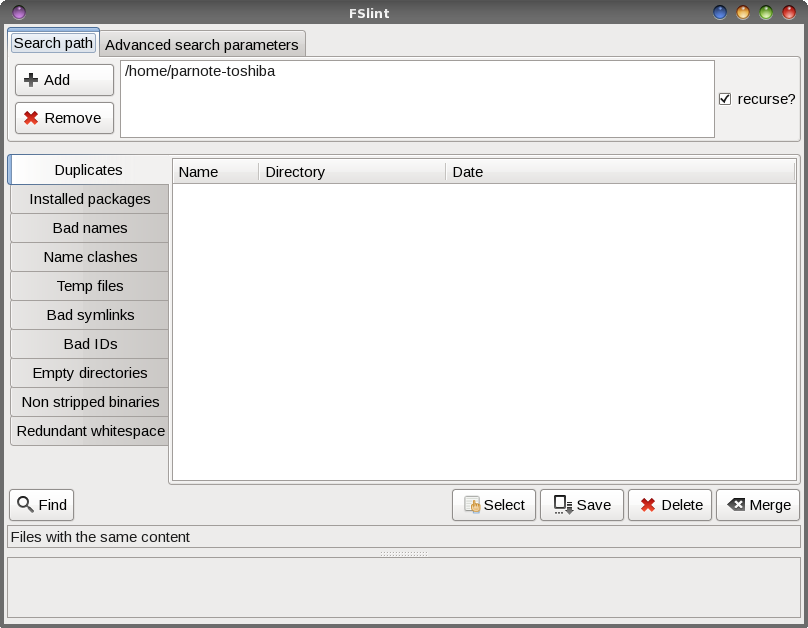 FSlint (short for File System Lint) came installed on my 64 bit Xfce PCLinuxOS installation. If it is not installed on your computer, you can easily install it from the PCLinuxOS repository, via Synaptic. The image above is what you will see when you first launch FSlint. I changed the search path (top fourth of the window) to only my ~/Pictures directory, since I only ever store images from my camera and phone there. Select the "Add" button, and select the directory where you store your photos. Then, highlight your home directory, and select the "Remove" button. Once you have your search path set, click on the "Find" button at the bottom left of the window. Now, walk away for a bit while FSlint searches for duplicates. 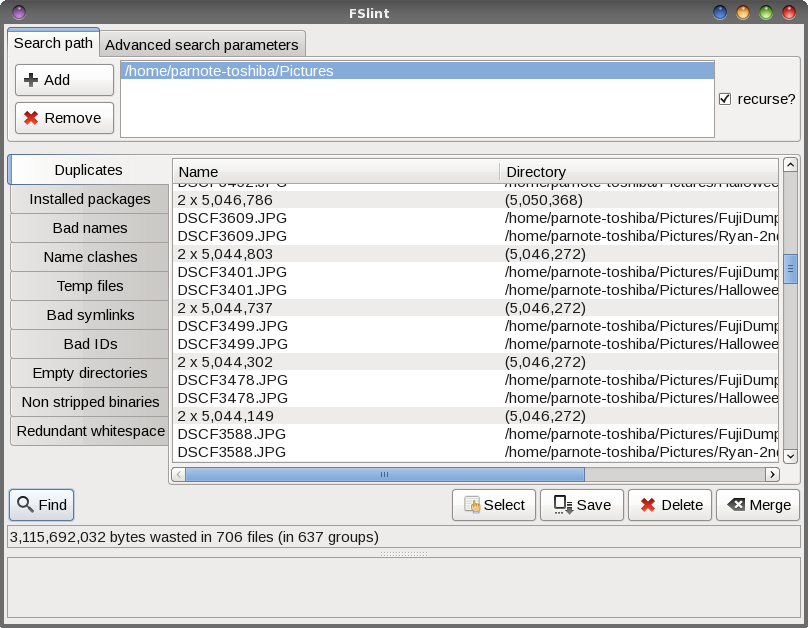 When the search is complete, you will see a list of all the duplicate files. Under the "Find" button, it shows that I have about 3GiB of wasted space on my hard drive from the duplicate files stored there. Now, we could manually go through and delete all those duplicates, one at a time, but that would take quite a bit of time. 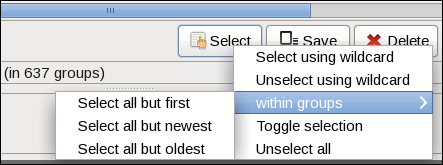 Fortunately, FSlint gives you some options that will speed up the process considerably. Click on the "Select" button, and you will see the menu choices shown above. Since FSlint collects and lists the duplicates into groups, you can select all but the first one listed, all but the newest, or all but the oldest. Then, once you've made your selection, select the "Delete" button to get rid of the duplicates. From the command line ... fdupes If you'd rather take care of the duplicate files from the command line, there is a tool for that, too. The only function of fdupes is to find and take care of duplicate files. It was not installed by default on my PCLinuxOS installation, but it is installable from the PCLinuxOS repository, using Synaptic. [parnote-toshiba@localhost ~]$ fdupes -rS Pictures/ The "r" switch will recurse all the subdirectories in the search directory, and the "S" switch will show the sizes of the duplicate files. Issued exactly as I've issued the command above, fdupes will only produce a list of duplicate files found in the search path (Pictures/). If you want to delete the files, provide the "d" switch. It will prompt you for which files to save, and delete the rest of the duplicates. It's just that straightforward. For your reference, here is a complete list of the command line options (switches) you can use with fdupes, which is just about as long as the official man page:
[parnote-toshiba@localhost ~]$ fdupes -h
Usage: fdupes [options] DIRECTORY...

 -r --recurse     include files residing in subdirectories
 -s --symlinks        follow symlinks
 -H --hardlinks       normally, when two or more files point to the same
                      disk area they are treated as non-duplicates; this
                      option will change this behavior
 -n --noempty         exclude zero-length files from consideration
 -f --omitfirst       omit the first file in each set of matches
 -1 --sameline        list each set of matches on a single line
 -S --size         show size of duplicate files
 -q --quiet       hide progress indicator
 -d --delete      prompt user for files to preserve and delete all
                      others; important: under particular circumstances,
                      data may be lost when using this option together
                      with -s or --symlinks, or when specifying a
                      particular directory more than once; refer to the
                      fdupes documentation for additional information
 -v --version     display fdupes version
 -h --help        display this help message
The command will take a bit of time to run. On the computer I'm writing this article on (which happens to also be the one where I store most of my photos until they are backed up), I have just under 17,000 photos stored on the hard drive. Fdupes uses md5sum checksums to seek out duplicate files. It took fdupes approximately five minutes to produce the list of duplicate photos. So, once you start it, go make a sandwich. When you come back, it should be done ... or at least, almost done. The nice thing about fdupes is that even though it is a command line tool, it does have a progress meter to show you how far it has gotten in its search for duplicate files. Thus, you won't be sitting there staring at a somewhat blank screen, wondering if it is working or when it might be done. Although I can't imagine many instances where you might want to do so (aside from calling it from a bash script or to run in the background), using the "q" switch hides the progress meter. With the exception of the two aforementioned cases, I would personally prefer to see the progress meter. Sorting it all out ... ExifTool Now that we've eliminated all the duplicate photos, we now need to sort our pictures. Sure, we could spend hours and hours doing it by hand, and if that's the route you choose ... well, you have a lot more time than I do. But, there is a better and easier way. Enter ExifTool. When it comes to reading, writing, and managing the metadata stored in image files, there simply is nothing better than exiftool. Most people associate exif data with JPG files, but there is metadata stored in the header of many graphics files. And exiftool is exactly what you need when you need to work with any of that metadata.  Just running exiftool on the above image (of me and my son Ryan, during his first bicycle ride with mom and dad when he was 11 months old), using the command exiftool DSCF3269.JPG (run from a terminal session in that image's directory) yields 104 lines of metadata output. Below are just the first 27 lines of that output: $ exiftool DSCF3269.JPG ExifTool Version Number : 10.36 File Name : DSCF3269.JPG Directory : . File Size : 4.3 MB File Modification Date/Time : 2014:05:14 19:09:18-05:00 File Access Date/Time : 2017:03:18 16:41:25-05:00 File Inode Change Date/Time : 2016:08:02 21:55:56-05:00 File Permissions : rwxrwxrwx File Type : JPEG File Type Extension : jpg MIME Type : image/jpeg Exif Byte Order : Little-endian (Intel, II) Make : FUJIFILM Camera Model Name : FinePix S1500 Orientation : Horizontal (normal) X Resolution : 72 Y Resolution : 72 Resolution Unit : inches Software : Digital Camera FinePix S1500 Ver1.03 Modify Date : 2014:05:14 19:09:17 Y Cb Cr Positioning : Co-sited Copyright : Exposure Time : 1/400 F Number : 5.0 Exposure Program : Portrait ISO : 64 While exiftool will give you much more information about your images than you probably care to know, we can leverage this information to help us sort our photos. To get a grasp of everything that exiftool is capable of doing, you can view the man page by entering exiftool -h on the command line, or by viewing the man page online, here. Be forewarned. It's quite a long (dry) read, full of technobabble. So, let's just break it down to just what you need to sort your photos from one big amalgamated mess into something a little friendlier and easier to navigate. exiftool -o '-Directory<CreateDate' -d newdir/%Y/%Y-%m-%d -r /olddir
-o tells exiftool to copy, instead of move, your images.
Using the "-o" switch is probably the safest way to use the command, keeping your originals in their original location and making a copy in the new destination directory. There may be a time, however, when you don't have enough hard drive space to have copies all over the place, at least until you have time to verify the copy and delete the original. In that case, you will have to move (rather than copy) the files to their new destination directory. To do so, just eliminate the "-o" switch from the command. If you're one of those "command line shy" Linux users, there's little I can suggest to get you over your shyness. The exiftool is a powerful tool, and represents probably the best -- and fastest -- way to sort your photos. The command can easily be put into a very simple, barebones bash script, which can then be accessed from Dolphin's right click menu, or as a custom action in Xfce's Thunar, or as a Caja script in Mate, insulating you from having to drop to a command line every time you want to run the command. Summary If you take a lot of digital photos, you can see how quickly your digital photo collection can grow out of control, sort of like Medusa. Despite our best intentions to keep things organized, the lack of time in our busy and demanding schedules, coupled with the volume of digital photos that accumulate so quickly, we can find ourselves overwhelmed in a very short period of time. Perhaps, with these tools, maybe you can at least tame the beast. Or at least beat it into submission. Seriously, if you were to do this periodically, I'd say you'd be ahead of 90 percent of us in keeping your photos organized. |