| Previous
Page |
PCLinuxOS
Magazine |
PCLinuxOS |
Article List |
Disclaimer |
Next Page |
Lumina Desktop Configuration |
|
by phorneker When we first launched Lumina, the desktop was quite minimal, to say the least. 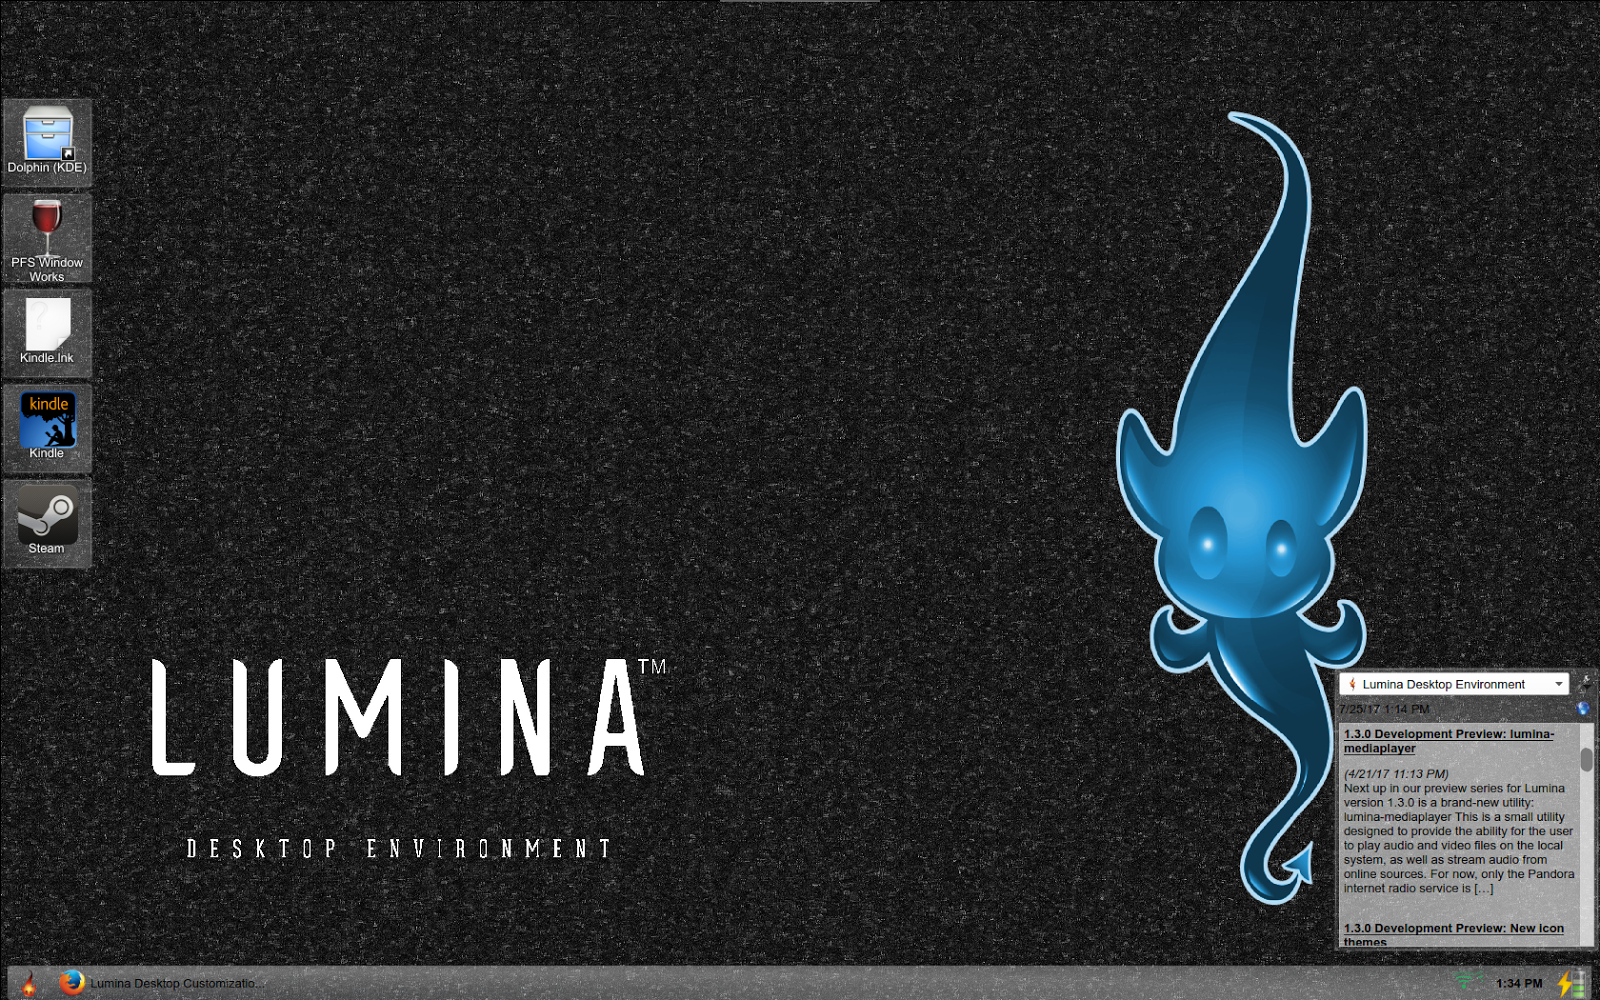 Though it looks like there is only one panel on this desktop, there are really two panels. The second panel is hidden at the top center of the screen. By default, the layout of the panels is set up for efficiency, with the second panel revealed as needed. Lumina comes with some preset layouts. These layouts are available in Desktop Settings accessible by right clicking on the background, then selecting Preferences, then all Desktop Settings from the popup menu, or by selecting Preferences from the main menu with the default layout.
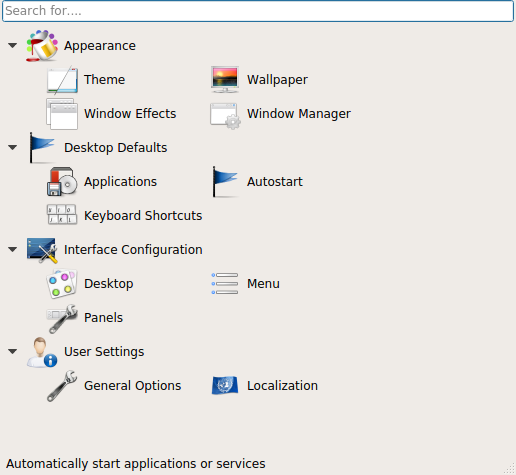 From here, we select Panels from Interface Configuration to customize the layout of the panels, as well as customizing the panels themselves. 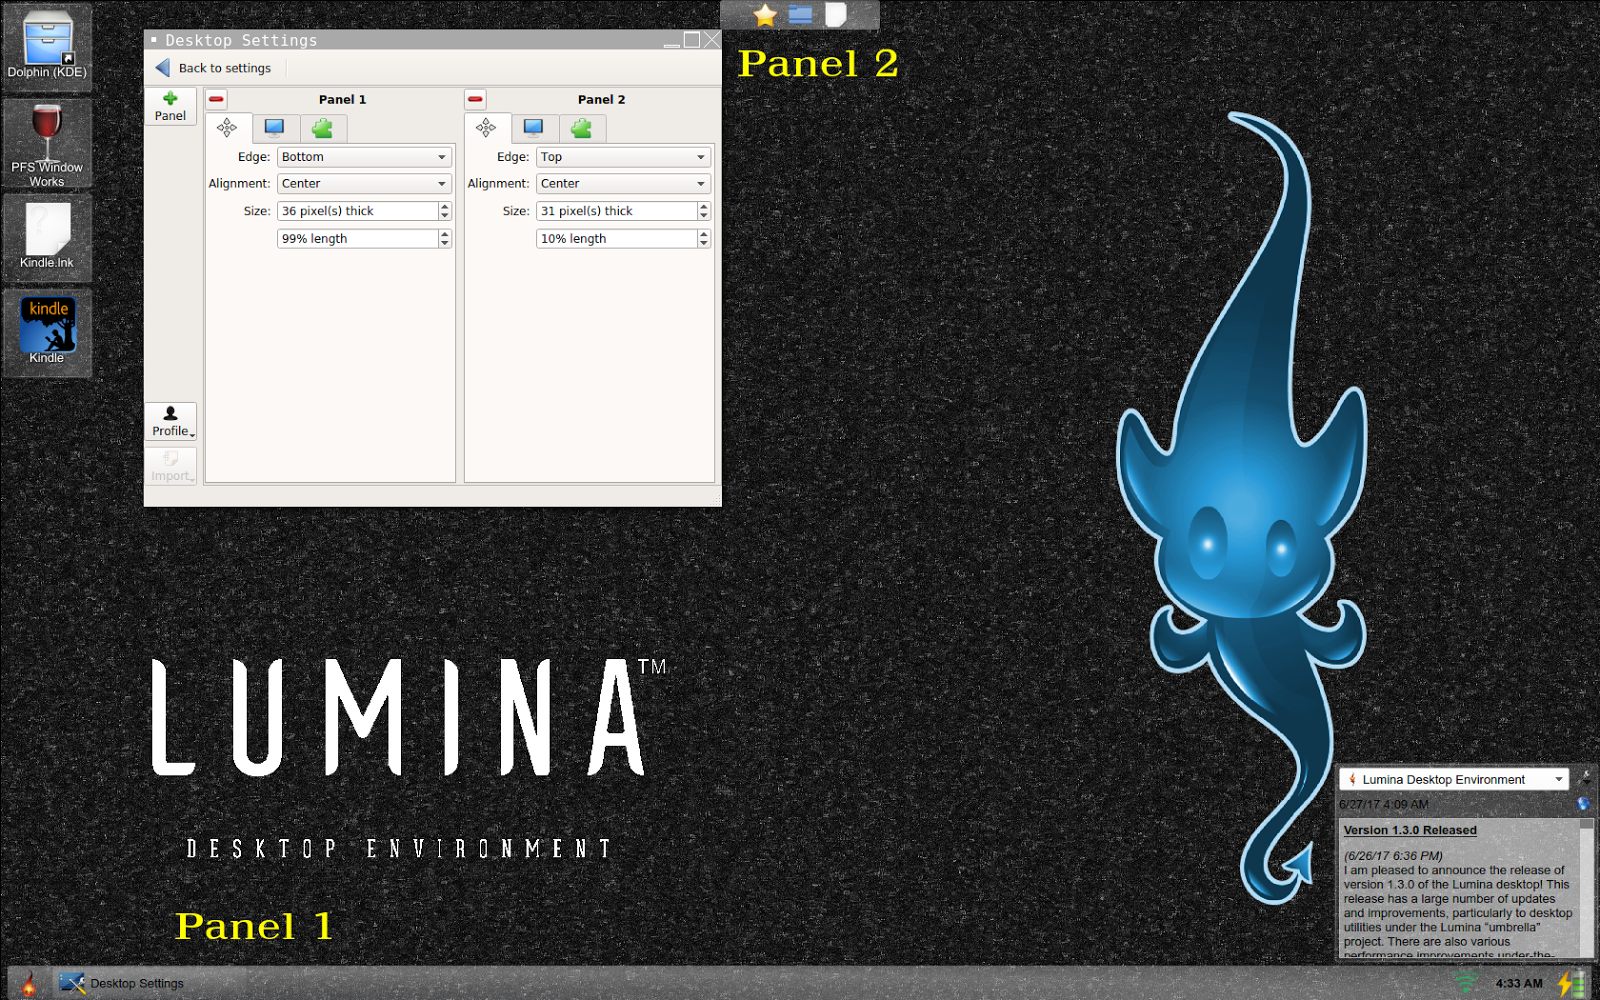 This is the Lumina default panel layout with the second panel showing. There are four preset layouts available, and are accessed from the Profile button near the lower left hand corner of Desktop Settings. 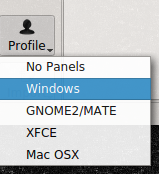 You can choose from Windows, Mac OS-X, MATE (or GNOME 2), or Xfce, or you can also select None to start a layout from scratch. 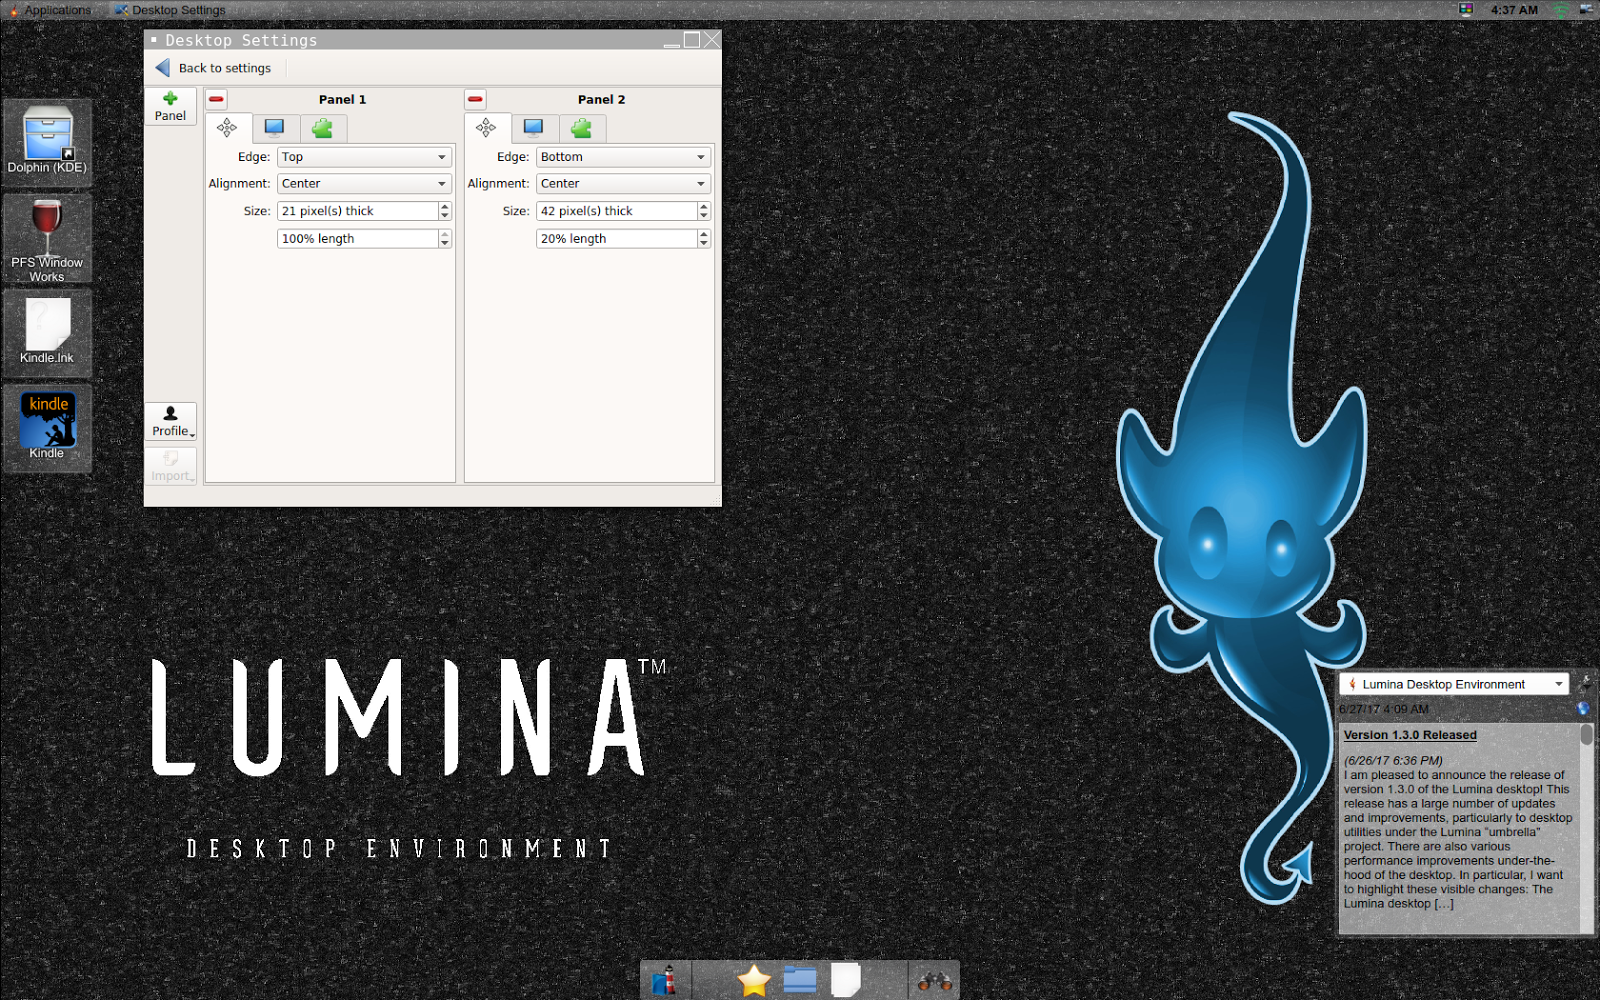 This is the Lumina take on the Xfce desktop. 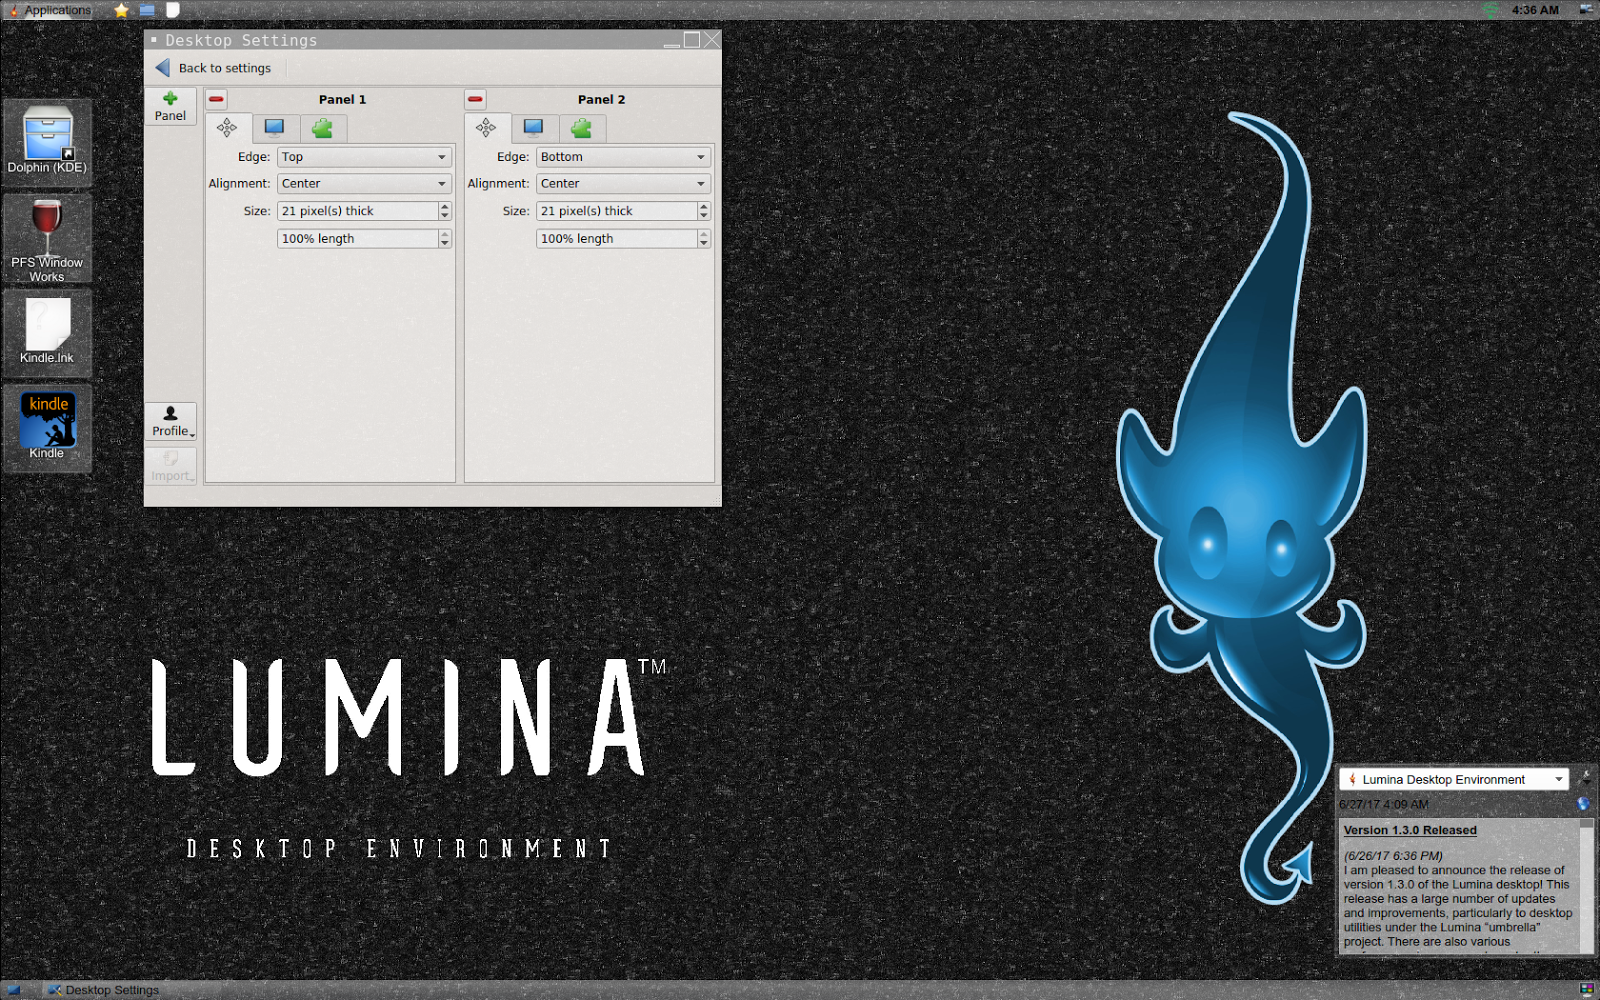 ...and here is Lumina's version of the MATE desktop. 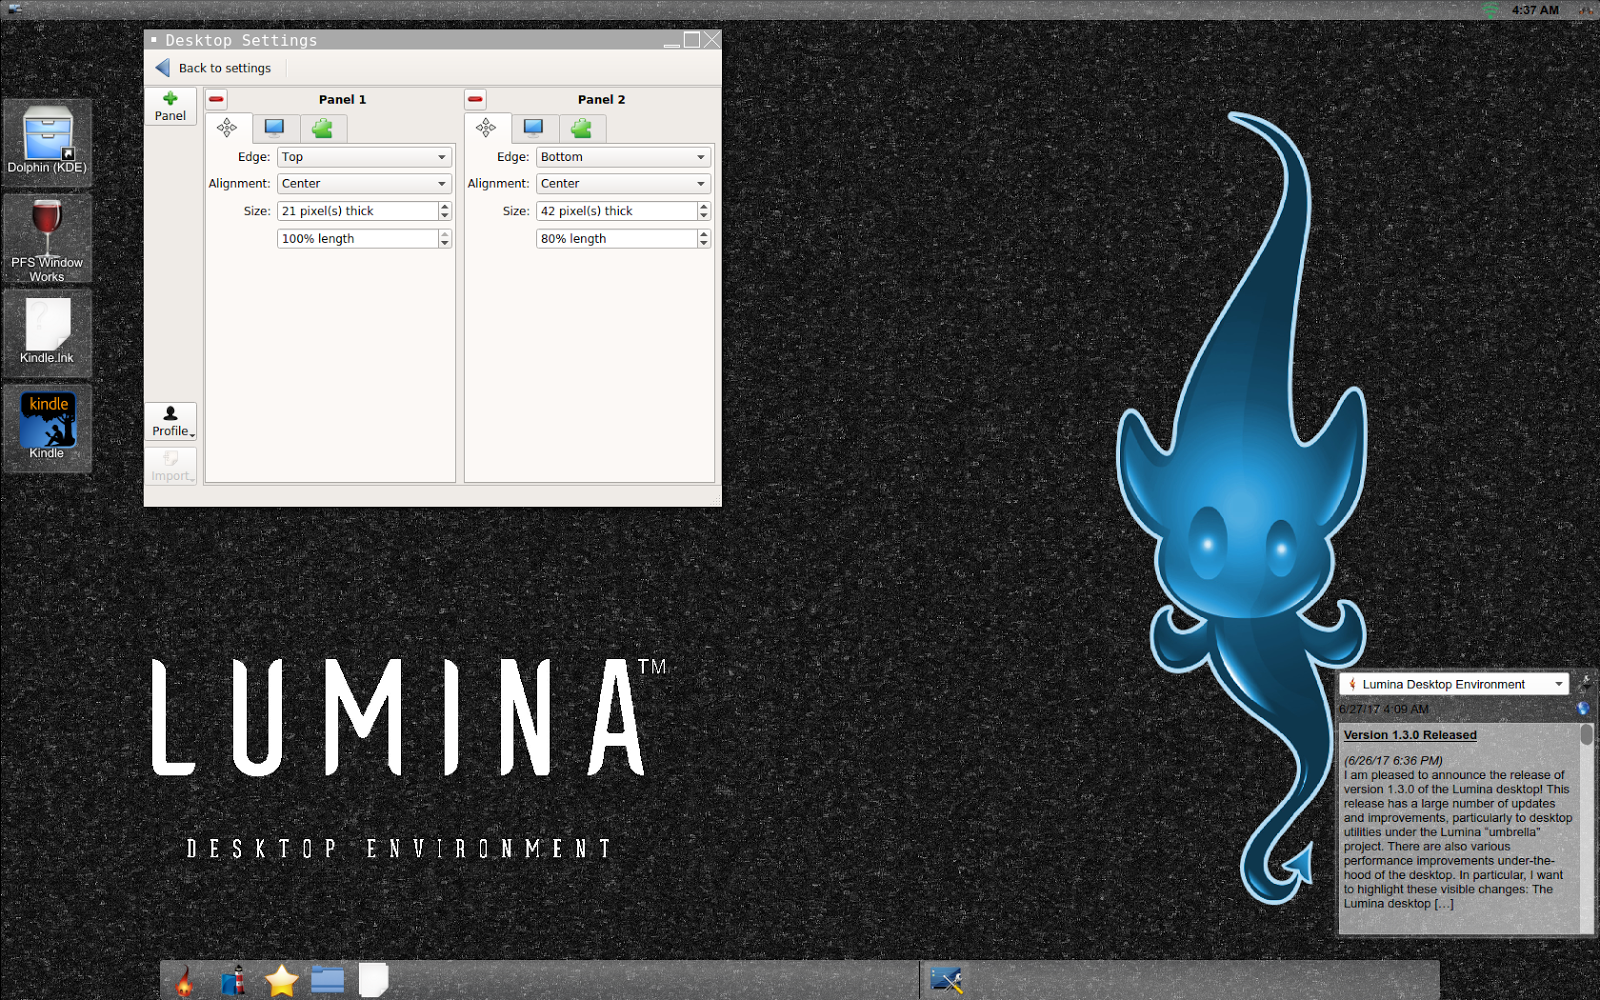 ...and this would be appropriate for PCLinuxOS running on a Intel-based MacBook. And finally, 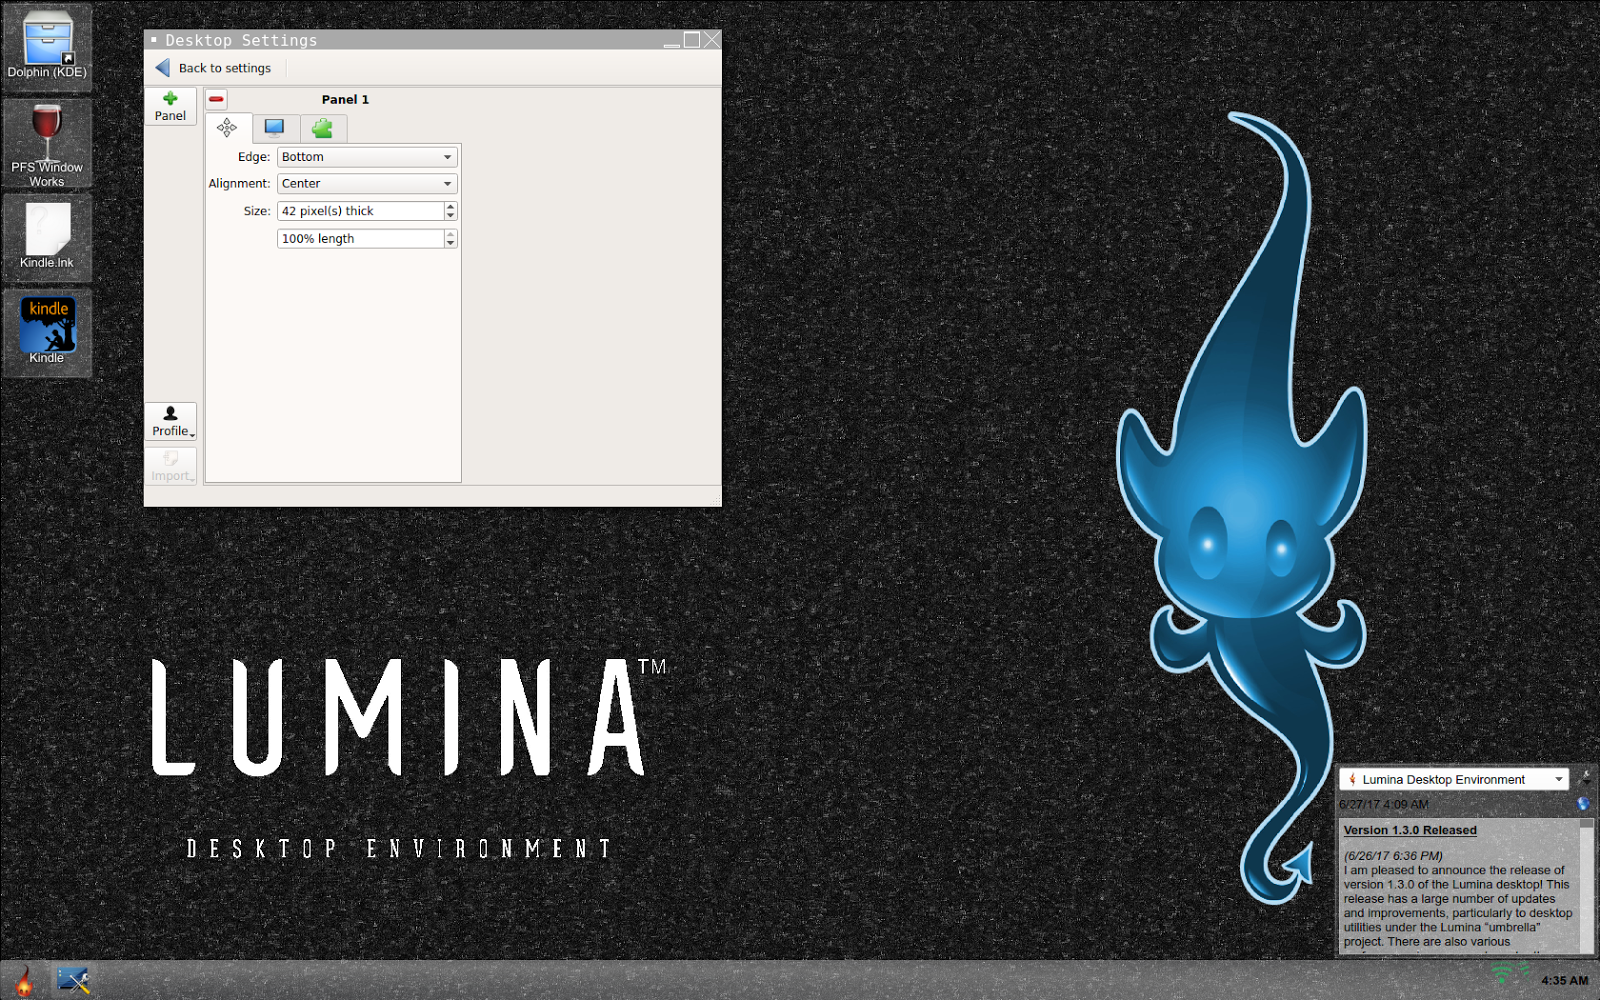 The classic "Windows" desktop. Each of these layouts can be customized and once you save your changes, the settings are restored each time you login to Lumina.
For this article, let us select Xfce. The main menu is now located at the upper left hand corner of your screen and is labelled Applications (just as in Xfce itself as it should be). On the upper right hand corner of the screen are four elements which are (from left to right) a workspace selector (for switching desktops within Lumina), the system clock and calendar, a system tray (which here contains the network applet), and a mini control panel that contains a volume control, battery monitor, a desktop switcher, and a button to exit the Lumina session. There are two panels available in this layout as well. From the settings shown below, we should be able to ascertain which panel is which. 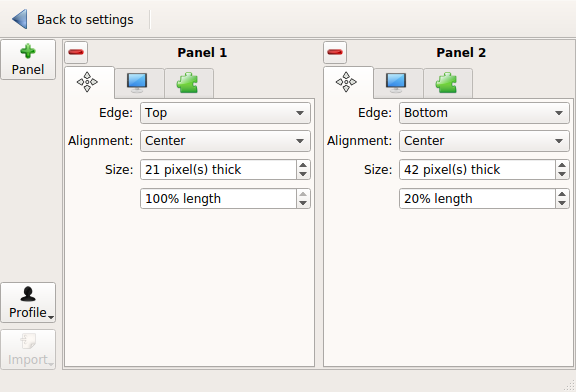 For each panel, there are three tabs. The first tab has settings that control the placement and size of the panel. Here the first panel is 21 pixels thick, takes the entire width of the screen, and is placed at the top edge of the screen. The second panel is 42 pixels thick, located at the bottom center of the screen, and utilizes only 20 percent of the width of the desktop. We can change the placement, width and thickness of each of these panels. 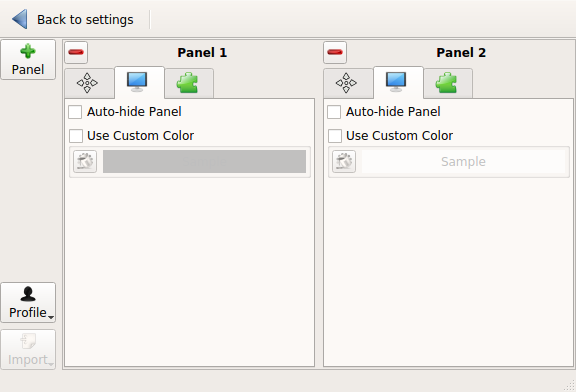 The second tab has only two options, namely to auto-hide the panel, and to change the color of the panels. We already saw the auto-hide option as it is part of the default layout of Lumina. The panel does not show on the screen unless you get the mouse pointer close enough to the edge where the panel is located. When Use Custom Color is selected, you could click on the paint can to manually select a color, or you could click on Sample and choose a color off the current desktop. 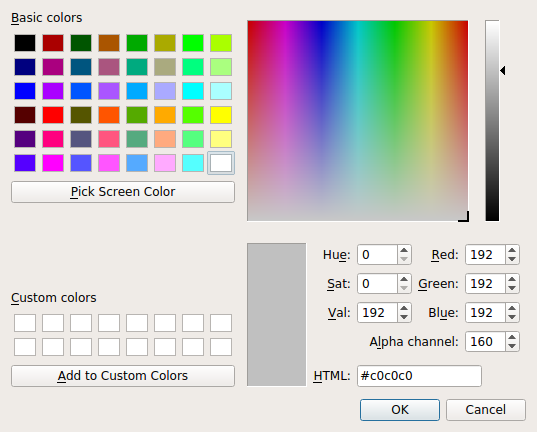 Here, I chose #c0c0c0 so we can see the effect of the change to the panel. Click on OK here. 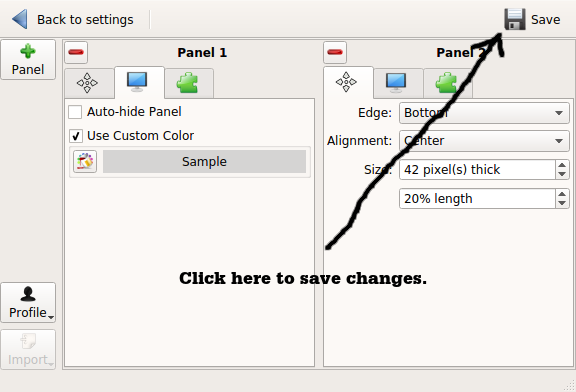 Notice the Save icon now appears in the Desktop Settings. This indicates that changes need to be saved. Click on Save for the changes to take effect.  Now, let us look at the third tab.  The Application menu for this layout has changed from the default layout. To simulate Xfce, the application menu is also displayed in a manner similar to Xfce. Now, look at Panel 2. The Xfce panel is simulated with lines and spacers in the configuration of this panel. We can add and remove elements to this to give it a panel more like the real Xfce (or anything else you want for that matter). For this article, this is where the fun begins. What we should do here is to add commonly used applications to Panel 2. Start by clicking on the "+" icon in Panel 2. 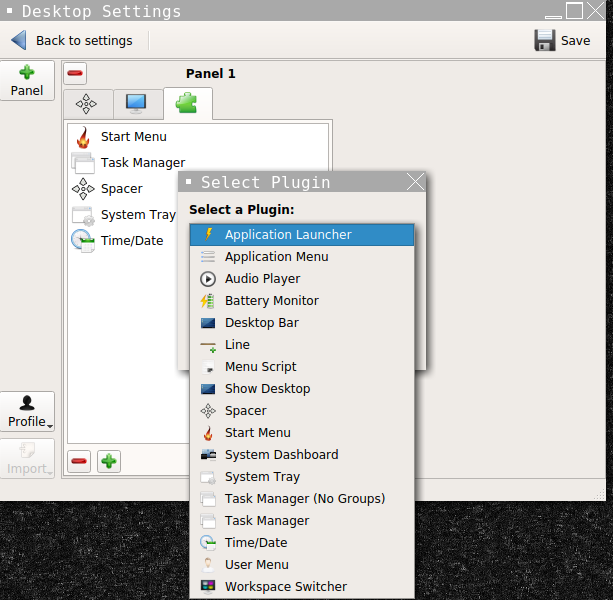 Here is a list of available elements we can place in a Panel. To add applications to any Panel, we need to select Application Launcher. You will need to wait a few seconds for the list of applications to appear (depending on what you have installed in PCLinuxOS).
Click (and hold the mouse button down) on the popup menu here to pull the list of applications. Suppose we want to add Firefox to Panel 2. We then scroll down the list and select Firefox, then click on OK. 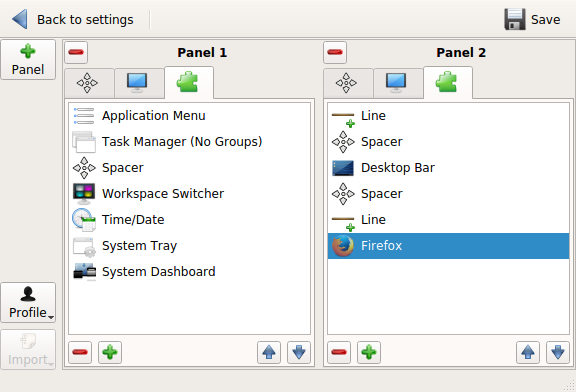 Firefox is now in Panel 2. But look where it is! This is not where we want Firefox to appear in the Panel. The arrow buttons on the lower right hand of where we are editing Panel 2 will move the order the Firefox element will appear in the Panel. 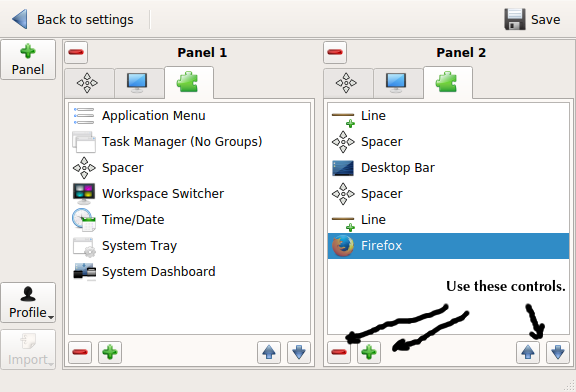 Move Firefox up to the second position from the top, and click on Save. Now, we can see Firefox in the bottom panel of the screen. However, we need to remove some considerable space between the Desktop Bar and Firefox. Select the third tab (the one with the puzzle piece under where it says Panel 2). Click on Spacer below Firefox and delete it (using the minus button). We should now have the following in Desktop Settings: 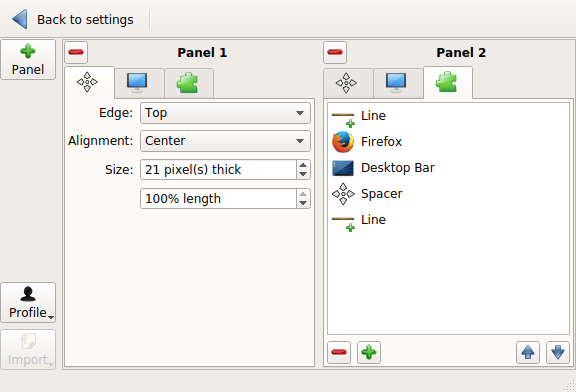 We can get rid of the other Spacer by clicking on Spacer, and deleting it with the Minus button. At some point, we will need to adjust the length of the panel. As it is, we have room for two more applications before we need to adjust the size of the panel. One common application we use is Thunderbird to send and receive e-mail. We simply add Thunderbird the same way we did for Firefox, and position it in Panel 2 just under Firefox. For the next item, let us add a Start Menu element. When we clicked on the Plus button, we were asked to select a Plugin. Elements are nothing more than plugins to the Lumina system. The Start Menu is included in Panel 1 in the default layout. To add the Start Menu to Panel 2, select Start Menu instead of Application Launcher from the plugin menu. We will need to reposition Start Menu to the top of Panel 2. Now, to clean up the panel, we get rid of the two Line elements. At this point, there are some options on which to improve the appearance of Panel 2. We could adjust the width of Panel 2, or we could adjust the thickness of Panel 2. Now it is starting to look like a usable panel. Before we get to that, consider that we can be as creative as we want with these panels. Just because we selected Xfce for the layout does not mean that the layout has to conform to the specifications of Xfce. We are, after all, customizing Lumina, not Xfce. For this example of what can be done, let us start by adding three applications, an audio player, a Start Menu, and three lines and spacer, then order them as shown below: 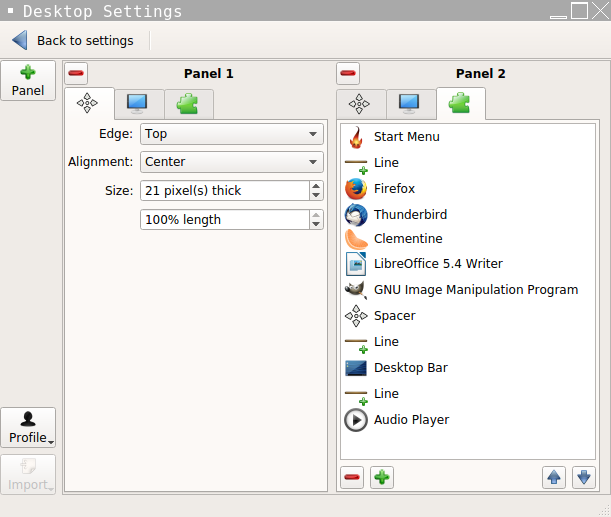 We can adjust the color and sizing of this panel as well. 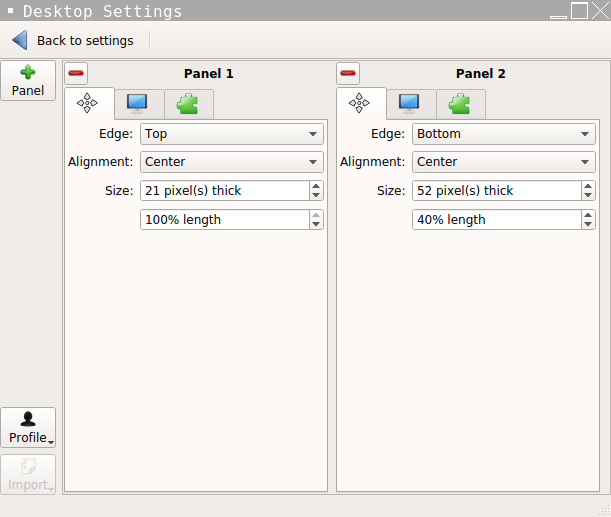 Here, we set the height of Panel 2 to 52 pixels and have it cover 40 percent of the width of the screen. For custom color, let us use 25% grey for the background shading (color value being hexadecimal #404040, or a decimal value of 64 of 256). Using these parameters, we have achieved this so far: 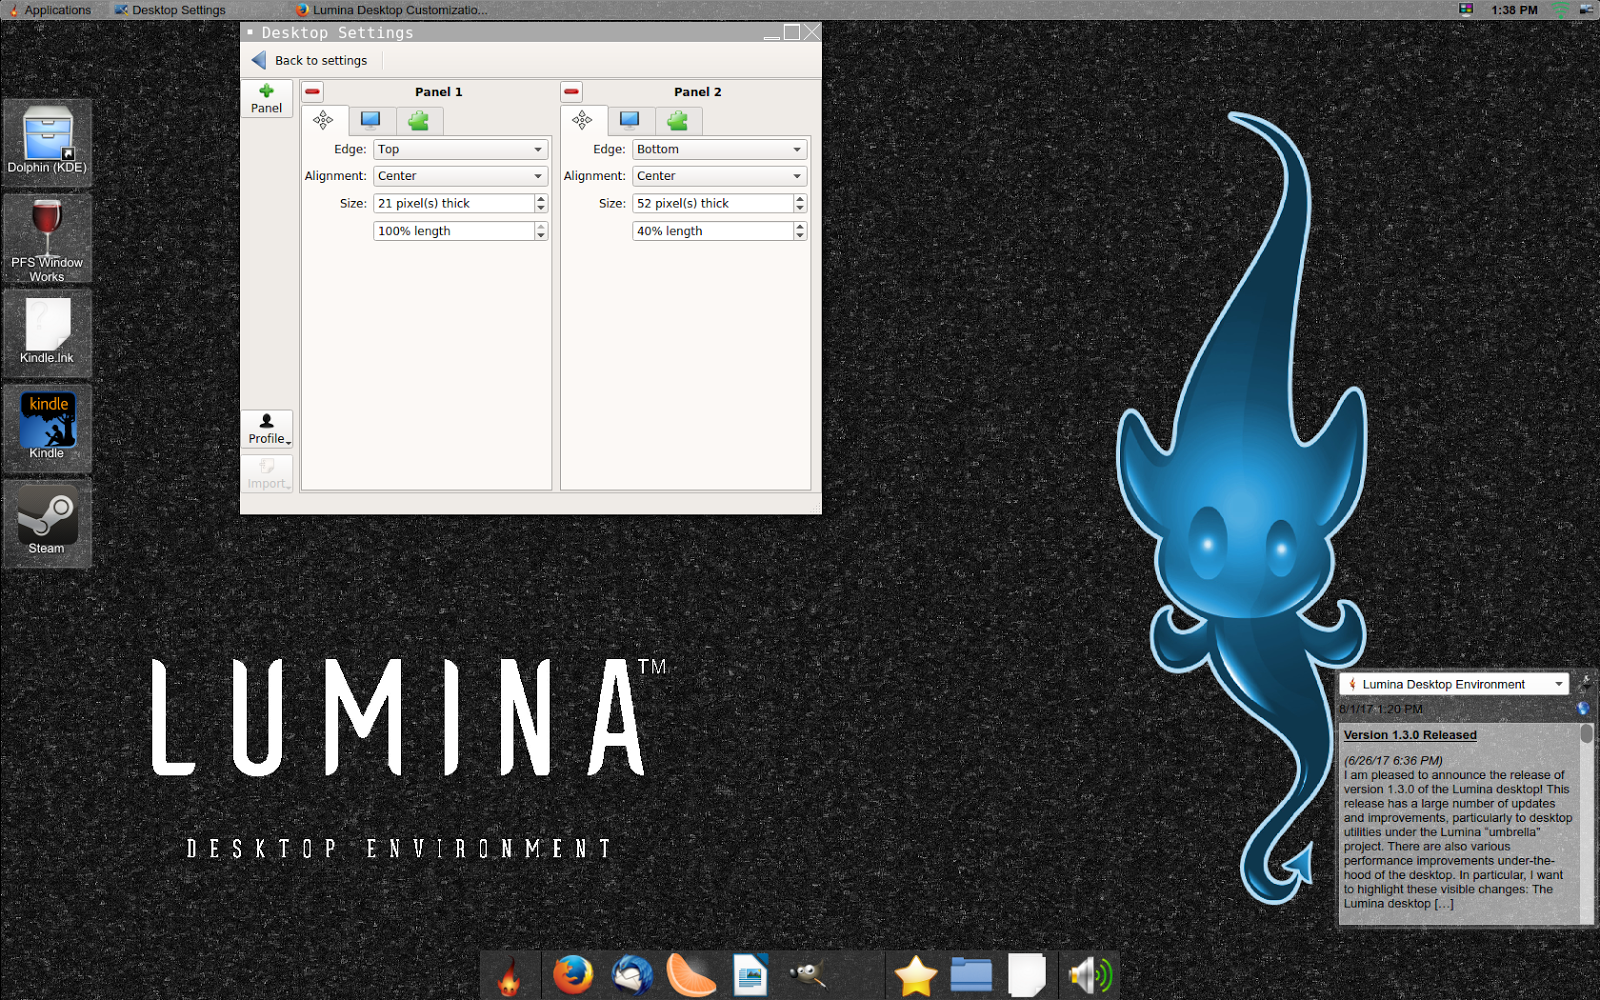 Now, let us click on Back to Settings. Under Appearance, there are four items to choose from to further customize this desktop. Let us click on Theme. 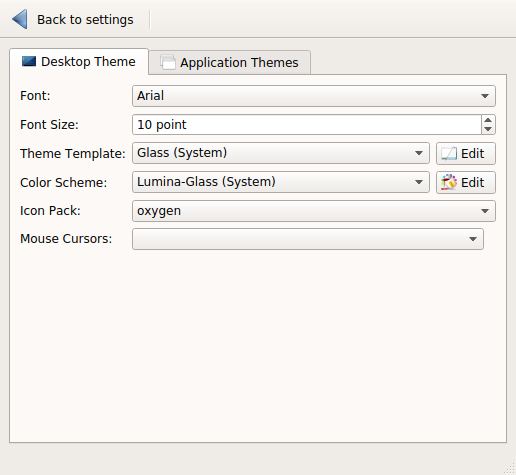 Here, we only need to be concerned with the Desktop Theme settings. There are three theme templates that come with Lumina. 
...and there are eleven color schemes included with Lumina. 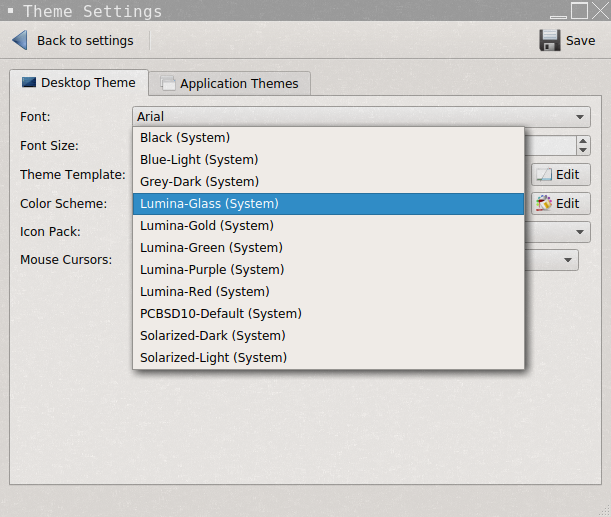 ...each of these color schemes is editable. The widths if fields have been adjusted so you can read the attribute names in the Color Scheme Editor. 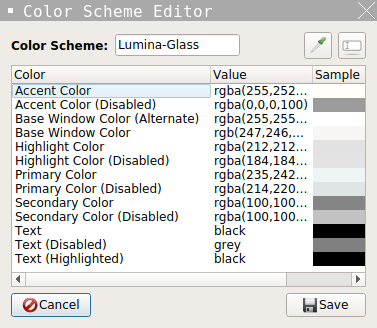 You can use the color picker tool to select your color from anywhere on the screen, or manually enter a color value. When entering color values manually, you can select a named color as defined by the W3C Consortium, or enter RGBA (for Red, Green, Blue and Alpha) values formatted as rgba (red, green, blue, alpha) or as rgb (red, green, blue) in the Color Value dialog box. A good reference for color names can be found at http://www.color-hex.com/color-names.html. This website provides a chart containing the color name, a sample of each color, and its hexadecimal value. Suppose we choose Black for the color scheme (and click on Save for the change to take effect). The colors in the panels change (if you did not select a custom color when configuring a panel). For this screenshot, I reset the color in the bottom panel to use the default system color. 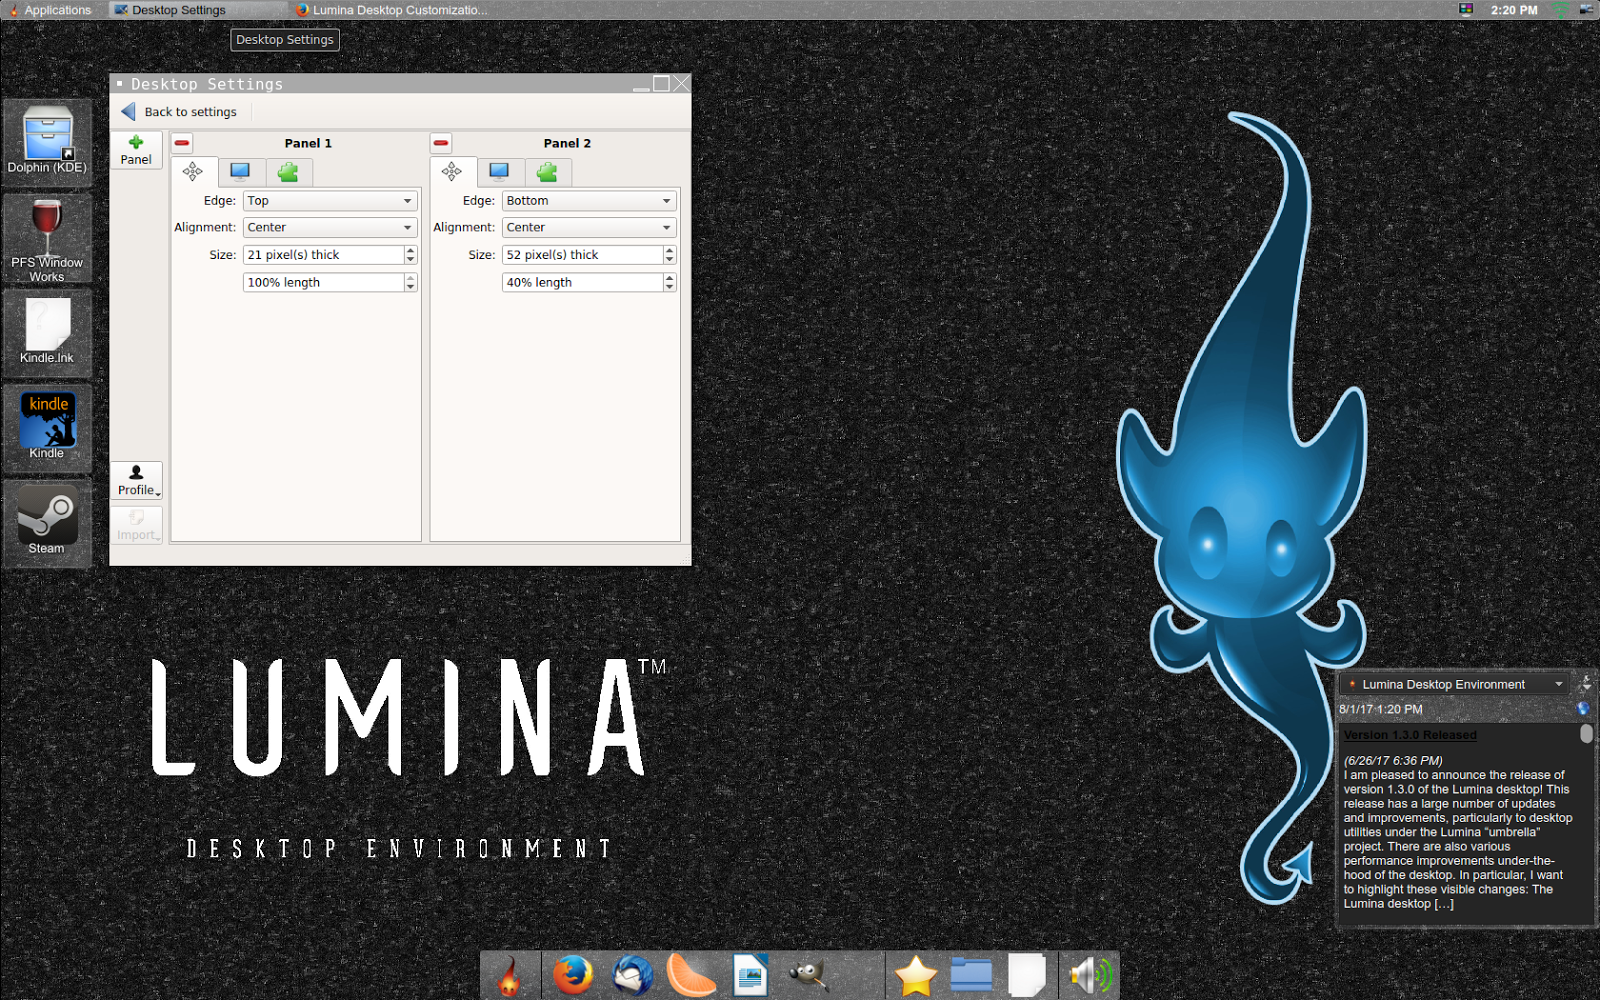 Look what happened. The background in the RSS feed (on the lower right hand corner of the screen) changed to white text on a black background. The same color combination applies to active and inactive windows shown on the top panel. As you try each color (Clicking on Save each time to see the effect), notice the changes made in the panels. You can also change the font, the icon pack and mouse cursors on the display as well. You may need to change the height of the top panel to accommodate the change in the font size. By default, Lumina assigns a 10 point Arial (Helvetica) as a system default for most elements on the desktop. The exception here is the font used on the title bars on the windows. These are taken from Fluxbox default settings. Here, 10 point Letter Gothic (monospace) is used as the default font for the title bar. 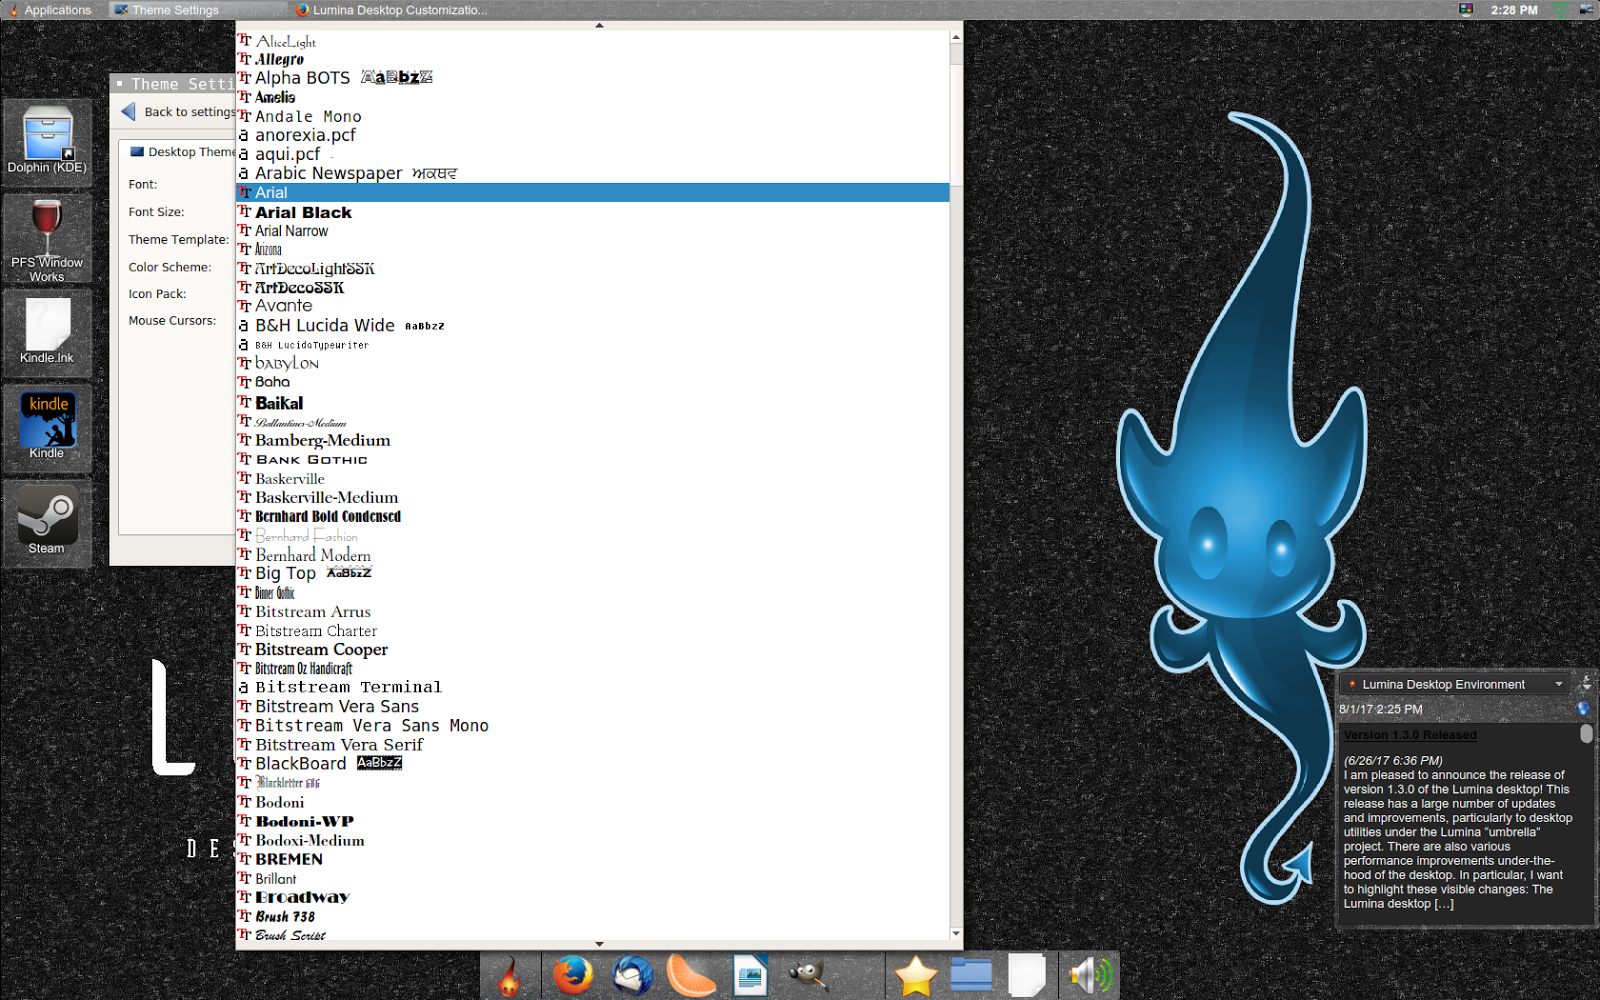 Samples of the fonts on the list are shown for TrueType and Adobe Type 1 fonts. On my laptop, I have more than 250 fonts installed, as we can see from this partial list. Let us say we want to use Futura (you can choose any font you wish). We then select that font from the menu and click on Save. (This font can be downloaded from https://www.futurafree.com.) 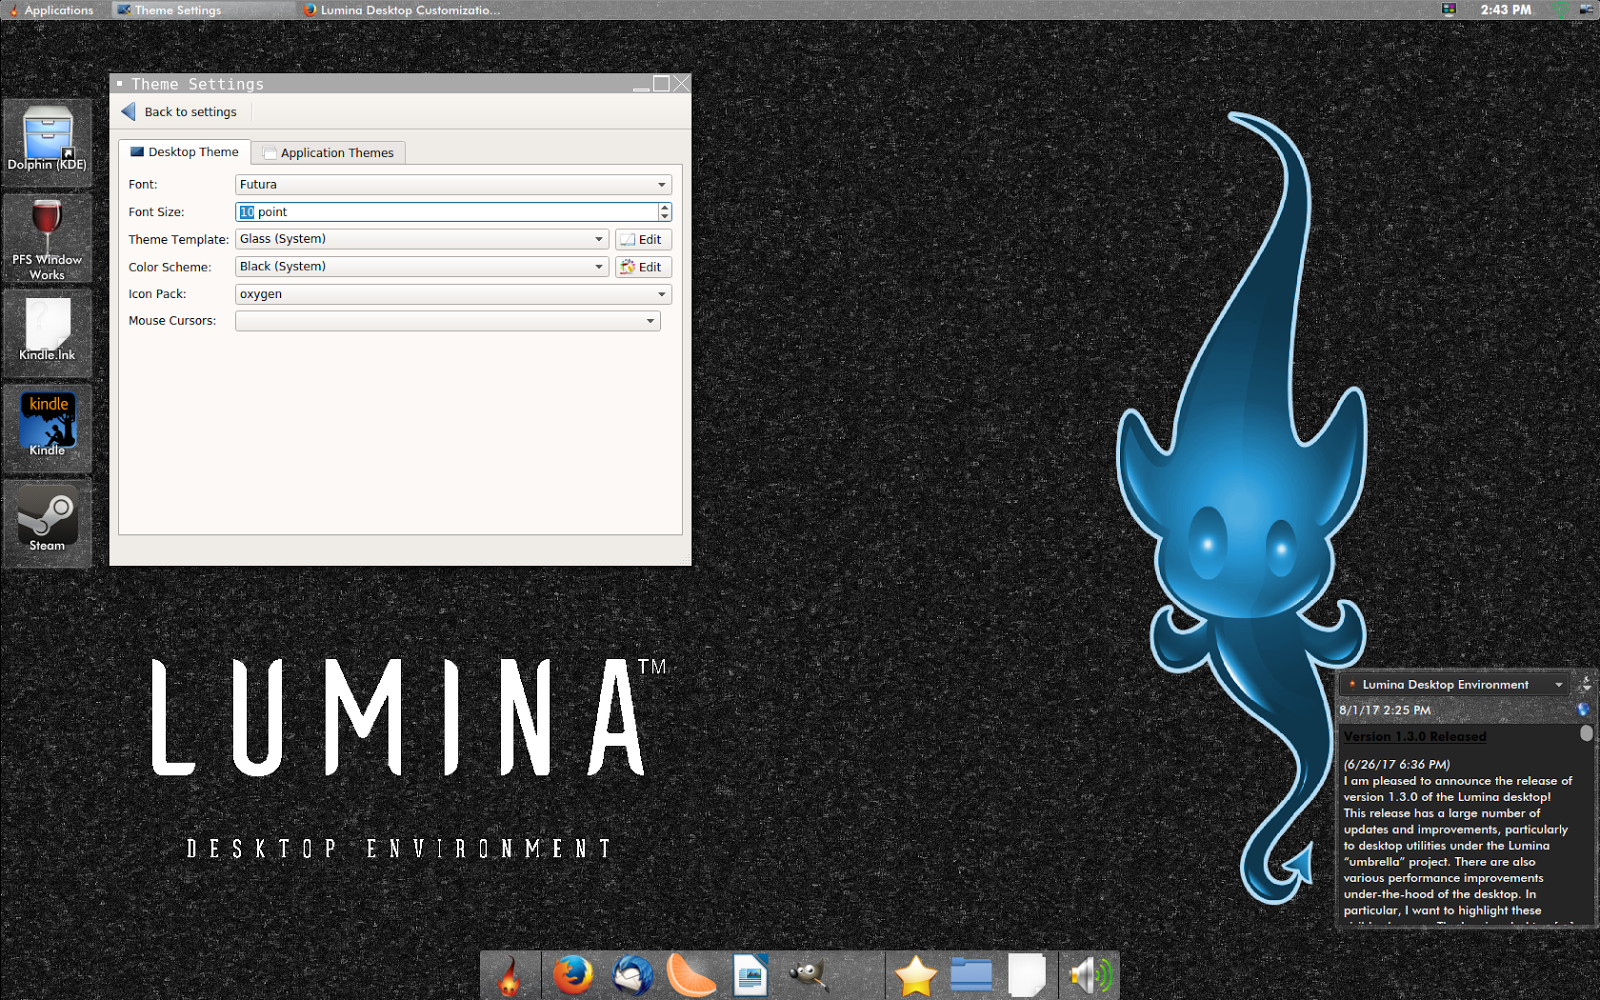 The fonts in the top Panel, the icons and the RSS reader have changed, as will any element on the desktop specific to Lumina.
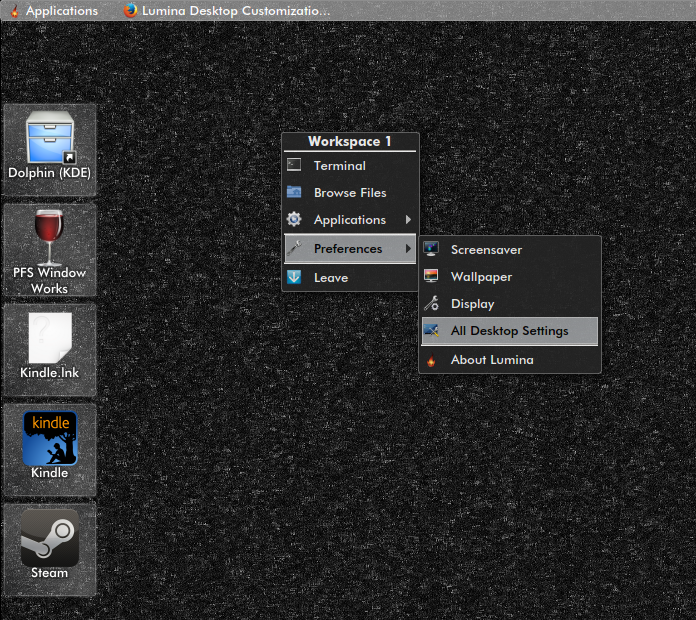 So that you can see the changes better, here is a closer look at the desktop with the context menu (accessed by right-clicking on the background) with the changed theme and selected font (Futura). The Window Manager Settings allows you to change the look of the windows themselves. As Lumina is built on Fluxbox, Fluxbox themes determine the look of the windows. Arch is the default theme in Lumina for PCLinuxOS. The following below are the installed themes which can be used with Lumina. 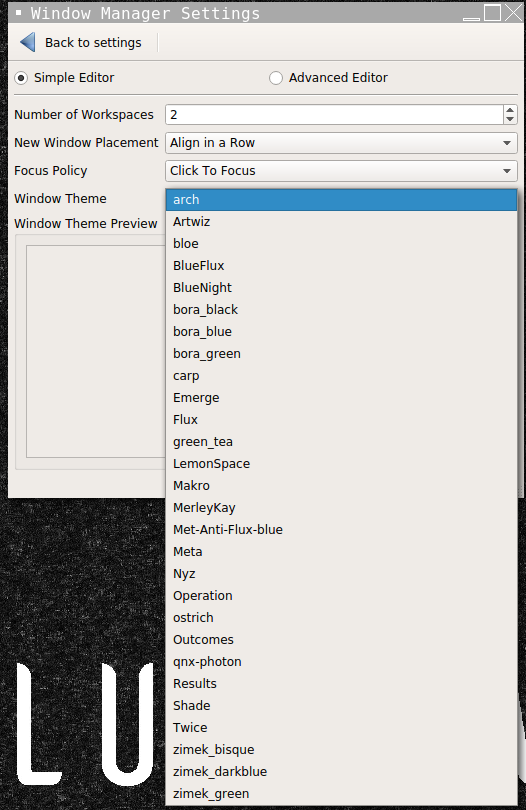 For this example, let us select BlueNight (you can choose any theme you wish). 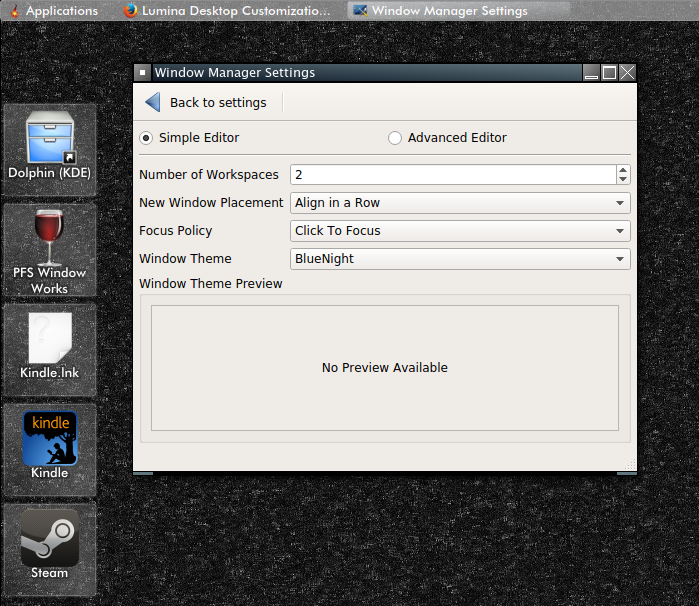 Because this is a Fluxbox theme, the Lumina settings such as fonts, colors and sizing are not applied here. At least, the theme is a better fit for this desktop. Now, let us get to the background itself. Click on Back to Settings and select Wallpaper from Appearance. 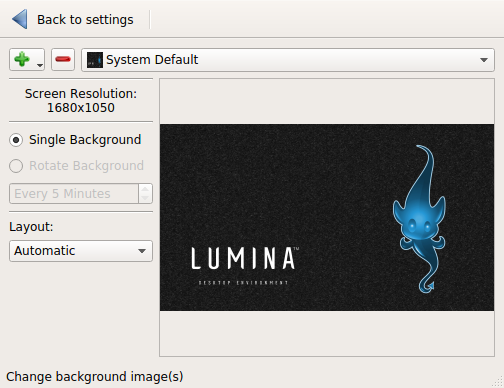 Here, we see two buttons, a plus and minus button, and a list of available wallpapers we can use. By default, only the default wallpaper is shown in the list (the one that has been the background all this time). The minus button removes a wallpaper selection from the list. The plus button adds selections to the list of available wallpapers. Selections can be a single file, a single color, or a directory (with the option to include subdirectories within that directory). As for graphic file formats supported, anything that can be edited in GIMP, Kolourpaint, MTPaint or Inkscape is supported by this desktop environment (including Encapsulated PostScript files). 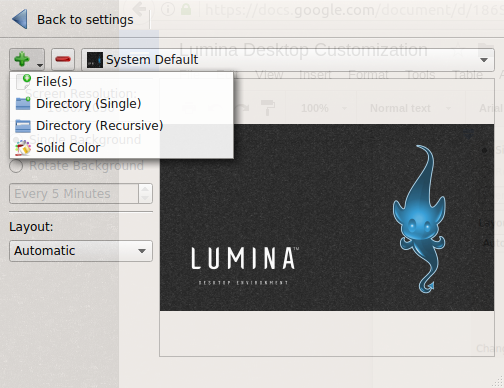 When you choose a directory with the recursive option, it could take a while to open the directory if there are a lot of files in that directory that can be used as wallpaper. This is useful if you want to display a slideshow for a background. For this example, I used the local copy of my website where the wallpapers are stored. http://horneker.com/pclinuxos-wallpapers.html You can use any source as long as the images are stored locally (on your hard drive in a separate directory)  Because there are multiple images in this directory, we have the option of automatically changing the background at intervals. Also, we can use the minus button to remove items not to be displayed as wallpaper. As this is a reasonable selection and interval, we shall click on Save and wait a while for the wallpapers to change. By default, the background changes every five minutes. The interval can be set to as little as one minute, or as much as two hours (120 minutes). The Layout option allows images to be tiled, scaled, centered, fit to the screen, or justified to an edge of the screen. By default, Lumina adjusts images accordingly depending on the image being displayed (in terms of size and aspect ratio).
Click on Save to begin the slideshow. 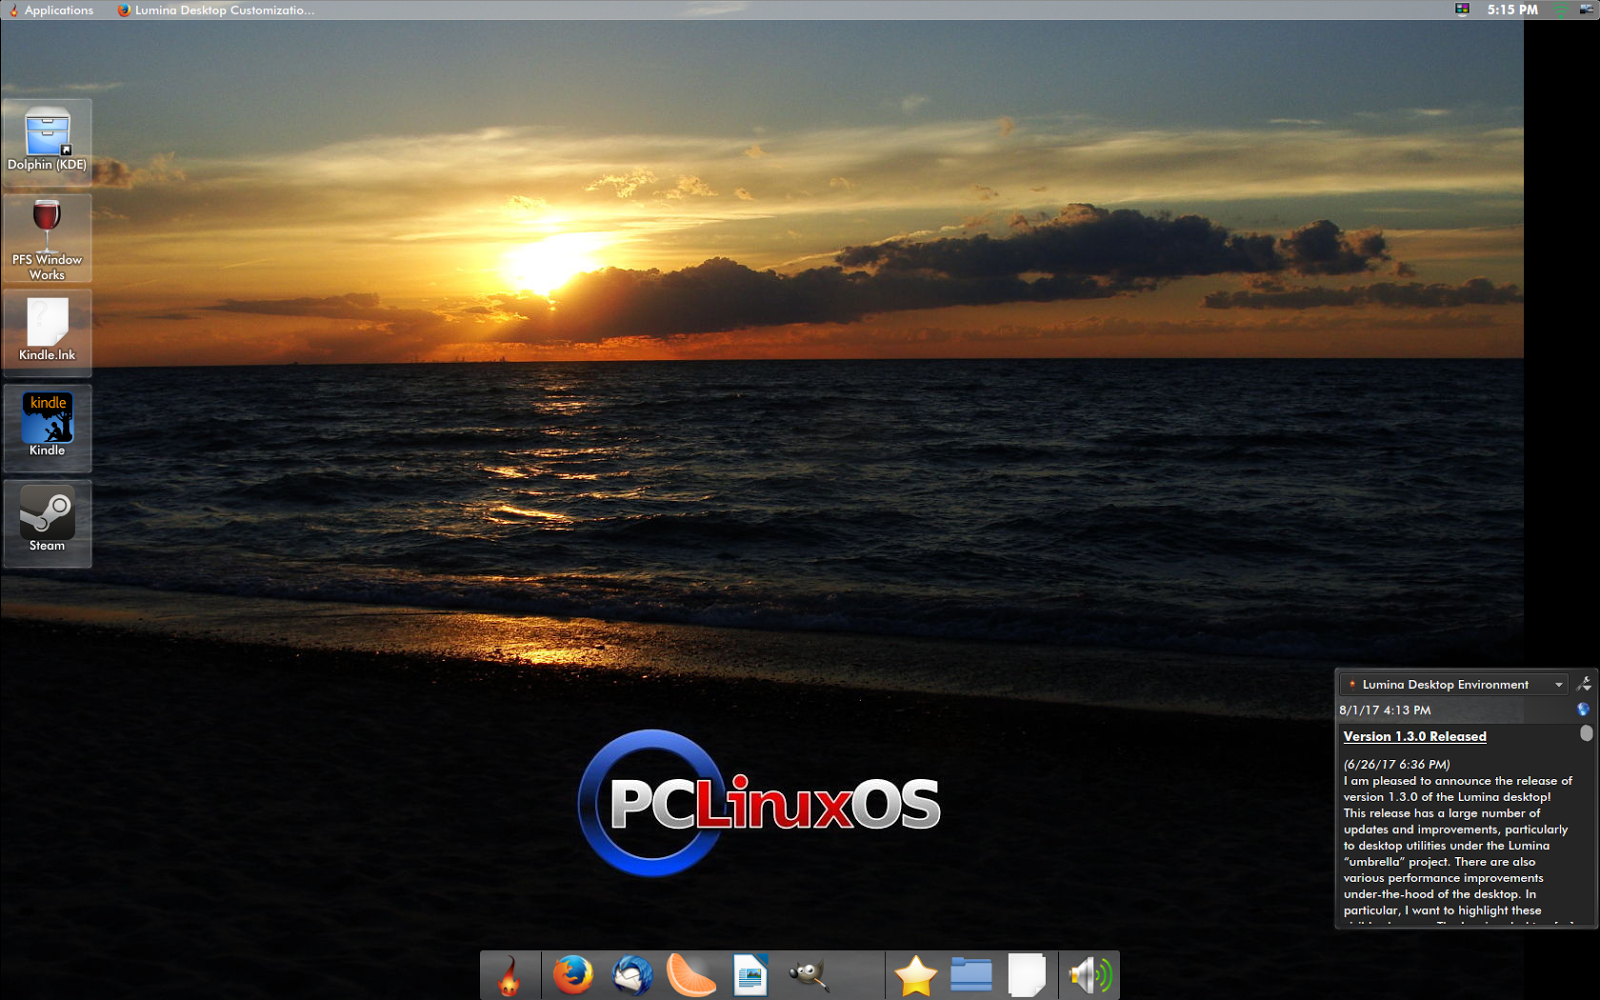 This is just the beginning of how to customize Lumina. What we did was more than just simulate Xfce, we kicked the Xfce experience up a notch. |