| Previous
Page |
PCLinuxOS
Magazine |
PCLinuxOS |
Article List |
Disclaimer |
Next Page |
Long Awaited GIMP 2.10 Released |
|
by Meemaw
GIMP 2.10.0 was released on April 27th and 2.10.2 was released on May 20th. GIMP has always been wonderful, but in the 2.10 version, many things have been corrected and added. I'm sure this article will only scratch the surface, but I wanted to give you some highlights of the new version. One of the newest things you'll see when you upgrade to GIMP 2.10 is that there are more themes and more icons. When you first open it after updating, GIMP will open with the Dark theme and Symbolic icons, which are now the default. No worries, you can open the Preferences and change the theme and the icons. The themes are Dark, Light, Grey and System. The icons are Legacy, Color, Symbolic and Symbolic-inverted. Symbolic and symbolic-inverted are the same design, but Symbolic is grey (suitable for the dark theme) and symbol-inverted is dark grey (suitable for a lighter theme). Legacy icons are the traditional icons GIMP has had forever, so you can use them if you decide they are irreplaceable. I chose the light theme with the color icons. The added zing here is that you can choose what size your icons are. In the drop-down, choose "Guess icons size from the resolution", "Use the icon size from the theme", or "Custom size". When you choose Custom size, the slider at the bottom will activate and you can choose Small, Medium, Large and Huge. If you need things a bit bigger, this is great. The icon set in the image below is the "Color" set. GIMP's big news is that GEGL is now being used throughout the program. I know it is an image processing library, but I really don't understand it very well, so I'll quote from the release notes:
Color Management has been revamped. In previous versions, it was a plug-in, but now it's a core feature. When you start a new project in GIMP, you'll find that the Create New Image window has much more to select. Just click on Advanced Options. 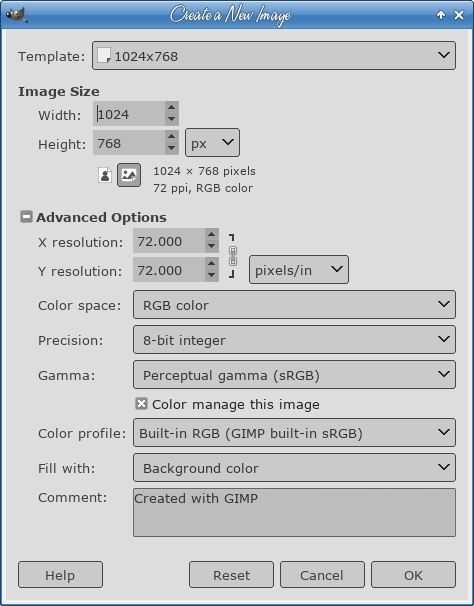 Color space, Precision, Gamma and Color profile are new choices. Until I learn a bit more, I'm sticking with the defaults above (other than my choice of fill). Layers and masks have many more choices to help enhance your creation. Clicking on the layers dock, you'll see a "mode choice" button at the top with two choices, Default and Legacy. Default is the new mode collection, and Legacy is the modes that were in GIMP 2.8. You can see there are more choices in Default. 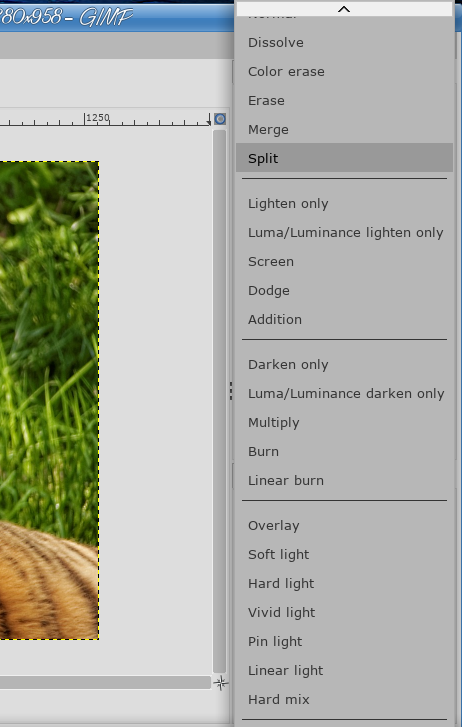 Creating a new layer, you can also see that the New Layer window has more choices: 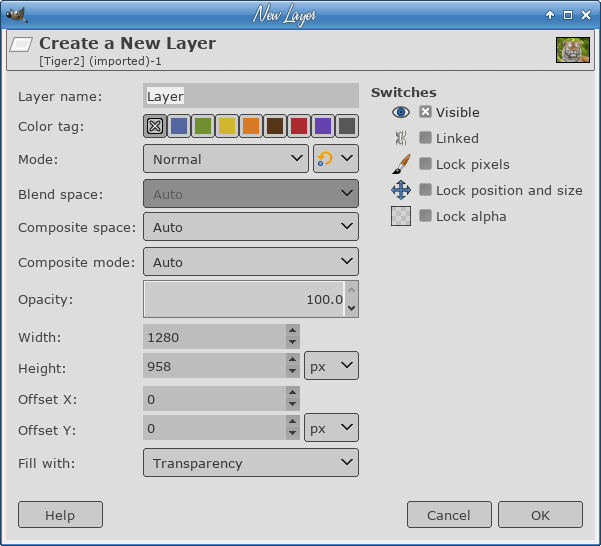 Also, if you always want an alpha channel in your layers, you can enable automatic generation of the alpha channel in imported images upon opening them. See Edit > Preferences > Image Import & Export for ways to do this on Import. The Transform menu has been extended and there are a few more tools: 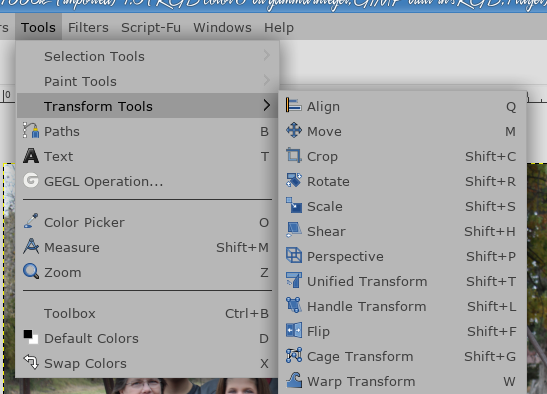 Unified Transform You can use this tool to stretch a photo any direction (rather than having to pull up different tools). As you can see, there are more handles and the photo is changed differently depending on which handle you grab (and which way you move it). 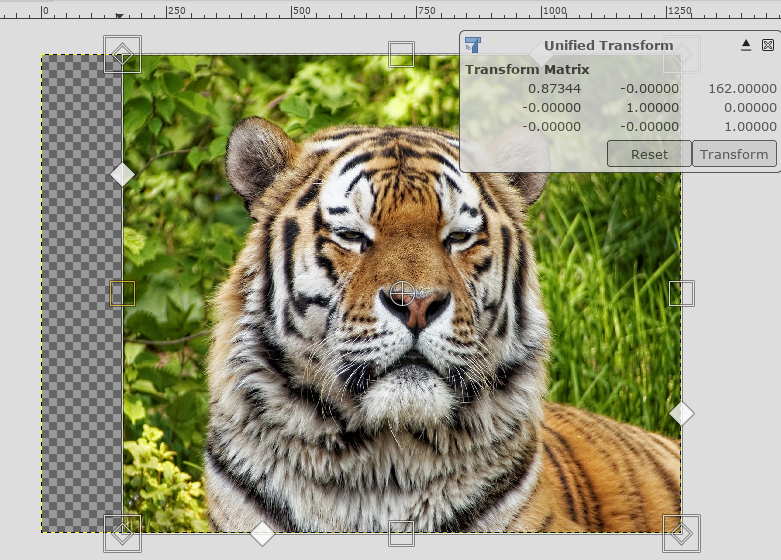 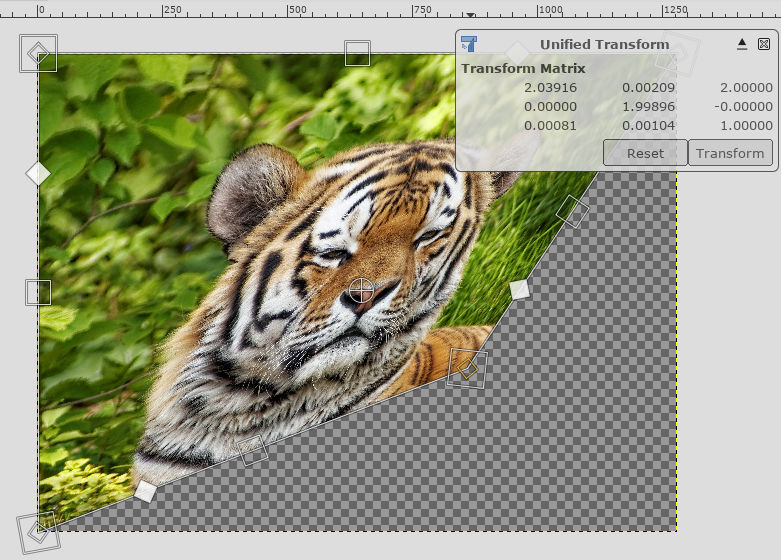 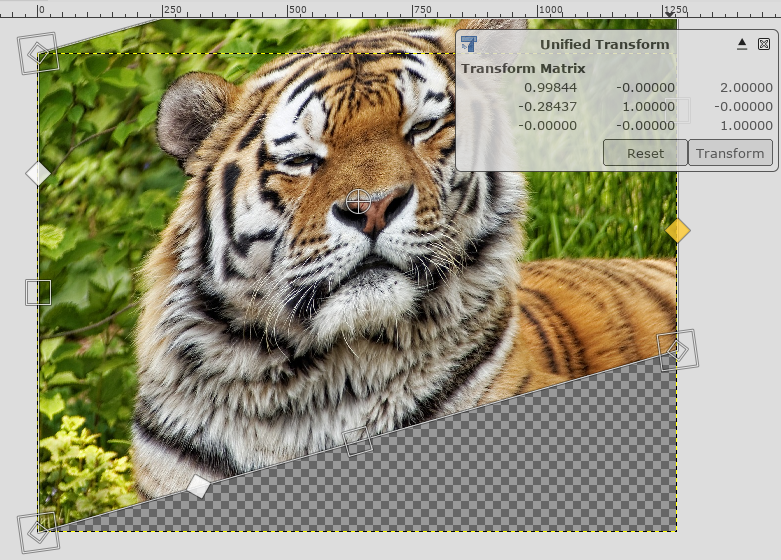 Warp Transform This tool will stretch a chosen part of your image (not like the smudge tool). When I started, the egg yolk was a circle. 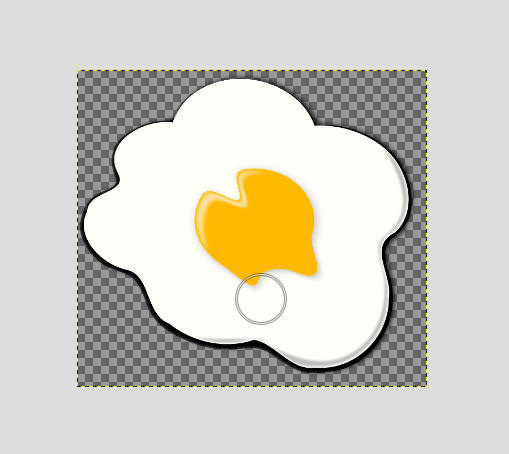 Handle Transform This tool will stretch or rotate an image while the handle holds it in a specific spot. The circle in the upper left corner is the handle. 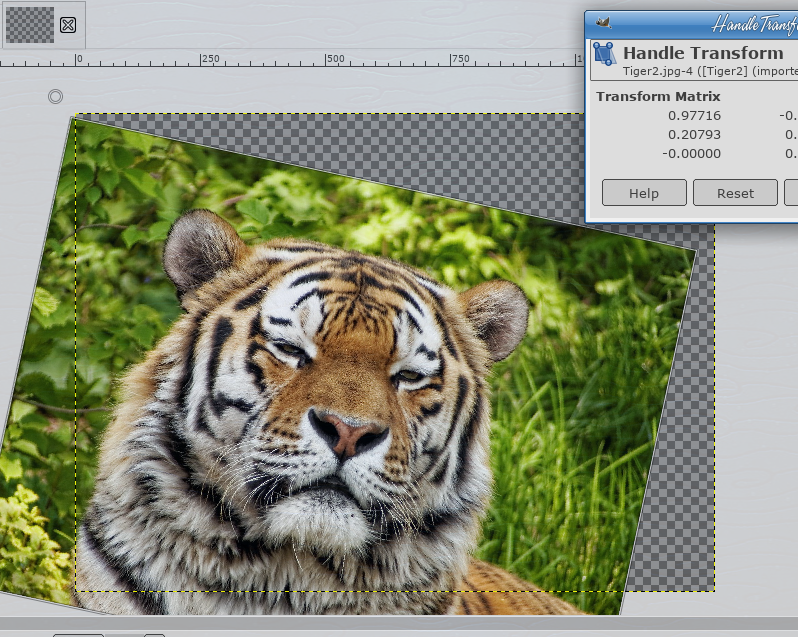 Blend tool becomes Gradient tool GIMP has renamed the Blend tool to Gradient tool and changed its default shortcut to G. This is only the start of the change! The new tool pretty much makes the old Gradient Editor dialog obsolete. Now you can edit the gradient right where you drew it, on your creation, adding and deleting stops and colors as you go. You can even start with a pre-made gradient, then develop it into a different one right there. 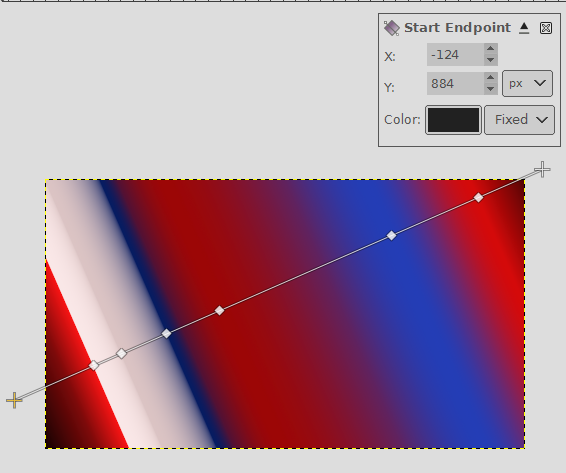 Better selection tools The Foreground Select tool is more selective now. Two new masking methods are now available for that. The Select by Color and Fuzzy Select tools both have a Draw mask option to display future selection area with a magenta fill. The Fuzzy Select tool also got a Diagonal neighbors option to select diagonally neighboring pixels. With the Free Select tool, closing the selection now doesn't make the selection automatically. Instead, you still can tweak positions of nodes, then press Enter, or double-click inside the selection, or switch to another tool to confirm the selection. The Intelligent Scissors tool now lets you remove the last added segment with Backspace key, and GIMP now checks, whether the first and the last segments are distinct before closing the curve. Digital painting improvements GIMP 2.10 has many improvements requested by digital painters. The one I noticed right away was the MyPaint Brush tool. It has a number of different brushes that GIMP didn't have before, except in a GIMP fork called GIMP-Paint. 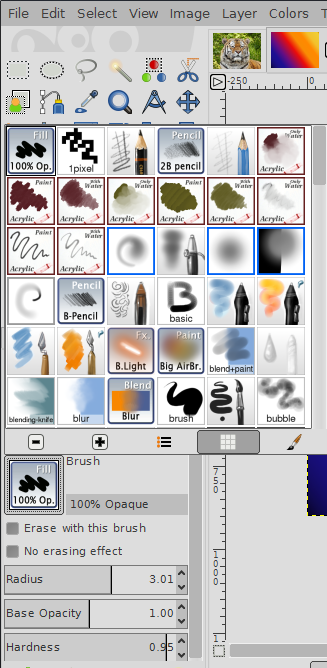 Many of the tools have additional choices. From the release notice: The Smudge tool got updates specifically targeted in painting use case. The new No erase effect option prevents the tools from changing alpha of pixels. And the foreground color can now be blended into smudged pixels, controlled by a new Flow slider, where 0 means no blending. All painting tools now have explicit Hardness and Force sliders except for the MyPaint Brush tool that only has the Hardness slider. Most importantly, GIMP now supports canvas rotation and flipping to help illustrators checking proportions and perspective. A new Brush lock to view option gives you a choice whether you want a brush locked to a certain zoom level and rotation angle of the canvas. The option is available for all painting tools that use a brush except for the MyPaint Brush tool. New Symmetry Painting dockable dialog (click on Windows > Dockable Dialogs > Symmetry Painting), enabled on per-image basis, allows to use all painting tools with various symmetries (mirror, mandala, tiling...). 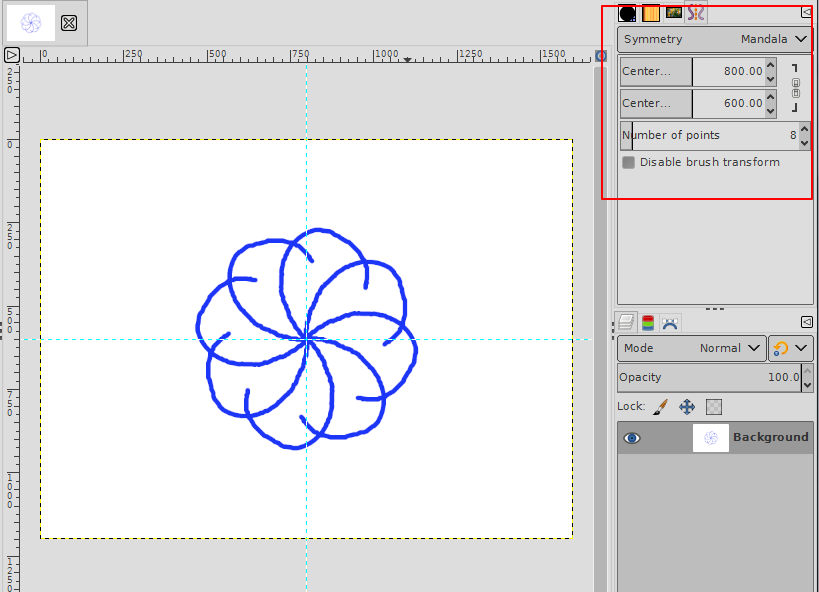 One of the things I found that is really great (at least for me) is the split view on the new filters. Activating split view (circled) allows you to see the difference between what you started with and what you are doing with the filter. 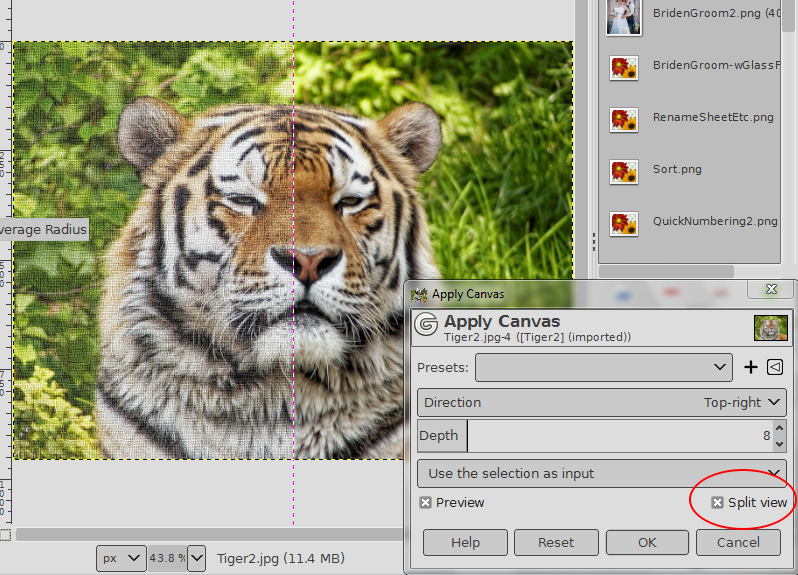 Don't know which filters are the new and improved? Look for the icon in front of each filter. I think the big G means it's a new &/or improved version, and the gear is the legacy filter, but I may be wrong. 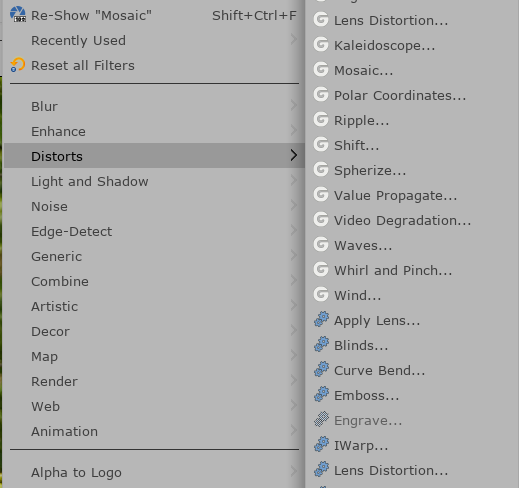 Exposure, Shadows-Highlights, High-pass, Wavelet Decompose and Panorama Projection are new filters aimed at photographers. I intend to try each of them to see how awesome they are. Many more changes are present. You'll have to open GIMP and see what you can find. I haven't even covered half of the improvements.
For further information, see the release notes: |

