
| Previous
Page |
PCLinuxOS
Magazine |
PCLinuxOS |
Article List |
Disclaimer |
Next Page |
Configuring Late Model Epson Printers |
|
by phorneker Early last month, I had to purchase a new printer as my aging Epson Stylus NX-415 simply refused to feed in card stock (for making Christmas cards) from a newly purchased pack of 25 greeting cards. Attempts made included cleaning the rollers where paper was fed. (The printer can still print on regular paper and photo paper, but not card stock.) I went to the local OfficeMax and looked at what they had in stock. (The NX-415 was purchased at Office Depot 10 years earlier. Since then, Office Depot and OfficeMax merged into one company, namely Office Depot Office Max. The local store is branded as an OfficeMax store, and I still use my Office Depot rewards card I obtained before the merger of OfficeMax with Office Depot.) The store had a number of Brother, Canon, Hewlett-Packard and Epson models available. What I looked for was a printer that loaded paper from the top at the back of the printer. This was necessary to allow card stock to be fed to the printer. Of these, only the OfficeJet 3850 and the Epson Expression XP-440 loaded paper that way. Fortunately, both of these printers will work with PCLinuxOS. I ended up choosing the Epson Expression XP-440 (at $49.99 on sale) over the OfficeJet 3850 for the following reasons:
Setting Up The XP-440 for printing
What is included in the box, besides the printer, is a (industry standard) power cable, setup instructions, a set of Epson 288 ink cartridges (black, yellow, magenta and cyan), and a CD-ROM with Windows-specific utilities. For PCLinuxOS, you will not need the CD-ROM, but you will need to download Epson's ESC/P-R driver from Epson Download Center. 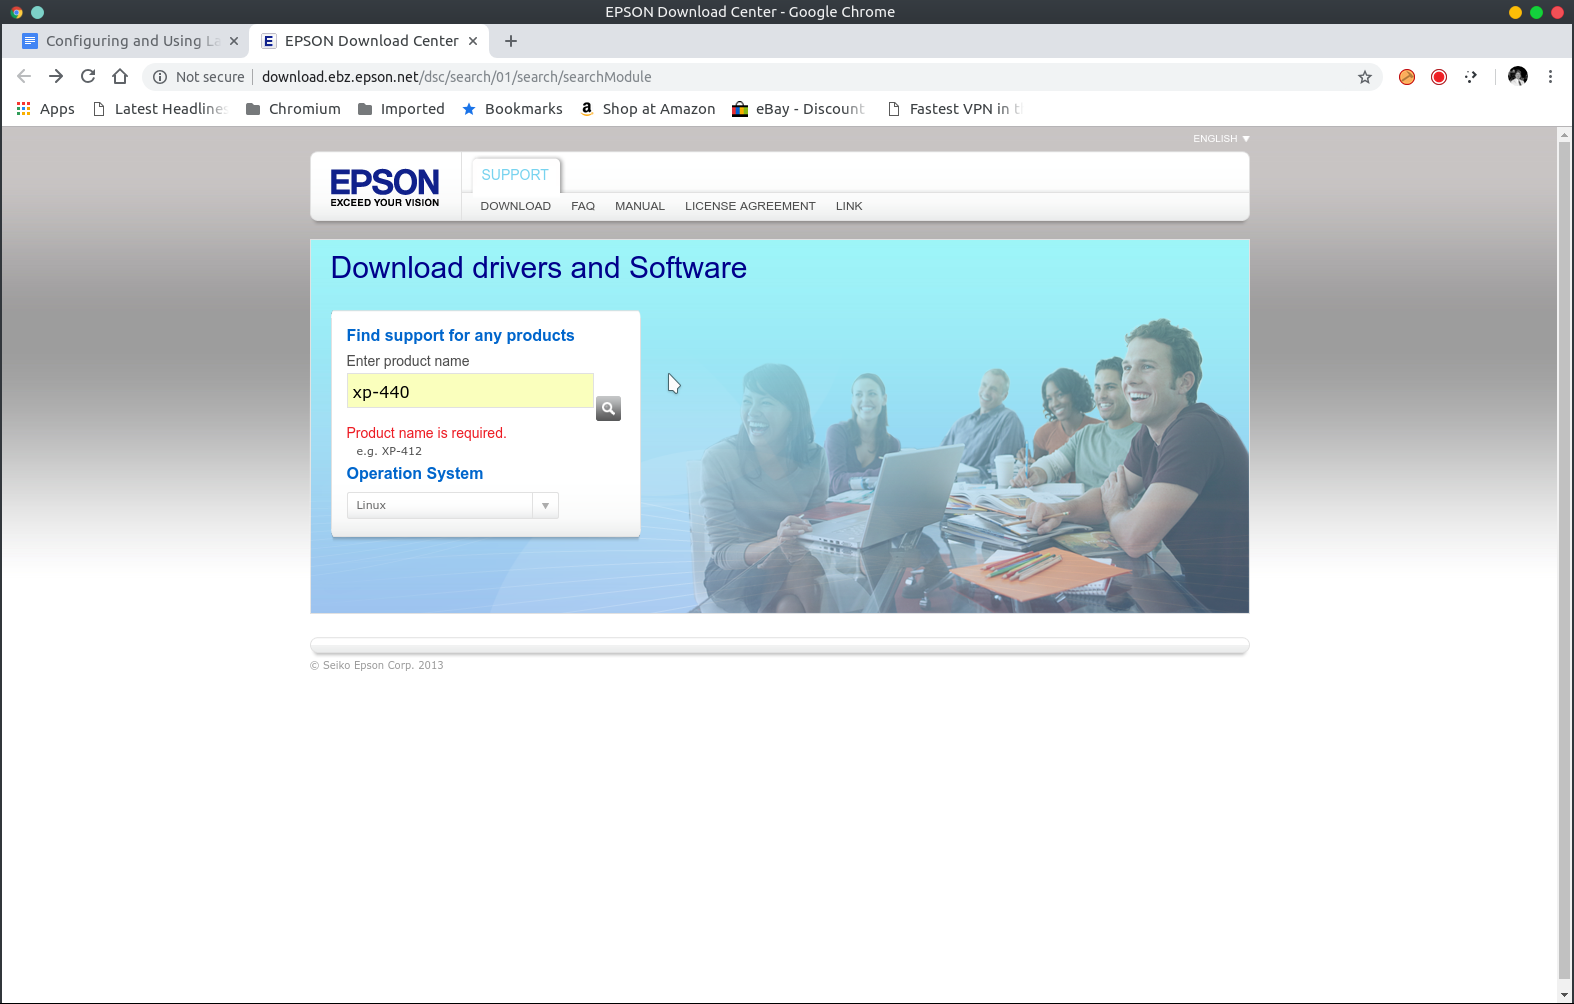 Here, I entered xp-440 for the product name, and selected Linux from the drop down menu labelled "Operation System". After clicking on the search button (the one with the magnifying glass), I get the following: 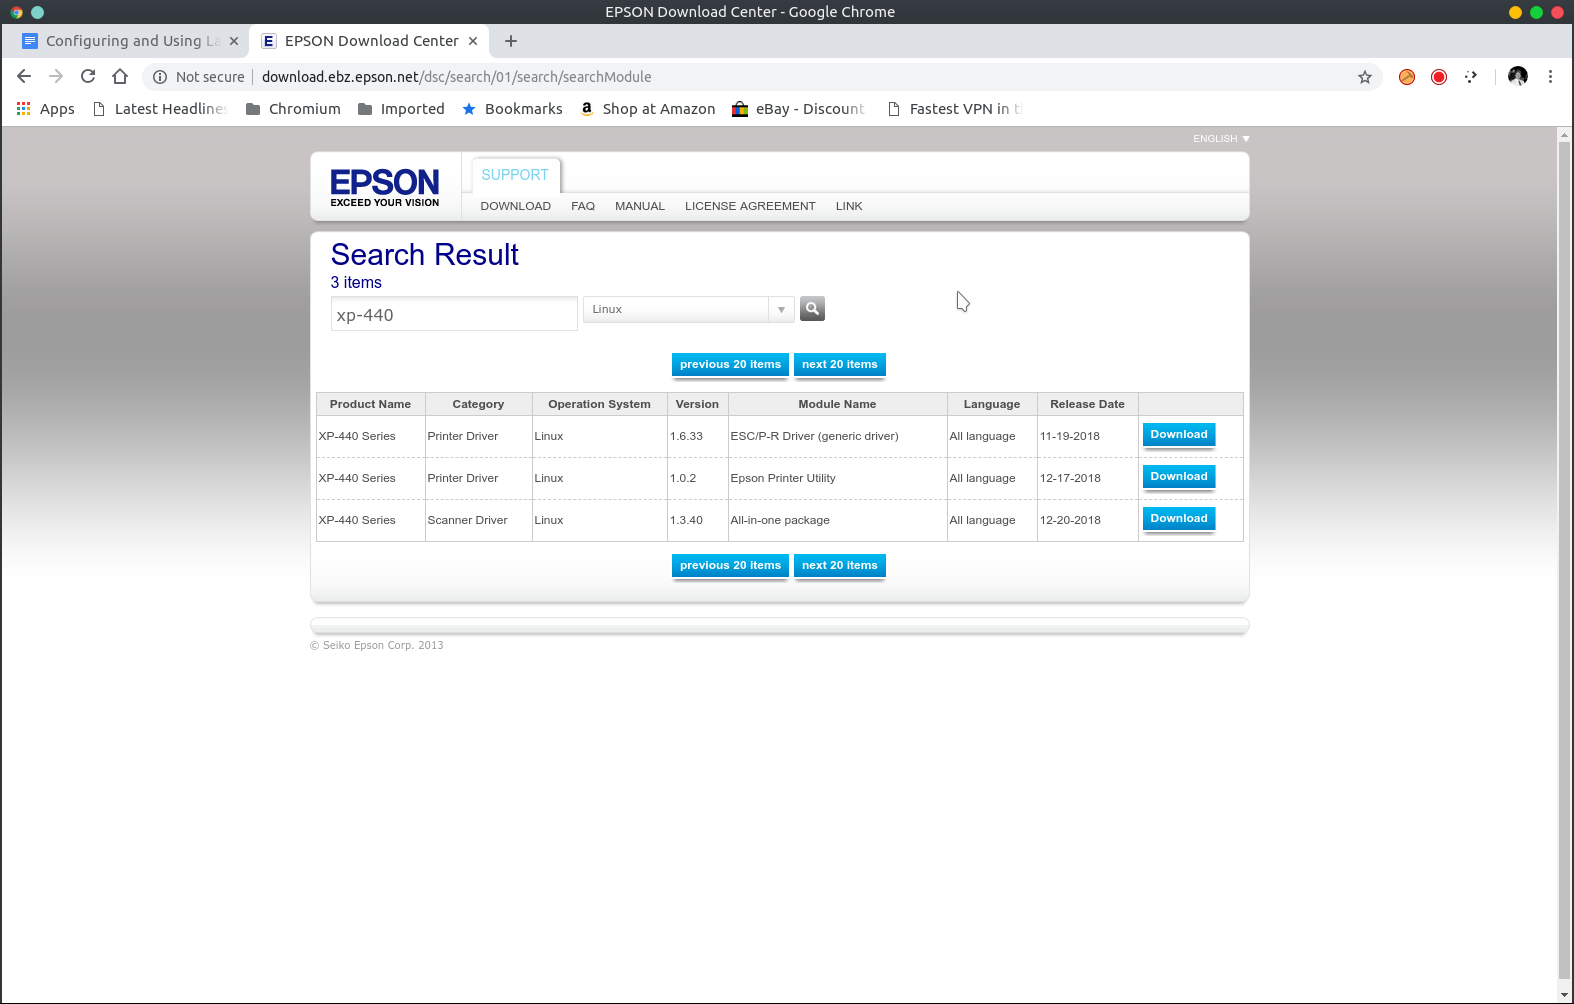 There are three files available for download. The first is the ESC/P-R driver. 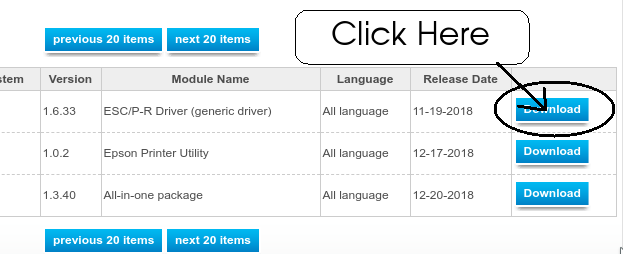 This is what we need to download and install to print to the XP-440. Click the top button labelled "Download" and this comes up: 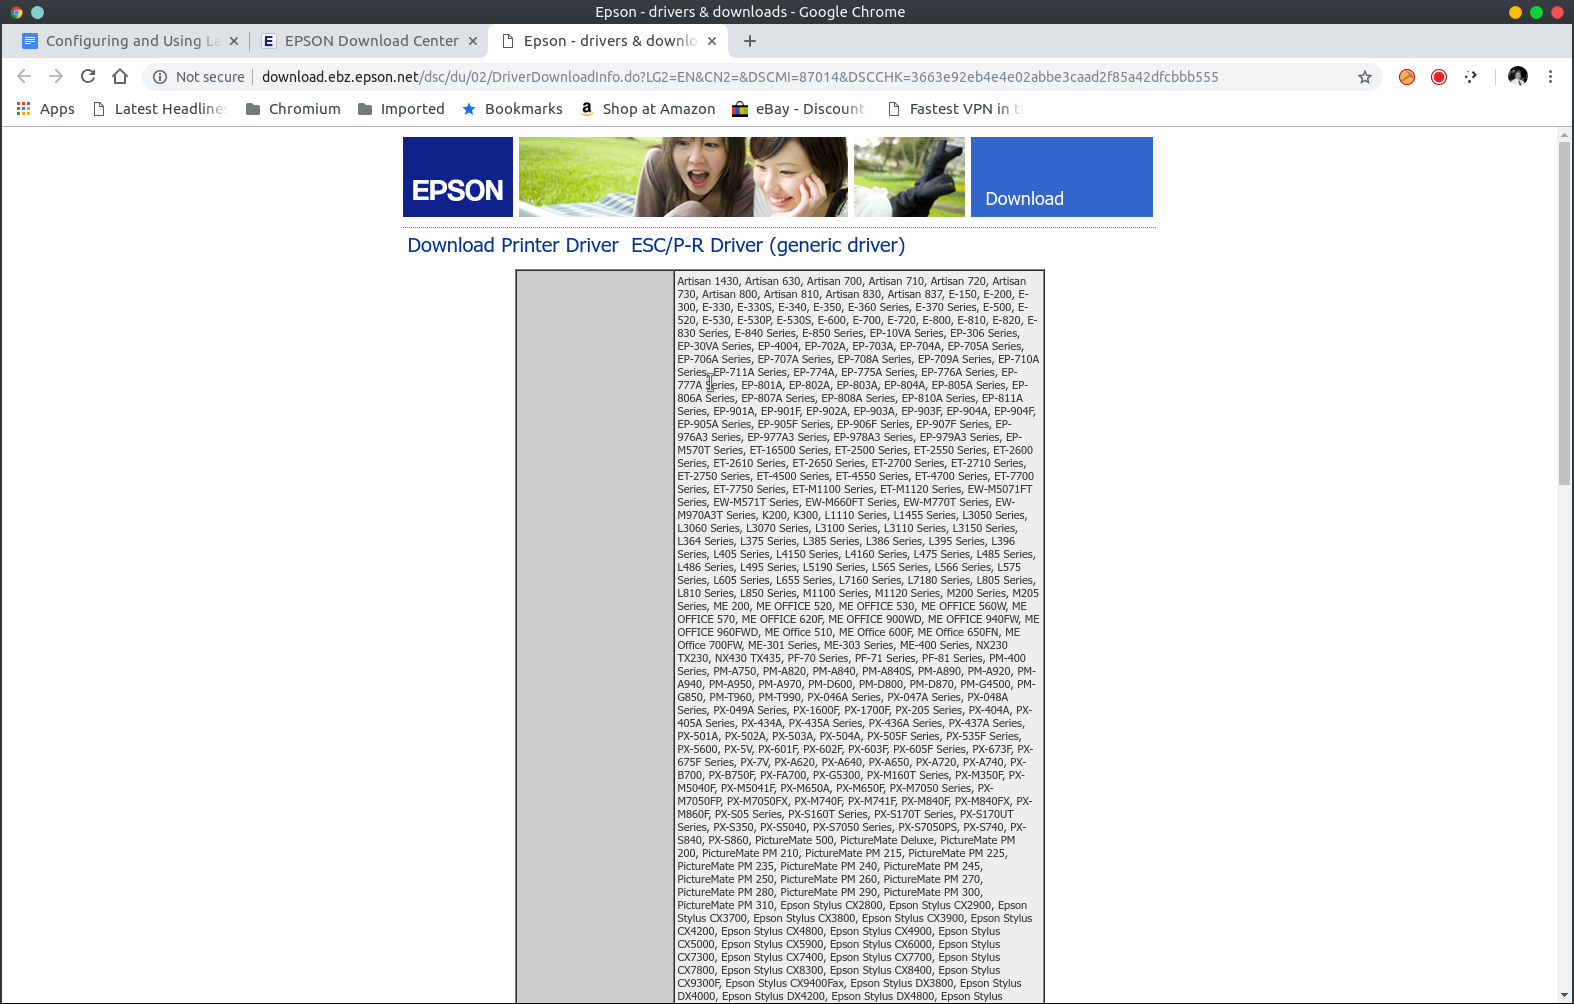 As we can see here, there are many Epson printers that are supported with this ESC/P-R driver. Scroll to the bottom of the page and click on Accept to be able to download the RPM file. (This file should really be in the repository, as it is available in the repositories of all the other major Linux distributions.) Scroll to the bottom of the page, and select the 64-bit RPM package. 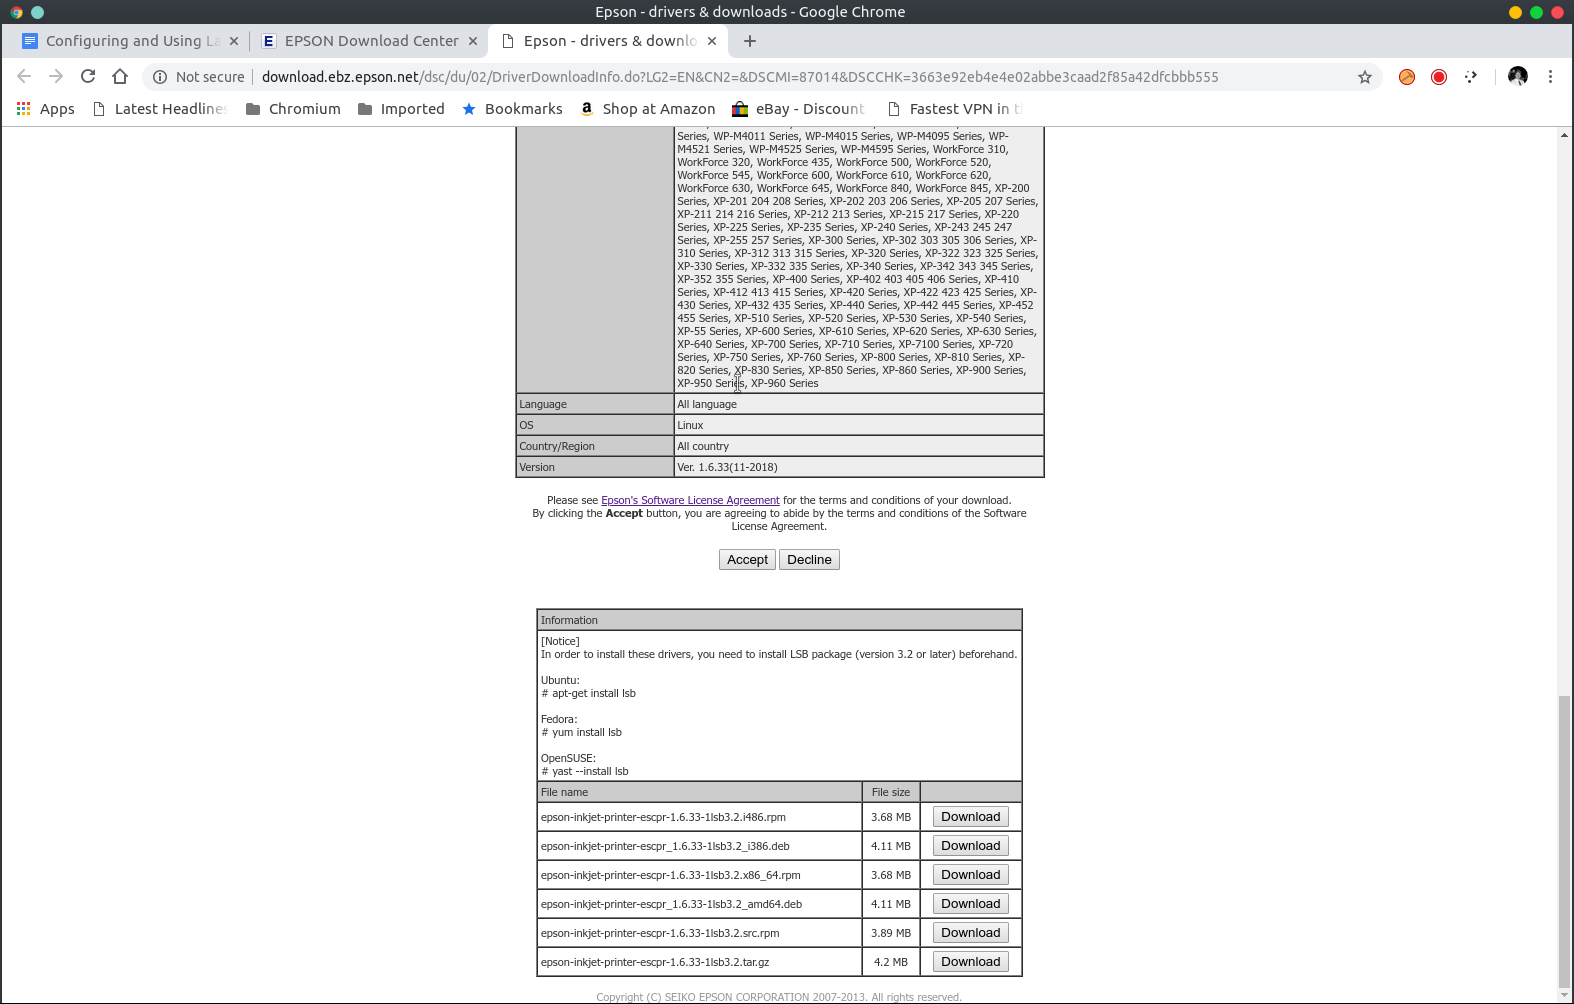 The third item at the bottom of the web page has the link to the 64-bit RPM package. You will need to have the lsb-lib64 and the task-printing packages installed from Synaptic to be able to install the Epson drivers as the drivers were compiled using Version 3.2 of the Linux Standards Base. You can also download the .tar.gz file if you wish to compile the driver yourself. This file contains the source code for the ESC/P-R driver. (This is one of the benefits of open sourcing anything.) (The driver also works with my NX-415 when configured as a NX-410 printer.) 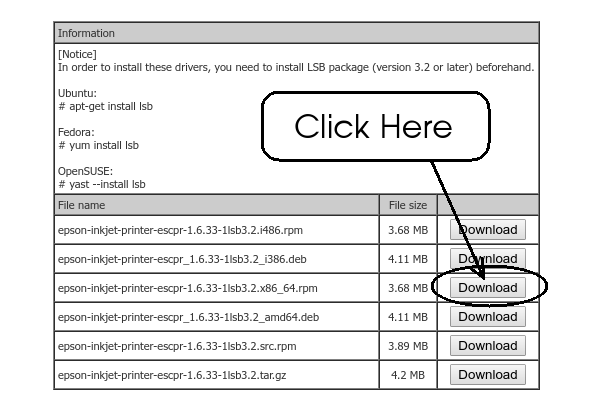
Note: Make sure the lsb-lib64 and the task-printing packages are installed before attempting to install the downloaded package. In a terminal window (Konsole or other application), change to the directory where you downloaded the driver package and type in: rpm -i epson-inkjet-printer-escpr-1.6.33-1lsb3.2.x86_64.rpm to install the driver package. Now let us close the third tab that opened (for downloading the printer driver). There is another utility available that is useful, but not necessary. 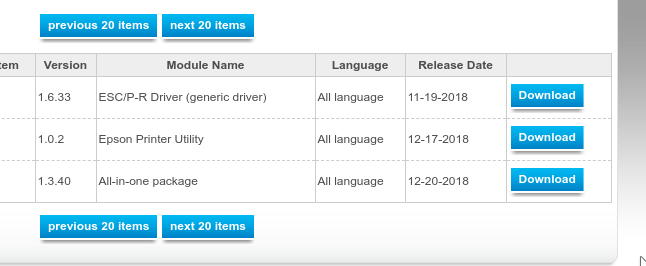 The Epson Printer Utility is useful for displaying the ink levels of the ink cartridges installed in your printer. It is useful, but not necessary as you can access the same levels from the control panel on the printer. The third package is Version 3.x of the Imagescan utility. I do not recommend downloading this package. Instead, you can download Version 2.x of the Image Scan! For Linux utility (the one I used for the NX-415) and it will work with the XP-440. The scanning utility does work on PCLinuxOS (after modifying /etc/sane.d/epsonds.conf), but Imagescan will not work with the GIMP as Imagescan was not implemented as a GIMP plugin. For this reason, you will need to either install iscan from the repository, or install Version 2.x of Image Scan! for Linux from Epson's website.
Once you downloaded and installed the necessary drivers and software, you should setup the printer according to the enclosed Startup guide, which consists of removing all shipping tape attached to the printer. Be very careful not to touch the white ribbon cable inside the printer when removing the tape, or damage to the printer could result. This white ribbon cable links the print head and ink cartridges to the rest of the printer. After removing all shipping tape, connect the power cord and power up the printer. Select the language (English, Spanish, French, German, etc.) for the country you live in and press OK on the control panel. Next, open the lid using the side handles to open up the entire printer (including the flatbed scanner that is embedded into the lid). The empty ink cartridge chamber with four slots will appear allowing you to insert the ink cartridges in the following order: Black first, then yellow, then cyan and finally magenta. (Note: each cartridge has shipping tape that must be removed before use.) The XP-440 uses 288 and 288XL cartridges, with the difference being that XL cartridges are high-capacity cartridges (in terms of the amount of ink in the cartridges). Once the cartridges are installed in the printer, close the lid and press the Start button (the one with the vertical line inside a diamond on the button) to start priming the ink charging system. The printer takes a few minutes to get each ink color primed for use. Meanwhile, you can load the paper into the printer. Once the printer has finished its task and is ready to use, reboot PCLinuxOS to ensure that the printer drivers and supporting files are recognized by CUPS at startup time. Setup the print queue Late model Epson printers have Wi-Fi capabilities, and it is completely optional. If you choose to setup Wi-Fi on this printer, you will be prompted to provide the ESSID of the network where the printer is to be connected, along with the type of encryption (such as WEP and WPA/PSK), and the network password. (For security reasons, I will not go into any detail here.) A status sheet will print out indicating the success of network connectivity. This sheet will provide the IP address of the printer on your network. You may also directly connect the printer to your PCLinuxOS machine through a USB cable. PCLinuxOS will detect the printer either way the printer is connected. To configure the printer, open the PCLinuxOS Control Center (also called Configure Your Computer depending on which desktop environment you are using) and select Hardware from the sidebar. Then select "Set up the printer(s)..." as shown here. 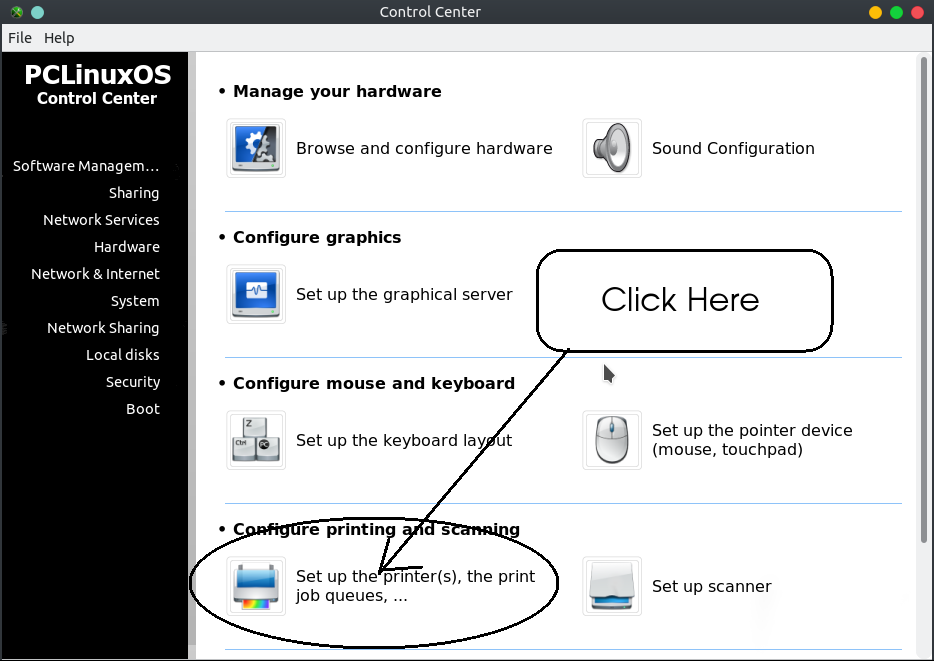 Here is my setup for the XP-440. The EPSON_XP_440_Series entry was automatically created as it detected the printer as a network printer. The EPSON-XP-440-Series entry (with dashes instead of underscores) was automatically created after I connected the printer with a USB cable. This is the print queue used when the printer is locally connected. The other queue, named XP-440-Series was manually created. (Used mainly with VirtualBox for printing services for the Windows NT 4.0 virtual machine as its LPT1: device name and configured as an Apple Color LaserWriter. The printing is done through the version of Samba supplied by the repository.) 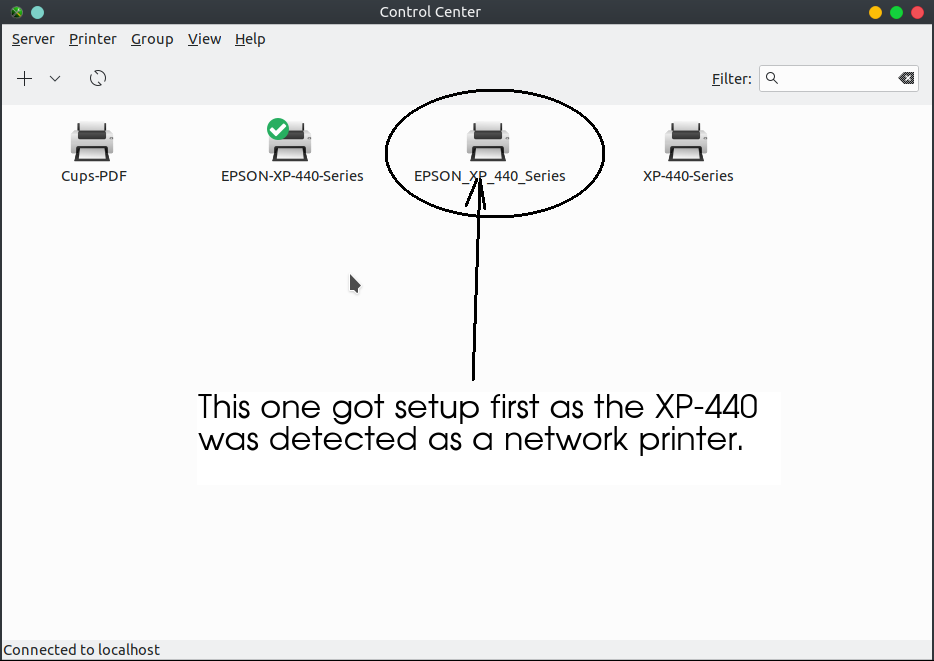 Once the print queue is connected, it is now ready for printing. Scanning with XP-440 To setup the XP-440 for scanning, you will need to know the USB ID for the attached printer. The lsusb command takes care of that detail. For the XP-440, the USB ID is 4dba:1114. As the root user (type the su command and enter the administrator password), open /etc/sane.d/epkowa.conf and add the following: usb 4dba:1114 as shown: 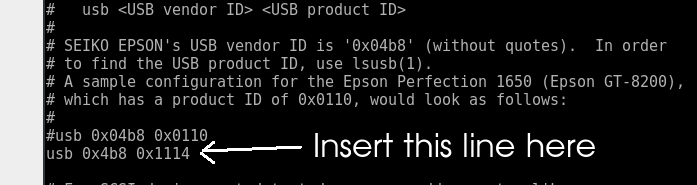 Then save the file. The scanner should be ready to use. Note: This file is not present if Version 3 of Imagescan is installed. This is why I recommend installing iscan or Image Scan! For Linux (Version 2). If everything goes well, you should be able to print from LibreOffice, GIMP, and most other applications. However, printing directly from web browsers is not guaranteed to work. This is one reason why I have a Cups-PDF queue setup on my laptop. You can print from Firefox by printing the page as a PDF first, then opening an application such as Okular to print. This has a benefit of being able to print only pages that need to be printed, saving ink and paper. Also, not all websites are printable (much less print friendly), so it would not really make any sense to print a website that cannot be printed. If you are using Google Chrome, Holding down the Control and Shift keys, then pressing the P key will bring up the GTK print dialog where you can select the print queue to use to print. This works for me every time I want to print from Chrome. 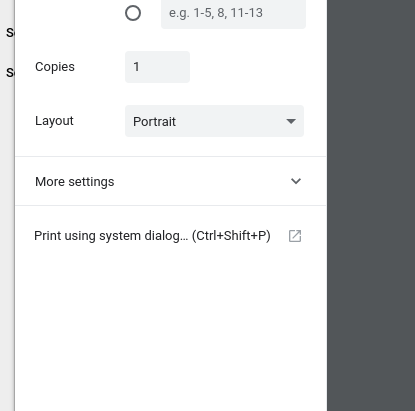 With that having been said, you are now ready to use your new printer. |
