| Previous
Page |
PCLinuxOS
Magazine |
PCLinuxOS |
Article List |
Disclaimer |
Next Page |
Ventoy: The Ultimate USB Loader |
|
by Alessandro Ebersol (Agent Smith)  USB flash drives on Linux have always been problematic. Aside from the nostalgic unetbootin, the bootable USB solutions on Linux are always lame. Either you don't have all the features of the Windows programs, or it's complicated and laborious to make it work. Just for comparison, Windows has Wubi, Rufus, Yumi, Universal USB Installer, LiLi USB Creator, and the list goes on and on. On Linux, we had Unetbootin, which was a very good tool, but which did not continue development in the jump from 32 to 64 bits. Really, it did not improve as it should, lagging behind other solutions. So, we who use Linux have been orphaned of some solution that was practical, easy and that effectively worked. Ventoy shows up and saves the day Enter Ventoy, a program that manages the use of the USB flash drive regarding boot management, the flash drive being just one ISO, or multi ISO's. Also, several types of ISO's are supported, from Linux, BSD and even Windows. In addition, they can be mixed without any problem. How does Ventoy work? The concept of Ventoy is so simple that it is surprising that nobody had thought about this system before. Ventoy is a script, a small program, that, when run (as root), partitions a USB stick (which must be specified so that the program can do its job), in two partitions: A 32 MiB partition, in which a loader is installed, and, which also serves as an EFI partition, if the pendrive is used to boot on machines with EFI boot, and the rest of the pendrive is formatted in exFAT, and the pendrive is labeled Ventoy. 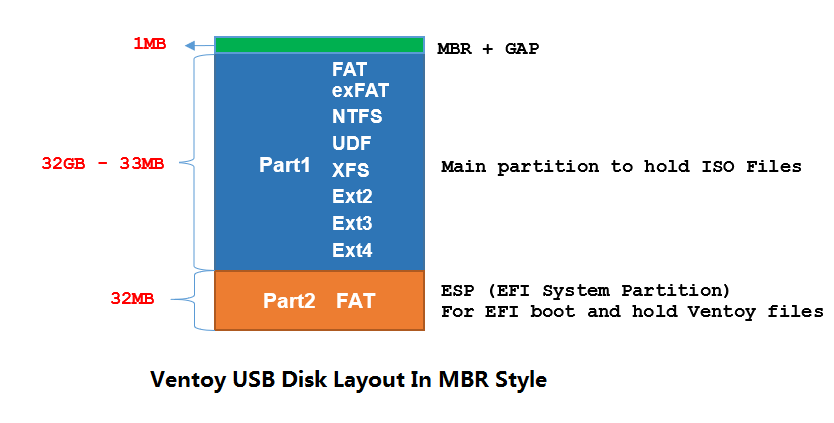 Pendrive's layout, after Ventoy's installation With the above layout, Ventoy becomes compatible with both systems that boot in legacy MBR mode and with more modern EFI/GPT systems. Ventoy, however, does not support secure boot, and it must be disabled. As for the first partition, by default, Ventoy selects the exFAT file system for the primary partition to store iso files. ExFAT is better compatible with Windows/Linux/Mac and exFAT is suitable for the USB stick. In Ventoy-1.0.11, you can reformat the first partition with another file system. exFAT, FAT32, NTFS, UDF, XFS, EXT2, EXT3, and EXT4 are supported. Note that if you choose XFS, EXT2, EXT3, or EXT4, the USB drive will not be available on Windows, and it cannot be used to install Windows. But if you only use Linux, it will be a good choice, because those listed filesystems will perform better on Linux. As for the second partition, there must be an EFI system partition with the FAT file system, and these are the mandatory requirements of the UEFI specifications. Therefore, this partition is created to hold the EFI boot file and other files needed for Ventoy. Since these files are very small, 32 MiB is sufficient. In addition, the EFI partition can also be in the first partition, but the developer defined it in the second partition, only because in some versions of Windows (like Windows 7), only the first partition on the USB drive is visible to the system. This is good for the protection of Ventoy. This partition is very small and used by Ventoy, so it is best not to change anything on this partition. And the 1 MB gap? It is used to store the boot loader on Legacy bios systems. Using Ventoy To use Ventoy, you will need a pendrive, or what some people refer to as a USB flash drive. To write this article, I used an 8GB USB stick. Again I stress: Ventoy must be run as ROOT. Now, to the steps for using Ventoy.
1) Download the script, selecting the Linux version:
https://github.com/ventoy/Ventoy/releases/download/v1.0.15/ventoy-1.0.15-linux.tar.gz 2) After downloading the script, unzip it somewhere in your /home directory. When unzipping, it creates a ventoy-1.0.15 folder. Change to this folder. 3) Connect your USB stick to the computer. You should know how the system identifies your flash drive (sdb, sdc, etc.). If you can't easily find out, use Gparted to find out. 4) The syntax for Ventoy commands is: Ventoy2Disk.sh CMD [OPTION]/dev/sdX, where
CMD:
OPTION: (optional) 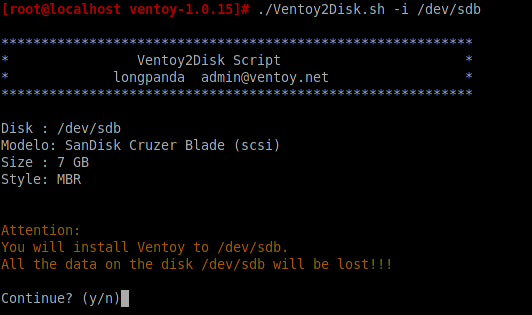 5) Type Y. 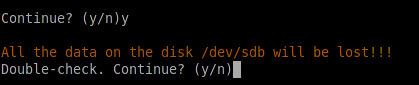 6) It will ask for confirmation, so type Y again. 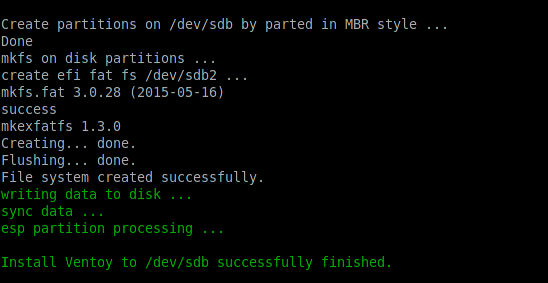 7) The script will be executed, the USB stick partitioned and formatted, and the Ventoy boot loader installed. 8) After partitioning and installation, the drive layout looks like this: 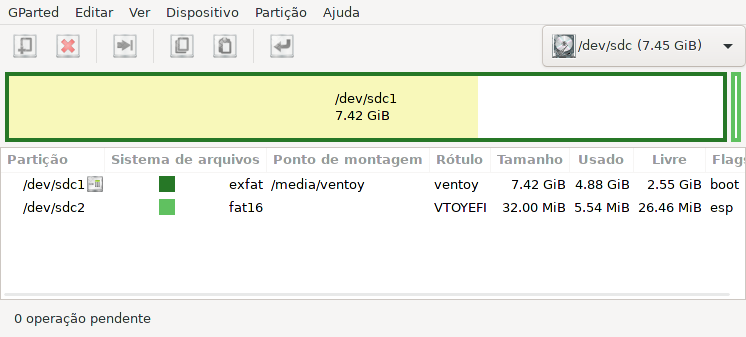 9) And the drive is ready to be used, being identified by the system as Ventoy.  10) To test, I copied some ISO's to the USB stick (PCLOS Lxqt, PCLOS Br LXDE, SlitAz, etc.) 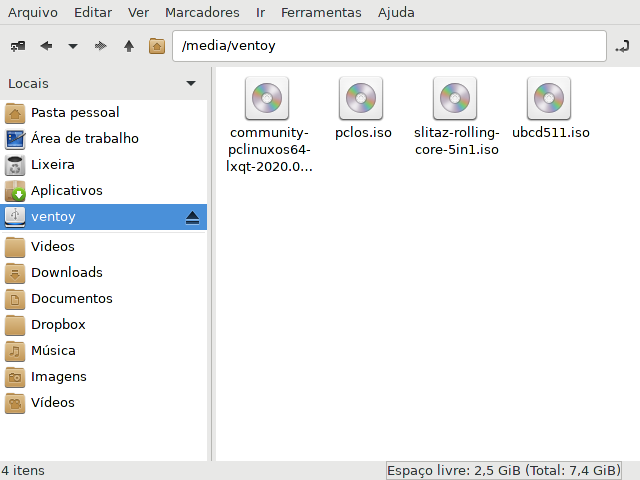 Did it work? Yes! No doubt! Below are photos of the tests. 1) With the computer turned off, the USB stick was inserted. When turning on, in this case, I pressed F12. 2) The device selection menu appears. 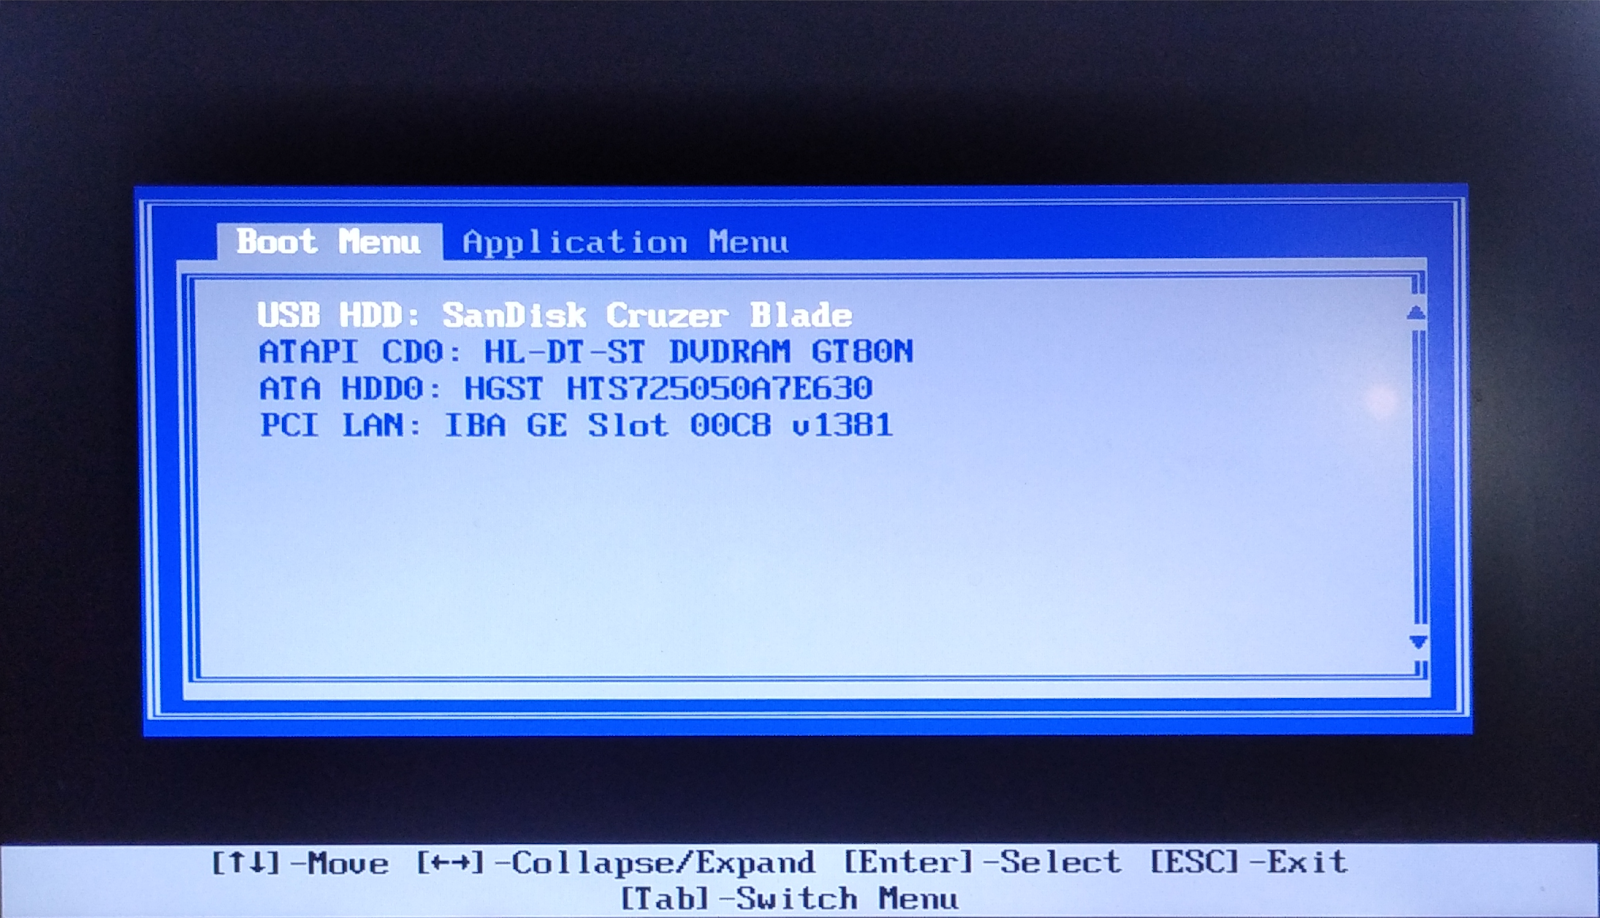 3) Choose the USB drive. 4) Upon boot, the Ventoy menu appears, with all the ISOs stored on the first partition listed. 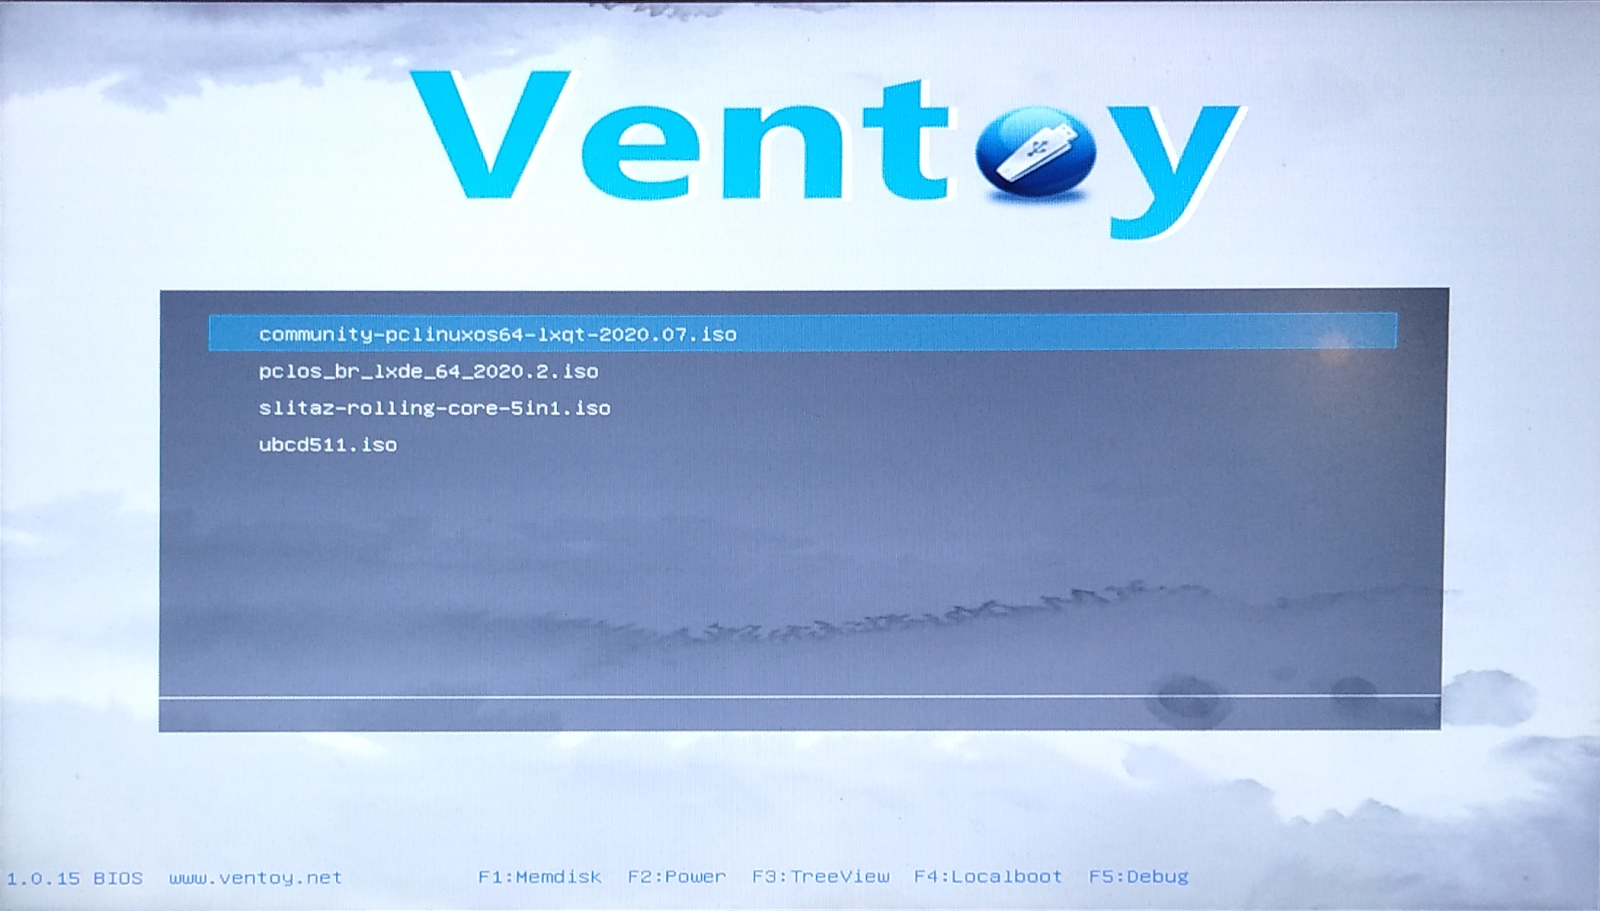 All the ISO's have booted and executed. However, not all ISO's are compatible with the scheme that Ventoy uses as a bootloader. To check the compatibility of a specific ISO with Ventoy, check the Tested ISO page. I hope you enjoyed this great tool, which is non-destructive, simple and effective, and works for the management of USB bootable USB drives, whether they are just a single ISO or multiple ISOs. A big (isolated) hug, and see you next month. |