| Previous
Page |
PCLinuxOS
Magazine |
PCLinuxOS |
Article List |
Disclaimer |
Next Page |
Using Timeshift To Backup & Restore Your PCLinuxOS System |
|
by Ramchu 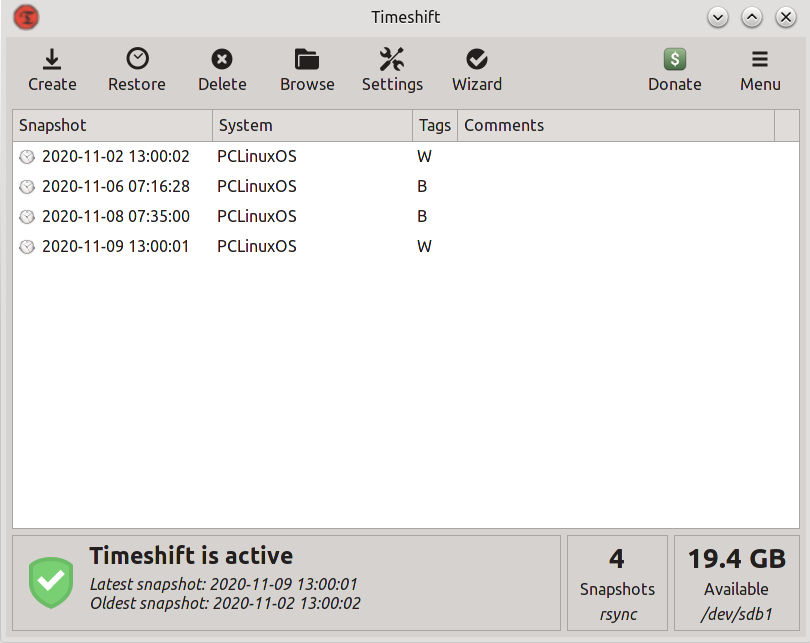 I recently ran across a post by one of the PCLinuxOS forum members, asking for an article/tutorial on how to use Timeshift, so I decided to give it a go. Now, if you're new to PCLinuxOS or Linux in general, you may be asking yourself, "what is Timeshift?" Well, Timeshift is a package/program written for Linux to create restore points for your operating system, much like the restore point feature in Windows. It allows you to make incremental backups that create exact images of your system, at specific points in time. They can be used to restore your system to the exact state that it was in, at the time when the backup was made. The backups are incremental so they don't need as much hard drive space to store. Timeshift isn't for servers. It was written for the Linux desktop, and works very well in this area. There are several good reasons to install and use Timeshift on your Linux desktop system:
You can just roll back to a predetermined point in time, before the disaster struck. Timeshift also allows you to backup to external hard drives, protecting your system from hardware failures. Timeshift can be set to run at many different intervals, hourly, daily, weekly, monthly and/or every time you boot your system, so your backups are never out of date. It runs in the background so you can continue working while it protects your system.Timeshift comes preinstalled in most, if not all, PCLinuxOS installation ISOs. But if it's not installed on your system, never fear, it's in the repository. Just open Synaptic and search for Timeshift, then install it. You will find Timeshift in the Application Menu > Archiving > Timeshift in your system's PC menu. 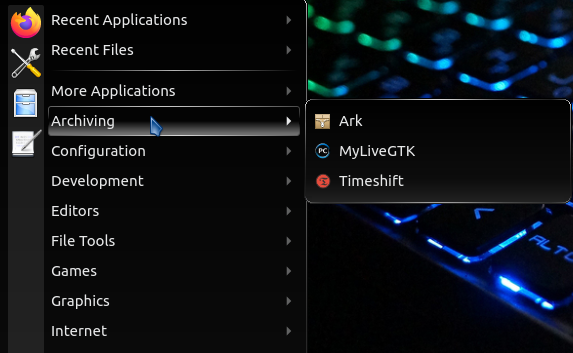 When you start Timeshift, you will be prompted for your root password, as Timeshift must be run with Root/Administrative privileges. Enter your password, and click OK or press the Enter key on your keyboard. 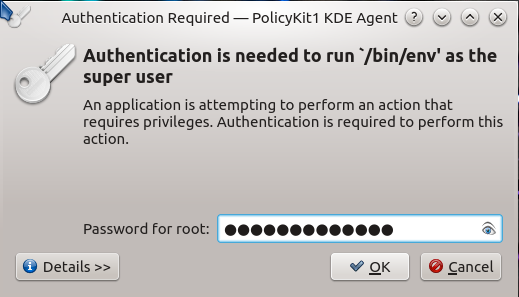 You will now be in the Timeshift Setup Wizard, and presented with the first dialog window. Here is where you will choose whether to run your backups as RSYNC or BTRFS. Unless you have specially formatted your system hard drive for BTRFS, you're going to want to choose RSYNC. Click Next to advance.  In this dialog window you will be asked where to store your backups. Select the drive where you want the backups to be stored. If you have a second drive or an external drive, that would be the better choice. After choosing the drive for your backups, choose Next to advance. 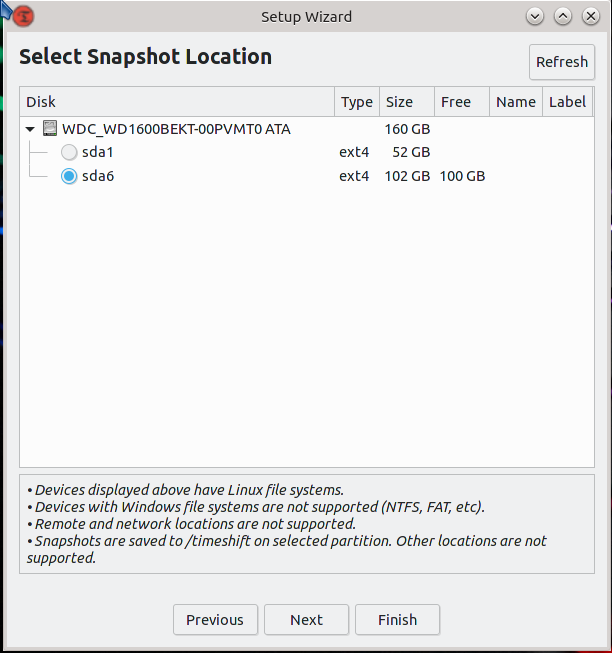 In this window, you will set the timing and how many backups to store. Set something that works for you and your system. I have read that weekly and nightly works for most users, but if you aren't sure, go with the defaults. Choose Next to advance. 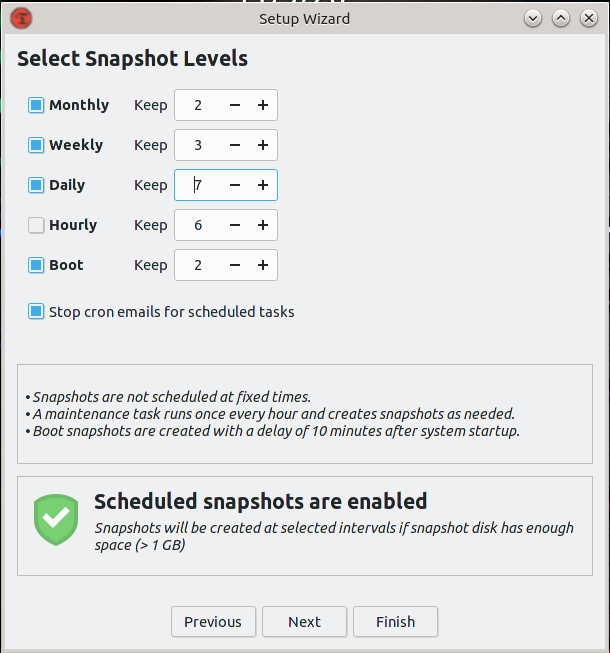 Here, you will set what users and files to backup. I choose to backup only the user root, Home /root and exclude all of the files. You can choose to backup the entire system and all users and user files. If you have only a few gigabytes of data in your user partition, this may work for you. However, I recommend using another way of backing up user files, even if it's nothing more than drag and drop to your backup device. After making your choices, click Next to advance. 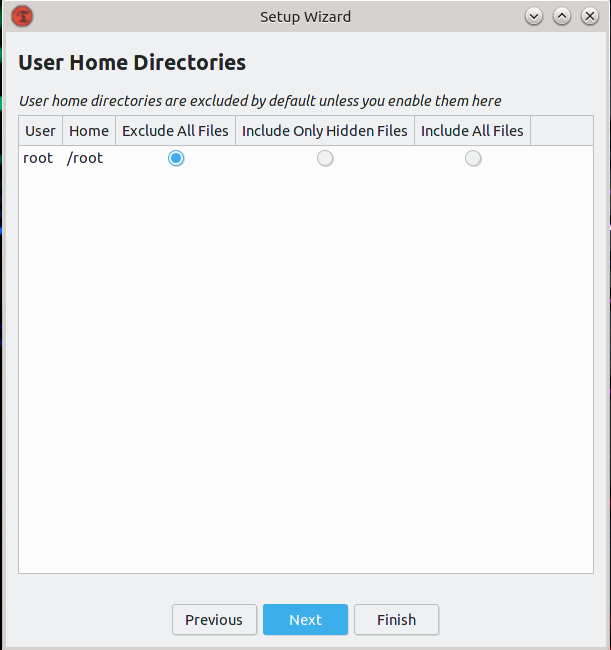 In this window, Timeshift will tell you that the Setup is Finished. If you ever want to change the settings, start Timeshift and go to the Settings menu to make your desired changes. Click Finish to close the window. 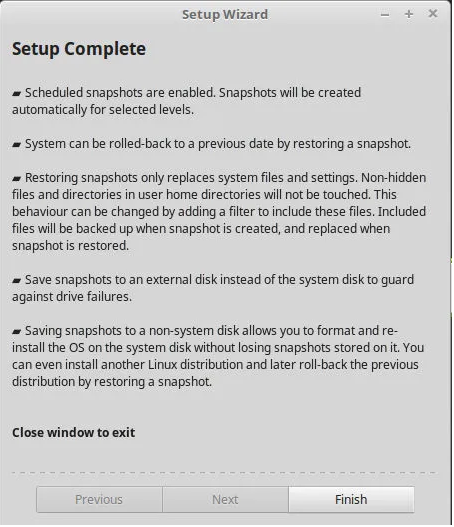 That's it. You don't need to do anything further, unless you want to immediately create a backup, and I would recommend that you do. Otherwise, Timeshift will create a backup at the next scheduled time. Creating a backup with Timeshift is really, really easy. Just click on the Create button.  Timeshift will immediately begin the backup and give you a visual indicator of the progress, along with an estimate of the amount of time until completion. 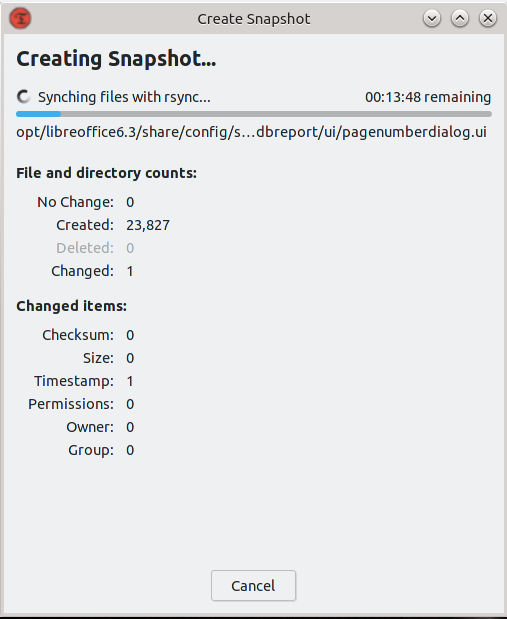 After your backup is complete, it will be listed on the main Timeshift screen. This is where all of your backups will be listed, should you ever need to do a restore. Just remember: when doing a restore, files and changes that were made after the restore point, can be lost. 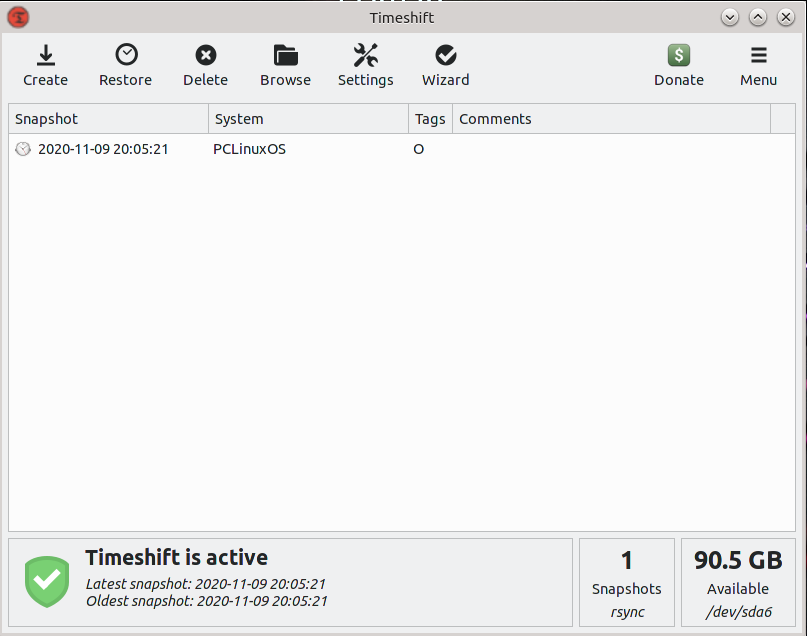 If you want to see the backups, just navigate to the drive/partition that you selected using your file manager, and click on the Timeshift folder. 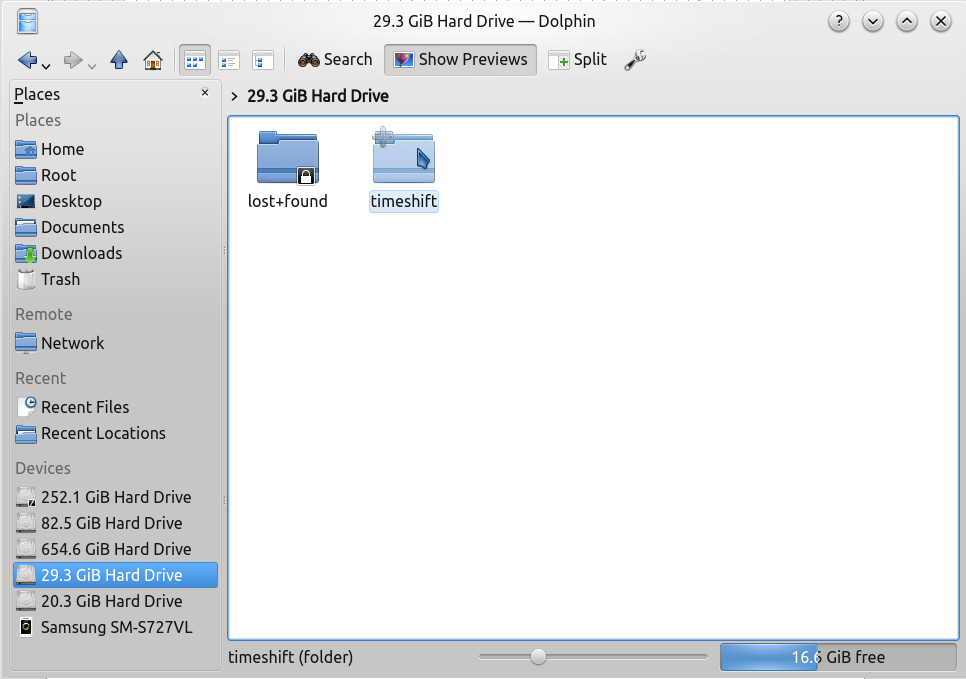 Inside, you will see all of the different backup folders. 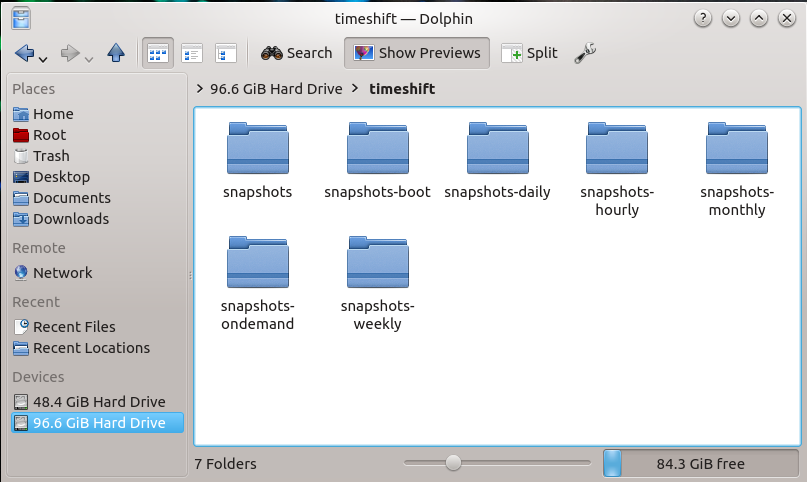 To do a restore, boot up a Live USB, CD, DVD or whatever, on the device that you need restored, startup Timeshift, and Timeshift will scan the drives and find the backups. Select the desired restore point, and click the Restore button in the Main Menu. 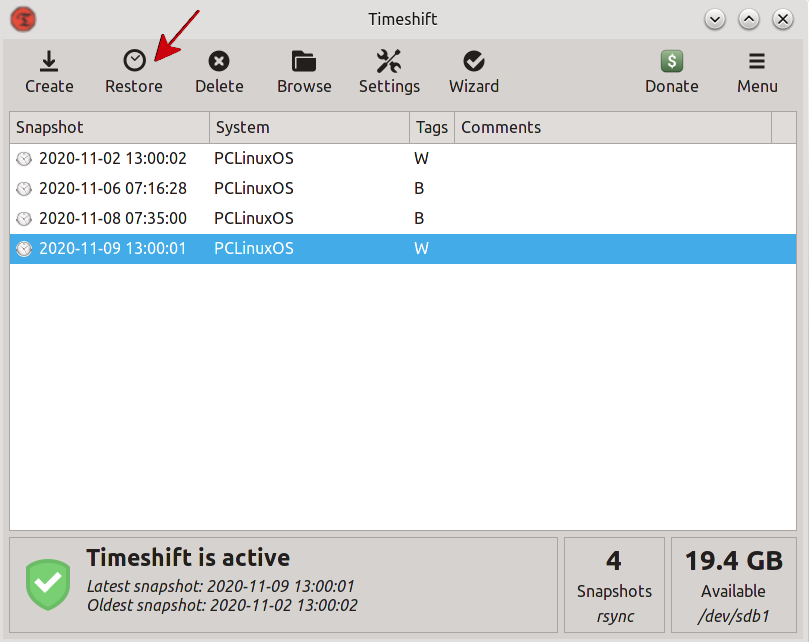 You will also notice a column in the TimeShift window called "Tags." This indicates what prompted TimeShift to make the backup. Hover your mouse over the individual tags, and you should see something like the image below, explaining what each tag "code" means. 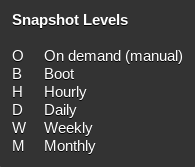 There you go, you should now be able to backup and restore your PCLinuxOS computer, in just minutes, avoiding having to reinstall and going through all of the process of getting your system just the way you want it. While working on writing this article, I found a very good Timeshift video on YouTube. In the video, they are running Timeshift in Linux Mint, but I think that we can overlook that, seeing how Timeshift runs exactly the same in PCLinuxOS. |