| Previous
Page |
PCLinuxOS
Magazine |
PCLinuxOS |
Article List |
Disclaimer |
Next Page |
Inkscape Tutorial: Common Inkscape Mistakes |
|
by Meemaw I've subscribed to several YouTube pages, just like many people have. One of the pages I've subscribed to is named Logos by Nick. In his channela he has many tutorials for GIMP and Inkscape. In this one, he describes five mistakes that new Inkscape users make. Let's look: 1. Trying to perform path operations on objects that aren't paths. Items that are grouped won't edit using path operations, and objects that haven't been converted to paths (Path > Object to path) can't be edited either. Make sure your object actually is a path, and ungrouped from other objects, before you edit it. If you click on it, and it doesn't say "path" in the status box at the bottom of the window, or you can't do what you're trying to do, you need to change something. 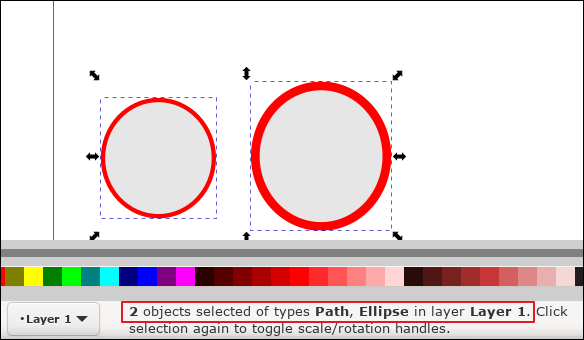 2. Trying to edit very complicated paths with the node tool. Nick says this can actually lock up your computer, and I've had my computer lock up before.... not fun! Either delete some nodes, simplify your drawing or break it up into smaller sections that you can work on one at a time. This might have too many nodes - 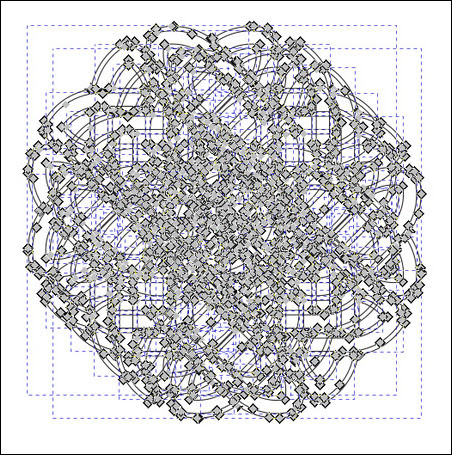 3. Not knowing about scaling strokes. I actually hadn't thought of this, but you can change the setting on your stroke. When I drew the circle below, I set the stroke at 10 px. When I resized it larger, the stroke changed to 16 px. If you unselect the button on the right of your window, the stroke will stay the size you set it, even if you resize your object. 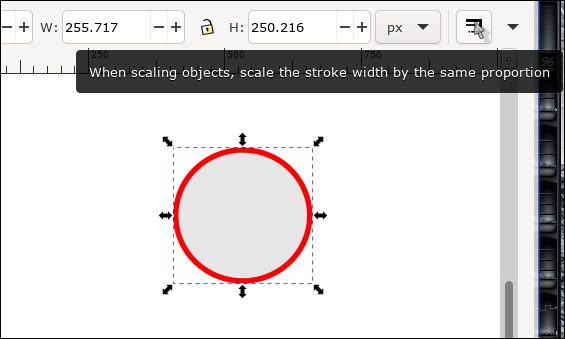 4. Forgetting to disable snapping. Snapping can be very useful! If you have two objects and you want the sides to touch without overlapping, snapping works well. However, sometimes you need to move things around without them snapping together. You may even need them to overlap. Many of the covers I make have characters in them that need to stand together, but one in front of another rather than elbow to elbow or flipper to flipper. If you forget and things start snapping where you don't want them to, simply press <SHIFT + 5>, or, if you have your Snap toolbar active (View >Show/Hide > Snap Controls Bar), you can click on the Toggle snapping on/off button to turn it off. 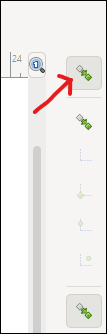 5. Exporting images the wrong way (drawing, page, selection). I actually do this a lot! Exporting your creation can be done three different ways, which I'm sure you already know, but let's clarify it. At the top of your Export window there are tabs, as shown here: 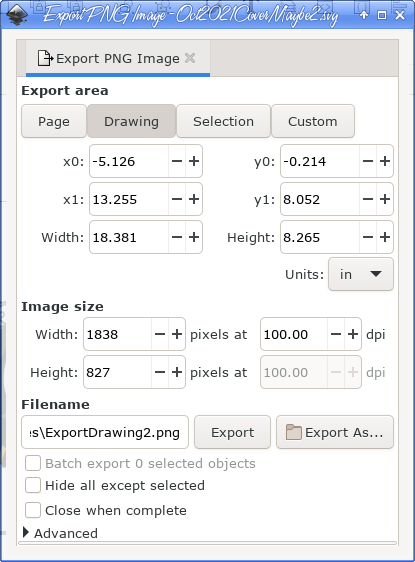 Export drawing - I don't know about you, but when I'm working on a drawing, I generally "store" extras to the side of my page. If I go to the Export window, and have nothing selected, the program defaults to "Export drawing" which exports everything you have - including anything you may have "stored" to the side. In the following cover work, exporting the drawing would have included everything you see there, even though very little of it is on the page (you can see my page boundaries there in the center)... 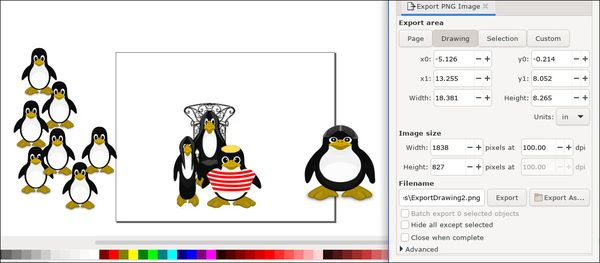 .... and how it looks after it's exported. 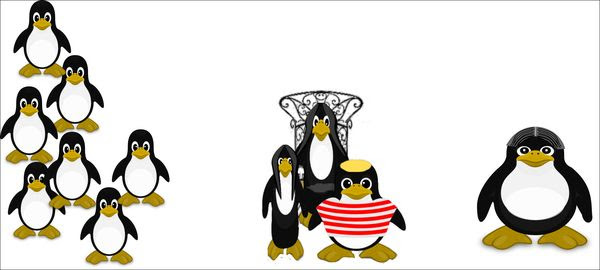 If you want ONLY the items on the page exported, you have to export the PAGE. Export page - this exports only the items that are on your page and nothing else. As for the drawing above, the Tux at right was half on the page and half off, so it exported the half that was on. 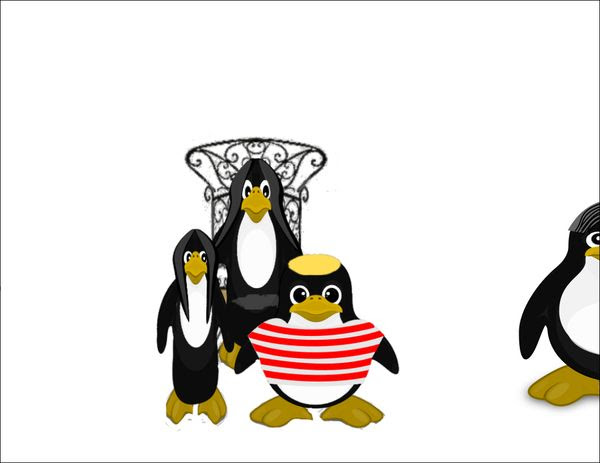 Export selection - You can use this if you have created a specific item that you might want to use again. After creating it and possibly grouping it, simply select it, then choose Export selection, and only your selection will be saved. For the April, 2011 issue, I made a magazine cover with a baseball field and the crowd on the bleachers in the background. I saved the crowd separately from the whole picture:  I found a thing or two that I hadn't thought of before (and I've been using Inkscape for a long time!) I hope you learned something as well. |