| Previous
Page |
PCLinuxOS
Magazine |
PCLinuxOS |
Article List |
Disclaimer |
Next Page |
GIMP Tutorial: GIMP 3.0 Review |
|
by Meemaw
GIMP 3.0.4 is out! As I reported earlier, the packagers were having trouble with the program, but put the appimage in the repo. I decided not to review it until their problems were resolved. My preference only. With the release of version 3.0.4, we have it in the repo rather than an appimage, and I can review some of the new features and fixes. I used the following sites in my exploration: librearts.org, the GIMP Manual, and creativeblog.com.
GIMP has always opened onto your program window, ready to start a project, or onto whatever you opened to work on. Now it has a welcome screen consisting of five tabs: Welcome has the splash screen (ours is one for PCLOS) and several helpful links. Personalize has some of the basic edits for appearance, so you can get started right away. Contribute has links to help you contribute to development. Create has a list of your recent projects, a “Create New Image” button and an “Open Existing Image” button. It also has a checkbox at the bottom to turn off the welcome screen if desired. Release Notes lists some of the new features, with a “flash” effect on some that will show you where they are (not included below). 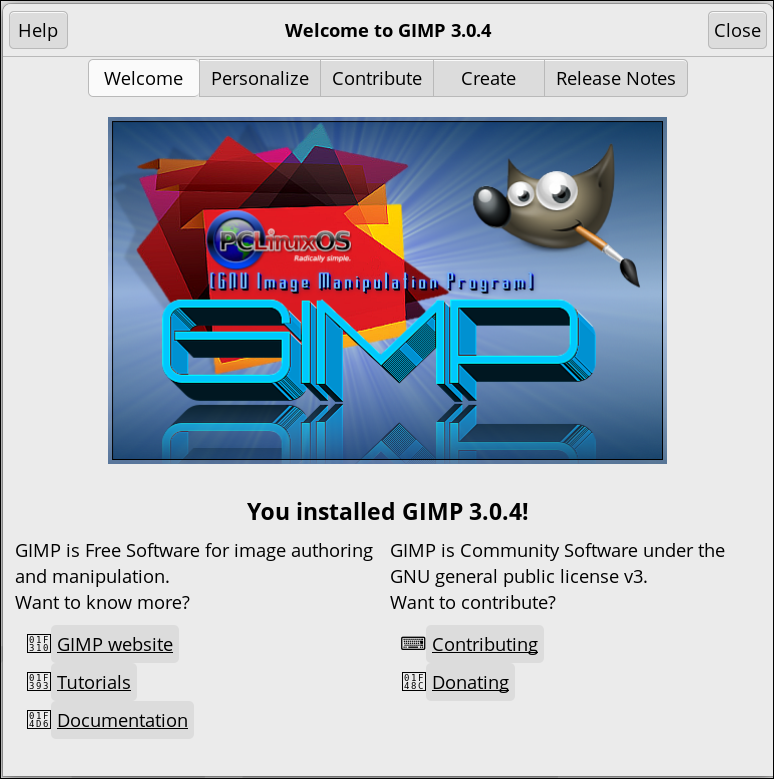 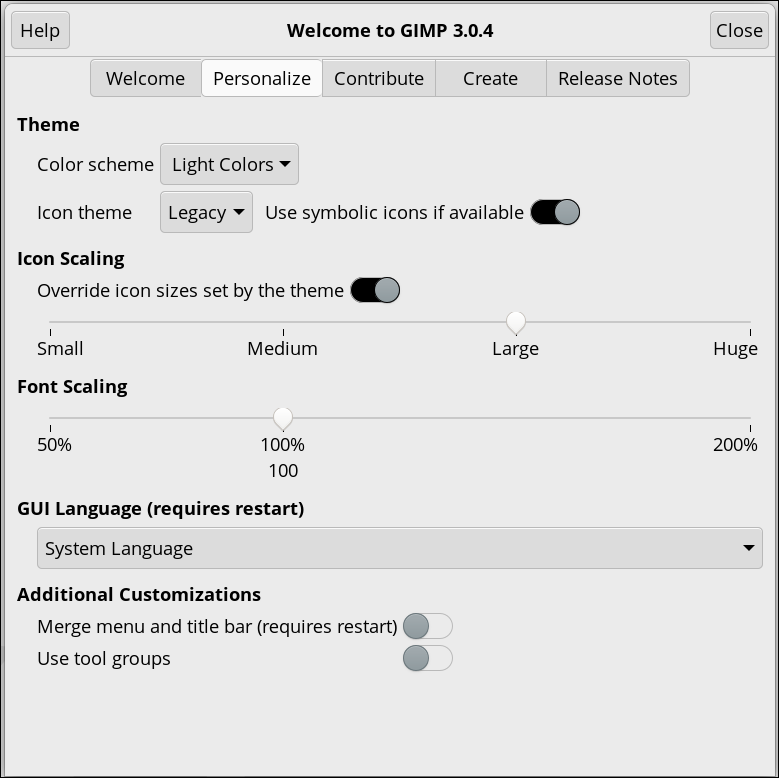   Non-Destructive Editing (From creativeblog.com) “One of the most asked for features/workflows arrives in this release with additional updates. Non-Destructive Editing (NDE) appeared in a recent previous release, and is now being further refined. This is of course a very important addition, and allows attributes like Levels and other modifications to be applied, and later either removed or adjusted at will. You will see a small “fx” icon next to the layer in the Layer Pallet. When clicked, it brings up options to turn the effect on/off, modify or delete. A “Merge filter” toggle will flatten the layer effects.” (From the release notes) “In GIMP 2.10, filters were automatically merged onto the layer, which prevented you from making further edits without repeatedly undoing your changes. Now, by default, filters stay active once committed. This means you can re-edit most GEGL filters in the fx menu on the layer dockable without having to revert your work.” When you edit something, any effect you use, including color edits, are added to the layer window on the layer you are editing, and you can see the edits on your image. I opened the following image and used the Unsharp Mask filter and then edited the colors using Curves. As you can see in the second photo, when I click the fx to the left of the layer, those two operations are in the layer effects. 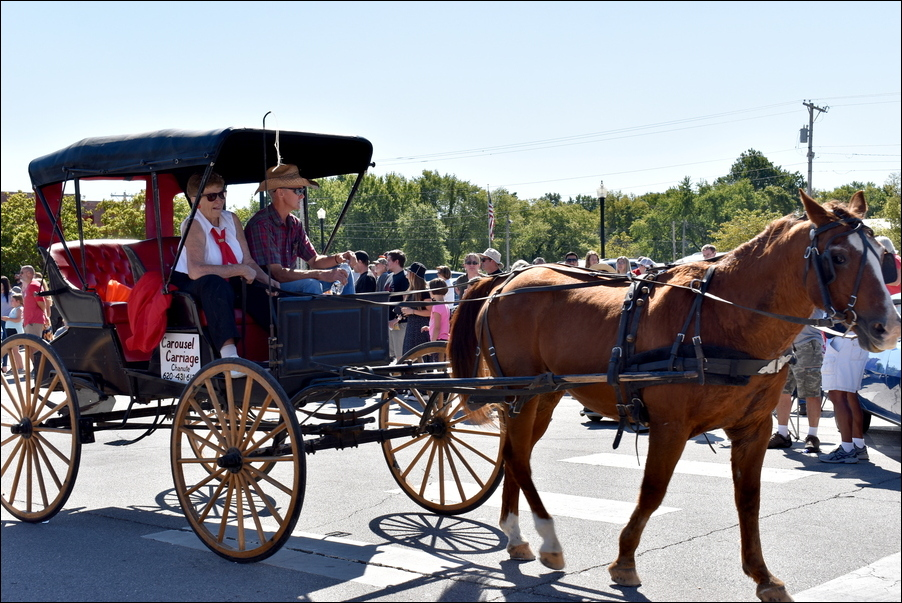 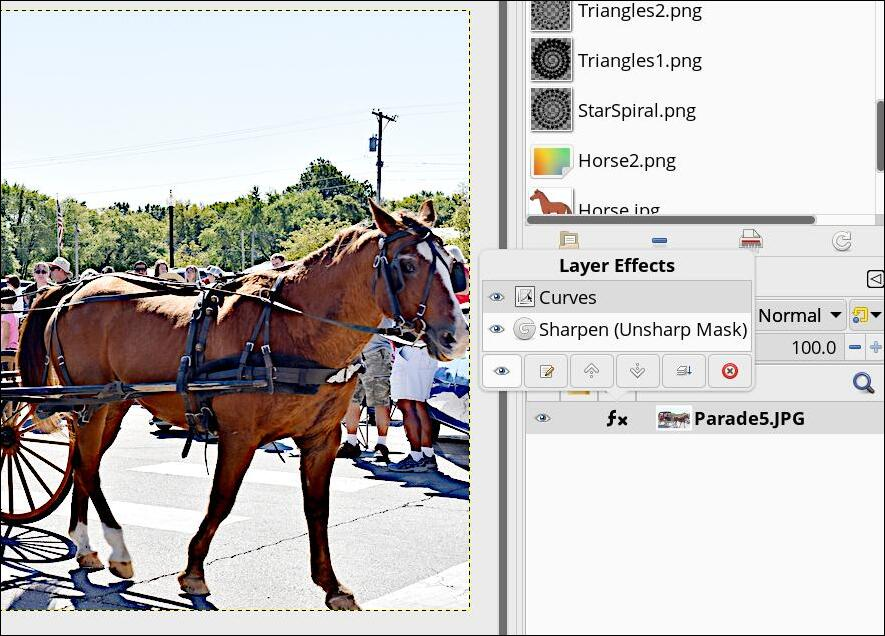 Those effects can be moved up and down in the layer effects dialog (all in the layers), which could possibly change the way your image looks. Saving your project as an xcf file preserves all of this. It’s only when you finally export your project that the effects are merged into the layer. Most of the effects are now non-destructive, according to the GIMP . Most of the GEGL filters are non-destructive, but some of the others are not. They recommend you search the filters to see which ones are GEGL. Something I noticed right away — when you copy and paste something, GIMP puts it on a NEW layer, rather than a FLOATING layer. You can anchor it using Merge Down. You can also use the menu item Paste as Floating Layer, then merge down.
“Layer Groups” enable you to group layers together in a hierarchical structure. This will make it easier to manage your project if you have many layers.
You can create a layer group by clicking the New Layer Group button at the bottom of the Layers Dialog (it looks like a folder), by using the menu command Layer > New Layer Group, or through the right click Layers context menu. You’ll see the new layer group above the layer you selected earlier. You should give it a descriptive name so you know what that group is. You rename it exactly the same way you rename layers. You can create multiple layer groups, and you can embed them, that is, include a layer group inside another group. Adding Layers to a Layer Group You can add existing layers to a layer group by click-and-dragging them. If you want more than one layer in that group, select them all and drag them into the group. To add a new layer to the current layer group, select the New Layer Group where you want your new layer to be, then click the New Layer button. An Add Layer window will appear, just as always. When a layer group is not empty, a small triangular icon appears. By clicking it, you can open or close the group. 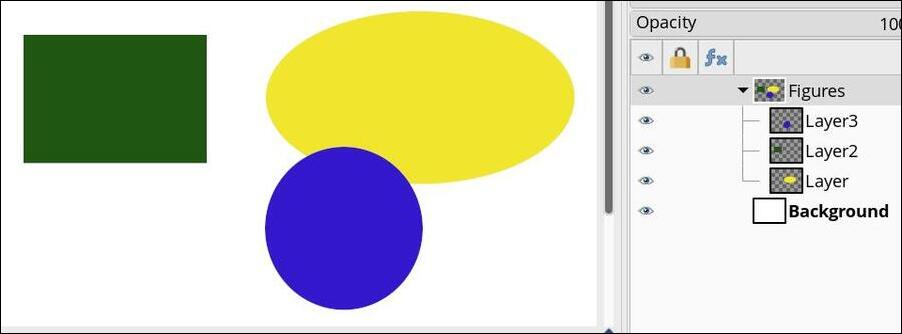 Layers that belong to a layer group are slightly indented to the right, allowing you to easily see which layers are part of the group. From the GIMP Manual: If a layer group is made invisible using the eye icon but still open (so that the layers inside the group are shown in the list), there is a struck out eye shown besides the layers that are inside the group to indicate that these layers are not displayed in the final projection of the image, but theoretically visible in the layer group. In this example, I clicked the “eye” in front of the top layer group, and everything in that layer group is not visible now. However, you can see the crossed-out eyes in front of the individual layers. 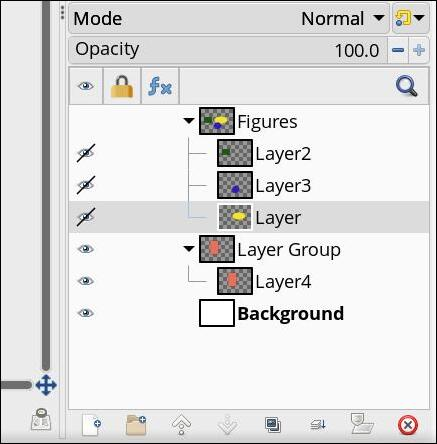 Also from the GIMP Manual: Opacity When a layer group is activated, opacity changes are applied to all the layers of the group. Layer Mask Masks are also available on layer groups. They work similarly to ordinary layer masks, with the following considerations. The layer group’s mask size is the same as the combined size of all its children at all times. When the group’s size changes, the mask is cropped to the new size — areas of the mask that fall outside of the new bounds are discarded, and newly added areas are filled with black (and hence are transparent by default). Layer Locks The various locks for layers have moved from the toolbar above the layers tree view to the layer rows. Click where a lock icon is supposed to be visible in the Lock column and select the options you need. Below, I clicked on the space that had the square for the layer lock and got this: 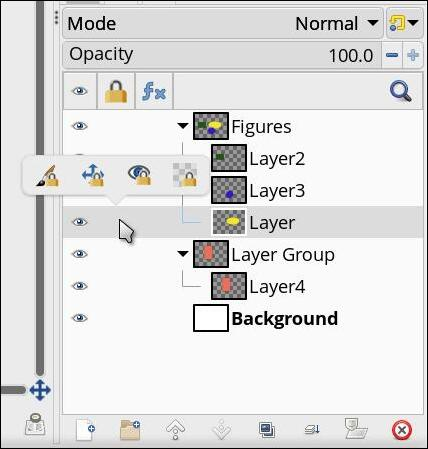 You’ll see four icons. From left to right: Lock pixels, lock position and size, lock visibility, and lock Alpha channel. Choose the one that you need.
The Text tool has two new styles: Outlined and Outlined and filled. It does what it says in the text tool. However, librearts reported that the rendering quality is not amazing, and the UI is kind of clunky. In fact, I tried to put some text on a layer, and while choosing the colors, GIMP crashed on the setting Outlined and Filled. I have seen several bug reports submitted to GIMP, so I’m sure they are working on it. Editing the text is possible, and the fill defaults to your foreground color, but the default outline is gray, and trying to choose a different color for the outline is where the program crashes. I was, however, able to change the outline from 10 px to 5 px, and the color of the fill to green and then purple. If you’re willing to leave the outline color gray, the rest of it still works. It’s just that the outline color stays gray, even on the Outlined setting, and attempts to change it crashes GIMP. 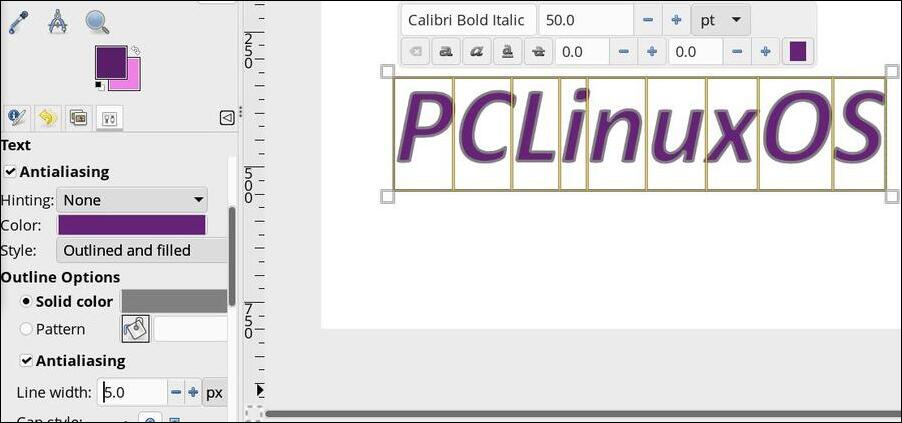 More to See! Wilbur has a new design! They updated/modernized the Wilbur icon. Additional export formats were added, including psd for Photoshop, in case you need to share. Fonts are more accurately stored and displayed. Updated translations: GIMP is available in 85 languages, and 47 of them have been updated. In Preferences > Canvas Interaction > Modifiers, you can customize actions you want your mouse buttons to perform with a specific tool. New (Experimental) Tool: The new tool (Paint Select) allows progressive selection using a brush. However, it is very unstable, so is only included in the Playground section of the Preferences dialog. That is only visible if you run GIMP with the -show-playground flag. I don't think this is everything, but it will get you started, if you haven't explored yet. |