| Previous
Page |
PCLinuxOS
Magazine |
PCLinuxOS |
Article List |
Disclaimer |
Next Page |
GIMP Tutorial: Create Transparent Cutout Text |
|
by Meemaw
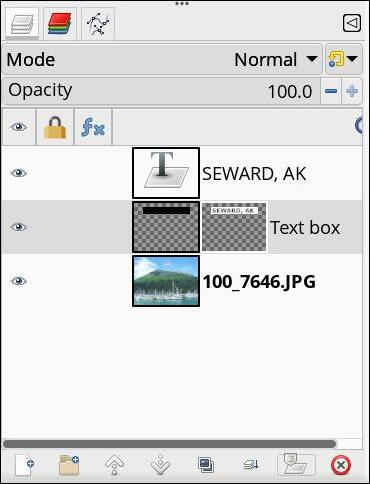
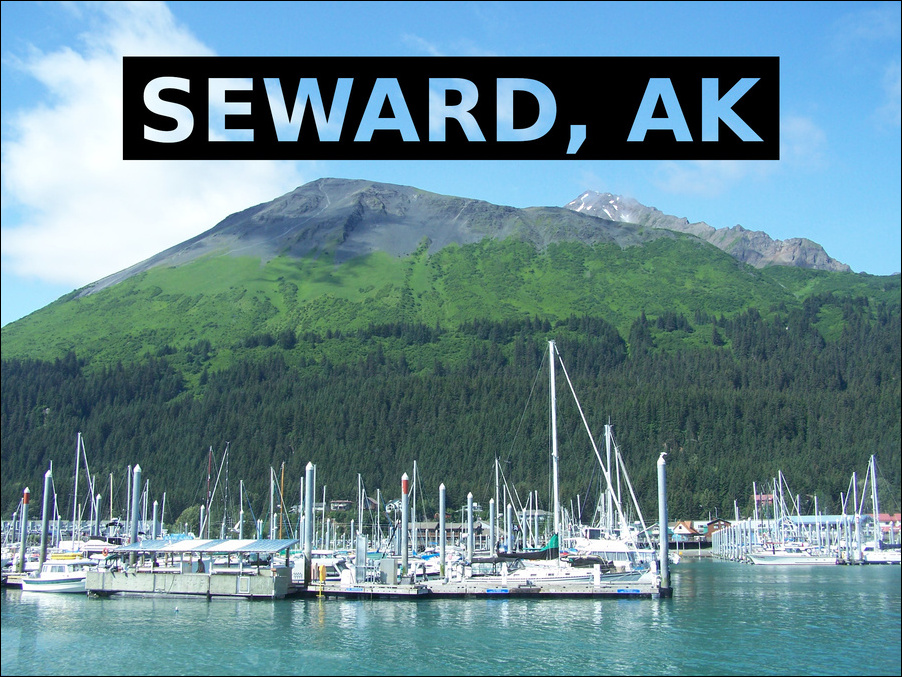 I used a photo of the harbor in Seward, Alaska (we went there on vacation in 2017). Load it first. To put the text in, choose the text tool. You can change the color to white, choose the font and size before you type. In the tutorial, Davies changed the kerning (distance between the letters) as well, but that’s a personal choice. Type your text. You’ll notice that GIMP puts the text on a separate layer, which is what you want. Choose Layer > Crop to content. This will turn off the text information, but if you’ve made a mistake, you can choose the text tool again. You can do this any time in your steps, but this is where his video has it. To make sure everything is centered (if that’s how you want it), you should add a vertical guide in your project. Choose Image > Guides > New by percent and make it 50% to center the guide. You can always delete it when you’re finished. When you choose the Move tool, and grab the text, you’ll see a plus sign in the middle that you can line up with the guide. 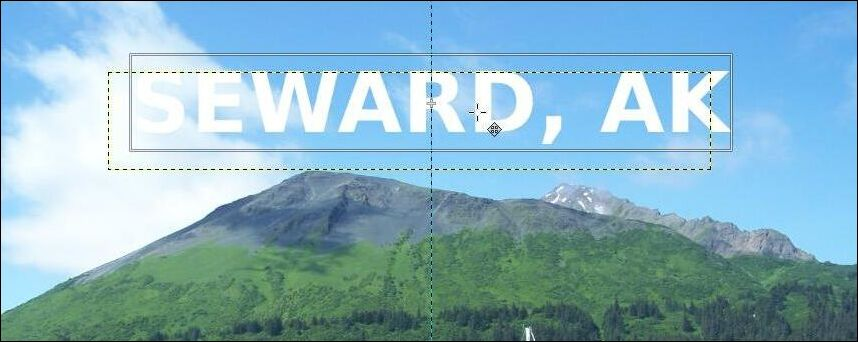 Now we’re going to add our frame. Create a new transparent layer (he named it “Text box” but that’s up to you). Move that layer between the text and the photo layers. Choose your Rectangle select tool, and draw a rectangle a bit bigger than your text and fill it with black. A shortcut you might not remember is to grab the black color chip from the color palette and drag it on top of the rectangle, which will fill it. 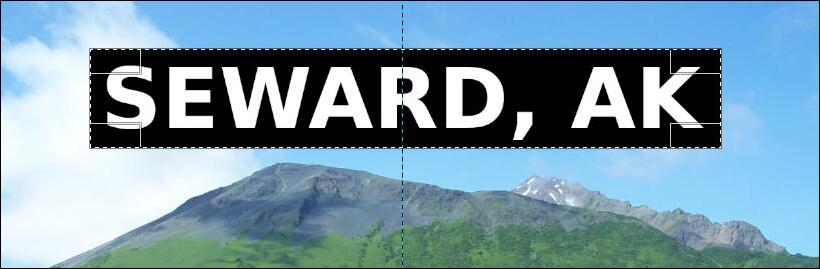 Again, choose Layer > Crop to content to make the box layer the size of the box. Choose Select > None, then change to the Alignment tool (next to the Move tool). Select the box layer, then the text layer, and align your items horizontally (they should be already because of the guide), and then vertically, which will center the text in the box. Choose Select > None again, then select the text layer and click Layer > Transparency > Alpha to selection. The selection needs to remain this time. Now select the box layer and click on the Layer Mask tool, which is at the bottom of the layers window next to the Delete layer button.  Your layer mask setting should be changed to ”Selection”, and “Invert” should be checked, as shown here. Your layers dialog should look like the next image as well. 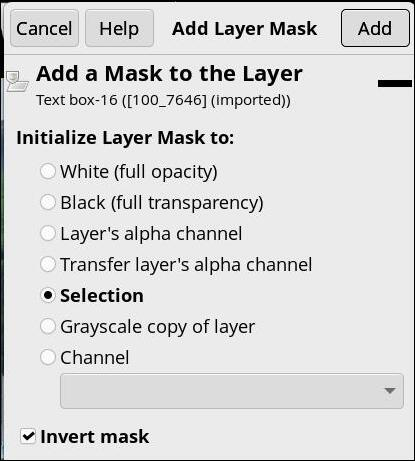
 Now, go back to your text layer and turn off the visibility. You should be able to see through to your photo. Neat, huh? I also made one using a local sight. In Southeast Kansas years ago, they did coal mining with huge diggers. One of the remaining electric shovels, affectionately named Big Brutus, is parked in Weir, KS and is now a museum. 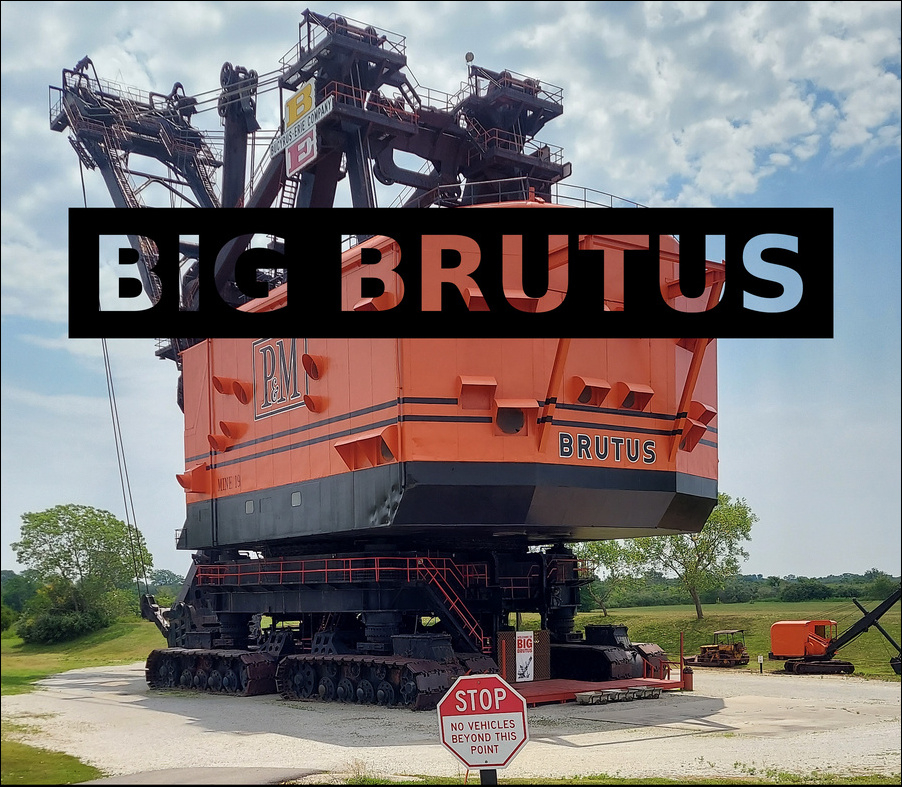
|