Flashback:
Creating a Favorite Applications Menu
Updated and Revised by Andrew Strick (a.k.a. Sticktoo)
Based on the original article by Pam Dougan in the April 2007 issue of PCLinuxOS Magazine
"I spend time in the Forums, just like everyone else, and while I was there I saw a Post asking about a Favorite Applications shortcut menu. We all have a few applications we use almost all the time, but don't want to clutter up our panels or desktop with all those icons. I read the reply from Pastor Ed and wanted to share it with you. His method places a sub-menu in the KDE menu."
Method #1
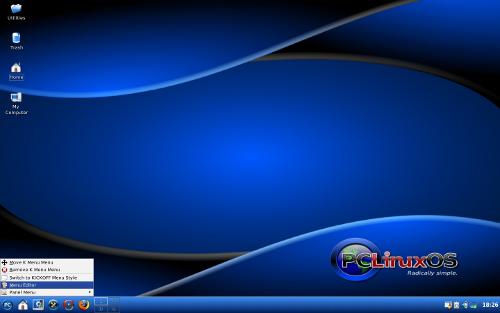
We'll begin by bringing up the Menu Editor by right clicking on the KMenu icon and selecting Menu Editor from the context menu.
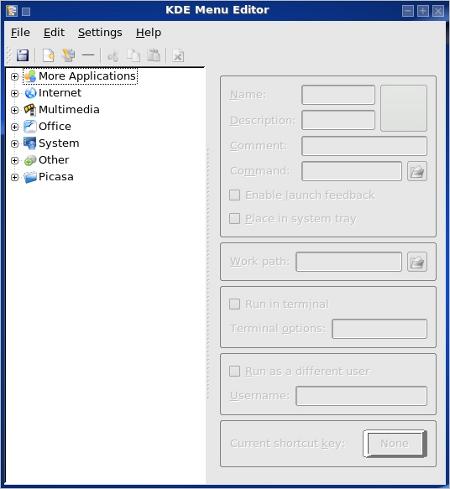
The KDE Menu Editor.
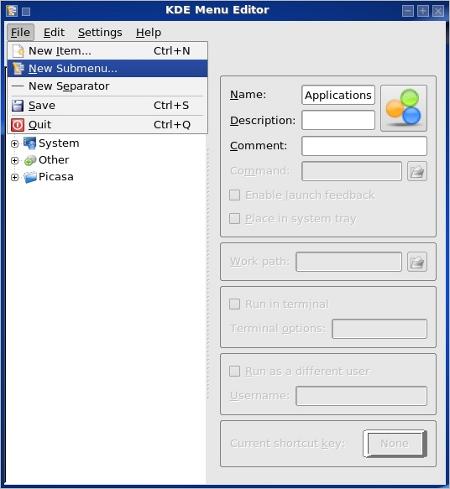
Next, we'll create a new submenu, either by using File > New Submenu or clicking on the New Submenu icon on the toolbar. We'll call our submenu MyFaves. As far as placement goes, we could make MyFaves a main menu if we really wanted to. But since we'd prefer to keep it out of sight we'll place it somewhere else, such as the More Applications menu.
The new MyFaves submenu.
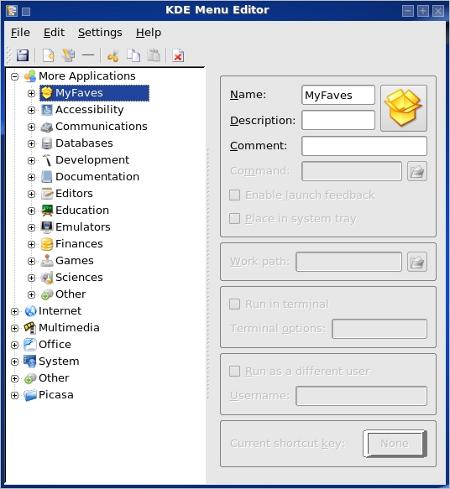
Before we start adding applications to MyFaves we'll take a moment to select a new icon. We'll click on the current icon (the open box).
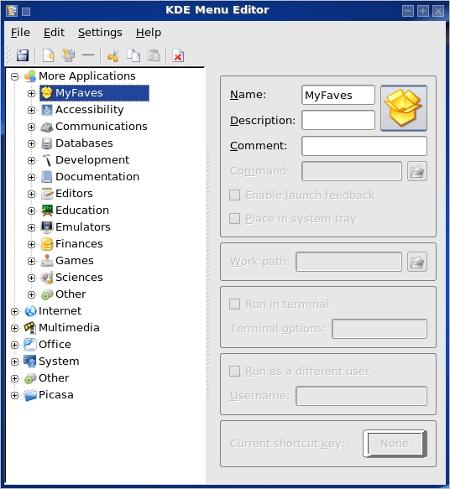
This will bring up the standard KDE select new icon dialog. The nice, shiny applixware A looks nice, so we'll go with that.
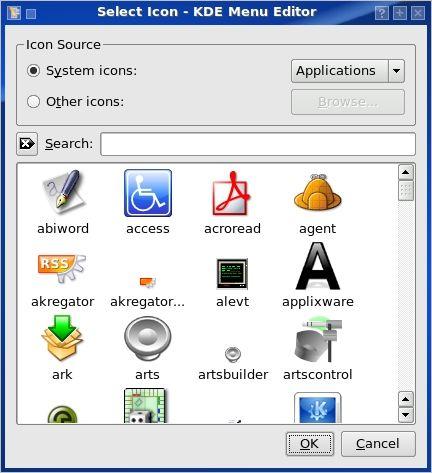
The result:
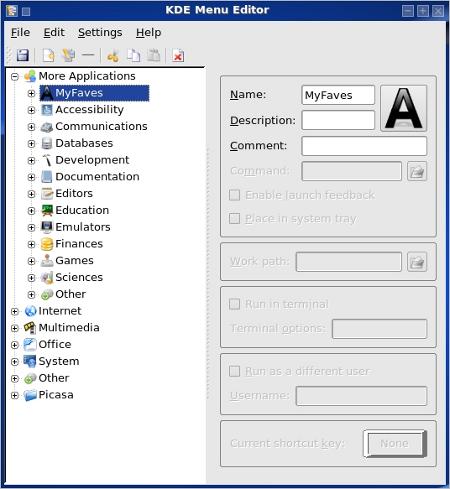
Okay, now we can start adding some applications to MyFaves. There are three ways of doing this. One is to use File > New Item. This method takes some time and effort, because it requires you to create the item from scratch by entering the name, command and desired icon. Of course, it's not really that much of a hassle, but since there are simpler ways of getting what we want, we won't bother with it.
The second method is to drag an application from another submenu by holding down the left mouse button and pulling it up to MyFaves. When we do this we have to make sure that the squiggly line representing our application is under MyFaves and is indented. If it's not we might wind up placing the application under another submenu or in the main body of More Applications.
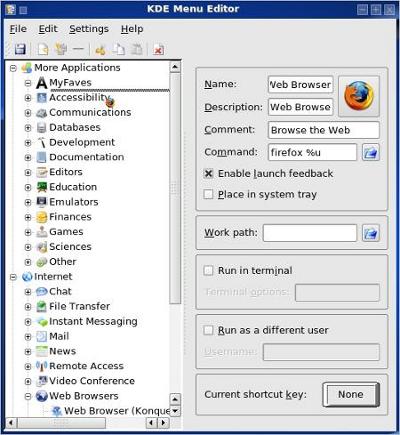
The final method is to copy an application from one submenu to another. To copy an application, we can either select it and then use Edit > Copy, or we can just right click on it and select Copy from the context menu.
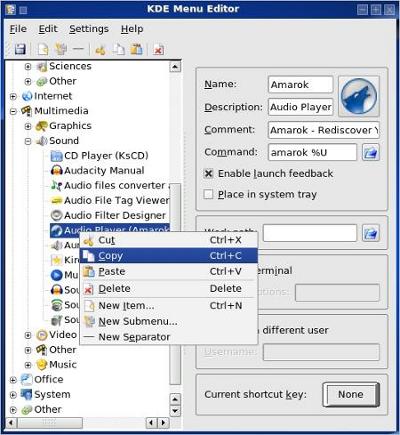
We'll navigate back to MyFaves and paste the application (Edit > Paste or Right Click > Paste).
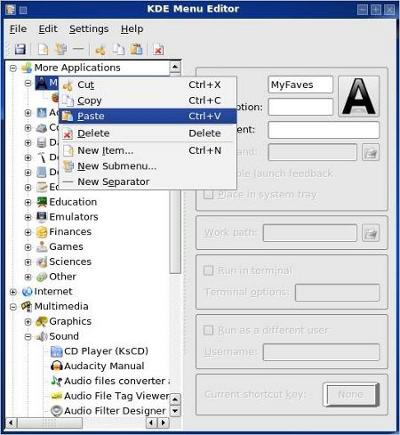
The result:
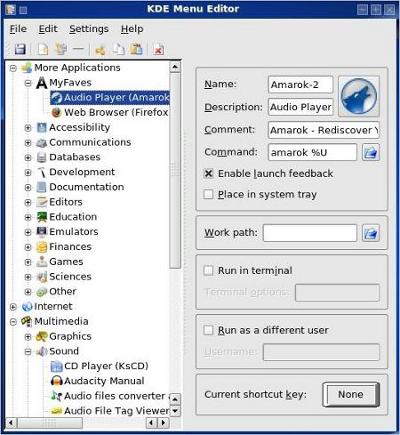
Now, one thing to note is that "-2" has been automatically appended to the copied entries to prevent them from overwriting the originals.
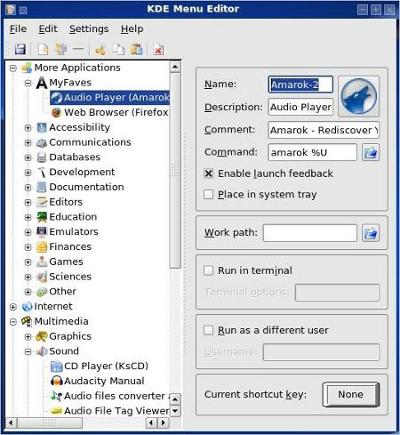
Since we've placed the copy in a new submenu we can remove the suffix without any issues.
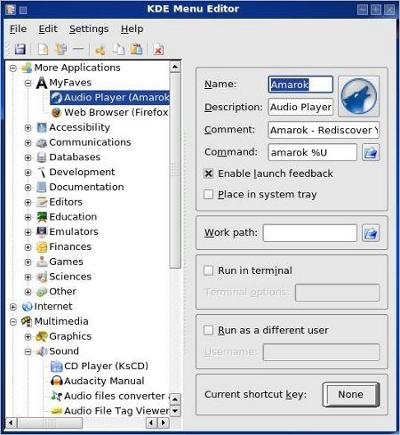
Now we'll save the changes to the KMenu by clicking the Save icon in the toolbar (the one that looks like a little floppy disk). Alternatively we could go to File > Save, or use the shortcut (Ctrl+S).
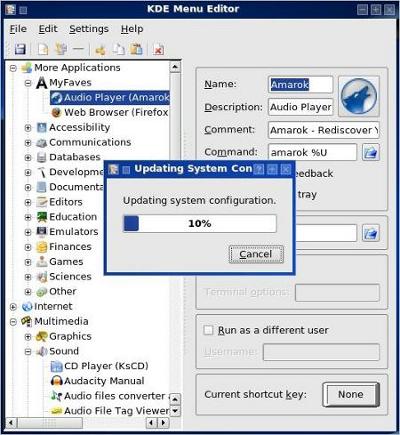
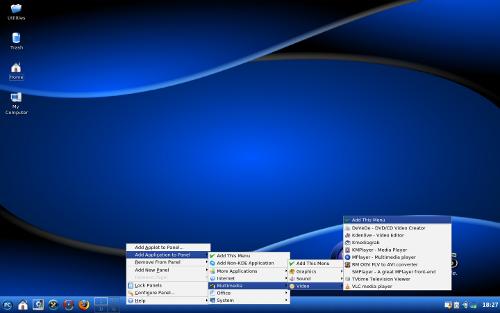
Now, having a MyFaves menu isn't really going to do us a whole lot of good if we have to keep clicking on the KMenu to get to it. Fortunately for us, KDE allows us to place a link to any KMenu submenu on the panel.
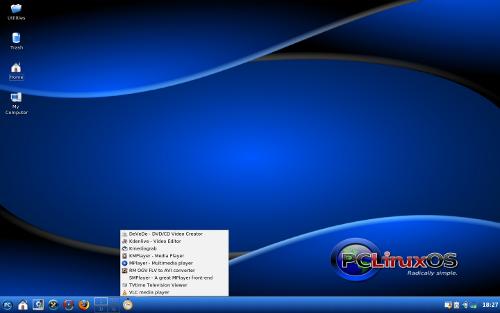
All that we have to do is right click on the panel to bring up a context menu, select add Add Application to Menu and navigate to MyFaves. Then we just have to click on Add This Menu. (NOTE: for some inexplicable reason I couldn't get the changes to the KMenu to save, so I had to pick another menu to illustrate this step.)
The result:
Method #2
We can achieve similar results by adding shortcuts to a folder and then adding the folder to the panel.
We need a new folder, so we'll make one by right clicking on the desktop and going to Create New > Folder.
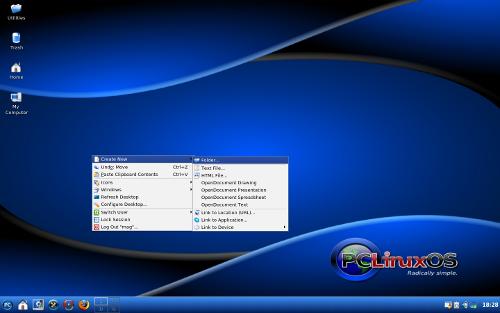
We'll again call it MyFaves.
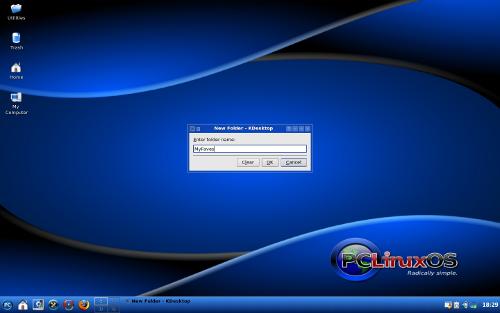
Now we'll open the folder and bring up the Menu Editor, placing them close together.
Next we'll add applications to the folder by dragging them from the KMenu into the folder.
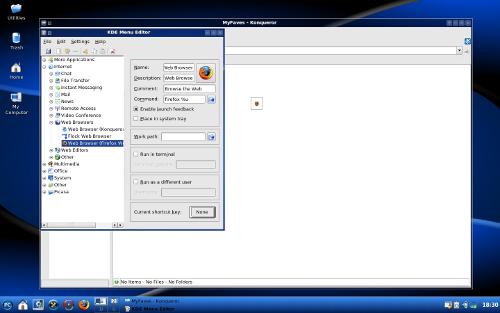
When we let go of the left mouse button, we're presented with a dialog box that asks us whether we want to copy the application launcher or just create a link to it. There really isn't much difference between the two options, so we'll just pick Link Here.
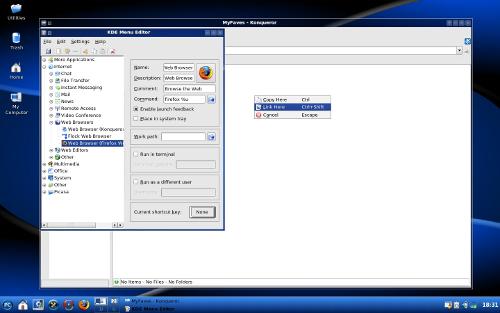
The MyFaves folder now contains a shortcut for Firefox.
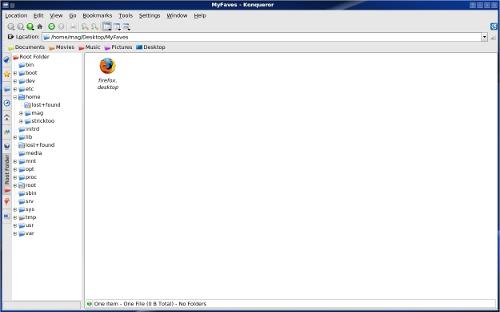
Once we're done adding applications to the folder, we can close it and exit out of the Menu Editor.
So, we currently have a folder full of shortcuts just sitting on our desktop. Now what?
Now we add it to our panel and create a convenient menu. All that we need to do is drag the folder over the panel and let go of the mouse button. When we do that, we'll see a context menu asking if we want to Add MyFaves as a File Manager URL or as a QuickBrowser. We want to add it as a QuickBrowser (a File Manager URL will just open MyFaves in Konqueror; QuickBrowser will create a pop-up menu).
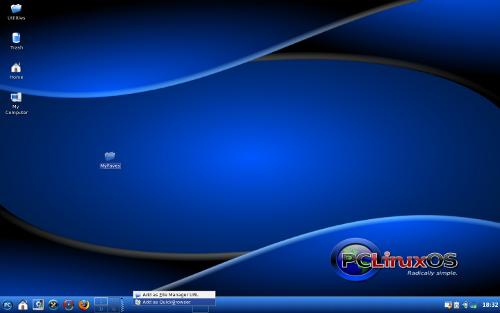
Our new QuickBrowser menu:
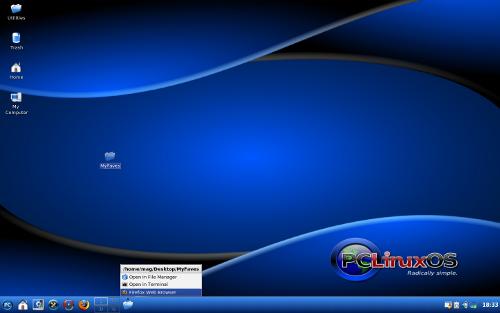
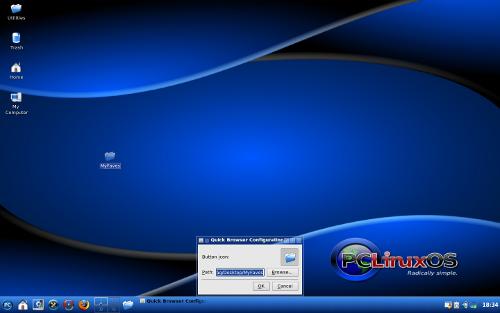
We can even change the icon if we want. We can just right click on the MyFaves icon and choose Configure...
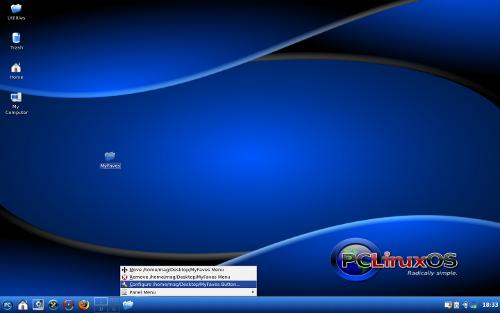
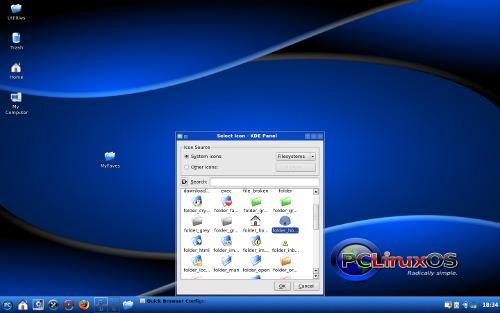
...Click on the current icon...
...And pick our new icon.
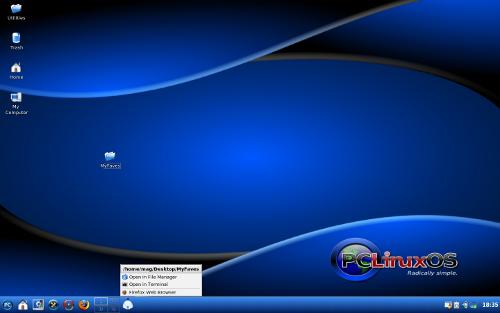
Our new icon:
And that's all that there is to it.
A Note from Andrew:
Personally, I prefer Method #1 to Method #2, for a couple of reasons. With Method #1 you can organize the menu any way you want and add separators; if you have a lot of applications you could even create submenus. With #2 the menu is organized in whichever way you have Konqueror set to sort folder contents (e.g. alphabetically or by date). Also, the menu created by #2 includes the title of the folder and the Open in File Manager and Open in Terminal options. Finally, you have to keep the folder; if you delete it, here's what will happen.
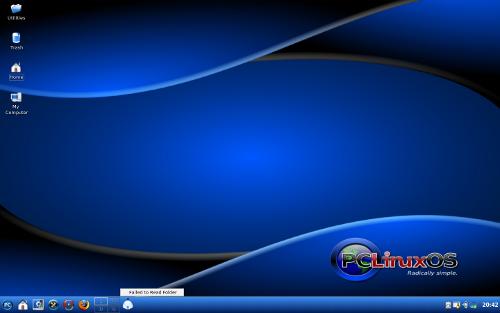
Of course, you could make it hidden by appending a dot to the folder name (MyFaves becomes .MyFaves), but then you have to remember where you put it and be careful not to delete it and... Well, anyway, I prefer to just make a new submenu and be done with it.
CONCLUSION:
Using a Favorites menu to quickly acess your most used programs is a great way to keep your panel clean and organized. I've never really minded clutter on my panel and consequentlly I never really considered a Favorites menu until I reread the original article. Now I'm hooked and my desktop has never looked better!
Thank you to Pastor Ed for the original suggestion in the Forum, and to Pam Dougan for the original article.
